


Is your drywall showing signs of damage with exposed gypsum? This can make your walls look rough and unfinished, and if left untreated, the problem could get worse.
But don’t worry—you don’t need to call a professional or spend a fortune to fix it. In this guide, you’ll learn simple, step-by-step methods to repair drywall with exposed gypsum quickly and effectively. By the end, your walls will look smooth and sturdy again, saving you time and stress.
Preparing The Damaged Area
Repairing drywall with exposed gypsum needs careful preparation. The damaged area must be clean and stable before fixing. Proper preparation helps the patch stick well and last longer.
Cleaning Loose Debris
Start by removing all loose debris from the damaged drywall area. Loose pieces can stop the repair materials from sticking properly. Use a soft brush or a vacuum cleaner to clear dust and small fragments. Cleaning well ensures a solid base for the repair.
Follow these steps for effective cleaning:
- Wear safety goggles and a mask to protect from dust.
- Brush gently to avoid making the damage worse.
- Vacuum the area to pick up tiny dust particles.
- Use a damp cloth to wipe around the edges of the damage.
Cutting Away Damaged Sections
Next, cut away any damaged drywall that is weak or crumbling. This creates a clean, firm surface to attach new drywall or patch material. Use a utility knife or drywall saw for this job. Cutting must be neat and precise for a good finish.
Here are key points for cutting damaged sections:
- Mark the damaged area with a pencil. Draw a square or rectangle around it.
- Score the drywall along the lines with a utility knife.
- Use a drywall saw to cut through the scored lines carefully.
- Remove the damaged piece gently without breaking nearby drywall.
- Check the edges to make sure they are smooth and even.
Applying Drywall Patch
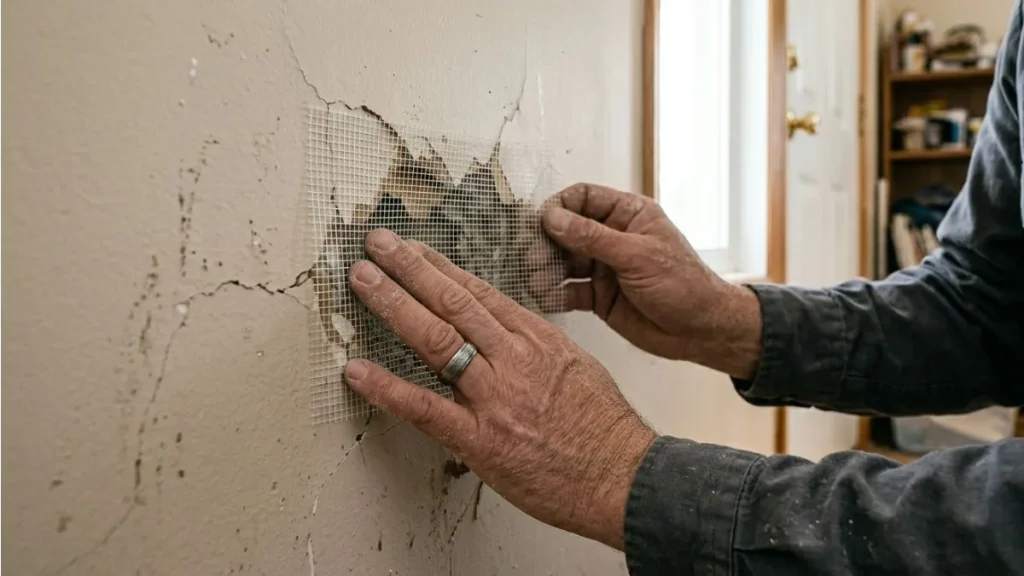
Applying a drywall patch is a key step in repairing drywall with exposed gypsum. This process covers the damaged area and prevents further crumbling. A properly applied patch restores the wall’s smooth surface and strength. It takes careful measuring, cutting, and securing to get a clean finish. Use the right materials and tools to make the repair last long and look neat.
Fitting The Patch
Start by measuring the damaged area precisely. Cut a drywall patch slightly larger than the hole or damaged section. Hold the patch over the hole and mark the size on the wall. Use a drywall saw to cut the hole into a neat square or rectangle. This shape makes fitting the patch easier and stronger.
Next, trim the drywall patch to fit the hole. The patch should fit snugly without gaps or overlaps. A loose patch may fall out or cause cracks later. A tight fit ensures good support and a smooth surface.
Here are steps to fit the patch properly:
- Measure the hole’s width and height carefully.
- Cut the drywall patch 1/8 inch smaller than the hole.
- Test fit the patch inside the hole; trim edges if needed.
- Ensure the patch sits flush with the surrounding wall.
After fitting, the patch is ready for securing. A well-fitted patch gives a strong base for the next repair steps.
Securing With Joint Tape
Joint tape holds the drywall patch firmly in place. It also smooths the edges between the patch and the wall. Use paper or fiberglass mesh tape designed for drywall repair. Paper tape is stronger but harder to apply. Fiberglass mesh tape is easier for beginners.
Follow these steps to secure the patch:
- Apply a thin layer of joint compound around the patch edges.
- Place the joint tape over the seams, pressing it into the compound.
- Use a drywall knife to smooth the tape and remove air bubbles.
- Cover the tape with another thin layer of joint compound.
- Let it dry completely before sanding and painting.
Good taping prevents cracks and peeling later on. It also gives a flat, even surface. Below is a comparison of tape types:
| Type of Tape | Pros | Cons |
| Paper Tape | Stronger, better crack resistance | Needs skill to apply without bubbles |
| Fiberglass Mesh Tape | Easy to use, self-adhesive | Less durable, can bubble if not covered well |
Apply tape carefully and cover well with compound. This step ensures the patch blends perfectly with the wall.
Using Joint Compound

Repairing drywall with exposed gypsum requires careful use of joint compound to restore a smooth surface. Joint compound fills gaps, covers damaged gypsum, and prepares the wall for painting. This material sticks well to the rough gypsum and creates a strong base for repairs. Applying joint compound correctly helps hide damage and prevents further crumbling. The process involves layering, drying, sanding, and adding more coats until the surface looks even and seamless. Proper technique ensures a durable and professional finish.
First Layer Application
The first layer of joint compound is crucial for covering exposed gypsum and creating a solid base. Start by cleaning the damaged area to remove dust and loose gypsum particles. Use a putty knife to apply the joint compound directly onto the exposed surface. Press the compound firmly into cracks and holes to fill gaps completely.
Keep these tips in mind for the first layer:
- Apply a thin layer: Avoid thick patches; thin layers dry faster and crack less.
- Feather the edges: Spread the compound beyond the damaged area to blend with the surrounding wall.
- Use a wide knife: A 6-inch or 8-inch putty knife helps create a smooth surface.
Sanding And Smoothing
Sanding the dried joint compound is essential to smooth the surface. Use fine-grit sandpaper (around 120-150 grit) for gentle sanding. Sand lightly to avoid removing too much compound. The goal is to create an even, flat surface without scratches or bumps.
Follow these sanding steps:
- Wear a dust mask to protect your lungs from dust.
- Use a sanding block or sponge for better control.
- Sand in circular motions to blend edges smoothly.
- Check the surface by running your hand over it; it should feel flat and soft.
Use a vacuum or damp cloth to clean dust after sanding. Removing dust improves adhesion for the next coat. Avoid heavy sanding that exposes gypsum again. Sand gently until the surface looks ready for additional layers.
Additional Coats
Applying more coats of joint compound improves durability and finish. Each coat should be thinner and cover a wider area to blend well. Wait for each coat to dry before sanding and applying the next.
Use this process for additional coats:
- Apply a thin, smooth layer: Use a wide putty knife to spread compound evenly.
- Feather edges further: Extend the compound 2-4 inches beyond the previous layer.
- Sand lightly: Smooth the surface after drying but avoid over-sanding.
- Repeat: Apply 2-3 coats total for best results.
Finishing Touches
After repairing drywall with exposed gypsum, the final steps make the wall look smooth and new. Finishing touches are important to hide the repair and protect the surface. These steps include priming and painting. Proper finishing improves the wall’s strength and appearance. It also helps the paint stick well and last longer.
Priming The Surface
Priming is the first step after the drywall repair dries completely. The gypsum core is very porous. Without primer, paint soaks in and looks uneven. Primer seals the surface and creates a uniform base. It also helps the paint stick better.
Follow these tips for priming:
- Choose a drywall primer: Use a high-quality, water-based primer designed for drywall.
- Clean the surface: Remove dust and debris using a damp cloth before priming.
- Use a brush or roller: Apply primer evenly on the patched area and a few inches beyond it.
- Allow drying time: Let the primer dry fully, usually 1-2 hours, before painting.
Priming ensures the patched area blends with the rest of the wall. It also prevents stains from the gypsum showing through the paint later.
Painting To Match Walls
Painting is the last step to complete the drywall repair. Matching the paint color is key to hide the patch. Use the same paint type and finish as the surrounding wall. This keeps the look smooth and consistent.
Here is a simple process for painting:
- Test the color: Paint a small spot over the primer and let it dry. Check if it matches the wall.
- Apply thin coats: Use a brush or roller to apply 2-3 thin layers of paint, allowing each coat to dry.
- Feather the edges: Lightly blend paint from the patch into the surrounding wall for a smooth transition.
- Use proper tools: Use a small roller for large areas and a brush for corners or edges.
Patience during painting delivers the best results. Rushing causes visible patches and uneven color. Take your time to make the repair disappear into the wall.
Read Also: How to Patch Holes in Roof from Satellite
Conclusion
Repairing drywall with exposed gypsum is easier than it seems. Take your time and follow each step carefully. Use the right tools to get a smooth finish. Small cracks and holes can turn into big problems if ignored. Fixing them early saves money and effort later.
A clean, well-done repair improves your wall’s look and strength. Keep practicing to get better at drywall repair. Soon, these tasks will feel simple and natural. Your home will look neat and well cared for. Try this fix yourself and see the difference.


