Are your stair treads looking worn out or damaged? Maybe you want to replace them but worry about ruining your stairs in the process.
Removing stair treads without causing damage can feel tricky, but it doesn’t have to be. In this guide, you’ll discover simple, step-by-step methods to carefully take off your stair treads while keeping your stairs intact and ready for a fresh new look.
Identifying Attachment Methods
Removing stair treads without causing damage starts with identifying how they are attached. Different methods require different tools and techniques. Knowing the attachment type helps protect both the treads and the stair structure.
Nails And Screws
Nails and screws are the most common way to attach stair treads. They hold the tread firmly to the stair frame but can be removed carefully to avoid damage.
Key points to check:
- Look for nail heads or screw heads on the tread surface or sides.
- Use a flashlight to see if the fasteners are hidden under paint or carpet.
- Listen for a metallic sound when tapping the tread, indicating metal fasteners.
Adhesive Types
Some stair treads are glued down instead of nailed or screwed. Adhesives create a strong bond but need careful handling during removal.
Common adhesives used:
- Construction glue
- Contact cement
- Epoxy
Signs of adhesive use:
- No visible fasteners on the tread.
- Tread feels firmly stuck with no movement.
- Edges show glue residue or discoloration.
Hidden Fasteners
Hidden fasteners keep stair treads secure without visible nails or screws. These include clips, brackets, or fasteners installed under the tread.
How to identify hidden fasteners:
- Look for small gaps or seams along the tread edges.
- Check underneath the tread if possible.
- Research the stair type to know common hidden fastener systems.
Common hidden fastener types:
| Fastener Type | Description | Removal Tip |
| Metal clips | Clips attached to stringers, holding treads in place | Unscrew or pry clips carefully before lifting tread |
| Brackets | Brackets underneath that support tread edges | Remove screws securing brackets first |
| Plastic fasteners | Snap-in fasteners hidden under tread edges | Use a putty knife to release clips gently |
Removing treads with hidden fasteners requires patience. Find the fastening points and release them slowly. Avoid prying hard to prevent damage.
Removing Fasteners
Removing stair treads without causing damage requires careful attention to the fasteners holding them in place. Fasteners like nails, screws, and adhesives keep the treads firmly attached. Removing these fasteners gently prevents cracks, splits, or other damage to the wood or material.
Extracting Nails Without Damage
Nails are common fasteners for stair treads. Pulling them out roughly can split the wood or leave marks. Follow these steps for safe nail removal:
- Use the right tool: A claw hammer or a nail puller works best.
- Protect the wood surface: Place a thin piece of wood or cardboard under the tool’s claw to avoid dents.
- Loosen the nail gently: Wiggle the nail slightly before pulling it straight out.
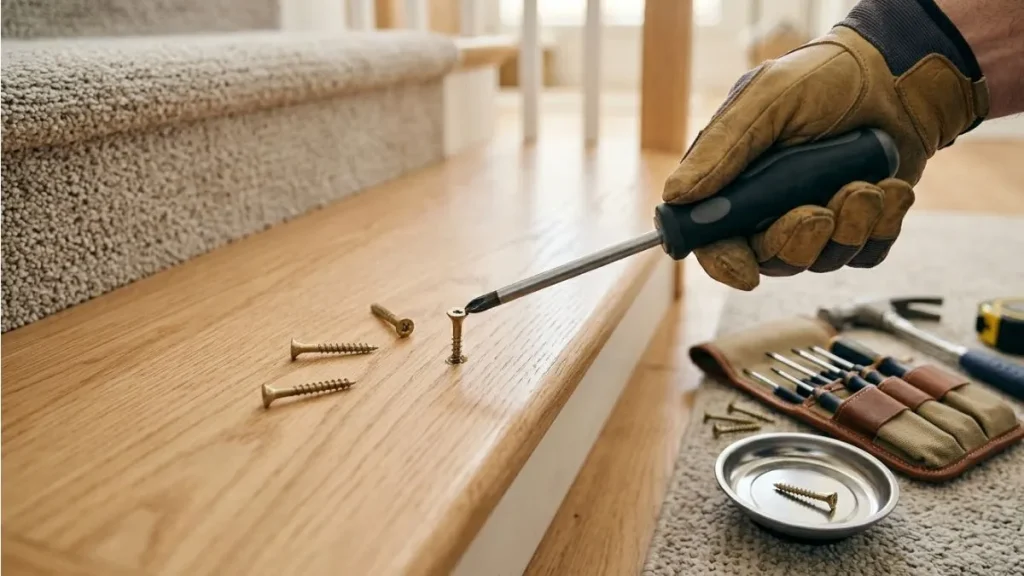
Unscrewing Carefully
Screws hold stair treads securely but removing them carelessly can strip the screw head or damage the wood. Use these tips to unscrew without harm:
- Choose the correct screwdriver: Match the screwdriver tip to the screw head (Phillips, flathead, etc.).
- Apply firm, even pressure: Prevent slipping that can damage the wood or screw.
- Turn slowly: Unscrew at a steady pace to avoid stripping.
Sometimes screws are painted or covered with debris. Clean the screw head with a brush or cloth first. If the screw is tight, apply penetrating oil and wait 10-15 minutes before trying again.
Use a drill with a clutch set to a low torque if unscrewing many screws. This controls power and stops the drill when the screw loosens.
Softening Adhesives
Many stair treads use glue or adhesive to stick firmly. Removing glued treads requires softening the adhesive without harming the wood or finish. Follow these steps:
- Use heat: A heat gun or hair dryer warms the adhesive. Heat softens glue, easing removal.
- Apply solvent: Use adhesive remover or rubbing alcohol carefully on small areas. Test first on a hidden spot.
- Wait and peel: Allow heat or solvent to work for a few minutes, then gently pry the tread.
Be cautious. Excessive heat can damage the wood finish. Use moderate heat and keep the tool moving. Avoid soaking the wood with solvent to prevent warping.
Lifting The Treads
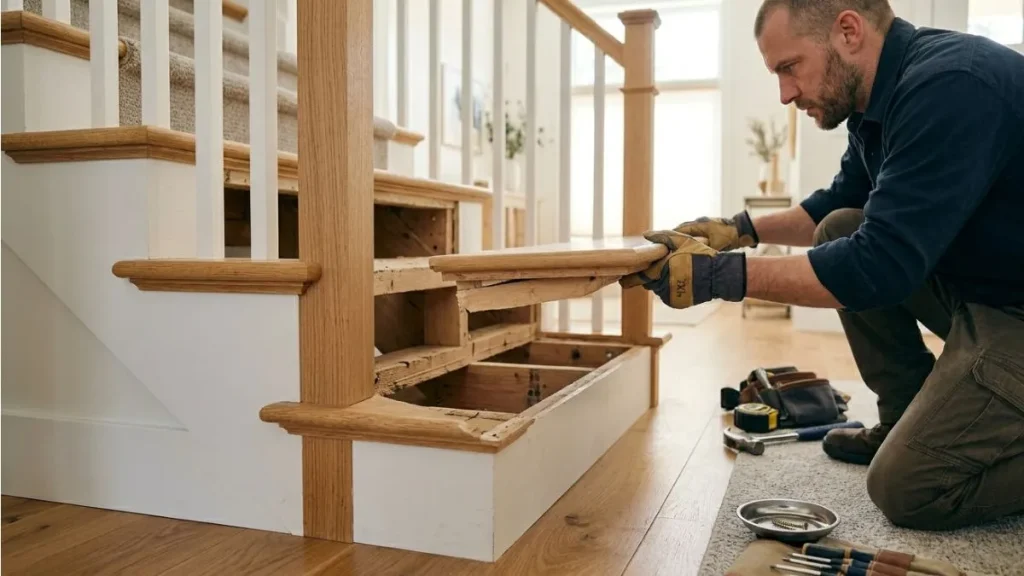
Removing stair treads without causing damage requires a careful approach, especially during the lifting stage. Lifting the treads involves detaching them from the stair frame or risers without cracking, splitting, or warping the wood or other materials. Proper techniques and tools help protect both the tread and the underlying structure. Taking time and working methodically ensures a clean removal and preserves the materials for reuse or replacement.
Using Pry Bars Safely
Pry bars are essential tools for lifting stair treads, but using them incorrectly can damage the wood or surrounding surfaces. Start by selecting a pry bar with a flat, wide end to distribute pressure evenly. Avoid narrow or pointed ends that can gouge the tread.
- Protect surfaces: Place a thin piece of wood or a scrap board between the pry bar and tread. This acts as a buffer and prevents dents or scratches.
- Work gradually: Insert the pry bar gently under the tread edge. Apply small amounts of force, increasing slowly to avoid sudden movements.
- Alternate sides: Lift from one side a little, then move to the other side. This balances the pressure and reduces stress on the tread.
Maintain a steady hand and avoid jerking motions. Keep your body positioned to apply force smoothly and avoid slipping. Consider using a pry bar with a comfortable grip to reduce hand fatigue during the process.
Applying Even Pressure
Even pressure is critical to prevent cracking or splitting the stair treads. Uneven force often leads to damage at weak points or nail holes. Distribute your effort across the entire tread edge rather than focusing on a single spot.
Follow these steps for applying even pressure:
- Insert protective shims or thin boards between the pry bar and tread to spread force.
- Lift the tread by small increments, checking progress frequently.
- Use two pry bars or helpers to raise the tread from multiple points simultaneously.
- Tap gently with a rubber mallet if the tread resists movement, avoiding direct hammer blows on the wood.
Handling Fragile Materials
Some stair treads are made of delicate materials such as softwood, veneer, or laminate. These require extra care during lifting to avoid cracks, chips, or peeling.
Follow these tips for fragile materials:
- Identify material type: Know if the tread is hardwood, softwood, or covered with veneer or laminate.
- Use softer padding: Place felt pads or rubber strips between tools and the tread.
- Work slowly: Avoid quick prying. Let the adhesive or nails loosen gradually.
- Apply heat if needed: Warm a heat gun or hairdryer slightly to soften glue before lifting.
- Support the tread: Hold the tread firmly with your hands or helpers to prevent bending or snapping.
Fragile materials benefit from gentle handling and patience. Avoid using metal tools that may scratch or dent. Use plastic or wooden wedges when possible to reduce damage risk.
Recommended: Replacing Stair Treads Built into Stringer
Dealing With Residue

Removing stair treads can leave behind sticky residue and rough patches. These leftovers make the surface uneven and unattractive. Dealing with residue is a key step in restoring your stairs. Proper cleaning and smoothing prevent damage and prepare the area for new finishes or treads. Use gentle methods to protect the wood beneath.
Removing Leftover Glue
Glue residue often sticks firmly to wood. To remove it without damage, start by softening the glue. Use a heat gun or hair dryer on low heat. Hold it a few inches away from the glue for 20-30 seconds. This makes the glue easier to scrape off.
Next, gently scrape the softened glue using a plastic scraper or putty knife. Metal tools may gouge the wood, so avoid them. Work slowly and carefully to lift the glue in thin layers.
- Apply a glue remover or adhesive solvent if residue remains.
- Test the solvent on a small hidden area first.
- Use a clean cloth to rub the solvent and dissolve the glue.
- Wipe the area with a damp cloth to remove any chemical traces.
Sanding Rough Spots
After glue removal, rough spots often remain. Sanding smooths the surface and prepares it for refinishing. Use medium-grit sandpaper (80-120 grit) to start. Sand gently along the wood grain to avoid scratches.
Switch to fine-grit sandpaper (180-220 grit) for a smooth finish. Use a sanding block or orbital sander for even pressure. Avoid sanding too deep, which can damage the wood.
Here are tips for sanding stair treads safely:
- Wear a dust mask to avoid inhaling wood dust.
- Use eye protection to guard against flying particles.
- Work in a well-ventilated area.
- Clean the surface with a vacuum or tack cloth after sanding.
Tips To Avoid Damage
Removing stair treads without causing damage requires care and the right approach. Tips to avoid damage focus on working slowly and using proper methods. This helps keep the wood and surrounding surfaces safe. Taking time and using good tools prevents costly repairs and keeps the stairs looking good.
Patience And Technique
Rushing the removal of stair treads can lead to cracks, splinters, or broken parts. Patience is key. Start by gently loosening the edges with a flat pry bar or putty knife. Slowly work the tool under the tread, moving a little at a time. Avoid forcing or prying too hard in one spot.
- Begin at one corner or side.
- Use slow, steady pressure.
- Alternate sides to lift evenly.
- Stop if you feel strong resistance.
Using the right technique also means supporting the stair tread as you remove it. Place a block of wood or a support under the tread to reduce stress. This prevents bending or cracking. Patience also helps you spot hidden nails or glue spots that need extra care.
Proper Tool Selection
Choosing the right tools reduces damage during removal. A variety of tools work best for different parts of the tread. Use a flat pry bar or putty knife to gently lift edges. A hammer helps tap the tool in carefully. Avoid large crowbars or heavy tools that can break wood.
Soft tools protect the surface better. Use a wood block between the pry bar and the stair to avoid dents. A utility knife can cut through caulk or paint sealing the tread to the riser or stringer. This makes lifting easier and cleaner.
- Flat pry bar or putty knife for lifting
- Hammer for gentle tapping
- Utility knife for cutting caulk or paint
- Wood block to protect surfaces
Work In Small Sections
Removing stair treads in small sections helps avoid damage. Don’t try to lift a whole tread at once. Break the task into parts, lifting a few inches at a time. This reduces stress on the wood and nearby parts. It also lets you see if any area is stuck or nailed tightly.
- Start at one edge and lift a few inches.
- Move to the next section, repeating the process.
- Check for nails or glue spots as you go.
- Stop and cut any stuck areas with a utility knife.
Working in small sections makes the process safer and cleaner. It also limits the chance of splintering or cracking. Use supports or blocks under the lifted parts to keep pressure even. This method keeps the stair structure stable throughout removal.
- Prevents bending or cracking
- Allows careful removal around nails
- Minimizes damage to adjacent parts
- Improves control over the process
Conclusion
Removing stair treads without damage takes care and the right tools. Start slowly and gently to keep the wood safe. Use a pry bar with a soft touch and protect the edges. Watch for hidden nails or glue spots. Take your time to avoid cracks or splits.
Clean the area after removal for a neat finish. Following these steps helps keep stairs strong and ready for new treads. This way, your stairs look good and last longer. Simple actions make a big difference.