


Is your bathroom sink plug stuck or hard to remove? You’re not alone.
A jammed or broken plug can make everyday tasks frustrating and messy. But don’t worry—removing it doesn’t have to be a headache. In this guide, you’ll discover simple, step-by-step ways to get that plug out quickly and easily. Keep reading, and you’ll save time, avoid costly repairs, and get your sink working like new again.
Types Of Sink Plugs
Removing a plug from a bathroom sink can be tricky without knowing its type. Sink plugs come in different styles, each with a unique way to open and close. Knowing the kind of plug helps to remove it safely and fix any issues.
Pop-up Plugs
Pop-up plugs are very common in modern sinks. They open and close by pressing down. When pressed once, the plug goes down to block the drain. Pressed again, it pops up to let water flow.
To remove a pop-up plug:
- Look under the sink for a rod connected to the plug.
- Loosen the clip that holds the rod in place.
- Pull the rod gently to release the plug.
- Lift the plug out from the sink drain.
This type often has a horizontal rod and a vertical lift rod working together. If the plug sticks, cleaning the area can help it move freely again. Sometimes, dirt or hair blocks the mechanism.
Lift-and-turn Plugs
Lift-and-turn plugs have a simple design. You twist the plug to open or close it. To remove this plug, first lift it slightly. Then turn it counterclockwise until it stops. After that, pull it out from the drain hole.
This type does not have rods under the sink, making it easier to handle. Sometimes the plug can be stuck due to buildup around its edges. Cleaning around the plug helps in smooth removal.
- Lift the plug gently to unlock it.
- Turn the plug counterclockwise slowly.
- Pull the plug straight up and out.
- Clean any dirt around the plug before reinstalling.
Lift-and-turn plugs are durable and fit tightly to stop water. Regular cleaning will keep them working well. Avoid forcing the plug to prevent damage.
Push-and-pull Plugs
Push-and-pull plugs work by pushing down to close and pulling up to open. They do not require twisting. To remove this plug, pull it straight up firmly. Sometimes it may need a bit of wiggling to come out.
These plugs usually have a stem that fits into the drain. The stem might have a ring or clip that holds it in place. Check for these parts before pulling hard.
- Grab the plug firmly at the top.
- Pull straight up without twisting.
- Wiggle gently if it feels stuck.
- Inspect the stem for any clips or rings.
- Remove clips if needed to free the plug.
Push-and-pull plugs are easy to use but can get stuck if dirt builds up. Cleaning the drain area often helps keep the plug moving well. Avoid using too much force to stop damage to the sink or plug.
Removing Pop-up Plugs
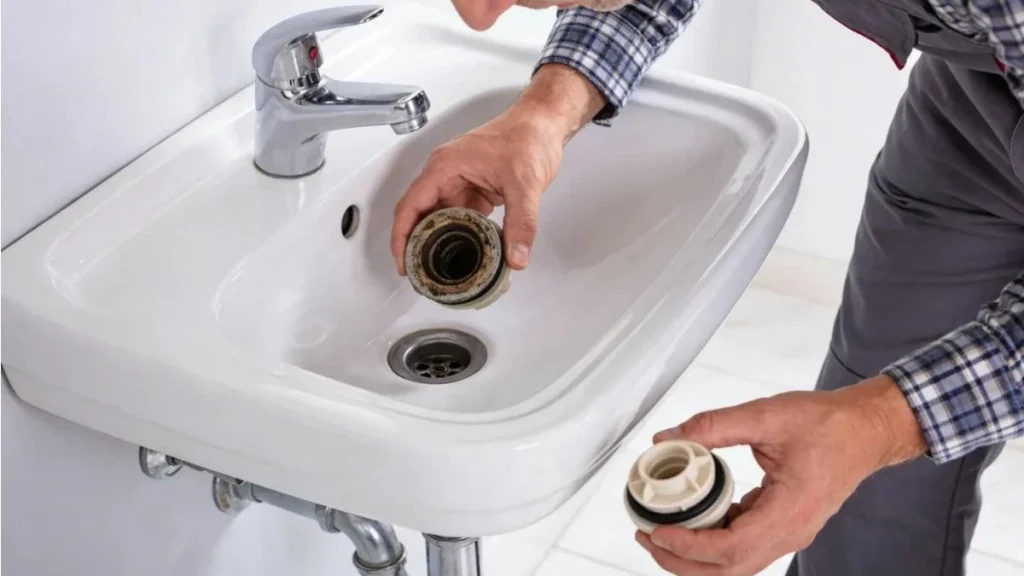
Removing a pop-up plug from a bathroom sink is a simple task. The pop-up plug stops water from draining. Sometimes, it gets stuck or needs cleaning. Knowing how to take it out saves time and money.
Locate The Pivot Rod
The first step is to find the pivot rod under the sink. This rod controls the plug’s up and down movement. Usually, it is attached to the drain pipe. It looks like a small metal stick. The pivot rod connects to a horizontal lever.
Look inside the cabinet below the sink. Follow these tips to find it:
- Check near the drainpipe where the sink drain connects.
- Look for a small metal rod that moves when you lift the plug.
- It may have a clip or nut holding it in place.
Knowing the pivot rod’s location is key. It must be disconnected to free the plug.
Disconnect The Rod
After finding the pivot rod, the next step is to disconnect it. This will release the plug from the lever. Follow these simple instructions:
- Find the clip or nut securing the rod to the drain pipe.
- Use your fingers or pliers to loosen the clip or nut.
- Gently pull the rod away from the drain pipe.
Be careful not to force the rod. It may bend or break. If the rod is stuck, try wiggling it gently. Sometimes, a little lubrication helps loosen tight parts.
Once disconnected, the plug will no longer be held in place by the rod.
Lift Out The Plug
With the pivot rod disconnected, the plug can be removed. Reach inside the sink drain opening. Use these tips to lift the plug out:
- Grasp the plug firmly with your fingers.
- Pull it straight up and out of the drain.
- If the plug resists, try moving it side to side gently.
Sometimes, the plug is dirty or stuck from soap scum. Cleaning around the plug helps it come out easier. After removal, check the plug for damage or dirt. Clean it before putting it back or replacing it with a new one.
Removing Lift-and-turn Plugs

Removing a plug from a bathroom sink can be simple. The lift-and-turn plug is common in many sinks. This type of plug works by lifting and turning to open or close. Knowing how to remove it helps with cleaning or fixing drain issues. Careful steps make the process easy and safe. Here is how to remove a lift-and-turn plug.
Unscrew The Knob
The first step is to unscrew the knob on the plug. This knob is the part you turn to open or close the drain. It is usually on the top of the plug.
Follow these simple steps:
- Turn the knob counterclockwise to loosen it.
- If it is hard to turn, use a cloth for better grip.
- Keep turning until the knob comes off completely.
- Do not force it too much to avoid damage.
Sometimes the knob may be stuck due to dirt or rust. In such cases:
- Apply a small amount of lubricant around the knob.
- Wait a few minutes for it to work.
- Try turning the knob again gently.
Removing the knob reveals the stem underneath. This stem holds the plug in place. The knob and stem work together to control the plug’s movement.
Lift The Plug
After unscrewing the knob, the next step is to lift the plug out of the sink. The plug is connected to a stem that fits into the drain.
Steps to lift the plug:
- Hold the stem firmly with one hand.
- Pull the plug straight up to remove it from the drain.
- If it feels stuck, wiggle it gently while pulling.
- Avoid using too much force to prevent damage.
Sometimes the plug can be tight due to build-up or corrosion. Use these tips:
- Soak the area with warm water to loosen dirt.
- Use a soft brush to clean around the plug base.
- Try lifting the plug again after cleaning.
Once the plug is removed, inspect it for cracks or wear. Cleaning the plug and drain area helps improve sink drainage and hygiene.
Removing Push-and-pull Plugs

Removing a plug from a bathroom sink can seem tricky at first. Knowing how to handle a push-and-pull plug makes the task easier. These plugs open and close by pushing down or pulling up. Sometimes, they get stuck or block water flow. Learning simple steps helps fix these problems quickly.
Pull Up The Plug
Start by grasping the plug firmly with your fingers. Gently pull it straight up to release it from the drain. Avoid using too much force to prevent damage. Some plugs may have a small knob or lever on top to help lift. If the plug does not come up easily, try these tips:
- Use a cloth for better grip on slippery plugs.
- Rock the plug slightly from side to side while pulling up.
- Check if the plug has a visible clip or screw holding it in place.
Sometimes, the plug is attached to a rod underneath the sink. In this case, locate the rod and loosen any screws or clips. Carefully pull the plug out once the rod is free. This method prevents breakage and makes removal safe.
Check For Obstructions
After removing the plug, look inside the drain opening for any blockages. Hair, soap scum, and dirt often cause clogs. Cleaning these obstructions improves water flow and prevents future problems. Follow these steps to check and clean:
- Use a flashlight to see inside the drain clearly.
- Remove any visible debris by hand or with tweezers.
- Flush the drain with warm water to clear small particles.
If debris is hard to reach, a drain snake or a wire hanger can help. Insert it gently to pull out hidden blockages. Regular cleaning of the plug and drain keeps the sink working well and avoids bad smells.
Dealing With Stuck Plugs
Removing a stuck plug from a bathroom sink can be tricky. Often, the plug gets jammed due to dirt, rust, or buildup. Knowing simple steps helps solve this problem without damage. Care and patience are key when dealing with stuck plugs. Using the right tools and methods saves time and effort. Here are some easy ways to remove a stuck bathroom sink plug safely.
Use Lubricant
Applying lubricant can loosen the stuck plug. It helps reduce friction between the plug and the sink drain. Use a small amount of household lubricant like WD-40 or silicone spray.
- Spray the lubricant around the edge of the plug.
- Wait 10 to 15 minutes for it to soak in.
- Try to move the plug gently to see if it loosens.
Lubricant softens rust and dirt buildup that holds the plug tight. Avoid using too much lubricant to prevent mess. Use a cloth to wipe off excess lubricant after loosening.
Apply Gentle Force
Applying gentle force helps remove the plug without breaking it. Use your hands or simple tools like pliers with a cloth to avoid scratches. Pull or twist the plug slowly and carefully.
- Grip the plug firmly but gently.
- Try twisting it left and right a little bit.
- Pull upwards steadily without sharp jerks.
Too much force can damage the sink or plug. If the plug does not move, stop pulling and try lubricant again. Patience is important to avoid breaking parts.
Seek Professional Help
Sometimes, the plug stays stuck despite your efforts. Calling a plumber is a safe choice. Professionals have special tools and experience to handle tough cases.
Hiring a professional avoids damage to your sink or pipes. It also saves time and stress. If you notice leaks or broken parts during removal, seek help immediately.
| Reason to Call a Professional | Benefit |
| Plug stuck for a long time | Expert tools and knowledge |
| Risk of damaging sink parts | Safe and careful removal |
| Signs of leaks or broken plumbing | Quick repair and prevention |
Cleaning And Maintenance

Removing the plug from a bathroom sink is a simple task. It helps keep your sink clean and working well. Regular cleaning and maintenance prevent clogs and bad smells. Knowing how to remove the plug also helps fix small problems fast.
Clean The Drain
Start by removing the sink plug carefully. Use a cloth or gloves to avoid dirt. Look inside the drain for hair, soap, or dirt. These block the water flow and cause slow drainage. Use a small brush or an old toothbrush to clean inside the drain. You can also use a cup of warm water mixed with vinegar to wash the drain. This mix helps remove grease and kills some bacteria.
Follow these steps to clean the drain well:
- Remove visible dirt or hair with your hands or a tool.
- Use a brush to scrub the drain walls gently.
- Pour warm water and vinegar mix down the drain.
- Let it sit for 10-15 minutes for better cleaning.
- Rinse the drain with warm water to clear all dirt.
Cleaning the drain regularly stops bad smells and keeps water flowing fast.
Inspect For Damage
Check the plug and drain parts for any damage after cleaning. Look for cracks, rust, or worn-out pieces. Damaged parts can cause leaks or make the plug not fit well. A plug with a broken seal will not stop water properly. The drain pipe may also have small holes or cracks. These problems need fixing to avoid bigger damage.
Use this checklist to inspect the parts:
| Part | What to Check | Signs of Damage |
| Sink Plug | Surface and seal | Cracks, worn rubber, loose fit |
| Drain Pipe | Body and joints | Rust, holes, leaks |
| Drain Cover | Attachment points | Broken clips, bent parts |
Replace any broken parts to keep the sink working well and avoid leaks.
Reassemble The Plug
After cleaning and checking, put the plug back in place. Make sure the plug fits tightly in the drain hole. Align the plug’s parts correctly before locking them together. A loose plug can cause water to leak or drain slowly. Tighten any screws or clips to secure the plug firmly. Test the plug by filling water in the sink. Watch if the water holds or leaks through the plug.
Follow these steps to reassemble the plug:
- Place the plug into the drain hole carefully.
- Check the rubber seal is clean and fits well.
- Attach any clips or screws to hold the plug.
- Turn the plug to lock it, if it has a twist lock.
- Fill the sink with water to test the seal.
Proper reassembly keeps the sink clean and stops water from leaking.
You May Also Like: Can’t Remove Bathroom Sink Drain
Conclusion
Removing a plug from a bathroom sink is easier than it seems. With the right tools and steps, you can fix it fast. Take your time and be gentle to avoid damage. Cleaning the area helps keep your sink working well.
Now, you can handle this small task yourself. No need to wait for a plumber. Save money and feel proud of your work. Keep these tips handy for future sink problems. Simple tasks like this make home care easier every day.


