Are you stuck with sticky tile residue on your floor and don’t know where to start? Removing sticky tile can feel like a tough, messy job—but it doesn’t have to be that way.
In this guide, you’ll discover simple, effective steps to get your floor clean and smooth again. Whether you’re prepping for new flooring or just want your space to look fresh, you’ll find tips that save you time, effort, and frustration.
Removing Tile Adhesive
Removing tile adhesive is a key step in clearing sticky tiles from your floor. The leftover glue can be tough and messy, making it hard to get a smooth surface. Proper removal prevents damage and prepares the floor for new coverings.
Manual Scraping Techniques
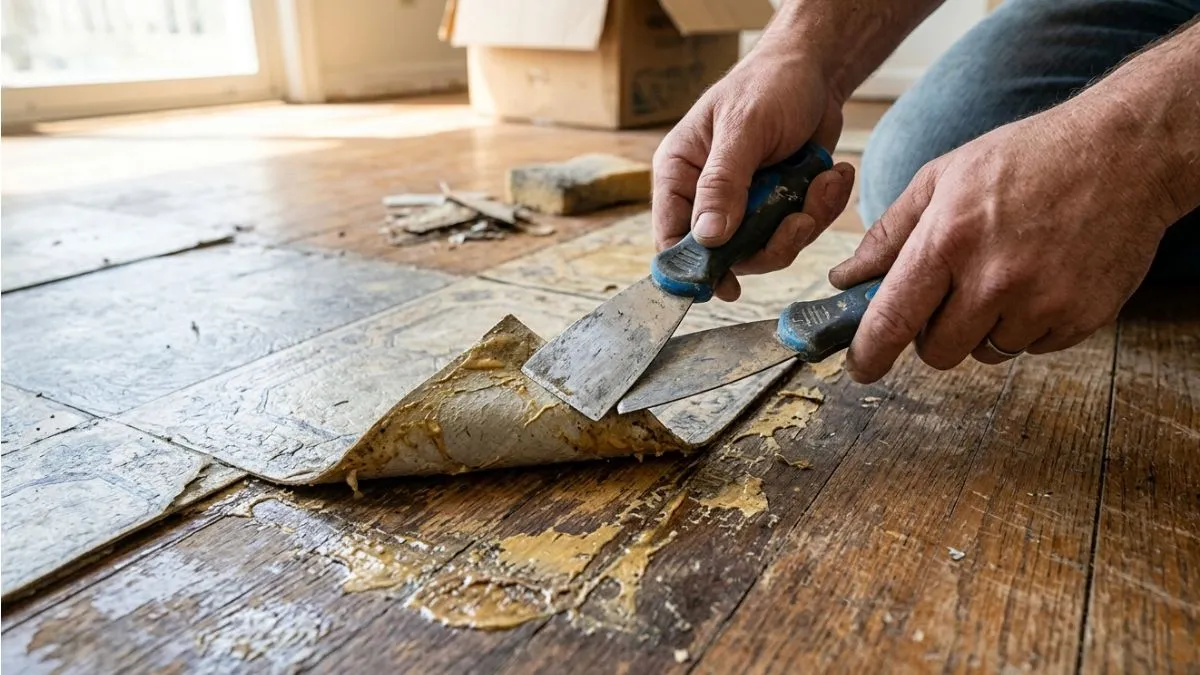
Manual scraping uses hand tools to remove tile adhesive from the floor. It is simple but requires effort and patience. Use a putty knife, scraper, or chisel with a sturdy handle. Hold the tool at a low angle to avoid scratching the floor surface. Start at one edge and push the blade under the adhesive. Work slowly to lift and peel away the sticky residue.
Tips for manual scraping:
- Wear gloves to protect your hands from sharp tools and adhesive.
- Use a wide scraper to cover more area with each stroke.
- Apply pressure carefully to avoid damaging the floor underneath.
- Work in small sections to keep the task manageable.
For very thick adhesive, a hammer and chisel may help break it up before scraping. A stiff brush or sandpaper can remove small leftover bits. Manual scraping is best for small jobs or when chemicals are not an option. It creates some dust and debris, so wear a mask if needed. Clean the floor with a damp cloth after scraping to remove all loose particles.
Using Heat To Soften Adhesive
Heat makes tile adhesive soft and easier to remove. This method works well for many types of glue and sticky residues. Use a heat gun or a hairdryer set on high heat. Hold the heat source a few inches above the adhesive. Move it slowly back and forth to warm the glue evenly. As the adhesive softens, use a scraper to peel it off gently.
Benefits of using heat:
- Less physical effort compared to scraping alone.
- Reduces dust by loosening the adhesive.
- Preserves the floor by avoiding harsh chemicals.
Chemical Adhesive Removers
Chemical removers dissolve tile adhesive to make it easier to wipe or scrape away. These products come in liquids, gels, or sprays. Choose a remover made for your floor type and adhesive. Always read the label for safety instructions and proper use. Apply the chemical with a brush or cloth over the sticky area. Let it sit for the time suggested by the manufacturer, usually 15 to 30 minutes.
Common types of chemical removers:
| Type | Best For | Safety Notes |
| Citrus-based | Light to medium adhesive, safe for most floors | Non-toxic, pleasant smell |
| Solvent-based | Strong, old adhesive | Use gloves and ventilate well |
| Caustic removers | Heavy-duty removal | Corrosive; wear protective gear |
After chemical application, scrape off softened glue with a putty knife. Rinse the floor thoroughly with water to remove chemical residue. Ventilate the room well during and after treatment. Test the remover on a small area first to check for floor damage or discoloration. Chemical removers speed up the process but require care to avoid harm to skin and floors.
Dealing With Stubborn Residue
Two effective ways to remove this sticky residue include sanding and using a floor scraper machine. Each method works well depending on the type of floor and the amount of residue left behind.

Sanding Methods
Sanding is a common method for removing sticky tile residue. It works by wearing down the adhesive until it is smooth with the floor surface. This method is best for wooden or concrete floors. Sanding can be done by hand or with a power sander. Here is how to do it:
- Prepare the floor: Clean the area to remove dirt and loose particles.
- Choose the right sandpaper: Start with coarse grit (60-80) for thick residue.
- Sanding technique: Use steady, even strokes. Avoid staying too long in one spot.
- Finish with finer grit: Use fine sandpaper (120-150) to smooth the surface.
| Step | Action | Details |
| 1 | Clean Floor | Remove dirt and loose residue with a broom or vacuum |
| 2 | Use Coarse Sandpaper | Begin sanding to remove thick adhesive layers |
| 3 | Switch to Fine Sandpaper | Smooth the floor surface for a clean finish |
| 4 | Clean Dust | Vacuum or wipe away sanding dust before finishing |
Sanding takes time but leaves a clean, smooth surface. It works best on floors that can handle abrasion without damage.
Using A Floor Scraper Machine
A floor scraper machine is a powerful tool to remove sticky tile residue fast. It uses a sharp blade that moves back and forth to scrape away glue and adhesive. This method suits large areas or very tough residue. Many rental shops offer floor scraper machines for a reasonable price.
How to use a floor scraper machine:
- Prepare the floor: Clear the room and remove loose debris.
- Wear safety gear: Use gloves, safety glasses, and sturdy shoes.
- Set up the machine: Attach a sharp scraper blade suitable for your floor type.
- Start scraping: Move the machine slowly across the residue. Let the blade do the work.
- Clean the floor: Remove scraped-off residue with a broom or vacuum.
Cleaning After Removal
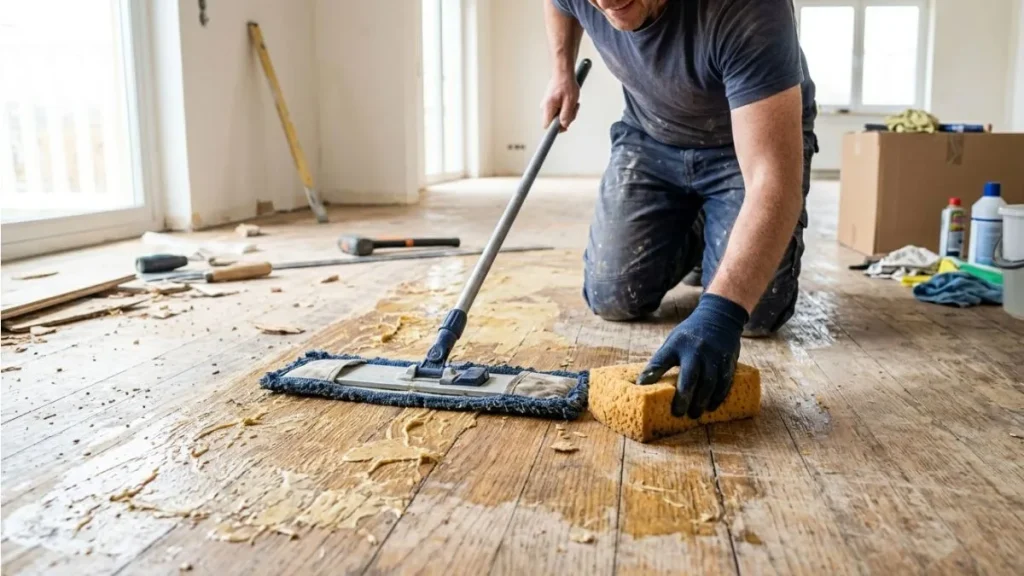
Removing sticky tiles from the floor leaves behind dust, bits of tile, and adhesive residue. Cleaning after removal is essential to prepare the surface for the next step, like installing new flooring or painting. Proper cleaning improves safety, prevents damage, and creates a smooth, neat base. It takes time and care but ensures better results.
Vacuuming Debris
Start by vacuuming all loose debris from the floor. This step removes dust, small tile fragments, and loose adhesive pieces that sweepers or brooms often miss.
- Use a vacuum with a hard floor setting to avoid scratching the surface.
- Focus on corners and edges where debris collects.
- Vacuum slowly to pick up all fine dust and particles.
After vacuuming, inspect the floor for any stuck bits of tile or hardened glue. These need manual removal to avoid damage during mopping.
| Tool | Purpose | Tips |
| Vacuum Cleaner | Remove dust and small debris | Use hard floor or bare floor setting |
| Putty Knife | Scrape stuck tile bits | Be gentle to avoid surface damage |
| Hand Broom | Clear large debris before vacuuming | Use stiff bristles for better results |
Mopping The Floor
Once the debris is vacuumed, mop the floor to remove any adhesive residue and fine dust. Use a gentle cleaner that suits the floor type.
- Choose a mild detergent mixed with warm water to avoid damage.
- Use a soft mop or microfiber cloth for even cleaning.
- Rinse the mop frequently to prevent spreading residue.
For stubborn sticky spots, apply a small amount of adhesive remover or vinegar solution. Let it sit for a few minutes, then scrub gently.
- Do not soak the floor with too much water.
- Dry the floor quickly with a clean towel or cloth.
- Check for missed spots and repeat if needed.
Proper mopping ensures the floor is clean, smooth, and ready for its next use. It improves appearance and prevents future problems like slipping or uneven surfaces.
Preparing Floor For New Covering

Removing sticky tile from the floor is only the first step. Preparing the floor properly ensures the new covering fits well and lasts long. This stage is crucial for a smooth, even surface. It helps avoid problems like cracks, bubbles, or uneven wear later. Clean the area, inspect it carefully, and make sure the floor is ready for the new layer.
Checking For Damage
After removing the sticky tile, check the floor for any damage. Look for cracks, holes, or loose parts. Damaged spots can cause the new covering to fail or look bad.
Steps to check for damage:
- Walk over the floor and listen for hollow sounds.
- Look closely for cracks or chips.
- Check if any parts feel soft or crumbly.
- Use a flashlight to spot small holes or uneven areas.
Mark damaged spots with chalk or tape. This helps you remember where to fix.
| Type of Damage | Signs | Repair Method |
| Cracks | Visible lines, gaps in the floor | Fill with floor patch or epoxy |
| Holes | Small or large openings | Use patching compound or concrete filler |
| Loose Areas | Tiles or pieces move when pressed | Secure or replace affected sections |
Fix all damage before moving on. Wait for repairs to dry fully. This step prevents bigger issues with the new floor.
Leveling The Surface
Leveling the floor creates a flat, even base. It stops bumps or dips under the new covering. Uneven floors cause tiles to crack or peel off later.
How to level the surface:
- Clear the floor of dust and debris.
- Use a long level or straight board to find high and low spots.
- Mark these areas with chalk.
- Sand down high spots with a floor sander or hand sander.
- Fill low spots with self-leveling compound or floor patch.
- Spread the compound evenly and let it dry.
- Check again with the level to confirm flatness.
Below is a simple guide for leveling materials:
| Material | Use | Dry Time |
| Self-Leveling Compound | Fills low spots quickly, smooth finish | 2-4 hours |
| Floor Patch | Repairs small holes and uneven areas | 24 hours |
| Concrete Grinder/Sander | Removes high spots and rough edges | Immediate |
Proper leveling improves the new floor’s look and lifespan. Take time to do this step right.
Read Also: How to Fix Uneven Tile Floor
Conclusion
Removing sticky tile from a floor takes patience and the right tools. Start slow and work carefully to avoid damage. Use heat or adhesive remover to loosen the sticky glue. Scrape gently with a putty knife or scraper. Clean the floor thoroughly after removing the tiles.
This helps new flooring stick well and look nice. Take breaks if needed. The job may take time, but steady effort pays off. Your floor will be ready for a fresh, clean look soon. Stay calm and keep going step by step.