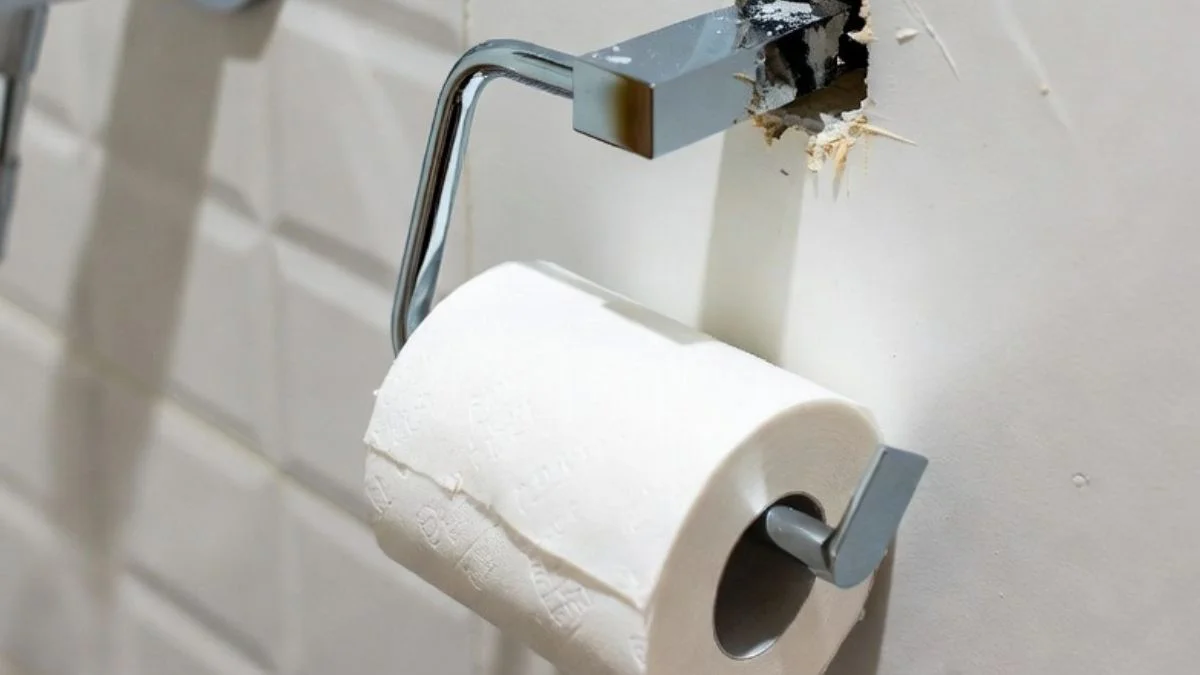
Your toilet paper holder pulled out of the wall and left behind an ugly hole? It’s frustrating — but it’s an easy fix you can handle yourself.
In this step-by-step guide, you’ll learn exactly how to repair drywall after removing a toilet paper holder, how to get a clean, seamless finish, and how to reinstall your holder so it never pulls out again.
No contractor needed. Just a few basic supplies and less than an hour of your time.
Why Toilet Paper Holders Damage Drywall in the First Place
Most toilet paper holders fail because they were never anchored the right way. Drywall alone is not strong enough to hold a fixture that gets pulled on daily.
The Most Common Causes of Drywall Damage
The biggest culprit is plastic expansion anchors. They come packaged with most holders, but they’re not built to handle constant sideways pulling force. Over time, they loosen and eventually rip out of the wall.
Mounting without hitting a stud is another common mistake. When a holder is screwed directly into drywall with no stud behind it, it’s relying entirely on the anchor — and that’s rarely strong enough for the long term.
Overtightening screws is also a problem many people overlook. Too much pressure actually crumbles the drywall around the anchor, weakening the hold instead of strengthening it.
What Kind of Damage to Expect
The damage you’re dealing with usually falls into one of three categories:
- Small clean screw holes — the easiest fix, just needs spackle and paint
- Enlarged or crumbled anchor holes — more common, requires cleaning up the edges before patching
- Torn surface paper — needs to be trimmed flat before any filler is applied
Tools and Materials You’ll Need for the Repair
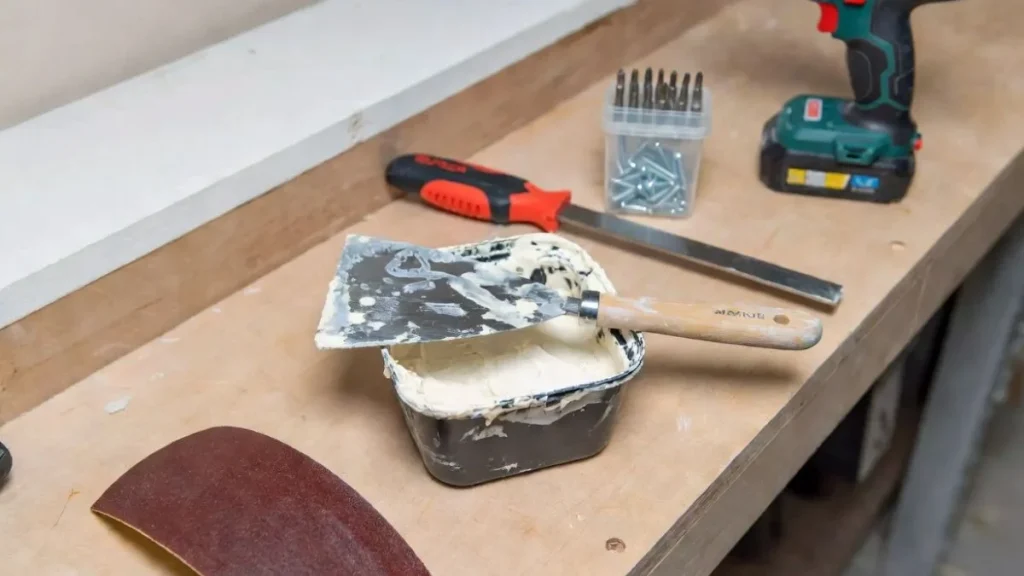
Before you start patching, it’s worth getting everything ready upfront. Having the right supplies on hand saves you from stopping mid-repair to run to the hardware store. The good news is that most of these items are inexpensive and easy to find at any home improvement store.
Basic Supply List
For small to medium screw or anchor holes, you don’t need much. A tube of lightweight spackle or joint compound is your main repair material — it fills the hole, dries hard, and sands smooth. You’ll also need a 4–6 inch putty knife to apply and smooth it out evenly.
Once the patch dries, sandpaper in 120 and 220 grit will help you level the surface and get it paint-ready. After sanding, always apply a coat of wall primer before painting — skipping this step is the most common reason patches look blotchy after painting. Finally, have your matching wall paint and a small brush or foam roller ready to finish the job cleanly.
For Larger Hole Repairs (Over ½ inch)
If the anchor pulled out a bigger chunk of drywall, basic spackle won’t be enough on its own. You’ll need a drywall patch kit — these are inexpensive and come with everything you need for holes up to 4–6 inches. Alternatively, a piece of self-adhesive fiberglass mesh tape works well as a backing to bridge the gap before applying compound.
For larger repairs, use regular joint compound rather than spackle. It bonds better over mesh and holds up more reliably when applied in multiple thin coats. A wider 8–10 inch drywall knife also helps you feather the edges smoothly so the patch blends into the surrounding wall.
Optional but Helpful Tools
A few extra items can make the job noticeably easier, even if they’re not strictly necessary.
A sanding sponge is great for tight bathroom spaces where a flat sandpaper sheet is awkward to maneuver. A small foam roller gives you a smoother, more even paint finish compared to a brush alone. And if you’re dealing with a stripped screw hole rather than a full anchor hole, the old toothpick trick works surprisingly well — pack a couple of toothpicks with a dab of wood glue into the hole, let it dry, and snap them off flush. It gives the screw something solid to grip again.
How to Repair Drywall After Removing a Toilet Paper Holder
This is the part that actually fixes your wall. Follow these steps in order and take your time — especially with drying. Rushing through the process is the number one reason repairs look obvious after painting.
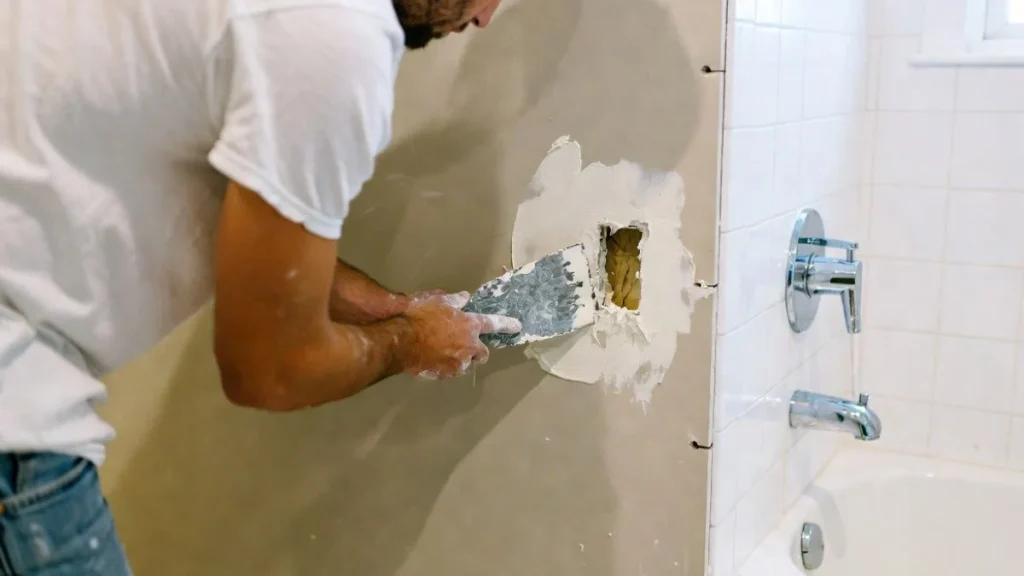
Step 1 — Remove the Toilet Paper Holder Completely
Unscrew the bracket and pull out any remaining anchors with pliers. Wipe the area with a damp cloth and let the wall dry fully before doing anything else. Patching over a damp surface leads to a weak, poor-quality repair.
Step 2 — Assess the Damage
Take a close look at what you’re actually dealing with before reaching for the spackle. The size and condition of the hole determines exactly how you’ll fix it.
Small Screw Holes (Under ¼ inch)
These are the simplest repairs possible. A single application of lightweight spackle is all you need. No mesh, no patch kit — just fill, let it dry, sand it smooth, and paint.
Medium Holes (¼ inch to 1 inch)
Anchor holes that crumbled or enlarged when pulled out fall into this category. You’ll need to clean up any loose or crumbly edges first using a putty knife or a utility knife. Then apply a self-adhesive mesh patch or use fiberglass mesh tape as a backing before filling with joint compound in thin layers.
Larger Damage (Over 1 inch)
If a chunk of drywall broke away entirely, use a proper drywall patch kit. These kits include a backing panel that supports the compound across the gap. Plan for two to three coats of joint compound, feathering each coat wider than the last for a smooth, invisible finish.
Step 3 — Apply Spackle or Joint Compound
Press the compound firmly into the hole and slightly overfill it — it shrinks as it dries. Feather the edges flat so there’s no ridge where compound meets wall. For medium or larger holes, always apply thin coats rather than one thick layer. Thick coats crack and take much longer to dry.
Step 4 — Sand the Patched Area Smooth
Start with 120-grit sandpaper to level the patch, then finish with 220-grit for a smooth, paint-ready surface. Wipe away all dust with a damp rag before moving on — dust left on the wall prevents primer and paint from bonding properly.
Step 5 — Prime Before Painting
Never skip this step. Spackle absorbs paint differently than the surrounding wall, and skipping primer leaves a dull, flat spot that’s clearly visible. Apply a thin coat of wall primer over the patched area and let it dry completely before painting.
Step 6 — Paint and Blend the Wall
Use a foam roller for the smoothest finish and apply thin coats, feathering the edges outward to blend with the surrounding wall. If your existing paint has aged or faded, repainting the entire wall from corner to corner is the only way to guarantee a truly seamless result.
How to Reinstall a Toilet Paper Holder So It Doesn’t Pull Out Again
Fixing the wall is only half the job. If you reinstall the holder the same way it was originally mounted, it’s only a matter of time before it pulls out again. A few small changes to how you anchor it make all the difference.
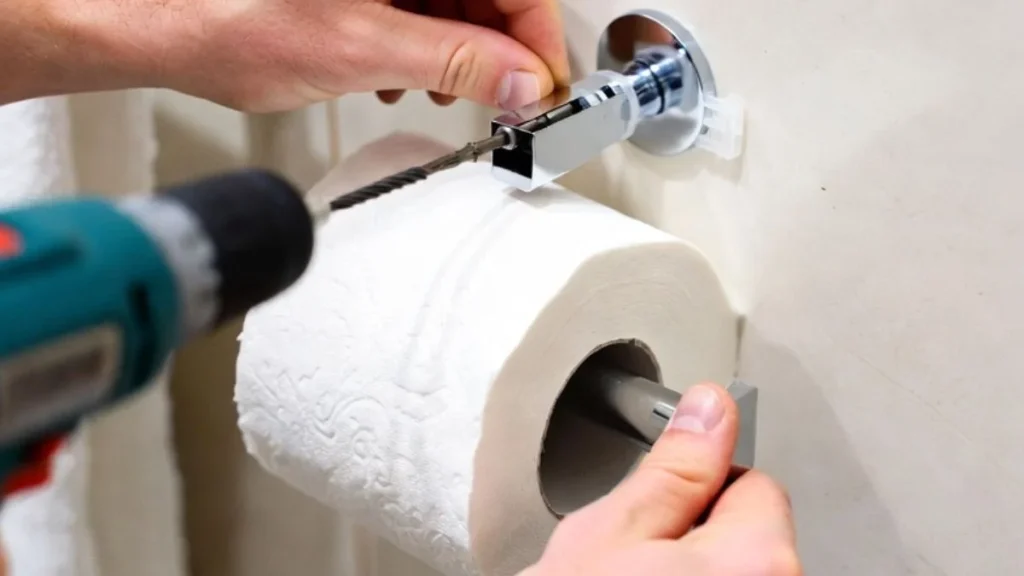
Find a Wall Stud When Possible
Mounting directly into a wall stud is always the strongest option — no anchors needed, no wobbling over time. Use an inexpensive stud finder to locate one before drilling anything. In most homes, studs are spaced 16 inches apart, so there’s a reasonable chance one lines up close to where you need it.
If a stud is within an inch or two of your ideal mounting spot, adjust the holder position slightly to hit it. A small positional change is worth it for a mount that lasts for years without any issues.
Choosing the Right Wall Anchors for Drywall
When a stud isn’t available, the anchor you choose matters more than most people realize. Basic plastic expansion anchors — the kind that come in the box with most holders — are the weakest option and the most common reason holders fail. Avoid reusing them, especially in the same holes.
Toggle bolts (also called butterfly anchors) are the strongest choice for drywall. They spread the load across a wider area behind the wall, making them far more resistant to the pulling force a toilet paper holder experiences daily. Self-drilling drywall anchors are another solid option — they’re easy to install, don’t require a pre-drilled hole, and hold reliably for mid-weight fixtures like toilet paper holders.
Whatever anchor you choose, always use fresh holes. Never reinstall into a hole that’s already been damaged or widened — the drywall around it is compromised and won’t hold properly.
Best Practices for a Lasting Installation
Use a level when marking your mounting points. A holder that’s even slightly crooked is noticeable every day and frustrating to live with. Take an extra 60 seconds to get it straight — it’s worth it.
Pre-drill pilot holes before driving screws, even when using self-drilling anchors. It gives you more control and significantly reduces the risk of cracking the surrounding drywall. When tightening the screws, stop when they’re snug — overtightening crushes the drywall around the anchor and weakens the hold over time.
Finally, give the holder a firm tug after installation to test it before using it daily. If there’s any give or wobble, address it now rather than waiting for it to pull out of the wall again.
Common Mistakes to Avoid When Repairing Drywall
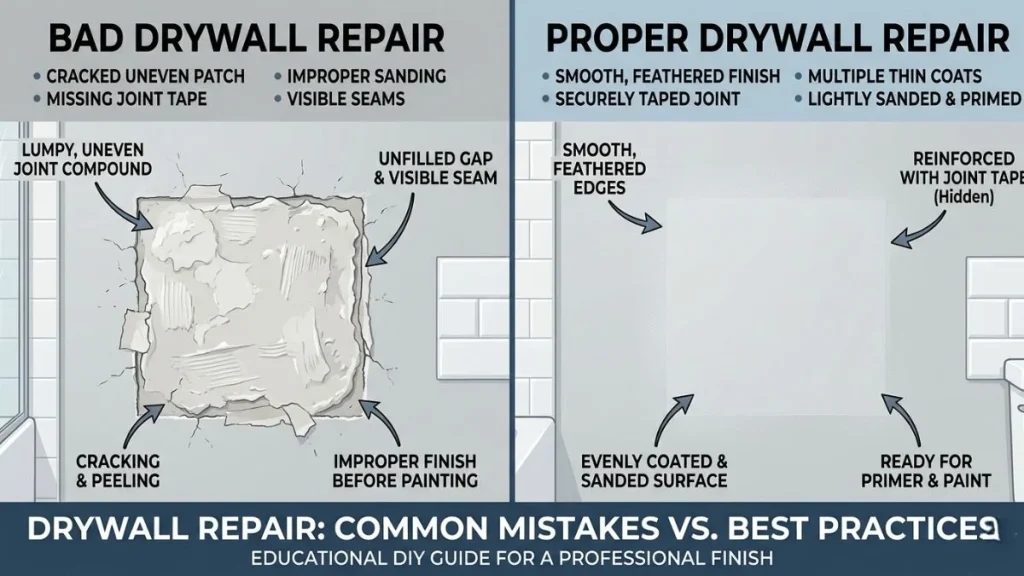
Even a simple repair can go wrong if you skip the basics. Here are the most common mistakes to watch out for:
Skipping primer before painting leaves a dull, flat spot on your wall that’s hard to fix after the fact. Always prime the patched area first.
Applying compound too thick causes cracking and uneven drying. Thin coats always produce a better result.
Sanding before the compound is fully dry tears the surface instead of smoothing it. Wait until it turns completely white and feels hard before sanding.
Using the wrong filler — caulk, wood filler, or adhesive — won’t sand or paint like spackle. Always use the right material for the job.
Reusing damaged anchor holes is what causes most holders to fail a second time. Patch the old holes and start fresh in a new spot.
Skipping the dust wipe-down before priming leads to poor adhesion and an uneven paint finish.
How Long Does a Drywall Repair Like This Take?
One of the most common questions homeowners ask is how much time to set aside for this kind of repair. The honest answer is — it depends on the size of the damage. The actual hands-on work is minimal. Most of the time is spent waiting for compound and primer to dry.
Realistic Time Expectations
A small screw hole is the quickest fix. Fill it, let it dry for 30–45 minutes, sand it smooth, prime, and paint. Start to finish, you’re looking at about an hour — including dry time.
A medium anchor hole requires two to three coats of joint compound, with drying time between each coat. Realistically, plan for a few hours spread across a single day.
Larger damaged areas need more patience. With proper drying between coats, you’re looking at one to two days before the wall is fully paint-ready.
How to Speed Up the Process
If you’re working in a bathroom — which tends to hold humidity — run a small fan or crack a window to improve airflow. Better ventilation noticeably reduces drying time. Applying thinner coats also helps significantly. The thinner the coat, the faster it dries and the less it shrinks.
Fast-drying lightweight spackle products are also worth using for smaller repairs. Some dry in as little as 15–20 minutes, which can cut your total repair time in half.
You Should Read Also: Repairing Drywall around Shower
Conclusion
Repairing drywall after removing a toilet paper holder is one of those jobs that looks intimidating but is actually very manageable. Clean out the hole, fill it with the right compound, sand it smooth, prime, and paint — that’s really all there is to it.
The key is patience. Don’t rush the drying time between coats, don’t skip the primer, and don’t reinstall the holder the same way it was before. Use the right anchors or hit a stud, and it’ll stay solid for years.
A small repair done right makes your bathroom wall look like nothing ever happened — and that’s exactly the result you’re after.