

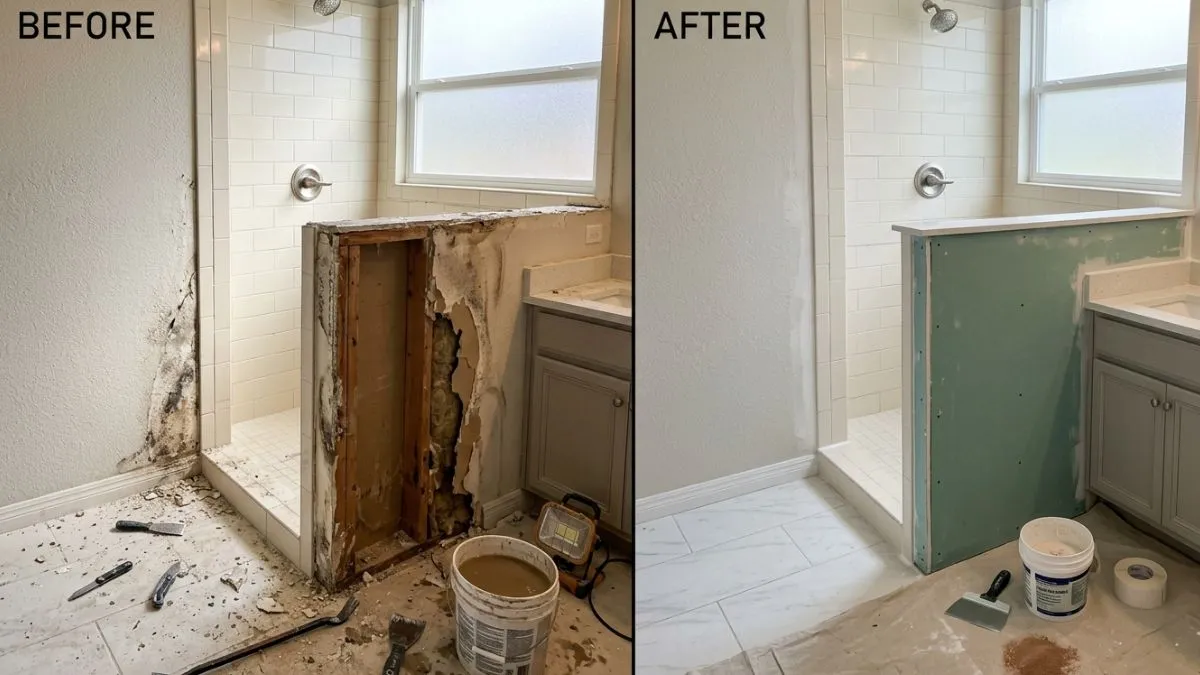
Is your bathroom wall looking rough around the edges near the shower? Repairing drywall around your shower might seem tricky, but it doesn’t have to be.
You want a smooth, clean finish that holds up against moisture and keeps your bathroom looking fresh. In this guide, you’ll discover simple steps to fix those damaged spots quickly and effectively. Keep reading, and you’ll learn how to protect your walls and make your shower area look like new again—without spending a fortune or calling in a pro.
Assessing Drywall Damage
Repairing drywall around a shower requires careful assessment of damage before starting any work. Moisture and water exposure cause drywall problems that worsen over time. Assessing drywall damage helps find the exact issues and plan proper repairs. This step saves time, money, and effort by avoiding hidden problems. Start by looking closely for visible signs and testing the drywall’s strength. Knowing what to check ensures a safe, lasting repair.
Identifying Water Damage Signs
Water damage on drywall near showers shows in many ways. Spotting these signs early stops further damage and costly fixes. Common signs include:
- Discoloration: Yellow, brown, or dark stains on the drywall surface.
- Peeling paint or wallpaper: Moisture makes paint bubble or peel away.
- Soft or sagging drywall: The drywall feels weak or bends when pressed.
- Cracks or warping: Drywall may crack or warp due to water swelling.
- Musty smell: Damp drywall often emits a stale, moldy odor.
Use a simple water damage checklist to guide the inspection:
Checking For Mold And Mildew
Mold and mildew grow easily on wet drywall around showers. They can cause health problems and damage walls further. Check carefully for these signs:
- Dark spots or patches: Usually black, green, or gray areas on the drywall.
- Musty or earthy smell: Mold has a strong, unpleasant odor.
- Soft or crumbly drywall: Mold weakens the drywall structure.
- Visible fuzz or dust: Mold spores may look fuzzy or powdery.
Use a flashlight and magnifying glass for a detailed check. Pay special attention to corners and joints near the shower. Wear gloves and a mask to protect from spores during inspection. If mold is present, remove the affected drywall and clean the area with a mold-killing solution. Keep the room ventilated to stop mold from returning.
Evaluating Structural Integrity
Drywall damage often affects the wall’s strength. Assessing structural integrity ensures the shower area stays safe and stable. Follow these steps:
- Press test: Push gently on the drywall near damaged spots. Soft or spongy feeling means weak drywall.
- Tap test: Tap the wall lightly with a tool. Hollow sounds can indicate hidden damage behind drywall.
- Check studs and framing: Remove a small drywall section to inspect wood framing for rot or mold.
- Look for loose drywall: Drywall that moves or cracks easily needs replacement.
Use a moisture meter to measure water content inside the wall. Values above 15% show high moisture risk. Dry framing and drywall must be dry before repair. Weak framing requires fixing or replacing to support new drywall.
Choosing The Right Drywall
Repairing drywall around a shower requires careful choice of materials. The right drywall ensures durability and prevents water damage. Bathrooms have high moisture levels, so standard drywall often fails over time. Choosing drywall designed for wet areas protects walls from mold and decay. This section explains the best drywall options for shower repairs.

Moisture-resistant Drywall Types
Moisture-resistant drywall is made to handle humid conditions better than regular drywall. It has special coatings or additives that slow water absorption. Here are common types:
- Green Board: Has a water-resistant core and green paper facing. Suitable for areas with some moisture but not direct water contact.
- Blue Board: Designed for veneer plaster finishes, offering moderate moisture resistance.
- Fiberglass Mat Board: Uses fiberglass instead of paper, making it highly resistant to mold and moisture.
- Paperless Drywall: Uses fiberglass mats, which resist mold and moisture better than paper-faced types.
Below is a quick comparison:
| Drywall Type | Water Resistance | Best Use |
| Green Board | Moderate | Bathroom walls (not shower enclosure) |
| Blue Board | Moderate | Walls with plaster finish |
| Fiberglass Mat | High | Wet areas including showers |
| Paperless Drywall | High | Shower surrounds and wet rooms |
Choose based on moisture exposure and budget. Avoid regular drywall in wet areas to prevent damage.
Advantages Of Cement Board
Cement board offers strong protection against water damage. It does not swell, warp, or decay when wet. This makes it a top choice for shower walls. Here are key benefits:
- Waterproof: Does not absorb water, preventing mold and mildew growth.
- Durable: Can support heavy tile and withstand daily moisture.
- Fire Resistant: Made from cement and fiberglass, it resists fire.
- Easy to Install: Can be cut with a utility knife or saw and attached with screws.
Selecting Waterproof Backing Options
Waterproof backing is essential under drywall or cement board in showers. It stops moisture from reaching the wall frame. Common options include:
- Waterproof Membranes: Thin sheets or liquid coatings applied over drywall or cement board.
- Foil-Backed Panels: Cement boards with a foil layer to block water.
- Plastic Vapor Barriers: Installed between framing and drywall to reduce moisture transfer.
Membranes come in two types:
- Sheet Membranes: Rolled materials that are glued or nailed onto walls.
- Liquid Membranes: Brush or spray-on coatings that create seamless barriers.
Below is a comparison of waterproof backing types:
| Backing Type | Water Resistance | Ease of Installation | Cost |
| Sheet Membrane | High | Medium | Moderate |
| Liquid Membrane | Very High | Easy | Moderate to High |
| Foil-Backed Panels | High | Easy | Moderate |
| Plastic Vapor Barrier | Moderate | Easy | Low |
Choose a waterproof backing that matches your shower’s exposure level and your skill for installation. Proper backing prevents costly repairs later.
Installing New Drywall
Repairing drywall around a shower requires careful steps to prevent water damage and mold. Installing new drywall is a key part of this process. It ensures the wall is strong and ready for waterproofing and tiling. Choosing the right drywall type, such as moisture-resistant or green board, is important near wet areas. Proper installation helps keep your bathroom safe and looking good for years.
Cutting And Fitting Panels
Start by measuring the damaged area accurately. Use a tape measure to find the height and width needed for the new drywall panel. Mark these measurements on the drywall sheet using a pencil.
Cutting drywall requires a sharp utility knife and a straight edge. Score the drywall along the marked line, then snap it cleanly. Smooth any rough edges with sandpaper.
Fit the panel into the wall opening. It should fit snugly but not too tight. Check for any gaps or uneven edges. Small gaps can be filled later, but large gaps may cause problems.
- Use moisture-resistant drywall for shower areas.
- Wear safety glasses and a dust mask when cutting.
- Make sure the panel fits flush with existing drywall.
- Label each panel for easy installation.
Securing Drywall To Studs
Attach the drywall panel to the wall studs using drywall screws. Use a drill with a screwdriver bit for faster work. Screws should be placed every 12 inches along each stud.
Do not overdrive screws. They should be flush or slightly below the drywall surface without breaking the paper layer. This helps the finishing materials stick better.
Check that the panel does not move once secured. It should be tight against the studs to avoid any gaps or bends.
- Use corrosion-resistant screws for wet areas.
- Start at the center and work toward edges.
- Wear gloves to protect your hands.
- Count the screws to ensure full coverage.
Sealing Joints And Edges
After securing drywall, seal all joints and edges to prevent moisture from entering. Use fiberglass mesh tape over seams. Apply a layer of joint compound with a putty knife, covering the tape fully.
Feather the edges of the compound to blend with the wall surface. Let it dry completely, then sand lightly. Repeat with 2–3 coats for a smooth finish.
Seal corners and edges with waterproof caulk. This step protects against water seepage, especially near the shower base and corners.
- Use mold-resistant joint compound.
- Apply thin coats to avoid cracking.
- Sand gently between coats.
- Keep the area dry during drying times.
Waterproofing Techniques
Repairing drywall around a shower needs careful waterproofing to stop water damage. Water can seep into drywall and cause mold, rot, and structural problems. Good waterproofing protects your repair work and keeps your bathroom safe and dry. Several techniques help create a strong water barrier around the shower area. These methods ensure your drywall stays intact and moisture-free for a long time.
Applying Waterproof Membranes
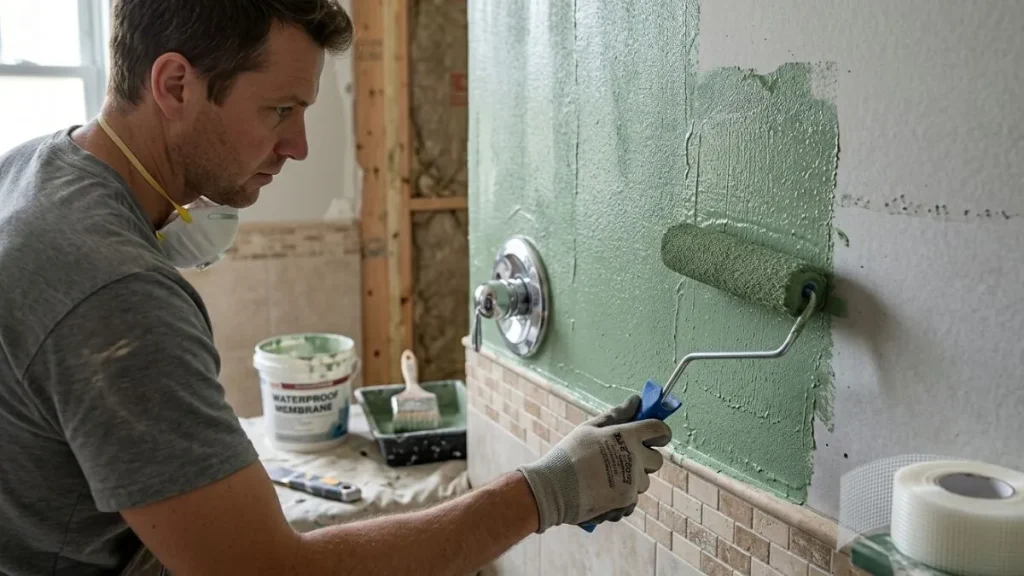
Waterproof membranes act as a shield between the drywall and water. These membranes are thin sheets or liquid coatings that block water from reaching the drywall surface. Using waterproof membranes is a critical step in shower repair to prevent water damage.
There are two main types of waterproof membranes:
- Sheet membranes: These are pre-formed sheets made of materials like polyethylene or rubber. They are applied over the drywall and sealed at seams.
- Liquid membranes: These come as paint or gel and are brushed or rolled onto the drywall. They dry to form a flexible, waterproof layer.
Benefits of waterproof membranes:
| Type | Advantages | Best Use |
| Sheet Membranes | Strong barrier, easy to inspect, durable | Large flat surfaces, shower walls |
| Liquid Membranes | Easy to apply, seals cracks, flexible | Irregular surfaces, corners, seams |
Steps to apply a liquid membrane:
- Clean the drywall surface thoroughly.
- Apply the first coat evenly with a brush or roller.
- Allow it to dry fully, usually 1-2 hours.
- Apply a second coat for full coverage.
- Inspect for missed spots and fix them.
Tip: Always follow the manufacturer’s instructions for drying times and number of coats.
Using Sealants And Tapes
Sealants and tapes block water from entering joints and corners around the shower. These areas are vulnerable because drywall panels meet or edges are exposed. Proper sealing stops water leaks and protects drywall.
Common products for sealing include:
- Silicone or acrylic sealants: Flexible and waterproof, perfect for corners and edges.
- Waterproofing tapes: Special waterproof tapes stick to drywall seams and corners.
How to use sealants and tapes effectively:
- Clean the surface to remove dust and grease.
- Apply tape over seams or joints, pressing firmly to avoid bubbles.
- Cover the tape edges with sealant to lock it in place.
- For corners, apply sealant in a continuous bead, smoothing it with a wet finger or tool.
- Let sealants dry completely before exposing them to water.
Pro tip: Use a caulking gun for smooth, even sealant lines.
Sealants come in different types. Silicone is more durable and flexible. Acrylic dries faster but can crack over time. Choose silicone for wet areas like showers.
Preventing Future Water Damage
Waterproofing is not a one-time job. Keeping drywall safe needs regular care and smart choices. Prevent future water damage by following simple steps.
Key tips to protect drywall around showers:
- Use water-resistant drywall: Also called green board or cement board, it resists moisture better than regular drywall.
- Maintain caulking and sealants: Check seals yearly and replace cracked or peeling caulk.
- Ensure proper ventilation: Use exhaust fans to reduce humidity and dry wet surfaces fast.
- Avoid direct water spray: Position showerheads to minimize water hitting drywall areas.
Regular inspection helps catch small leaks early. Look for discoloration, soft spots, or peeling paint. Fix these problems before they worsen.
Here is a simple checklist for ongoing drywall care around showers:
| Task | Frequency | Action |
| Inspect caulking and sealants | Every 6 months | Replace damaged or cracked sealant |
| Check for drywall damage | Every 6 months | Look for soft spots, mold, discoloration |
| Clean ventilation fans | Every 3 months | Remove dust and ensure airflow |
| Monitor humidity levels | Ongoing | Use dehumidifier or fans as needed |
Remember: Protecting drywall around showers saves money and keeps your bathroom healthy.
Finishing Touches
Repairing drywall around a shower requires careful attention to detail, especially during the finishing touches. These final steps ensure the repair is strong, smooth, and protected from moisture. Proper finishing helps the drywall blend seamlessly with the rest of the bathroom wall and prevents future damage. Focus on taping and mudding, sanding, and painting with the right materials to get a lasting result.
Taping And Mudding
Taping and mudding are essential steps in drywall repair. They hide joints and cracks, creating a smooth, even surface. Start by applying drywall tape over the seams. This tape strengthens the joint and stops cracks from forming later.
Use these steps for effective taping and mudding:
- Apply a thin layer of joint compound over the seams before placing the tape.
- Press the tape firmly into the compound to remove air bubbles.
- Cover the tape with another layer of joint compound, smoothing edges.
- Let it dry completely before applying additional coats.
Multiple coats improve strength and smoothness. Each coat should be thinner than the last. Between coats, check for any bumps or gaps and fill them.
| Step | Description | Drying Time |
| 1 | Apply base coat and tape | 24 hours |
| 2 | Apply second coat, feather edges | 24 hours |
| 3 | Apply final coat for smooth finish | 24 hours |
Tip: Use fiberglass mesh tape for wet areas like showers. It resists moisture better than paper tape.
Sanding For Smooth Surface
Sanding makes the drywall surface smooth and ready for painting. It removes rough patches and levels out dried joint compound. Use a sanding block or a pole sander with fine-grit sandpaper (120-150 grit).
Follow this sanding guide:
- Wear a dust mask and goggles to protect yourself.
- Sand gently with light pressure to avoid damaging the drywall.
- Focus on edges and any raised spots from mudding.
- Check the surface with your hand for smoothness.
After sanding, clean the dust with a damp cloth or vacuum. Dust can prevent paint from sticking well.
| Tool | Purpose | Best Grit |
| Sanding Block | Manual sanding for small areas | 120-150 |
| Pole Sander | Reach high or large surfaces | 120-150 |
| Drywall Sponge | Light smoothing without dust | N/A |
Tip: Use a drywall sponge for a dust-free finish on delicate spots.
Painting With Mold-resistant Paint
Painting completes the repair and protects drywall from moisture and mold. Showers create a damp environment. Mold-resistant paint helps keep walls clean and safe.
Choose paint designed for bathrooms or wet areas. These paints have special additives to prevent mold growth. Use a primer before painting to seal the drywall and improve paint adhesion.
Steps for painting around the shower:
- Clean the surface to remove dust and dirt.
- Apply a mold-resistant primer and let it dry fully.
- Use mold-resistant paint for at least two coats.
- Allow proper drying time between coats.
- Ventilate the bathroom during and after painting.
Table below shows common types of mold-resistant paint:
| Paint Type | Finish | Best For |
| Latex Mold-Resistant | Satin or Semi-Gloss | Bathroom walls and ceilings |
| Epoxy Paint | Glossy | High moisture areas, showers |
| Acrylic Mold-Resistant | Matte or Eggshell | Low moisture zones |
Tip: Semi-gloss finish resists water and is easy to clean.
Maintenance Tips
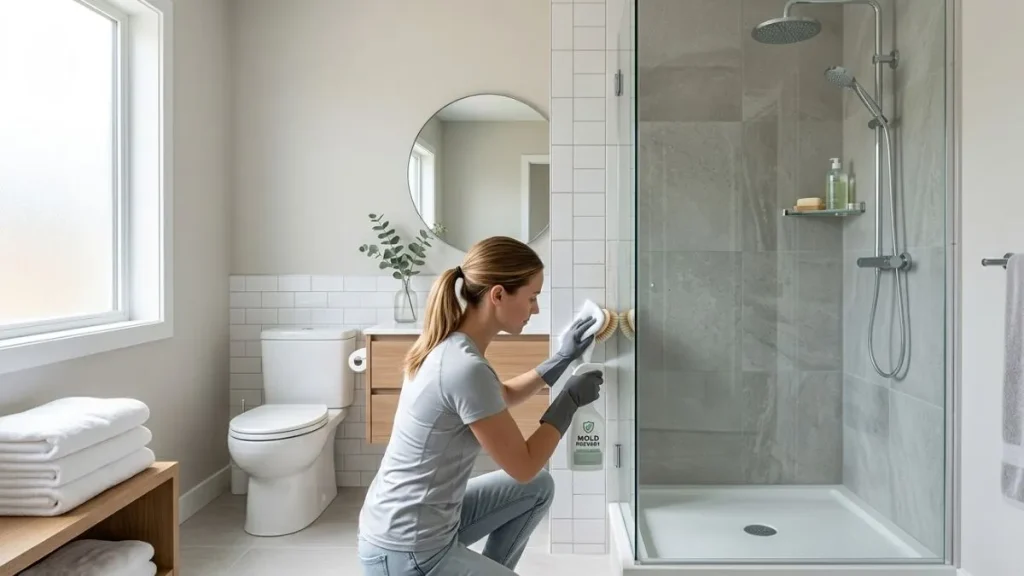
Repairing drywall around the shower needs regular care to keep it strong and dry. Maintenance tips help stop damage early and keep your bathroom looking good. Small problems can turn into big repairs if ignored. Follow these steps to protect your drywall and avoid costly fixes.
Regular Inspection
Check the drywall around your shower often. Look for signs of damage like cracks, soft spots, or peeling paint. Catching these early can save money and effort. Make a habit of inspecting every month or after heavy use.
- Look for discoloration: Yellow or brown spots show water damage.
- Press gently: Soft or spongy areas mean moisture inside the drywall.
- Check corners and edges: These spots often get wet first.
Use a simple checklist to track your inspections:
| Inspection Point | Signs to Watch | Action Needed |
| Drywall surface | Cracks, peeling, discoloration | Patch or repaint |
| Corners and seams | Softness, mold spots | Dry and repair |
| Caulking and seals | Gaps or cracks | Re-caulk or seal |
Regular checks help catch damage early. Early repairs keep your shower area safe and dry.
Addressing Leaks Promptly
Leaks cause most drywall damage near showers. Water seeps in and weakens the wall fast. Fix leaks as soon as you find them. Waiting causes mold, stains, and costly repairs.
Steps to handle leaks:
- Find the source: Check showerhead, faucets, and pipes.
- Turn off water: Stop water flow to avoid more damage.
- Repair leaks: Tighten fittings or replace broken parts.
- Dry the area: Use fans or towels to remove moisture.
- Fix drywall: Cut out damaged sections and replace with new drywall.
Quick action stops damage from spreading. Keeping leaks under control protects your drywall and home.
Keeping Shower Area Dry
Moisture is the enemy of drywall near showers. Keeping the area dry prevents damage and mold. Use these tips to reduce moisture build-up:
- Use a shower curtain or door: Keep water inside the shower space.
- Ventilate well: Turn on exhaust fans during and after showers.
- Wipe down walls: Remove water drops after showering.
- Fix grout and tile: Seal cracks to stop water leaks behind walls.
- Keep caulking fresh: Replace old or cracked caulk around the shower.
Maintaining dryness is a simple habit with big benefits. It helps your drywall stay strong and your bathroom healthy.
Read Also: Waterproofing Between Cement Board and Shower Pan
Conclusion
Repairing drywall around your shower helps protect your bathroom from water damage. Small cracks or holes can turn into big problems if left alone. Fixing these issues keeps your walls strong and your space looking fresh. Use the right materials and follow steps carefully for best results.
Regular checks prevent costly repairs later on. Taking action now saves time and money. Keep your bathroom safe and dry with simple drywall repairs.


