Have you discovered a cut or damaged floor joist in your home? This can feel overwhelming, but fixing it is more manageable than you might think.
Your floor’s strength depends on these joists, so repairing them quickly keeps your home safe and stable. In this guide, you’ll learn simple, step-by-step methods to repair cut floor joists and restore your floor’s support. Keep reading—you’re just a few easy fixes away from a stronger, safer floor.
Assessing Joist Damage
Assessing joist damage is the first step in repairing a cut floor joist. This process helps you understand how serious the problem is and what repairs are needed. Proper assessment ensures the floor remains safe and stable. It involves checking where the cut happened and how much strength the joist has lost. Taking time to assess the damage carefully can save money and prevent bigger problems later.
Identifying Cut Location
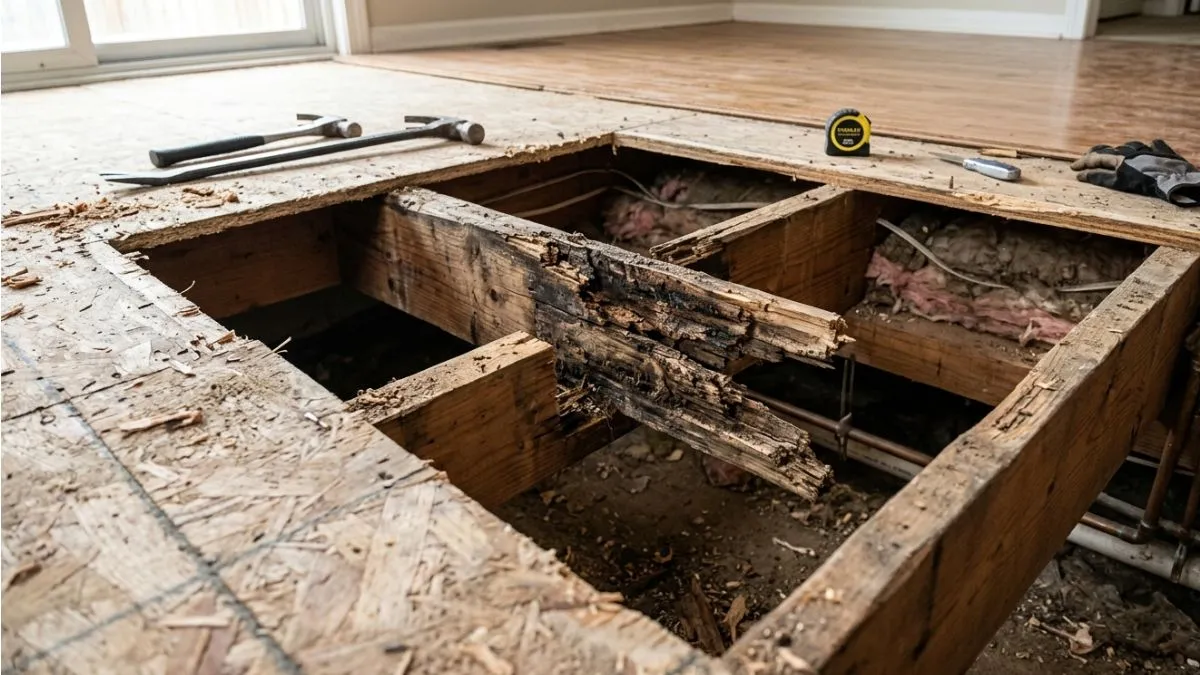
Finding the exact spot of the cut on the floor joist is important. The location affects how the joist carries weight and how easy it is to fix. Joists can be cut near supports, in the middle, or close to other structural parts.
- Near supports: Cuts near walls or beams are often more serious because these points carry more weight.
- Middle of the span: Cuts here can weaken the joist’s ability to hold weight evenly.
- Close to connections: Cuts near nails, screws, or metal plates may cause more damage.
Use a flashlight and measuring tape to inspect the joist. Look for:
- Visible cracks or breaks in the wood.
- Signs of wood splintering or missing pieces.
- Discoloration or rot near the cut area.
Mark the cut spot clearly. This helps during repair and when explaining the problem to a professional.
Evaluating Structural Impact
After finding the cut location, check how much the floor joist’s strength is affected. This step tells if the floor can hold weight safely or needs extra support. Joists carry the weight of floors, furniture, and people. A cut can reduce this ability.
Look for these signs of structural impact:
- Visible bending or sagging: The joist may bend near the cut, showing stress.
- Cracks spreading: Cracks growing from the cut weaken the wood.
- Floor movement: Floors might feel bouncy or uneven.
Use a simple test like pressing down on the floor above the joist. Note any unusual flex or noise. Compare this to other areas of the floor.
Structural impact levels and repair urgency:
| Impact Level | Signs | Repair Urgency |
| Low | No visible sag, minor cracks | Routine repair |
| Medium | Light sag, growing cracks, floor bounce | Prompt repair needed |
| High | Severe sag, large cracks, floor instability | Immediate repair or replacement |
Evaluate the cut size compared to the joist width. Cuts larger than one-third of the joist width usually weaken the structure significantly.
Document your findings clearly. This helps plan the best repair method and prevents future damage.
Repair Techniques
Repairing a cut floor joist requires careful attention and the right techniques to ensure the floor’s strength and safety. Several methods exist to fix damaged joists, each suited to different situations and levels of damage. Choosing the proper technique depends on the extent of the cut, the location, and the tools available.
Sistering Joists
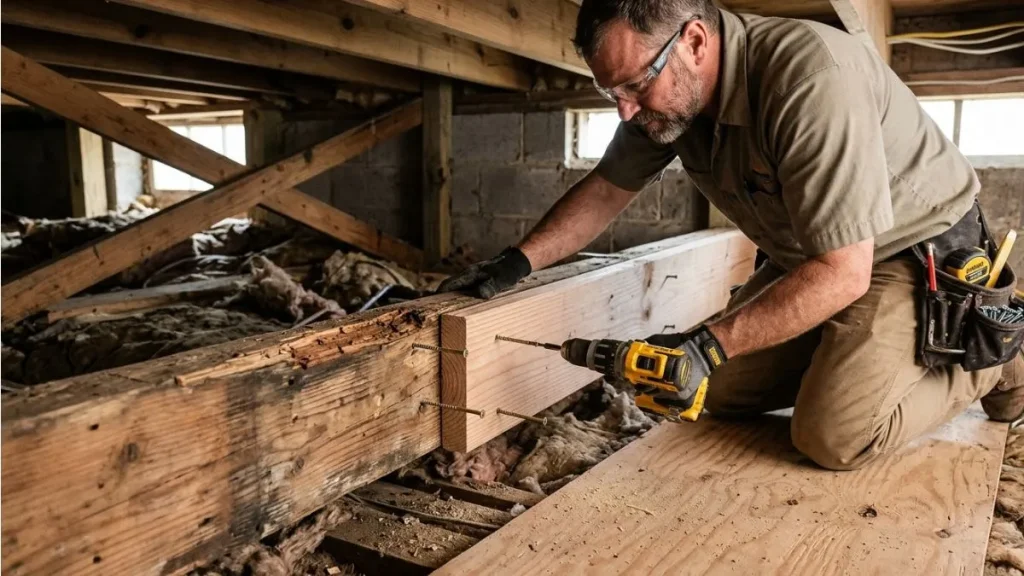
Sistering is a popular and effective method to repair cut or weakened floor joists. It involves attaching a new joist alongside the damaged one to share the load and restore strength. This technique can be used for small or large sections of damage.
Steps to sister a joist:
- Measure the length of the damaged joist section.
- Cut a new joist of the same size and length.
- Place the new joist directly next to the damaged one.
- Secure the two joists together using structural screws or bolts.
- Add construction adhesive between joists for extra bonding.
Key advantages of sistering:
- Restores original strength almost completely.
- Simple and cost-effective.
- Works well for long or short damage areas.
- Can be done without removing flooring.
Installing Scab Plates
Scab plates are another way to reinforce a cut floor joist. These are flat pieces of wood or metal fastened over the damaged area to add strength. Scab plates work best for small cuts or cracks.
How to install scab plates:
- Cut two scab plates slightly longer than the damaged area.
- Place one plate on each side of the damaged joist.
- Secure plates with screws or nails through the joist.
- Ensure plates are flush and tightly attached.
Benefits of scab plates:
- Quick and easy to install.
- Requires less material than sistering.
- Good for minor damage or cracks.
- Can be combined with other repair methods.
Scab plates do not restore full joist strength alone. Use them for small cuts or to add support alongside sistering.
Using Joist Hangers
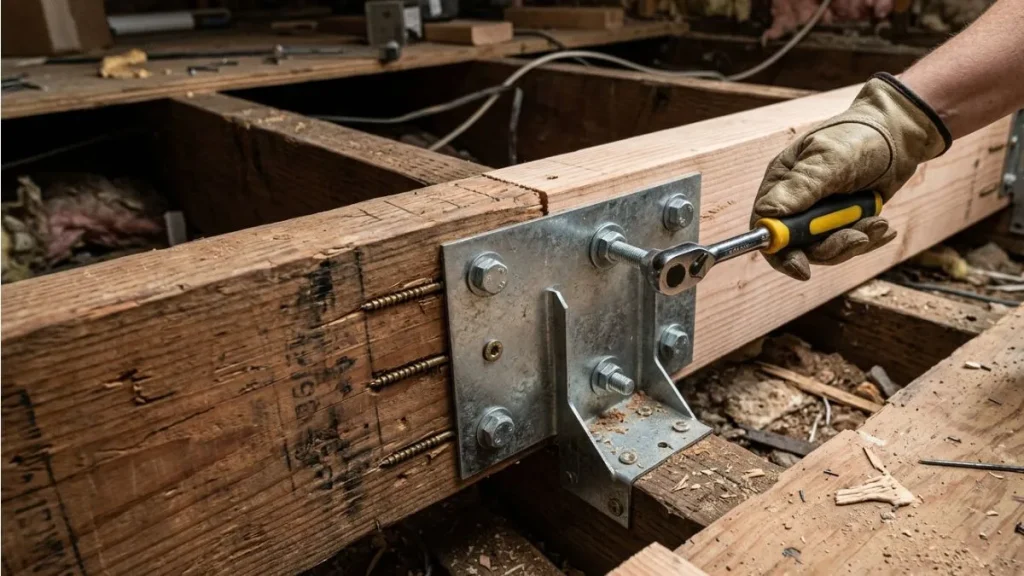
Joist hangers provide strong mechanical support to cut floor joists, especially near beam connections or ends. These metal brackets hold the joist firmly and help transfer loads properly.
Steps to use joist hangers:
- Select a joist hanger sized for your joist dimensions.
- Position the hanger on the beam or ledger where the joist ends.
- Insert the cut joist into the hanger.
- Secure the hanger to the beam and joist with approved nails or screws.
- Check for tight fit and proper alignment.
Joist hangers work best near beam connections and for short cut sections. They often complement sistering for full repair.
Securing The Repair
Securing the repair of a cut floor joist is a crucial step to restore its strength and stability. Proper securing prevents further damage and ensures the floor remains safe to use. This process involves using mechanical fasteners and adhesives to hold the joist firmly in place. Strong connections between the new and existing wood are necessary for a lasting repair. Attention to detail during this phase makes all the difference in the outcome.
Nailing And Screwing Methods
Using nails and screws is a traditional and effective way to secure a repaired floor joist. Nails provide quick fastening, while screws offer stronger holding power. Both work well when combined with proper joist reinforcement techniques.
Steps for nailing and screwing:
- Choose nails or screws that are long enough to penetrate both the new and old wood layers.
- Use galvanized or coated fasteners to prevent rust and corrosion.
- Space fasteners evenly, about 6 to 8 inches apart along the joint.
- Pre-drill holes for screws to avoid wood splitting.
- Drive nails or screws straight to ensure a tight fit.
Tips: Use screws for the main joints and nails for secondary support. Use a hammer or power drill depending on the fastener type. Check the joist alignment before final tightening. Secure the repair firmly but avoid over-tightening to prevent wood damage.
Applying Adhesives
Adhesives add extra strength to the mechanical fasteners in floor joist repairs. Wood glue or construction adhesive bonds the new wood to the old, reducing movement and increasing durability. The glue fills gaps and seals the joint from moisture, which helps avoid future decay.
How to apply adhesives correctly:
- Clean the surfaces of the joist thoroughly to remove dust and debris.
- Apply a generous but even layer of adhesive along the cut surfaces.
- Press the new joist section firmly against the old section.
- Clamp or hold the pieces tightly until the adhesive cures fully.
- Follow the manufacturer’s curing time, usually 24 hours, before load-bearing.
Different adhesives suit different repair needs. Here is a quick overview:
| Adhesive Type | Setting Time | Water Resistance | Strength | Best Use |
| Wood Glue (PVA) | 30 minutes to 1 hour | Low | Moderate | Indoor repairs, dry areas |
| Construction Adhesive | 10 to 15 minutes (initial) | High | High | Heavy-duty repairs, moist areas |
Remember: Adhesives work best alongside nails or screws, not alone. Clamping is key to a strong bond. Always read product instructions for safety and best results.
Inspecting And Testing

Repairing a cut floor joist requires careful inspection and testing. These steps ensure the floor is safe and stable. Before fixing the joist, check its condition and strength. Proper inspection helps spot hidden damage. Testing confirms if the repair can hold weight.
Checking Stability
Start by examining the joist closely. Look for cracks, splits, or signs of rot around the cut area. Use a flashlight to see dark or damp spots. These can weaken the wood. Tap the joist with a hammer gently; a solid sound means good wood. A hollow or soft sound shows decay.
Check the joist’s connection to other beams and supports. Loose nails or screws reduce stability. Tighten or replace fasteners if needed. Make sure the joist sits firmly on its support points.
Key points to check for stability:
- Visible cracks or splits near the cut
- Signs of moisture damage or rot
- Firm attachment to adjacent beams
- Absence of insect damage
- Proper alignment with surrounding joists
Checking stability thoroughly helps avoid future problems. It also guides how much reinforcement the joist needs.
Load Testing Procedures
Load testing checks if the repaired joist can carry weight safely. This process simulates normal floor loads. It reveals weak spots not visible during inspection. Start with small loads and increase gradually. Monitor the joist for bending or unusual sounds.
Use the following method for basic load testing:
- Place a heavy object, like sandbags or weights, on the repaired joist.
- Start with light loads, around 50 pounds.
- Observe the joist for deflection or cracking.
- Increase the load in 50-pound steps.
- Stop if the joist shows signs of failure or bends excessively.
Important factors during load testing:
- Measure joist deflection with a ruler or gauge.
- Listen for creaking or cracking sounds.
- Check adjacent joists for any stress signs.
After load testing, decide if the joist repair is strong enough. If it fails the test, add support like sister joists or metal plates.
Recommended Read: Splicing a Floor Joist
Conclusion
Repairing a cut floor joist is important for home safety. Always check the damage size before starting repairs. Use strong materials like sister joists or steel plates. Take time to measure and cut pieces carefully. Secure everything tightly with screws or nails.
Don’t rush the job to avoid future problems. Ask a professional if you feel unsure. A solid floor joist keeps your house stable and safe. Keep these steps in mind for a lasting fix. Simple work done right saves money and stress later.