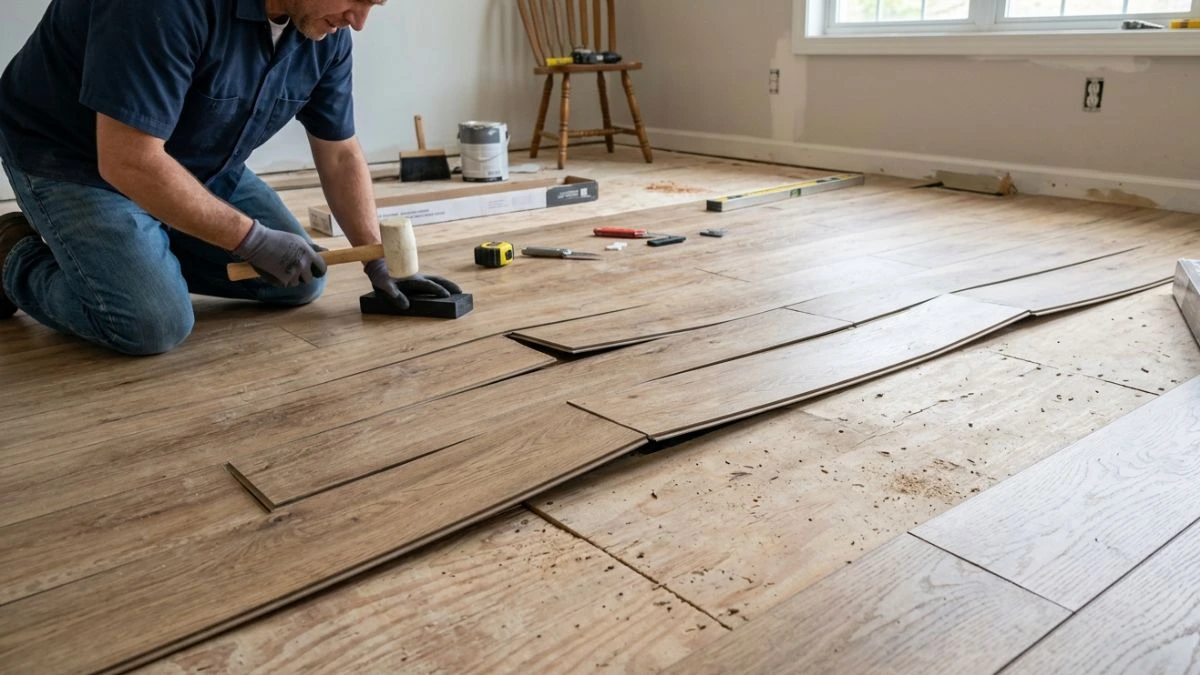
Are you struggling with vinyl plank flooring that just won’t lay flat during installation? It’s frustrating when your beautiful new floor looks uneven or lifts up, ruining the smooth finish you expected.
You might wonder what’s causing this problem and how to fix it without starting all over. You’ll discover the common reasons behind vinyl planks not laying flat and easy steps you can take to get a flawless floor that lasts.
Causes Of Vinyl Plank Warping
Vinyl plank flooring offers a stylish and durable option for many homes. Yet, many installers face a common problem: the planks do not lay flat during installation. This issue often stems from warping, which affects the floor’s look and function.
Subfloor Irregularities
The subfloor is the foundation for vinyl plank flooring. If the subfloor is uneven or damaged, the vinyl planks may not sit flat. Common problems include:
- Uneven surfaces: bumps, dips, or slopes can cause planks to lift or gap.
- Loose or damaged boards: these create instability under the flooring.
- Debris or dust: small particles prevent planks from fitting snugly.
- Old adhesive residues: leftover glue can create bumps.
Checking the subfloor before installation is crucial. The surface should be:
| Requirement | Details |
| Flatness | Within 3/16 inch variation over 10 feet |
| Cleanliness | Free of dust, debris, and adhesive |
| Dryness | No moisture or dampness |
| Stability | Secure and solid surface without loose areas |
Use a leveling compound for uneven spots. Sand down high areas. Remove debris and old glue. These steps help the vinyl planks lay flat and avoid warping.
Moisture Issues
Moisture is a major enemy of vinyl plank flooring. Water or high humidity can cause planks to warp or curl. Vinyl absorbs moisture, leading to expansion and buckling. Sources of moisture problems include:
- Wet subfloor or concrete slab
- Leaks from plumbing or roofs
- High humidity in basements or bathrooms
- Spills or water intrusion not cleaned promptly
Signs of moisture damage include:
- Planks lifting or bubbling
- Discoloration or stains
- Musty odors
- Warped or swollen edges
Temperature Fluctuations
Vinyl plank flooring reacts to changes in temperature. Extreme heat or cold makes the planks expand or contract. This movement can cause warping or gaps. Rapid temperature shifts are especially harmful. Common causes include:
- Direct sunlight heating the floor
- Poor room insulation
- Heating and cooling system cycling
- Doors or windows left open during cold weather
Temperature effects on vinyl planks:
| Condition | Effect on Vinyl Planks |
| High heat (above 85°F) | Expansion and possible buckling |
| Low temperature (below 50°F) | Contraction and gaps between planks |
| Rapid temperature changes | Stress on planks causing warping or splitting |
Maintain stable room temperatures during and after installation. Avoid installing in very hot or cold conditions. Use window treatments to block direct sunlight. These actions reduce vinyl plank warping.
Improper Acclimation
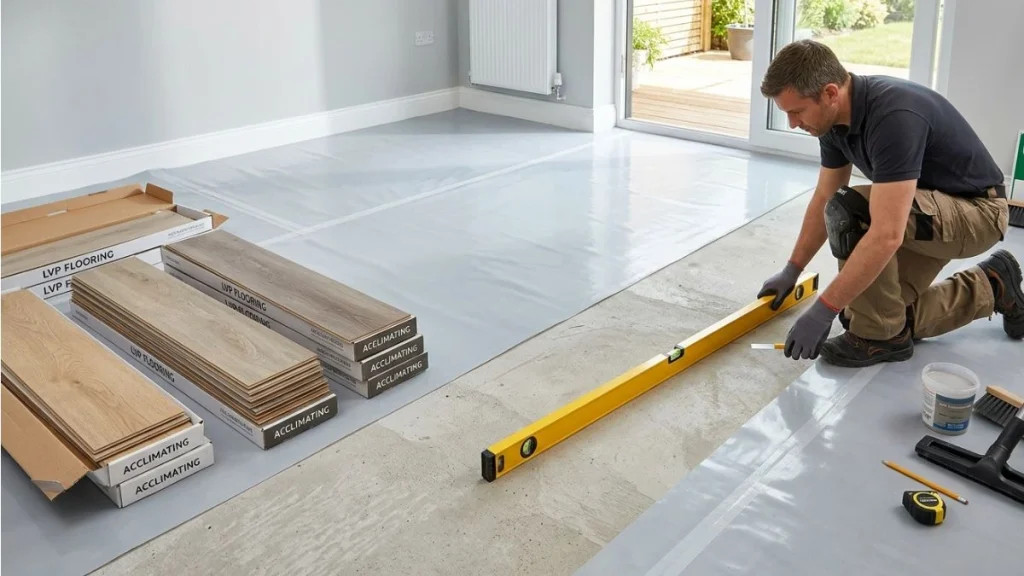
Vinyl planks require time to adjust to the room’s environment before installation. This process is called acclimation. Skipping or shortening acclimation causes warping and poor fit. Acclimation allows planks to:
- Reach room temperature
- Adjust to humidity levels
- Settle flat
Steps for proper acclimation:
- Store vinyl planks in the installation room for at least 48 hours.
- Keep the room temperature between 65°F and 85°F.
- Stack planks flat and off the ground.
- Avoid exposure to moisture during acclimation.
Without acclimation, planks expand or contract after installation, causing gaps or warping. Follow manufacturer guidelines to ensure flat, smooth flooring.
Correct Installation Techniques
Vinyl plank flooring not laying flat during installation is a common problem that affects the floor’s look and durability. Correct installation techniques help prevent this issue and ensure a smooth, even surface. Proper handling and preparation make the difference between a floor that stays flat and one that warps or lifts. Follow key steps to avoid bumps, gaps, and curling planks.

Acclimating Planks
Acclimating vinyl planks means letting them adjust to the room’s temperature and humidity before installation. This step helps the planks expand or contract naturally, reducing warping after installation.
How to acclimate vinyl planks:
- Store planks in the installation room for 48 to 72 hours.
- Keep the room temperature between 65°F and 85°F (18°C to 29°C).
- Avoid direct sunlight or extreme humidity during acclimation.
Skipping acclimation may cause planks to buckle or lift due to sudden changes in temperature or moisture. Proper acclimation allows the planks to settle and prevents uneven surfaces.
| Step | Details | Reason |
| Storage Time | 48-72 hours | Allows planks to adjust to room conditions |
| Room Temperature | 65°F to 85°F | Prevents sudden expansion or contraction |
| Humidity Control | Moderate humidity | Reduces risk of moisture damage |
Using Proper Adhesives
Choosing the right adhesive is critical for vinyl plank flooring to lay flat and stay in place. The wrong glue can cause planks to lift or bubble.
Types of adhesives:
- Acrylic-based adhesives: Good for most vinyl planks, dries quickly.
- Pressure-sensitive adhesives: Allows repositioning during installation.
- Polyurethane adhesives: Strong bond, ideal for high-traffic areas.
Tips for using adhesives:
- Clean the subfloor thoroughly before applying adhesive.
- Apply adhesive evenly with a recommended trowel size.
- Follow manufacturer instructions for drying times.
- Press planks firmly after placement to remove air bubbles.
Proper adhesive application prevents planks from curling or lifting. It also ensures the floor withstands daily wear and moisture.
Spacing And Expansion Gaps
Vinyl planks need room to expand and contract with temperature changes. Spacing and expansion gaps keep the floor flat and avoid buckling.
Key spacing rules:
- Leave a 1/4-inch to 1/2-inch gap around the edges of the room.
- Use spacers during installation to maintain consistent gaps.
- Cover expansion gaps later with baseboards or molding.
Why expansion gaps matter:
- Allow planks to move without lifting or warping.
- Prevent damage from pressure against walls or fixed objects.
- Improve the floor’s lifespan and appearance.
Ignoring expansion gaps causes planks to push against each other. This pressure makes the floor buckle or create uneven surfaces.
| Area | Recommended Gap Size | Purpose |
| Room Edges | 1/4″ to 1/2″ | Allow plank expansion |
| Between Planks | Minimal or none | Ensure tight fit but allow movement |
| Doorways | 1/4″ to 1/2″ | Prevent buckling near transitions |
Troubleshooting Warped Planks
Vinyl plank flooring is popular for its durability and easy installation. Still, sometimes planks do not lay flat during installation, causing frustration. Warped planks are a common reason behind this issue. These planks lift, curl, or bend, preventing a smooth surface. Knowing how to spot, fix, or replace warped planks helps complete the job right.
Identifying Problem Areas
Start by carefully inspecting the entire floor area. Warped planks usually appear raised or curved along the edges or in the middle. Look for these signs:
- Edges lifting away from the subfloor or other planks.
- Curled corners that do not sit flush.
- Visible gaps between planks caused by bending.
- Uneven surface when you run your hand over the floor.
Use a straightedge or level tool to check plank flatness. Place it across multiple planks and watch for gaps underneath. Mark problem areas with tape for easy reference.
| Warp Type | Signs | Impact |
| Edge Lift | Edges raised above floor level | Tripping hazard, poor fit |
| Curling | Plank ends curl upward | Visible gaps, uneven surface |
| Bow | Center of plank raised | Floor feels bumpy |
Early identification prevents further damage and reduces repair time.
Fixing Lifting Or Curling
Lifting or curling planks need quick attention to keep the floor stable. Start by removing any objects pressing on the floor. Follow these steps:
- Apply weight: Place heavy books or boards on the warped plank to flatten it.
- Use heat carefully: Warm the plank with a hairdryer on low setting to soften it.
- Press down: While warm, press the plank flat and hold it in place with weights.
- Allow cooling: Let the plank cool under weight for several hours or overnight.
Check the plank after cooling. If it remains flat, reinstall any removed pieces. Avoid using high heat or sharp tools that damage the plank.
For small gaps caused by curling, use a vinyl floor adhesive or double-sided tape to secure the plank edges. Follow product instructions carefully to avoid mess and ensure a strong bond.
Replacing Damaged Planks
Some warped planks cannot be fixed and need replacement. Signs include deep cracks, permanent bends, or water damage. Replace planks carefully to avoid harming nearby pieces. Follow these steps:
- Remove baseboards: Gently pry off baseboards near the damaged plank.
- Lift damaged plank: Use a tapping block and pull bar to loosen it.
- Clean subfloor: Remove glue or debris under the plank.
- Install new plank: Fit the replacement plank snugly into place.
- Reattach baseboards: Nail or press baseboards back securely.
Keep extra planks from your original flooring for replacements. Match plank color and pattern carefully. Check new planks for flatness before installation to avoid repeated issues.
Replacement prevents further damage and keeps the floor strong. Use proper tools and protect your hands during removal and installation.
Preventive Measures For Future Installations
Vinyl plank flooring not laying flat can cause frustration and affect the floor’s look and durability. Taking preventive measures before and during installation helps avoid this problem in future projects. Proper preparation and care ensure the floor stays smooth, secure, and beautiful for years.
Proper Storage Of Materials
Storing vinyl planks correctly before installation is key to preventing warping or bending. Moisture, heat, and heavy weight can damage planks if not handled properly.
- Keep planks flat: Store them horizontally on a flat surface to avoid bending.
- Control moisture: Store materials in a dry area away from water or dampness.
- Temperature control: Avoid exposing planks to extreme heat or cold.
- Protect from weight: Do not stack heavy objects on top of the vinyl boxes.
Use a table like this to track storage conditions:
| Storage Factor | Recommended Action | Reason |
| Position | Lay flat on pallets or shelves | Prevents warping and bending |
| Humidity | Keep below 60% | Avoids moisture damage and swelling |
| Temperature | Store between 60°F and 80°F (15°C – 27°C) | Prevents expansion or contraction |
| Weight | Do not stack heavy items on vinyl boxes | Prevents crushing or deforming planks |
Proper storage protects vinyl planks and helps the floor lay flat during installation.
Maintaining Stable Environment
Creating a stable environment in the installation area keeps vinyl planks from expanding or contracting. Fluctuations in temperature and humidity cause the flooring to warp or lift.
Follow these steps:
- Control humidity: Use a dehumidifier or air conditioner to keep indoor humidity around 40-60%.
- Maintain temperature: Keep room temperature steady between 65°F and 75°F (18°C – 24°C).
- Avoid drafts: Close windows and doors to prevent sudden temperature changes.
- Acclimate flooring: Let vinyl planks sit in the room 48 hours before installation.
Regular Floor Maintenance
Maintaining your vinyl plank floor regularly keeps it flat and smooth. Dirt, moisture, and damage can cause edges to lift or create uneven surfaces.
Important maintenance tips include:
- Clean often: Sweep or vacuum dirt and dust daily.
- Use damp mop: Mop with a well-wrung cloth to avoid excess water.
- Protect from scratches: Use furniture pads and avoid dragging heavy items.
- Inspect regularly: Check for gaps, lifting edges, or damage.
- Repair quickly: Fix minor issues before they worsen.
Here is a simple maintenance schedule:
| Task | Frequency | Purpose |
| Sweeping/Vacuuming | Daily | Remove dirt and grit to prevent scratches |
| Damp Mopping | Weekly | Clean spills and stains without water damage |
| Inspection | Monthly | Detect and fix lifting or gaps early |
| Furniture Pad Check | Every 6 months | Prevent scratches from heavy furniture |
Regular maintenance extends flooring life and keeps vinyl planks flat and secure.
You May Read Also: How to Install Vinyl Plank Flooring on Stairs
Conclusion
Vinyl plank flooring not laying flat can cause problems. Uneven floors or poor surface preparation often cause this. Check your subfloor for bumps or dirt. Let planks adjust to room temperature before installation. Use the right tools and follow the instructions carefully.
Small fixes can make a big difference. Taking time and care helps your floor look great. A smooth, flat floor lasts longer and feels better. Keep these tips in mind for a successful install. Your space will look neat and feel comfortable.