If you’ve ever tried to cut into vinyl siding, you already know how unforgiving it can be. One wrong move — especially on a cold day — and you’ve got a cracked panel on your hands. Installing an exhaust vent through vinyl siding is one of those jobs that looks straightforward but has a handful of tricks that separate a clean, leak-free installation from an expensive mistake.
This guide walks you through everything you need to know — from choosing the right tools and vent cap, to cutting vinyl without cracking it, sealing it properly, and avoiding the most common errors homeowners make. Whether you’re running a dryer vent, bathroom exhaust fan, or kitchen range hood through an exterior wall, the core principles are the same.
Why Proper Exhaust Vent Installation in Vinyl Siding Matters
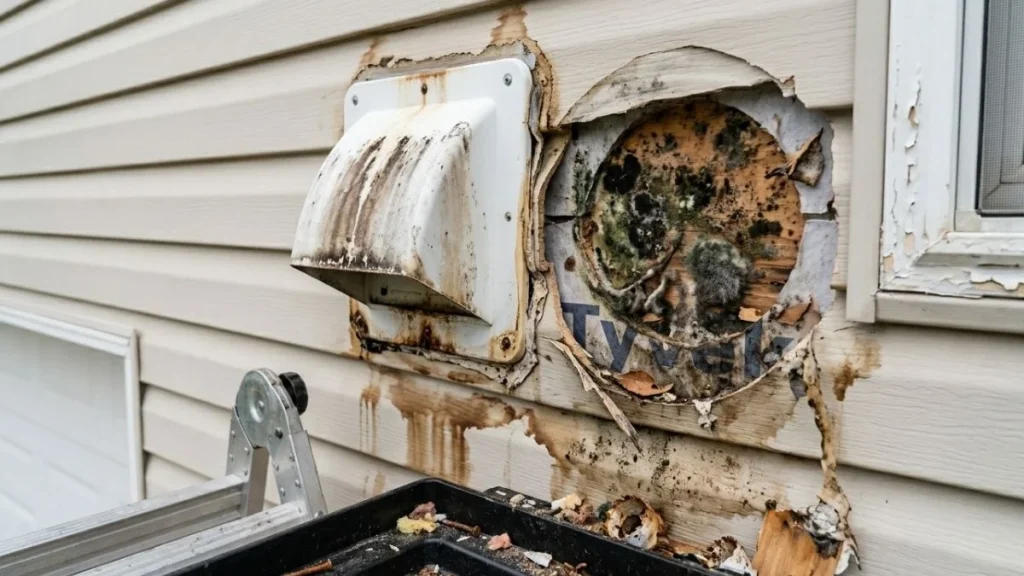
Exhaust vents do an important job inside your home. They pull out moisture, heat, odors, and stale air from bathrooms, dryers, and kitchens. But when that vent exits through vinyl siding without proper installation, you trade one problem for a handful of new ones.
Vinyl siding may look tough from the outside, but it’s actually a semi-rigid plastic material that expands and contracts with temperature changes. That movement, combined with a poorly fitted vent cap or missing caulk, creates gaps where water can work its way behind the siding. Once moisture gets behind vinyl panels, it has nowhere to go. Over time, you’ll see rot in the sheathing, mold growth inside the wall cavity, and — in worse cases — structural damage that costs thousands to fix.
Beyond moisture, a bad installation can also create entry points for insects and small pests. A vent cap without a working damper or mesh guard is essentially an open door into your wall cavity.
And here’s something most homeowners don’t think about: improper vent installation can actually void your vinyl siding warranty. Most siding manufacturers require that any penetrations be made per specific guidelines using compatible materials and sealants.
Common Types of Exhaust Vents That Exit Through Vinyl Siding
- Dryer exhaust vents — carry hot, moist air and lint outside
- Bathroom exhaust fan vents — remove humidity and odors from bathrooms
- Kitchen range hood vents — expel cooking smoke, grease-laden air, and heat
- Whole-house ventilation system outlets
Tools and Materials You’ll Need

Getting the right tools before you start makes this job significantly easier — and safer for your siding. Here’s a complete breakdown of what you’ll need for a standard exhaust vent installation through vinyl siding.
Tools Checklist
- Hole saw (sized to match your duct diameter — see table below)
- Cordless drill with variable speed
- Zip tool (vinyl siding removal tool) — non-negotiable
- Utility knife with fresh blades
- Tape measure and pencil
- Level
- Caulking gun
- Reciprocating saw (for cutting through wall sheathing if needed)
- Tin snips (for trimming vent cap flanges)
Hole Saw Size Guide
| Duct Diameter | Recommended Hole Saw Size | Common Application |
| 3 inch | 3¼ inch | Small bathroom fans |
| 4 inch | 4¼ inch | Standard dryer & bathroom vents |
| 6 inch | 6¼ inch | Range hood / high-capacity fans |
| 8 inch | 8¼ inch | Commercial-grade range hoods |
How to Install an Exhaust Vent in Vinyl Siding
Follow these steps in order. Skipping ahead — especially when it comes to cutting — is where most homeowners run into trouble.
Locate and Mark Your Vent Position
Start from the inside. Identify where your duct exits the appliance and trace the most direct path to the exterior wall. Ideally, you want the shortest, straightest duct run possible — especially for dryers, where long duct runs with multiple bends are a fire hazard.
Once you’ve identified your exit point, use a long drill bit to drill a small locator hole through the wall from the inside out. This gives you the exact center point on the exterior wall. Before you drill, use a stud finder and wire detector to make sure there’s no framing or electrical in the way.
Remove the Vinyl Siding Panel

Here’s where the zip tool earns its place in your toolbox. A zip tool (also called a siding removal tool) slides under the bottom edge of a vinyl panel and unlocks the locking channel so you can slide the panel out without forcing or bending it.
Work slowly along the bottom of the panel, moving the zip tool a few inches at a time. Once the lower edge is unhooked, the panel should pull away from the wall with gentle pressure. Set it aside on a flat surface — you’ll need it later.
Important: Cold Weather Warning
Vinyl siding becomes significantly more brittle when temperatures drop below 40°F (4°C). If you’re working in cold weather, use a heat gun on its lowest setting to gently warm the panel before removal. Never yank or force a cold vinyl panel — it will snap. Aim to work during the warmer part of the day whenever possible.
Cut the Hole in the Wall Sheathing
With the panel removed, you now have clear access to the wall sheathing (typically OSB, plywood, or foam board). Use your hole saw at the locator hole you drilled from inside. Cut slowly and let the saw do the work — don’t force it. Once through the sheathing, check the hole from inside to make sure it’s centered with your duct path.
Cut the Vinyl Siding Panel Separately
This is the most critical step for avoiding cracks. Never cut vinyl siding while it’s still on the wall. Instead, take the panel you removed and lay it flat on a stable work surface. Mark the center of your vent hole location on the panel, then use your hole saw to cut the opening.
Cutting the panel flat — rather than in place — gives you control over the tool and eliminates the vibration and flexing that causes vinyl to crack during cutting. If you don’t have a hole saw, a fine-tooth circular saw blade installed backwards also produces a clean cut in vinyl.
Install the Vent Cap
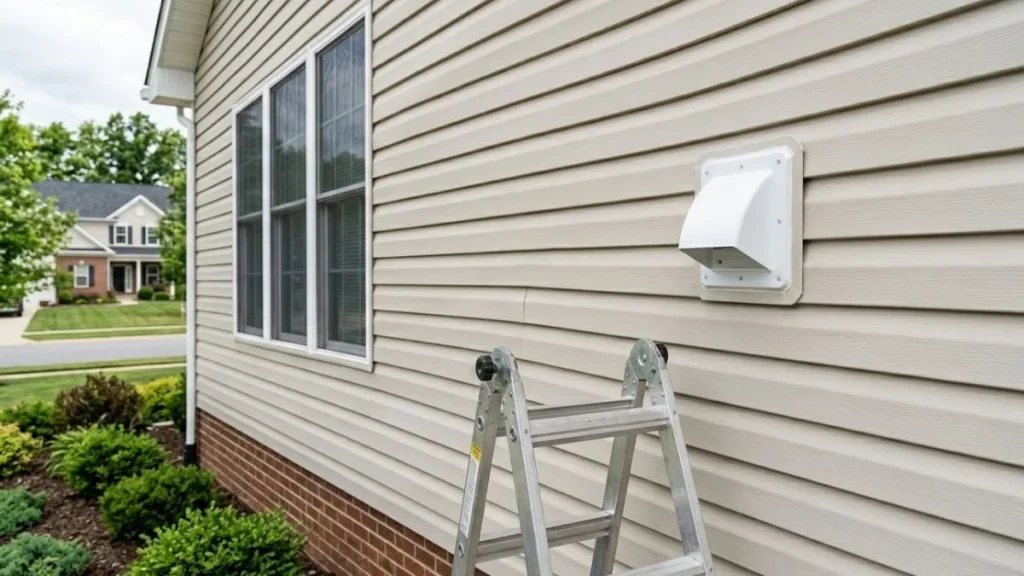
From outside the wall, insert the vent cap collar through the hole in the sheathing. The flanged face of the vent cap should sit flat against the exterior wall surface. Secure it with exterior-rated screws driven into the sheathing — not into the vinyl panel. Make sure the damper flap opens and closes freely, and that it’s oriented to open downward (so gravity keeps it closed when the appliance isn’t running).
Connect the Interior Ductwork
From inside the wall or room, slide your rigid metal duct over the collar of the vent cap. Use foil-backed metal duct tape to seal every joint. Do not use standard cloth duct tape — it degrades quickly in heat and moisture and is not code-compliant for dryer vents. Secure the duct-to-cap connection with a metal clamp for extra security. Run the duct back to your appliance and connect it, sealing every joint with foil tape.
Seal Around the Vent Cap
Apply a continuous bead of exterior-grade caulk around the full perimeter of the vent cap flange. Cut your caulk tip at a 45-degree angle for better control, and apply the bead in one smooth pass. Smooth it with a wet finger or a caulk finishing tool, then let it cure completely before exposing it to rain. Pay extra attention to the top edge — water flows down, and any gap at the top will channel water directly behind the siding.
Reinstall the Vinyl Siding Panel
Slide the cut panel back into position, aligning the top edge with the locking channel above it first. Then press the bottom edge down and snap it into the lower locking channel. The panel should sit flush with the surrounding siding, with the vent cap visible through the cut opening. If the vent cap’s flange is slightly too large for the panel to sit flat, use a J-channel or vinyl trim piece to bridge the gap cleanly.
How to Cut Vinyl Siding Without Cracking It
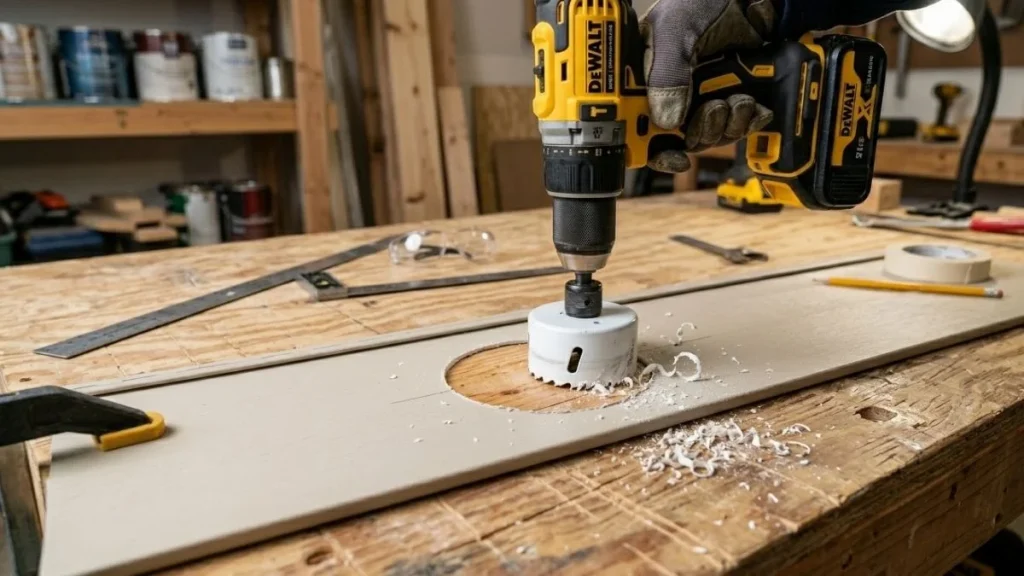
Cutting vinyl cleanly is a skill, but it’s not a difficult one once you know the rules. The biggest mistake is treating vinyl like wood — it’s not. It needs to be managed differently based on temperature, cutting method, and support.
Best Cutting Methods Compared
| Method | Best For | Risk of Cracking | Notes |
| Hole saw on drill | Round vent openings | Low (if panel is warm) | Best overall method |
| Fine-tooth blade (reversed) | Straight cuts | Low | Run blade backwards for cleaner edge |
| Tin snips | Trimming edges | Very Low | Good for small adjustments |
| Jigsaw | Curved cuts | High | Avoid — too much vibration |
| Utility knife (score & snap) | Straight cuts only | Low | Good for thinner panels |
Golden Rules for Cutting Vinyl
- Always remove the panel from the wall before cutting
- Work in temperatures above 40°F — warm the panel with a heat gun if needed
- Support the panel fully on a flat surface during cutting
- Use a sharp, clean blade — dull blades cause chipping and cracking
- Never cut near the locking channel edges — leave at least ½ inch of clearance
- Cut slowly and with steady, consistent pressure
Sealing and Weatherproofing: Getting It Right
Even a perfectly cut and fitted vent cap will fail over time if the sealant work is poor. Water infiltration behind vinyl siding is one of the leading causes of hidden wall damage in residential homes — and a poorly sealed vent cap is one of the most common entry points.
Best Caulks for Vinyl Siding
| Caulk Type | Best Use | Lifespan | Paintable? |
| Siliconized latex caulk | General exterior sealing | 15–20 years | Yes |
| 100% silicone caulk | High-movement areas, wet zones | 20–30 years | Difficult |
| Polyurethane caulk | Gaps near framing | 10–15 years | Yes |
| Acrylic latex caulk | Interior only | 5–10 years | Yes — avoid for exterior |
For most vinyl siding applications, a high-quality siliconized latex caulk is the best balance between flexibility, durability, and ease of use. Avoid petroleum-based products — they can cause vinyl to soften or discolor over time.
Common Mistakes to Avoid
These are the most frequent errors homeowners make during exhaust vent installation — and each one can create serious problems down the road.
- Cutting the vinyl panel while it’s still on the wall (leads to cracking and damage)
- Using too large a hole saw — gaps around the vent cap flange allow water and pests in
- Skipping the caulk step entirely — even a well-fitted cap needs sealant
- Using cloth duct tape on duct joints — it dries out and fails within months
- Securing the vent cap only to the vinyl panel instead of the sheathing — the cap will loosen over time
- Installing a vent cap without a working damper — allows backdrafts, cold air infiltration, and pests
- Forgetting to check for wiring, insulation, or fire blocking before drilling through the wall
- Ignoring the direction of the damper flap — it should open downward, not sideways
Installation Tips by Appliance Type
Dryer Vent Through Vinyl Siding
Dryer vent installation has the least room for error. Lint is highly flammable, and a poorly installed or maintained dryer vent is one of the leading causes of house fires in North America. Always use rigid metal duct — never flexible plastic or vinyl duct for dryers. Keep your duct run as short and straight as possible, with a maximum of 25 feet for a standard 4-inch duct (subtract 5 feet for each 90-degree elbow). Use a louvered dryer vent cap rated for dryer exhaust, and clean the duct annually to prevent lint buildup.
Bathroom Exhaust Fan Vent Through Vinyl Siding
Bathroom fans move relatively low volumes of air but carry a lot of moisture. The most important thing here is insulating the duct in any unconditioned spaces (like an attic or crawl space) to prevent condensation from forming inside the duct and dripping back into the fan. Use a dampered vent cap to prevent backdrafts, and never vent a bathroom fan into the attic — moisture will cause mold and structural damage. Always go through the sidewall or roof.
Kitchen Range Hood Exhaust Through Vinyl Siding
Range hoods move significantly more air than bathroom fans — typically 200 to 600 CFM or more for higher-end models. This means you need a larger duct (6-inch minimum for most residential range hoods) and a heavier-duty vent cap rated for grease-laden exhaust. Check your local building codes before installation — many jurisdictions have specific requirements for makeup air when range hoods exceed a certain CFM rating.
Read Also: Dryer Vent down Through Floor
Conclusion
Installing an exhaust vent through vinyl siding doesn’t have to be intimidating. With the right tools, a careful approach to cutting, and proper sealing technique, this is a project most homeowners can complete in a few hours with professional-quality results.
The two things that matter most are avoiding cracks during the cut and sealing the vent correctly for long-term weather resistance. Get those two steps right and everything else falls into place.
If you found this guide helpful, share it with a neighbor or friend tackling the same project. And if you have questions about your specific vent type or siding setup, drop them in the comments — happy to help.