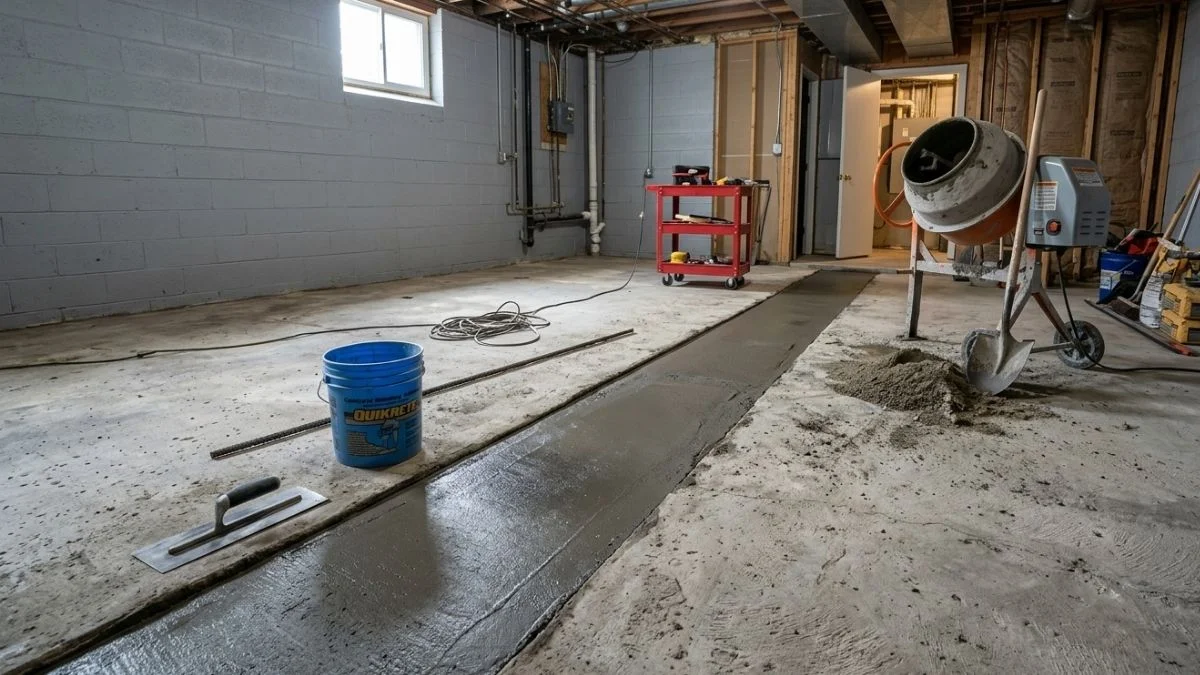
If you’ve recently had plumbing work done, rerouted electrical conduit, or installed radiant floor heating, chances are you’re staring at an open trench in your concrete slab — and wondering what to do next. That trench needs to be filled properly, not just slapped with some leftover concrete and forgotten.
A poorly repaired trench can crack within months, create a trip hazard, and allow water to seep through. The good news? With the right tools, materials, and a bit of patience, you can repair a trench in your concrete slab like a professional — even if you’ve never done it before.
This guide covers everything: the tools you’ll need, which materials work best, how to prep the trench, a step-by-step repair process, and pro tips to make sure the fix holds for years.
Tools You Need to Repair a Trench in a Concrete Slab

Having the right tools on hand before you start is half the battle. Running out to the hardware store mid-project breaks your workflow and can cause problems if your mixed concrete starts setting while you’re gone.
Essential Tools
- Angle grinder or circular saw with diamond blade — for cleaning up and squaring trench edges
- Cold chisel and hammer — for removing loose or crumbling concrete
- Wire brush — for scrubbing the trench walls and floor clean
- Shop vacuum — for removing dust and debris thoroughly
- Drill with paddle mixer attachment — for mixing concrete evenly
- Margin trowel and finishing trowel — for placing and smoothing the mix
- Concrete float — for surface finishing
- Screed board or straightedge — for leveling the repair flush with the existing slab
- Safety gear — gloves, safety glasses, dust mask, knee pads
Optional but Helpful Tools
- Pressure washer — for deep cleaning the trench before repair
- Laser level — ensures a perfectly flush finish
- Concrete vibrator — eliminates air pockets in wider or deeper trenches
- Heat gun or propane torch — for drying out excess moisture before pouring
Pro Tip: If your trench is over 4 inches wide, invest in renting a concrete vibrator. Air pockets are nearly impossible to eliminate by hand in wide fills, and they’re the #1 cause of premature repair failure.
Best Materials for Concrete Trench Repair
Choosing the wrong material is where most DIY repairs go wrong. Not all concrete mixes are created equal, and what works for a driveway patch won’t necessarily work for a narrow interior trench.
Choosing the Right Concrete Mix
| Mix Type | Best For | Notes |
| Standard concrete mix | Deep fills over 2–3 inches | Strong and economical, needs longer cure time |
| Fast-setting concrete | Quick repairs or tight timelines | Sets in 20–40 minutes — work fast |
| Self-leveling concrete | Shallow fills under 1.5 inches | Flows into corners without troweling |
| Hydraulic cement | Water-prone basements or below-grade slabs | Expands as it sets to stop water infiltration |
| Fiber-reinforced mix | High-traffic areas | Added strength and crack resistance |
For most standard trench repairs — say, a 3–4 inch deep trench after plumbing work — a standard concrete mix combined with a bonding agent is your most reliable option. Fast-setting concrete is great when you need the floor operational quickly, but it requires fast hands.
Bonding Agents and Primers
This is the step most DIYers skip — and it’s the reason most repairs fail. A bonding agent is applied to the existing concrete surfaces inside the trench before you pour your new mix. It creates a chemical and mechanical bridge between the old slab and the new fill material.
- Latex bonding agents — most common, easy to apply, works well for standard interior repairs
- Epoxy bonding agents — stronger bond, better for structural repairs or high-load areas, more expensive
Apply the bonding agent with a brush or roller, coating all four walls and the floor of the trench thoroughly. Let it become tacky before pouring — usually 15–30 minutes depending on temperature and humidity.
Reinforcement Options
| Reinforcement Type | Use Case |
| Rebar (#3 or #4 bar) | Wide trenches (4″+ wide) or structural slabs |
| Wire mesh | Medium-width trenches in non-structural areas |
| Fiber-reinforced mix | Narrow trenches where rebar won’t fit |
| None needed | Trenches under 2″ wide in non-load-bearing areas |
How to Prepare the Trench Before Filling
Preparation is where the real work happens. A properly prepped trench is the difference between a repair that lasts 20 years and one that starts cracking in 20 months.
Clean the Trench Thoroughly
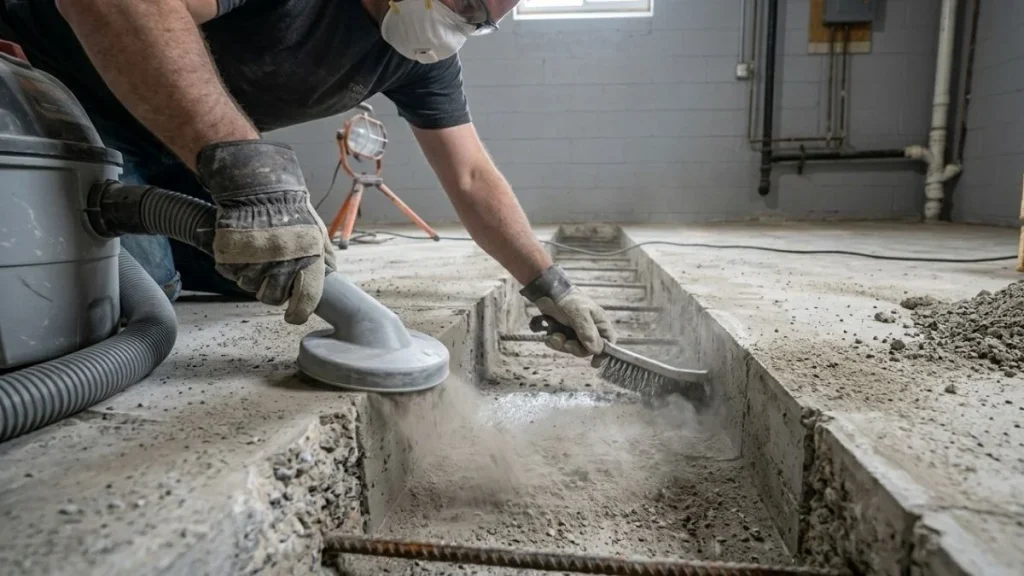
Start by removing all loose concrete chips, dirt, and debris from the trench. Use a cold chisel and hammer to break away any crumbling edges. Then scrub the walls and floor with a stiff wire brush to expose clean, solid concrete. Follow up with a shop vacuum to pull out every bit of dust — even a light coating of dust can prevent the bonding agent from adhering properly.
Inspect and Square the Edges
Run your angle grinder along the top edges of the trench to create clean, defined lines. Ragged or feathered edges don’t hold — the repair will chip away right at the seam. If possible, undercut the edges slightly (angling inward at the top) to create a mechanical interlock that holds the repair in place.
Dampen the Trench (But Don’t Saturate It)
Bone-dry concrete will pull moisture out of your new mix too fast, weakening the patch. On the other hand, standing water prevents bonding agents from working. The sweet spot is a surface that looks damp but has no pooling water. Mist the trench lightly with a spray bottle and let it absorb for a few minutes before proceeding.
Apply Bonding Agent
Brush or roll the bonding agent generously onto all trench surfaces — walls, corners, and floor. Work it into any recesses or rough spots. Allow it to become tacky to the touch before pouring. Don’t let it dry completely or it loses effectiveness. In warm weather, this may happen in under 15 minutes, so time your mixing accordingly.
Guide to Repairing a Trench in a Concrete Slab: Step-by-Step
With your trench prepped and bonding agent ready, it’s time to fill.
Mix Your Concrete
Follow the manufacturer’s water-to-mix ratio exactly. Too much water weakens the final product significantly — even a small excess reduces compressive strength. The ideal consistency resembles thick peanut butter: it holds its shape when squeezed but isn’t crumbly. Use a drill with a paddle mixer for even, lump-free mixing. Never mix by hand for anything more than a small patch.
Fill in Layers for Deep Trenches
For trenches deeper than 4 inches, fill in two or more layers rather than one big pour. Each layer should be 2–3 inches deep. Allow each layer to firm up slightly — around 30–60 minutes depending on temperature — before adding the next. This prevents settling, reduces shrinkage cracking, and ensures proper compaction throughout.
Compact and Remove Air Pockets
After placing each layer, rod the concrete by repeatedly inserting a thin rod or rebar piece vertically throughout the fill. This pushes out trapped air. For wider trenches, use a concrete vibrator run slowly through the fill. Air pockets left in the repair create weak spots that crack under load or freeze-thaw cycles.
Screed and Level the Surface
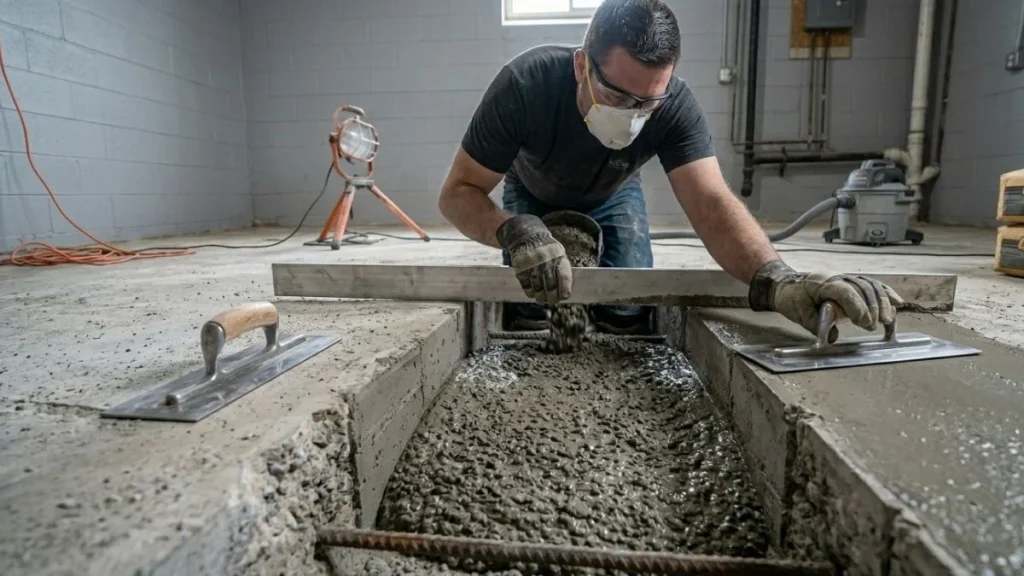
Once the trench is filled to just above the surrounding slab level, use a screed board laid across the trench and drag it along the existing slab edges to level the repair. Work in a back-and-forth sawing motion. Check with a straightedge or laser level to ensure the repair is flush — not high, not low.
Finish the Surface
For a smooth finish that matches an interior floor, use a steel finishing trowel worked in circular overlapping strokes. For garages or outdoor areas where slip resistance matters, drag a stiff broom lightly across the surface before it fully sets to create a broom-finish texture. Try to match the texture of the surrounding concrete for the best visual result.
Cure the Concrete Properly
Curing is the most skipped step in DIY concrete work — and the most impactful. Concrete doesn’t just “dry”; it undergoes a chemical reaction called hydration, and it needs moisture to complete this process. If it dries out too fast, the surface becomes weak and dusty.
Curing methods:
- Wet curing: Cover the repair with plastic sheeting or wet burlap for at least 7 days. Re-wet the burlap daily.
- Curing compound: Spray-on liquid membrane that seals moisture in. Apply immediately after finishing. Easier than wet curing.
Don’t allow foot traffic for 24–48 hours. Keep heavy loads off for at least 7 days.
Recommended: Repairing Concrete Slab After Plumbing
Pro Tips for a Long-Lasting Concrete Trench Repair
Control Joint Placement
Concrete shrinks as it cures, and that shrinkage causes cracking — it’s not a matter of if, but where. Control joints are intentional weak points cut into the concrete surface that direct cracking to a specific, predictable location rather than letting it wander randomly across your repair.
If your trench is long, tool or cut a control joint every 8–10 feet. Place them near the ends of the repair where it meets the existing slab. Use a jointing tool while the concrete is still fresh, or cut them with a diamond blade saw once the repair has cured enough to walk on (usually 24 hours).
Temperature and Weather Considerations
| Condition | Risk | Solution |
| Below 40°F (4°C) | Concrete freezes before curing | Use heated enclosures or cold-weather mix additives |
| Above 90°F (32°C) | Too-fast evaporation weakens the surface | Work in shade, mist the surface, use sun shades |
| High humidity | Extended set time | Allow extra curing time before applying loads |
| Rain during cure | Surface washout and pitting | Cover with plastic sheeting immediately after finishing |
The ideal concrete placement temperature is between 50°F and 85°F (10°C–29°C).
Sealing the Repair
Once fully cured (28 days for full strength), apply a penetrating concrete sealer to protect the repair from moisture, staining, and freeze-thaw damage. Penetrating sealers soak in without changing the appearance. Surface sealers add a slight sheen and are better for garage floors where stain resistance matters more.
Common Mistakes to Avoid
| Mistake | Why It’s a Problem | Fix |
| Skipping the bonding agent | New concrete won’t bond to old — repair pops out | Always apply bonding agent before pouring |
| Using too much water in the mix | Weakens compressive strength significantly | Follow manufacturer water ratio exactly |
| Not compacting layers | Air pockets create weak spots | Rod or vibrate each layer thoroughly |
| Finishing too early | Troweling brings water to surface, weakens it | Wait until bleed water disappears |
| Rushing the cure | Surface becomes weak and dusty | Cure for minimum 7 days with moisture retention |
| Ignoring control joints | Cracking appears randomly across the repair | Cut or tool control joints during or after placement |
| Feathered edges | Thin edges chip and break off | Always maintain a minimum ½ inch repair thickness at edges |
DIY vs. Hiring a Pro — Which One Makes Sense?
When DIY Is a Reasonable Choice
- Narrow trench (under 3 inches wide) and shallow depth (under 4 inches)
- Non-structural interior floor with no vehicle loads
- You have basic concrete experience and the right tools
When to Call a Professional
- Wide (over 6 inches) or very deep trenches (over 6 inches)
- Trench near load-bearing walls, footings, or post bases
- Prior repair attempts failed
- Garage floor, driveway, or any slab under vehicle loads
Average Cost of Professional Trench Repair
| Factor | Cost Range |
| Narrow trench repair (per linear foot) | $15 – $35 |
| Wide or deep trench repair (per linear foot) | $40 – $80 |
| Structural repair with rebar | $75 – $150+ per linear foot |
| Slab grinding and flush finishing | $2 – $5 per sq ft additional |
Conclusion
Repairing a trench in a concrete slab isn’t complicated — but it does require doing things in the right order, with the right materials. Skipping the bonding agent, rushing the cure, or using the wrong mix are the three most common reasons repairs fail and need to be done all over again.
Follow the steps in this guide, take your time with prep, and give the concrete the cure time it needs. A well-executed trench repair is virtually invisible and can outlast the original slab if done correctly. Whether you’re tackling this yourself or preparing to talk to a contractor, you now have everything you need to make a smart, informed decision.