

A plumber or HVAC technician cutting through a floor joist without authorization is one of the most common structural violations found during home inspections — and knowing how to support cut floor joists correctly is the difference between a safe repair and a costly collapse.
The problem is that most homeowners discover the damage mid-renovation or at resale, with no clear answer on whether the joist needs full replacement or can be reinforced in place.
This guide gives you the exact repair methods, IRC code standards, and decision criteria to fix the problem safely — or know when to call a structural engineer.
Why Floor Joists Get Cut (And Why It Matters)
Plumbing and HVAC work is the leading cause of joist damage in residential construction. When a drain line or duct run conflicts with a floor joist, tradespeople often cut or notch the joist rather than reroute the pipe — and they do it without structural review.

What the IRC Actually Allows
The International Residential Code sets hard limits on joist cutting and notching:
- Notches in the top or bottom of a joist cannot exceed one-sixth of the joist’s depth
- Holes bored through a joist must be at least 2 inches from the top or bottom edge and cannot exceed one-third of the joist depth
- No notching is permitted in the middle third of a joist span — this is where bending stress peaks
A 2×10 joist, for example, has a depth of 9.25 inches. That means a code-legal notch is no deeper than 1.5 inches. Many plumbers cut 3 to 4 inches without a second thought.
Why This Creates a Liability Problem
Joist damage from plumbing work transfers structural risk directly to the homeowner. The contractor who made the cut is long gone. The floor above — carrying live loads from furniture, people, and appliances — is now bearing that load on a compromised span.
Here’s the problem: reduced joist depth dramatically cuts span capacity. Removing even one-quarter of a joist’s depth can reduce its load-bearing strength by more than 40%. That’s not a cosmetic issue — it’s a structural integrity failure waiting to happen.
Sistering, scabbing, or installing plywood web stiffeners are the three primary methods for reinforcing cut floor joists without full replacement.
The Sistering Method: Reinforcing with Parallel Boards
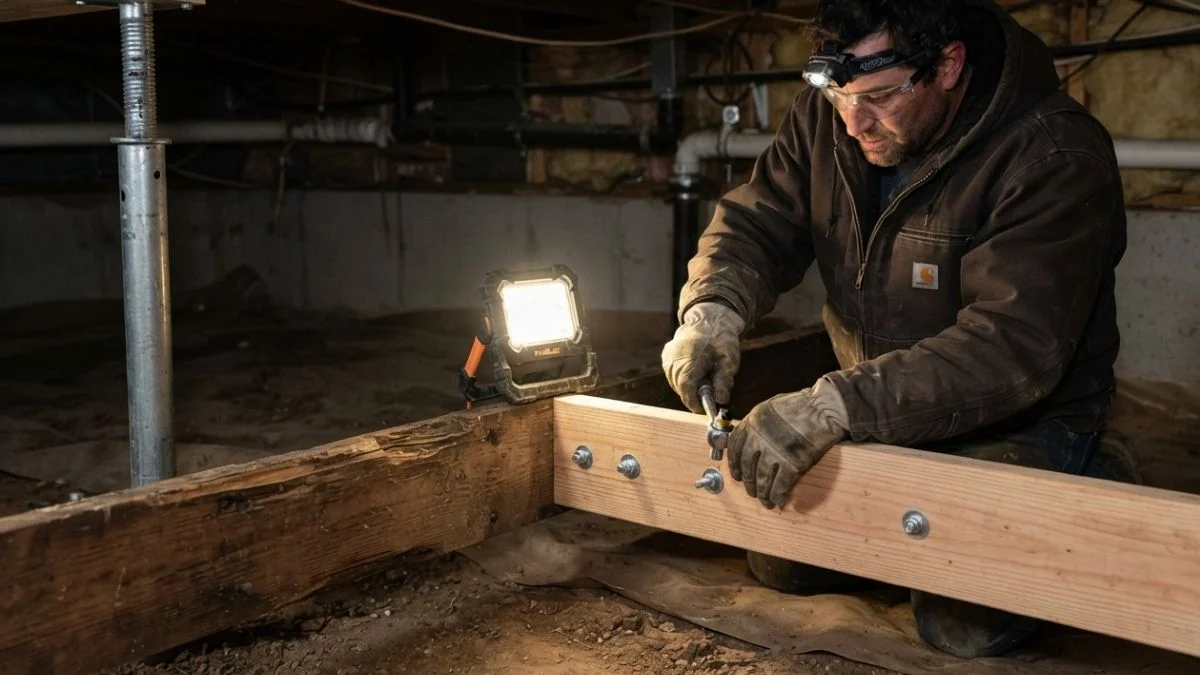
Sistering is the most reliable DIY method for floor joist structural repair. It involves fastening a new, full-length board directly alongside the damaged joist so the two members share the load — with the undamaged sister carrying the structural weight across the compromised section.

What Sistering Does and How It Works
When you sister a floor joist, load that was concentrated on the weakened span transfers to the new board. The sister acts as a bypass — it picks up the bending stress that the cut or notched joist can no longer safely handle. For moderate cuts that haven’t caused visible deflection or cracking, this method restores full load-bearing capacity without replacing the original joist.
Sizing, Length, and Materials
The sister board must match the original joist in both depth and lumber grade. According to IRC Table R502.3.1, joist sizing is determined by species, spacing, and span — so a replacement-grade 2×10 at 16 inches on center covering a 13-foot span requires No. 2 Douglas Fir or equivalent.
Key sizing and fastening rules:
- Sister boards must extend at least 3 feet beyond the damaged area on each side
- Use ½-inch carriage bolts every 12 to 16 inches in an alternating offset pattern
- Choose pressure-treated lumber if any moisture exposure is present near plumbing penetrations
Installation Sequence and Load Calculations
Temporary support walls for joists must go up before any sistering begins. Set adjustable steel posts or a temporary stud wall under the floor beam above, spaced no more than 6 feet apart, to transfer the live load off the damaged joist.
The sequence from there:
- Install temporary bracing and confirm the floor above is fully supported
- Lift the damaged joist incrementally with a bottle jack until it’s flush and level
- Position the sister board tight against the joist face with no gaps
- Install bolts in passes — snug first, then torque — to avoid binding or bowing
- Verify post-installation deflection stays within the L/360 span limit (for a 12-foot span, that’s no more than 0.4 inches of sag)
Temporary Support Walls: Mandatory Safety During Repair
Temporary support walls are not optional — they are a structural requirement before you touch a damaged joist. Removing or repositioning a load-bearing member without first redirecting its load creates an immediate collapse risk.

How the Load Path Works
The load above the damaged joist — furniture, people, subfloor, and framing — follows a direct vertical path down through the joist to the beam or foundation below. When you sever that path for repair, you must replace it with a temporary one.
The correct load path for temporary bracing looks like this:
- Floor load transfers down through the subfloor to the temporary support wall
- The support wall distributes that load through jack posts or adjustable steel columns
- Those posts bear down onto a doubled 2×10 mud sill or concrete pad below
- A second parallel wall on the opposite side of the joist prevents lateral movement and uneven settling
Building the Temporary Walls Correctly
Each temporary support wall runs perpendicular to the joists, positioned 18 to 24 inches back from the damaged section on both sides. Use doubled 2×4 or 2×6 top and bottom plates, with studs spaced no more than 16 inches on center.
Here’s what most people miss: the wall must bear on a solid structure beneath it — never on unsupported subfloor spanning open air. If you’re working in a crawl space, set the mud sill on concrete blocks or a compacted gravel pad.
Keep temporary bracing in place for the full active repair period plus a minimum 24-hour cure time if construction adhesive is used alongside mechanical fasteners. Structural integrity depends on the adhesive reaching full bond strength before load is reapplied.
Building Code Compliance and When to Call a Structural Engineer
Not every cut joist qualifies for a DIY sister repair. The IRC draws clear boundaries on what damage is field-repairable and what requires a licensed structural engineer to design the fix.
IRC Joist Cutting Limits at a Glance
| Location on Joist | Notching Allowed | Boring Allowed |
|---|---|---|
| End third (top or bottom) | Max 1/6 joist depth | Max 1/3 joist depth |
| Middle third | No notching permitted | Max 1/3 joist depth, 2″ from edge |
| Bottom edge (anywhere) | No notching permitted | Not applicable |
Any cut that exceeds these limits — especially in the center third where bending stress peaks — goes beyond what sistering alone can reliably fix. Building code floor joist cuts in the center span zone require an engineer-designed repair or full joist replacement.
When a Structural Engineer Is Non-Negotiable
Call a licensed structural engineer before proceeding if any of these conditions apply:
- The cut or notch falls in the middle third of the joist span
- More than one adjacent joist is damaged — load redistribution affects the entire bay
- The home is multi-story and the compromised joist carries load from above
- Visible deflection, cracking, or separation is present at the cut location
- The joist is a engineered lumber product (LVL or I-joist), which have stricter manufacturer cutting rules
Permits and Inspections
Most jurisdictions require a building permit for structural joist repair, even when sistering. Pull the permit before starting work — an unpermitted structural repair can create title and insurance problems at resale. The inspection confirms the repair meets local code, which is your legal protection if the floor is ever questioned.
Repair vs. Replacement: Decision Framework
The choice between sistering and full replacement comes down to 4 factors: cut location, cut depth, wood condition, and how many joists are affected. Work through each one before picking a repair method.
When Sistering Is Sufficient
Reinforcing cut floor joists with a sister board is appropriate when all of these conditions are true:
- The cut or notch falls in the outer third of the joist span — not the center
- Cut depth is less than one-quarter of the total joist height
- The wood shows no rot, soft spots, or moisture damage around the plumbing penetration
- Only one isolated joist is affected, with adjacent joists structurally intact
When these four conditions align, sistering restores full load-bearing capacity and span performance without the cost or complexity of full removal.
When Replacement Is Necessary
Full joist replacement is the only safe path when:
- The cut falls in the center third of the span, where bending stress is highest
- Cut depth exceeds one-quarter of the joist height, collapsing too much of the web stiffener zone
- Rot or water damage is visible at or near the cut — compromised wood fiber cannot transfer load reliably
- Multiple adjacent joists are damaged, making load redistribution unpredictable
- The joist is already at or near its maximum allowable deflection before repair begins
Cost and Timeline Comparison
| Method | Typical Cost (DIY) | Timeline |
|---|---|---|
| Sistering | $50–$200 in lumber and hardware | 1–2 days |
| Full replacement | $300–$800+ including disposal | 3–5 days |
Sistering is faster and cheaper, but only when the damage genuinely qualifies. Applying a sister repair to a joist that needs replacement is false economy — it delays a structural failure rather than preventing one.
Read Also: How to Repair Cut Floor Joist?
Getting It Right the First Time
A properly sistered joist, installed to IRC standards with permitted work and a passed inspection, is structurally equivalent to an uncut original — the repair is only permanent if the process is done correctly from the start. Before closing up the subfloor, have a licensed structural engineer or building inspector physically verify the sistering work, confirm bolt spacing, and sign off on code compliance. That inspection record protects you at resale and eliminates any future liability from the original contractor’s cut.


