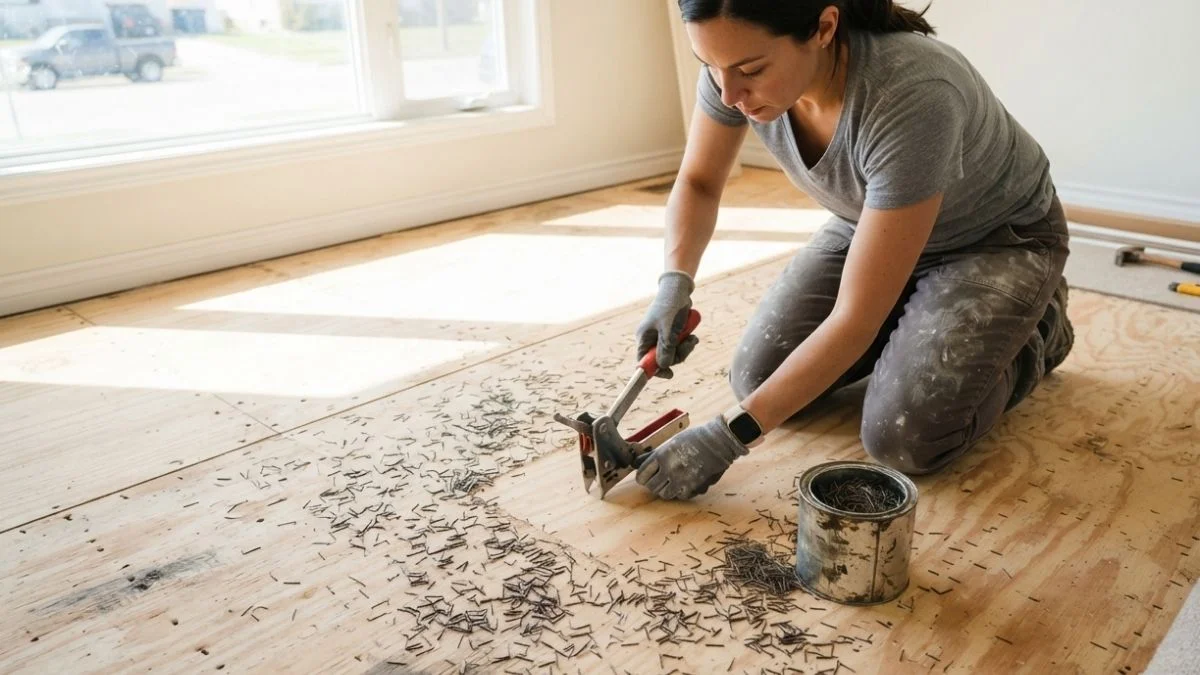
If you’ve just pulled up old carpet, you already know what’s waiting underneath — hundreds of tiny metal staples poking out of the subfloor in every direction. It’s one of those unglamorous parts of a flooring project that nobody warns you about until you’re already on your hands and knees staring at a sea of sharp metal.
Here’s the thing: skipping this step isn’t an option. Those staples might look small, but they can cause serious problems for your new flooring. Whether you’re installing hardwood, luxury vinyl plank, laminate, or tile, a single staple left behind can crack a plank, create an annoying bump, or even void your flooring manufacturer’s warranty.
The good news? Removing staples from a subfloor is a completely manageable DIY job. It takes patience, the right tools, and a good technique — and that’s exactly what this guide covers. By the time you finish reading, you’ll know exactly what to do, what tools to use, and how to avoid the mistakes that slow most homeowners down.
Why You Need to Remove Staples from Your Subfloor Before Installing New Flooring
This is the step that separates a professional-looking flooring job from one that causes headaches six months down the road. A lot of homeowners underestimate how much damage a few leftover staples can do — until they’re already living with the consequences.
What Happens If You Leave Staples Behind
When you install new flooring over a subfloor that still has staples sticking up, you’re essentially laying your new floor over an uneven surface. Even a staple that’s only 1–2mm above the wood surface is enough to create a visible bump under thin flooring like LVP or laminate. Over time, foot traffic pushes that bump further into the flooring material, causing cracks, separation at the seams, or permanent dents.
With hardwood flooring, it’s even more critical. Staples left in the subfloor can interfere with the nail gun used during installation, causing misfires and split planks. And if you’re gluing down flooring, staples prevent proper adhesion, which leads to lifting and bubbling over time.
There’s also the issue of squeaking. When staple legs shift under the weight of foot traffic, they rub against the subfloor wood and create that annoying squeaking sound that’s nearly impossible to fix without pulling up your new floor.
Finally, most flooring manufacturers require a flat, clean subfloor as a condition of their warranty. If an inspector finds that staples weren’t removed before installation, your warranty claim could be denied — leaving you to pay for repairs out of pocket.
How Many Staples Are We Talking About?
This depends entirely on how your old flooring was installed. Carpet padding is typically stapled every 3 to 4 inches along its edges and seams, which means a standard 12×12 bedroom can have anywhere from 300 to 500 staples. A larger living room? You could be looking at well over 1,000.
Vinyl sheet flooring uses a similar stapling pattern, sometimes even denser. So before you start, take a realistic look at the room and mentally prepare for the scope of the job. It’s not difficult work — but it is time-consuming, and rushing it is where most people make mistakes.
Tools You’ll Need to Remove Staples from Subfloor
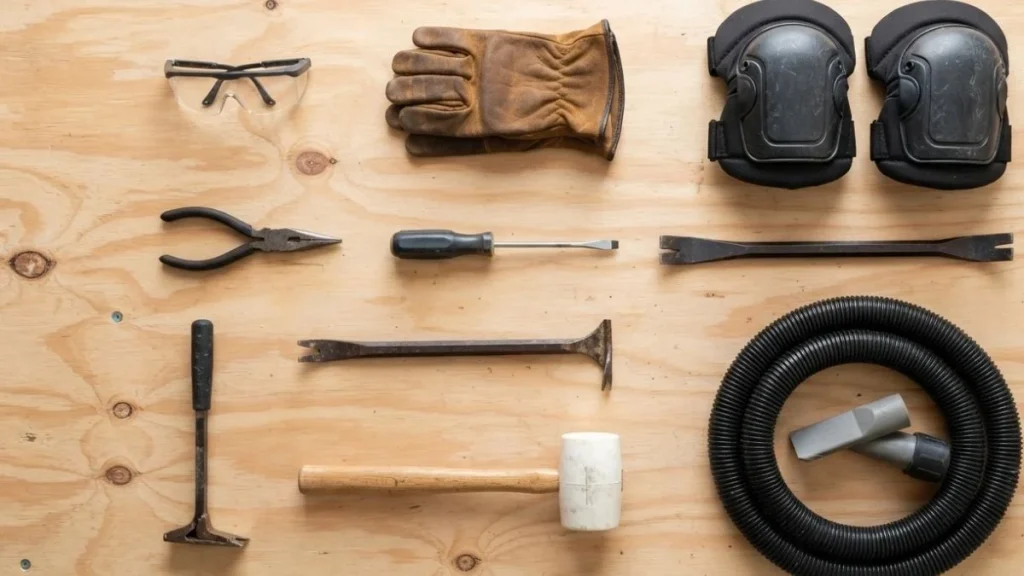
Having the right tools makes an enormous difference here. Trying to remove hundreds of staples with just a flathead screwdriver will leave you frustrated and with a sore back. Invest a little time in gathering the right equipment before you start.
Essential Tools
| Tool | Purpose |
| Floor staple remover / lever puller | Primary tool for lifting staple crowns |
| Flat pry bar or cat’s paw | Prying up stubborn or deep-set staples |
| Needle-nose pliers | Gripping and pulling staples the puller can’t reach |
| Flathead screwdriver | Lifting individual legs of broken staples |
| Rubber mallet | Tapping tools into position without damaging wood |
| Cut-resistant work gloves | Protecting hands from sharp staple edges |
| Safety glasses | Preventing eye injury from flying metal |
| Knee pads | Essential comfort for long work sessions |
Optional Tools That Speed Up the Job
- Oscillating multi-tool with scraper blade — excellent for stubborn staples and cleaning up raised wood grain
- Nail punch and hammer — for sinking broken flush staples below the surface
- Shop vacuum — keeps your work area clear and safe
- Portable work light or headlamp — helps you spot staples at a low angle
Which Tool Works Best?
For most homeowners, a dedicated floor staple remover — sometimes called a lever-style staple puller — is the best starting point. It’s designed specifically to slide under the staple crown and pop it up with minimal wood damage. They typically cost between $15 and $40 at any hardware store and are absolutely worth the investment.
For staples that are already partially raised or located in tight corners, needle-nose pliers are your best friend. And for anything that’s broken or flush with the surface, a nail punch to sink it flat is usually the fastest solution.
How to Remove Staples from Subfloor — Step-by-Step
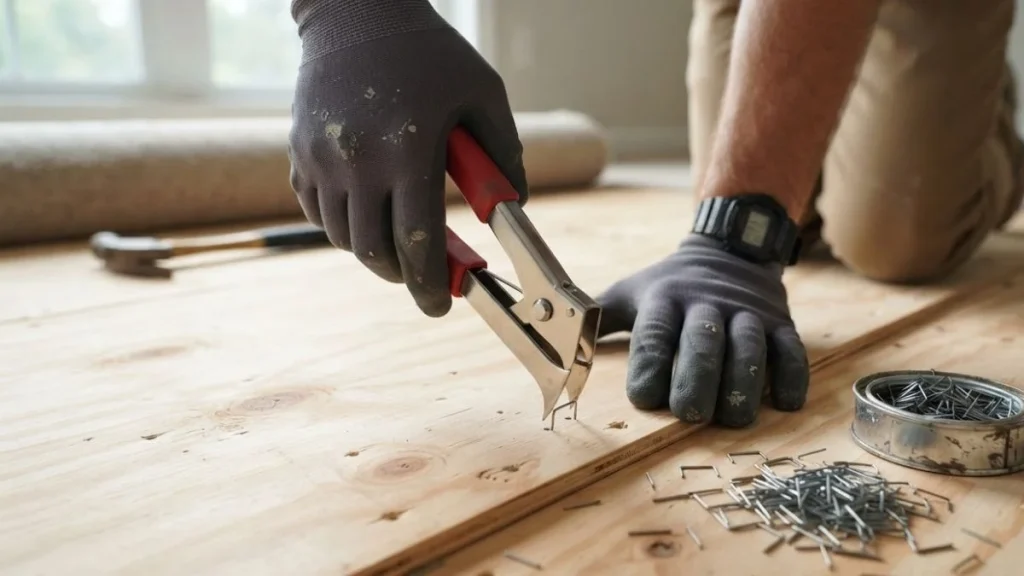
Now let’s get into the actual process. Follow these steps in order and you’ll get through the job cleanly and efficiently.
Clear the Work Area
Before touching a single staple, clear the room completely. Move out all furniture, remove any remaining carpet tack strips, and sweep up loose debris. Good lighting is more important than most people realize — set up a portable work light or use a headlamp to see the floor at a low angle, which makes staples much easier to spot.
If you’re working in a large space, divide the room into sections and work one section at a time. This keeps the job organized and ensures you don’t miss spots.
Gear Up
Put on your cut-resistant gloves and safety glasses before you touch anything. Staple edges are razor-sharp, and they have a way of flicking up unexpectedly when you pull them. Knee pads are equally important — you’ll be spending a lot of time close to the floor, and your knees will thank you by the end of the day.
Work the Floor with Your Staple Remover Tool
Start at one corner of the room and work in straight rows across the floor. Slide the tip of your floor staple remover under the crown of each staple and push the handle down to lever it up. Apply steady, controlled pressure — don’t yank. A smooth, even pull lifts the staple cleanly without gouging the wood.
Work methodically. Going row by row is far more efficient than jumping around the room randomly, and it helps ensure you don’t skip any areas.
Use Needle-Nose Pliers for Stubborn Staples
Some staples will resist the lever puller — especially older, rusted ones that have been sitting in the wood for years. For these, switch to needle-nose pliers. Grip the staple crown as close to the wood surface as possible, then use a gentle rocking motion (side to side, not straight up) to loosen it before pulling. This technique dramatically reduces the chance of the staple snapping in half.
Handle Broken and Flush Staples
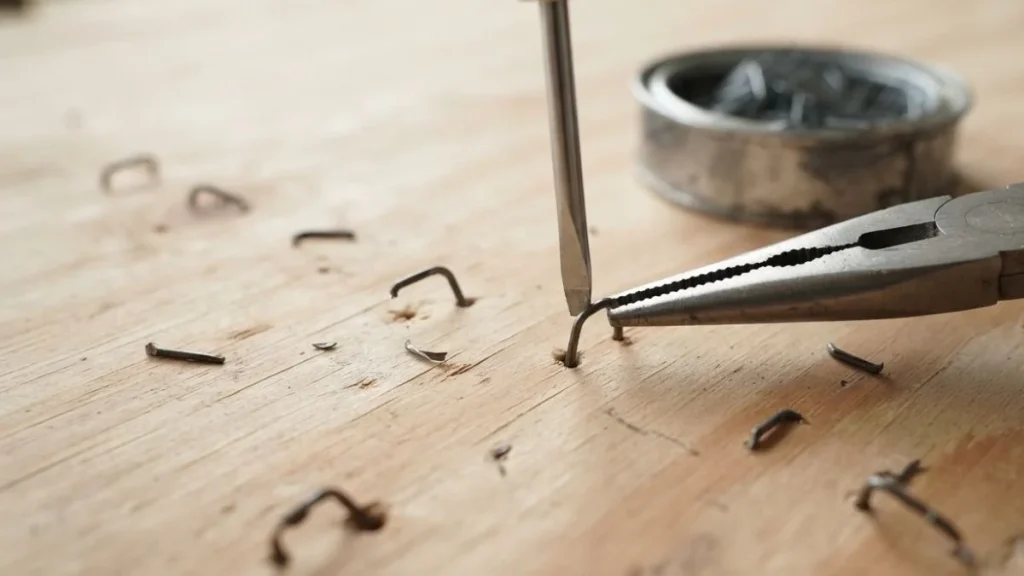
This is where most DIYers lose time. Staples break — it’s inevitable — and knowing how to handle them quickly keeps the job moving.
When a Staple Snaps Off
If a staple breaks and one or both legs are left in the wood, use a flathead screwdriver to lift one leg slightly. Once it’s raised enough to grip, use your needle-nose pliers to pull it out at an angle. Avoid pulling straight up — that almost always snaps it again.
When a Staple Is Flush with the Wood
Flush staples are the trickiest. You have three options depending on what flooring you’re installing:
- Sink it deeper using a nail punch and hammer — acceptable for most flooring types where a small divot won’t matter
- Scrape it level using an oscillating multi-tool with a scraper blade
- Leave it only if it is genuinely 100% flush and smooth to the touch — run your gloved hand over it to confirm
Final Inspection
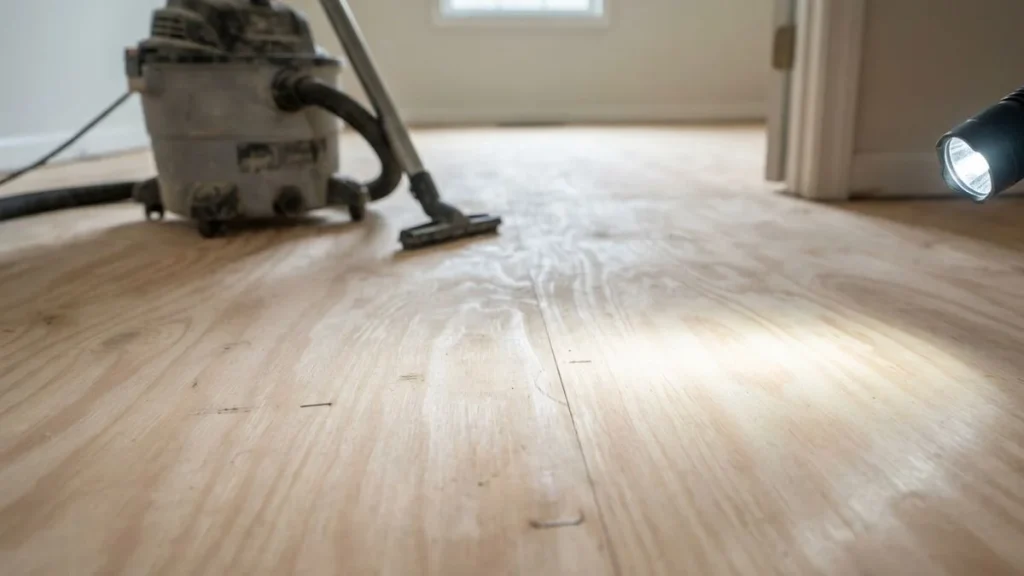
Once you’ve gone through the entire room, don’t pack up yet. Get down low and use a flashlight held at a near-horizontal angle to the floor. This raking light technique creates shadows that reveal even the smallest remaining staples or raised edges. Then do one more slow pass with your gloved hand across the entire surface.
This step takes an extra 15–20 minutes but saves you from discovering a missed staple after your new floor is already installed.
Clean Up and Prep the Subfloor
Vacuum the entire floor thoroughly using a shop vac to pick up all the pulled staples, metal fragments, and wood debris. Once it’s clean, take a moment to inspect the subfloor itself. Look for soft spots that might indicate moisture damage, any areas where the wood has lifted, and any lingering squeaks. Address these now — it’s much easier to fix subfloor problems before your new flooring goes down than after.
Pro Tips to Remove Subfloor Staples Faster and Easier
- Divide large rooms into quadrants and fully complete one before moving to the next
- Keep a small bucket or container nearby to drop pulled staples immediately — stepping on a loose staple is painful and dangerous
- Take a 10-minute break every hour — this is repetitive, physical work that strains your back, knees, and wrists
- A headlamp keeps both hands free and gives you consistent lighting right where you’re working
- Always do two passes through the room — once to pull staples and once to inspect
Common Mistakes Homeowners Make During Subfloor Staple Removal
Even experienced DIYers make these mistakes. Knowing them in advance saves you time, money, and frustration.
Rushing the job is the most common mistake. It’s tempting to power through and start your flooring installation as quickly as possible — but every staple you miss is a potential problem that costs far more to fix later than it would have taken to pull it now.
Using the wrong tools is a close second. A regular claw hammer and screwdriver will damage your subfloor surface and leave more staple fragments behind than they remove. The right tools aren’t expensive, and they make the job dramatically faster.
Pulling at the wrong angle snaps staples and leaves legs embedded in the wood. Always pull in line with the staple’s grain direction, not straight up from the surface.
Skipping the final inspection is a mistake that almost always comes back to haunt you. One missed staple under a hardwood plank can cause a crack that ruins an entire board.
Ignoring subfloor damage found during removal is also a missed opportunity. If you spot soft spots, rot, or significant gouging while you’re already down there working, fix it before installing new flooring — not after.
How Long Does Subfloor Staple Removal Take?
| Room Size | Estimated Time |
| Small bedroom (120 sq ft) | 1–2 hours |
| Average living room (300 sq ft) | 3–5 hours |
| Large open floor plan (600 sq ft) | 6–8 hours |
| Full house (1,500+ sq ft) | 1–2 full days |
These estimates assume you’re working alone with proper tools. Add extra time if staples are old and rusted, if the subfloor is OSB (which holds staples more aggressively than plywood), or if you’re dealing with particularly dense staple patterns from vinyl sheet flooring.
Read Also: How to Fix Soft Spot in Subfloor
Conclusion
Removing staples from a subfloor isn’t glamorous work, but it’s one of the most important steps in any flooring project. Do it right, and your new floor goes down smoothly and lasts for years. Skip it or rush it, and you risk bumps, squeaks, cracked planks, and voided warranties.
The process is straightforward: get the right tools, work methodically row by row, handle broken staples as you go, and always do a final inspection before you call it done. Take your time, protect your knees and hands, and treat it as the foundation of your entire flooring project — because that’s exactly what it is.
Once your subfloor is clean, smooth, and staple-free, you’re ready for the fun part — laying down your beautiful new floor.