


Are you thinking about installing replacement windows in your home? Before you start, there’s an important detail you can’t afford to overlook: flashing.
You might wonder, “Do replacement windows need flashing? ” The answer can save you from costly water damage and keep your home comfortable for years. You’ll discover why flashing matters, how it protects your windows, and what happens if it’s missing.
Purpose Of Flashing
Replacement windows often require flashing to protect the home from moisture problems. Flashing is a thin material installed around windows to stop water from entering the walls. Its main purpose is to keep water out and protect the building structure.
Role In Moisture Protection
Flashing acts as a shield against moisture around replacement windows. It directs water away from the window frame and walls. This prevents water from settling in places where it can cause rot or mold.
- Seals gaps: Flashing covers small gaps between the window and wall.
- Redirects water: It guides rainwater down and away from the house.
- Prevents leaks: Stops water from leaking into the interior walls.
Proper flashing installation is crucial to create a continuous barrier. This barrier stops water from entering at joints, corners, and edges. It works with other window components like weatherstripping and caulk to keep moisture out.
| Flashing Material | Common Use | Moisture Protection Level |
| Aluminum | Window sills and jambs | High |
| Vinyl | Lightweight flashing | Moderate |
| Self-adhesive membrane | Sealing corners and edges | Very High |
Flashing also helps the home breathe by allowing moisture vapor to escape. This stops condensation buildup that could lead to mold growth. Overall, flashing plays a critical role in keeping replacement windows and walls dry.
Preventing Water Damage
Water damage causes serious problems for homes without flashing around replacement windows. Water can soak into wood, drywall, and insulation. This leads to decay, stains, and costly repairs.
Flashing prevents these problems by creating a waterproof barrier. It stops rainwater from entering the home at weak points near windows.
- Protects window frame: Prevents wood rot and warping.
- Prevents mold growth: Blocks moisture that causes mold.
- Maintains insulation: Keeps insulation dry and effective.
- Stops interior damage: Protects walls and ceilings from water stains and damage.
Without flashing, water damage can develop slowly and go unnoticed. This leads to bigger issues such as structural damage and health risks from mold.
| Potential Water Damage | Effect on Home | How Flashing Helps |
| Wood Rot | Weakens window frame and wall structure | Blocks water from soaking into wood |
| Mold Growth | Causes health issues and odors | Prevents moisture buildup |
| Insulation Damage | Reduces energy efficiency | Keeps insulation dry |
Flashing is essential to prevent water damage around replacement windows. It saves money by avoiding repair costs. Proper flashing ensures a longer-lasting and healthier home environment.
Types Of Flashing For Windows
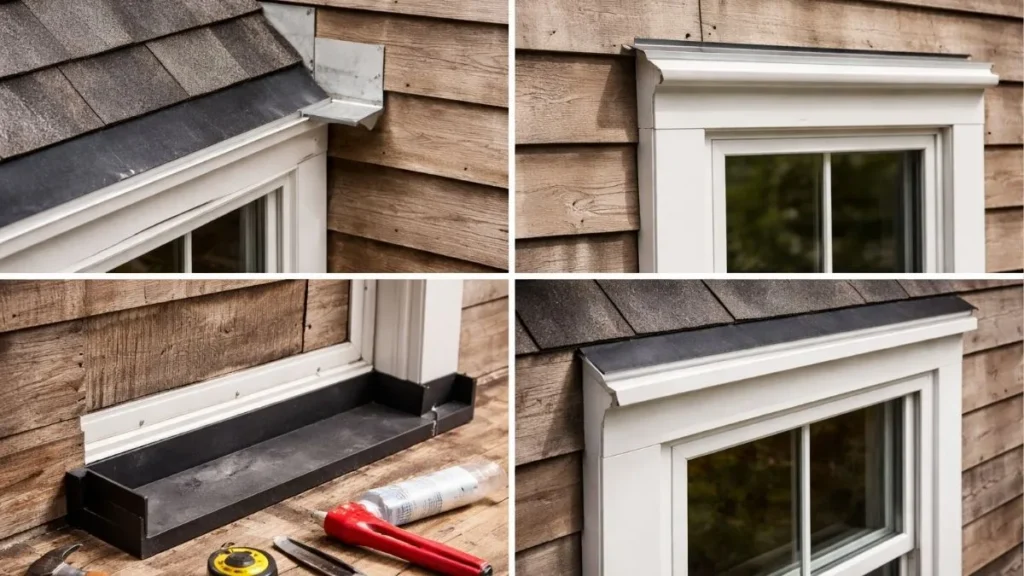
There are different types of flashing materials used for windows. Each type has unique features, benefits, and installation methods. Knowing these types helps in choosing the right flashing for your replacement windows. Below are the main types of flashing used in window installation:
Self-adhered Flashing Tape
Self-adhered flashing tape is a popular choice for window flashing. It is a sticky, flexible strip made from waterproof materials like rubberized asphalt or butyl. This tape sticks directly to the window frame and the surrounding wall, creating a tight seal.
Benefits of self-adhered flashing tape:
- Easy to install without special tools
- Flexible to fit irregular surfaces
- Provides a strong, waterproof barrier
- Durable and resistant to weather
Installation tips include cleaning the surface well before applying the tape and making sure it overlaps properly to avoid gaps. This type of flashing tape works well with many siding types, including vinyl, wood, and fiber cement.
Metal Flashing
Metal flashing is a traditional and reliable option for window flashing. It is made from materials like aluminum, copper, or galvanized steel. Metal flashing is rigid and shaped to fit around window openings.
This type of flashing offers strong protection against water intrusion. It lasts many years without losing effectiveness. Metal flashing is often used in areas with heavy rain or snow.
Key points about metal flashing:
- Requires cutting and bending to fit window frames
- Needs proper sealing at joints to prevent leaks
- Can be painted to match the building exterior
- Resistant to UV rays and extreme temperatures
Installation needs some skill and tools, such as tin snips and sealants. Metal flashing is best for homes where durability and long life are priorities.
Liquid Flashing
Liquid flashing is a newer option that uses a brush-on or spray-on waterproof coating. This flexible liquid forms a seamless membrane over the window frame and wall. Once dried, it prevents water from passing through.
Advantages of liquid flashing include:
- Ability to cover complex shapes and corners
- Creates a continuous, joint-free barrier
- Easy to apply with a brush or roller
- Compatible with many building materials
Proper surface preparation is important for adhesion. Multiple coats may be needed for full protection. Liquid flashing is ideal for small repairs or irregular window shapes. It can work well with other flashing types for extra protection.
Flashing In New Construction Vs Replacement

Flashing plays a key role in protecting windows from water damage. Its use differs between new construction and replacement window projects. New construction allows for flashing installation before siding or exterior finishes go up. Replacement windows require careful flashing around existing materials.
Differences In Installation
New construction windows are installed on open walls. Builders add flashing layers before wrapping the house. This method creates a continuous water barrier.
- Step 1: Install flashing tape on the rough opening.
- Step 2: Apply window flashing with integrated flanges.
- Step 3: Wrap with house wrap or building paper.
- Step 4: Finish with siding or exterior cladding.
This process ensures water runs away from the window and wall assembly.
Replacement windows fit inside or over existing frames. Flashing installation changes due to limited access.
| Aspect | New Construction | Replacement Windows |
| Access to framing | Full access, easy flashing installation | Limited, work around existing materials |
| Flashing type | Integrated flashing with window unit | Separate flashing materials or tapes |
| Water barrier | Continuous, layered protection | Patchwork, careful sealing needed |
Proper flashing in new builds creates a strong seal from the start. Replacement flashing requires skill to avoid gaps and leaks.
Challenges With Replacement Windows
Replacement window flashing faces unique obstacles. Existing siding, trim, and frames limit how flashing can fit.
- Hidden damage: Old water leaks may weaken framing or sheathing.
- Limited space: New flashing must fit without removing siding.
- Sealing gaps: Irregular openings make uniform flashing difficult.
- Compatibility: Flashing materials must work with existing ones.
Installers must inspect areas carefully before flashing. Removing trim or siding may be necessary to create a proper water barrier.
Some tactics to improve flashing in replacements:
- Use flexible flashing tapes that mold to uneven surfaces.
- Apply sealant under window flanges for extra protection.
- Cut back siding at the window edge for better flashing overlap.
- Replace rotted wood before installing new windows.
Failing to address these challenges risks water intrusion, mold, and wood rot. Proper flashing safeguards the home’s structure and extends window life.
When Flashing Is Necessary For Replacement
Replacement windows often raise questions about flashing. Flashing is a thin material installed around windows to block water from entering the home. Knowing when flashing is necessary helps protect your walls and prevent leaks. Not every window replacement requires flashing, but some situations do.
Assessing Window Condition
Before deciding on flashing, check the condition of the existing window and wall. Look for signs of water damage, rot, or gaps around the frame. These issues often mean flashing is needed to stop water from entering.
- Old or damaged window frames: Frames with cracks or rot allow water inside.
- Visible gaps or cracks: Spaces between the window and wall create entry points for moisture.
- Previous leaks: Areas with water stains or mold need better protection.
Assess the wall type too. Walls made of wood, vinyl siding, or stucco may require different flashing methods. For example, wood walls often need extra flashing to prevent rot.
| Window Condition | Flashing Need | Reason |
| Good condition, no gaps | May not need flashing | Existing protection is sufficient |
| Damaged frame or gaps | Flashing needed | Prevents water entry and damage |
| Signs of previous leaks | Flashing required | Fix and prevent future leaks |
Check if old flashing exists and its condition. Remove and replace damaged flashing during installation. Proper flashing stops water from settling under the window, protecting your home’s structure.
Building Code Requirements
Building codes set rules for window installation, including flashing. These codes help ensure safety and prevent water damage.
Most codes require flashing for replacement windows in these cases:
- Exterior wall openings: Flashing must cover gaps to prevent water entry.
- Windows in wet climates: Extra protection is mandatory.
- Specific wall materials: Some materials need flashing by code.
Codes vary by location. Consult local building codes or a professional installer for exact rules. Below is a basic overview of common flashing requirements in codes:
| Code Aspect | Requirement | Purpose |
| Continuous flashing | Must be installed around the full window perimeter | Stops water from entering any side |
| Use of approved materials | Flashing must be made of durable, waterproof materials | Ensures long-lasting protection |
| Proper overlap | Flashing layers must overlap to guide water outward | Prevents water from seeping behind walls |
Ignoring flashing codes can lead to failed inspections and costly repairs. Proper flashing installation meets safety rules and keeps your home dry and strong.
Common Flashing Installation Methods
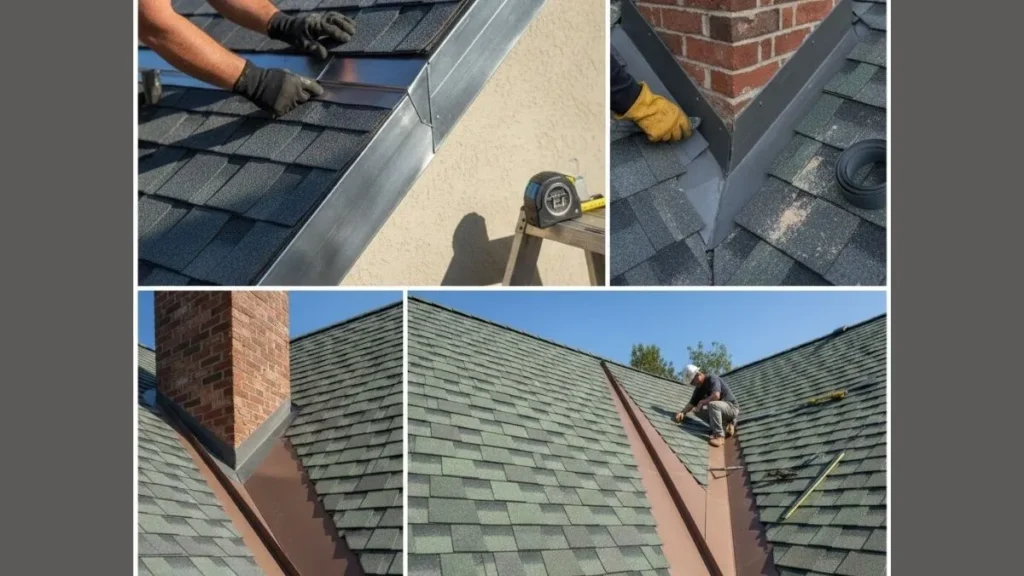
Installing flashing correctly is key to protecting replacement windows from water damage. Flashing directs water away from the window frame and prevents leaks. Several common flashing installation methods ensure a tight seal around the window. Each method works differently but shares the goal of keeping moisture out.
Step Flashing Technique
The Step Flashing Technique uses small, overlapping metal pieces placed along the window edges. These metal strips guide water down and away from the wall.
Here is how it works:
- Install the window flange or frame first.
- Place each step flashing piece at the junction where the window meets the siding.
- Overlap each flashing strip with the next, like shingles on a roof.
- Secure the flashing with nails or screws, ensuring no gaps.
Step flashing is often made of aluminum or galvanized steel. It is very durable and resists rust. This method suits homes with wood or vinyl siding. It allows water to flow safely down the wall without seeping inside.
| Advantages | Disadvantages |
| Long-lasting protection | Requires skilled installation |
| Works well with various siding types | More time-consuming to install |
| Allows water to drain effectively | Metal may expand or contract slightly |
This technique is a trusted choice for replacing windows in many homes. It offers a strong barrier against water intrusion by layering flashing pieces carefully.
Flashing Tape Application
Flashing Tape Application uses a sticky, waterproof tape applied around the window opening. This tape seals gaps and blocks water from entering.
Steps to apply flashing tape:
- Clean and dry the window frame and surrounding area.
- Apply the tape along the bottom sill, extending past the edges.
- Wrap the tape up the sides of the window frame.
- Cover the top edge with tape to complete the seal.
The tape is usually made from butyl or rubberized asphalt, making it flexible and water-resistant. It sticks well to most surfaces and adapts to small bumps or curves.
Flashing tape is fast to install and works well in tight spaces. It creates a continuous waterproof barrier around the window. However, the tape must be installed carefully to avoid wrinkles or gaps.
| Benefits | Limitations |
| Easy and quick application | Less durable than metal flashing |
| Flexible and adapts to shapes | May peel over time in harsh weather |
| Good for DIY projects | Requires clean surfaces for best adhesion |
Flashing tape suits many replacement window projects, especially when speed and flexibility matter. It provides a reliable seal if applied correctly.
Integration With House Wrap
Integration with House Wrap ensures flashing works with the home’s weather-resistant barrier. House wrap is a fabric-like material that covers the exterior walls to block wind and water.
Proper flashing installation involves layering the flashing and house wrap in a specific order. This setup helps water drain outward, not inward.
Key points in this method:
- The house wrap is installed first around the window opening.
- Flashing is placed over the house wrap at the window sill.
- Side flashing overlaps the house wrap to create a shingle effect.
- The top flashing goes under the house wrap to guide water down.
This layering prevents water from getting trapped behind the siding or window. It also enhances the home’s overall moisture defense system.
| Integration Steps | Purpose |
| Install house wrap around window opening | Base moisture barrier |
| Place sill flashing over house wrap | Protects window bottom from water |
| Overlap side flashing on top of house wrap | Directs water down and away |
| Install top flashing under house wrap | Prevents water entry from above |
This method offers the best protection by combining flashing with the home’s weather barrier. It reduces leaks and extends the window’s lifespan.
Risks Of Skipping Flashing
Installing replacement windows without flashing can lead to serious problems. Flashing acts as a protective barrier around the window, stopping water from entering your home. Skipping flashing may seem like a shortcut, but it raises many risks. These risks affect your home’s structure, comfort, and your wallet.
Potential Water Intrusion
Water intrusion is the most common risk of skipping flashing. Without flashing, rainwater can seep through gaps between the window frame and the wall. This moisture can enter your home’s interior and cause many problems. Even small leaks can lead to mold growth and damage to walls and flooring.
Signs of water intrusion include:
- Peeling paint around the window
- Discoloration or stains on walls
- Musty odors near windows
- Warped window frames or sills
Flashing directs water away from the window opening. It seals joints and prevents leaks during storms or heavy rain. Without it, water can collect and cause rot in the wall framing. This damage often starts hidden and worsens over time.
| Issue | Cause | Effect |
| Water seepage | No flashing to block rain | Damage to walls and insulation |
| Mold growth | Moisture buildup inside walls | Health risks and odor |
| Wood rot | Constant exposure to water | Structural weakening |
Long-term Damage And Costs
Skipping flashing can cause expensive problems over time. Water damage spreads slowly but steadily. It can weaken the window frame, wall studs, and even the foundation. Repairs after water damage are much more costly than installing flashing properly.
Common long-term issues include:
- Rotting wood around the window frame
- Damaged drywall and paint
- Mold remediation expenses
- Higher energy bills due to poor insulation
- Reduced home value
Here is a simple cost comparison table:
| Task | Typical Cost | Notes |
| Installing flashing | $100 – $300 | During window replacement |
| Water damage repairs | $1,000 – $5,000+ | Fixing rot, mold, drywall |
| Energy loss | Varies | Higher heating and cooling costs |
Read Also: Flashing Where Siding Meets Brick
Conclusion
Proper flashing helps stop water from getting inside your walls. It keeps your home dry and safe from damage. Replacement windows without flashing can cause leaks and costly repairs. Installing flashing is a smart step for any window update. This small detail protects your investment and adds peace of mind.
Remember, good flashing means better home protection. Don’t skip it when you replace your windows.


