There’s nothing quite as unsettling as stepping into your upstairs bathroom and hearing a loud creak beneath your feet. Maybe it happens every morning when you get out of the shower, or perhaps it’s gotten worse over the past few months. Either way, an upstairs bathroom floor creaking is one of those home problems that’s easy to ignore — until it isn’t.
The good news? Most creaking bathroom floors don’t mean your house is falling apart. In the majority of cases, the fix is simpler and more affordable than homeowners expect. But here’s the thing — ignoring it for too long can turn a $50 DIY fix into a $2,000 subfloor replacement. That’s why understanding what’s causing the creak matters just as much as knowing how to fix it.
You’ll learn the most common causes of an upstairs bathroom floor creaking, how to tell if it’s a minor issue or a serious structural problem, and the best step-by-step fixes — whether you’re a confident DIYer or someone who’d rather call a professional.
Why Is My Upstairs Bathroom Floor Creaking?

Before jumping into fixes, it’s worth understanding why bathroom floors creak in the first place — especially upstairs ones. Unlike ground-floor bathrooms that sit over a concrete slab or crawl space, upstairs bathroom floors are built over a system of wooden floor joists, a subfloor layer, underlayment, and your finish flooring on top. That’s a lot of layers — and any one of them can become the source of your creak.
How a Bathroom Floor Is Constructed
To fix the problem properly, it helps to understand what’s underneath you. A typical upstairs bathroom floor is made up of the following layers from bottom to top:
- Floor joists — the structural beams that span the width of the room and carry the load of everything above
- Subfloor — usually ¾-inch plywood or OSB panels nailed or screwed to the joists
- Underlayment — a thin layer that smooths out imperfections and adds some moisture resistance
- Finish flooring — tile, vinyl plank, hardwood, or whatever surface you walk on
When everything is tight and properly fastened, the floor is silent. The creak happens when any of these layers start moving independently — rubbing against each other or against the fasteners holding them in place.
The Most Common Causes of a Creaking Upstairs Bathroom Floor

1. Loose or Damaged Subfloor Panels
This is the number one cause of a creaking upstairs bathroom floor. Over time — especially in a moisture-heavy environment like a bathroom — subfloor panels can warp, swell, or pull away from the joists beneath them. When that gap forms, stepping on the panel causes it to flex downward, then spring back up. That flexing motion is exactly what creates the squeak.
You’ll often notice this type of creak follows a specific path across the floor — wherever there’s a gap between the subfloor and joist below.
2. Worn or Missing Nails and Screws
When a bathroom floor is originally installed, the subfloor is nailed or screwed down to the joists. Over years of foot traffic, moisture exposure, and natural house movement, those fasteners can work their way loose. Once they’re loose, there’s a tiny gap between the subfloor and joist — and every step creates friction and noise.
3. Moisture Damage and Water Infiltration
Slow leaks are sneaky. A toilet that rocks slightly, a shower pan with a hairline crack, or a pipe fitting that drips behind the wall — all of these can silently saturate your subfloor over months or years. Wet wood softens, warps, and eventually rots. A rotting subfloor doesn’t just creak — it becomes spongy and unsafe.
4. Damaged or Weakened Floor Joists
Floor joists are the backbone of your upstairs floor. When they’re compromised by moisture, rot, insect damage, or age, the entire floor loses its rigidity. A weakened joist will flex under load, causing everything above it to shift and creak. This is the most serious cause on this list — and the one that warrants immediate professional attention.
5. Normal House Settling and Seasonal Wood Movement
Not every creak is a red flag. Wood naturally expands in humid summer months and contracts during dry winter conditions. This seasonal movement can cause floors to creak temporarily — and then go quiet again. Houses also settle gradually over decades, which shifts the loads on floor joists slightly. In many cases, this type of creaking is harmless.
6. Gaps Between Flooring Layers
Poor installation or aging adhesive can create small gaps between the subfloor and the underlayment, or between the underlayment and the finish floor. Tile floors are particularly prone to this — when the mortar bed or adhesive degrades, tiles can flex slightly underfoot and produce a hollow, creaking sound.
Is a Creaking Upstairs Bathroom Floor Dangerous?
Most of the time, a creaking floor is an annoyance — not a safety hazard. But there are specific warning signs that should prompt you to stop ignoring the problem and take action immediately.
Call a professional right away if you notice any of the following:
- The floor feels soft, spongy, or gives slightly when you step on it
- There are visible dips, sags, or uneven spots in the floor
- Water stains or discoloration are appearing on the ceiling directly below the bathroom
- The creak has gotten noticeably worse over a short period of time
- You can smell mildew or musty odors coming from the floor area
If none of these warning signs are present, there’s a good chance your creak is a minor structural issue — annoying, but not dangerous. That said, the sooner you address it, the less likely it is to develop into something more serious.
How to Fix a Creaking Upstairs Bathroom Floor
The right fix depends entirely on what’s causing the creak. Here are the most effective solutions, starting with the simplest.
Tighten the Subfloor from Below
If you have access to the space below your upstairs bathroom — through a basement, crawl space, or an access panel — this is the easiest and most effective fix available.
What you’ll need: Drill, wood screws (1¼ inch), stud finder
How to do it:
- Have someone walk across the bathroom floor above while you watch from below to pinpoint the exact location of the creak
- Identify the nearest floor joist to the creaky spot
- Drive a short screw up through the joist and into the subfloor — but don’t go too deep, or you’ll puncture the finish flooring above
- Test the floor by having the person walk over it again
- Repeat as needed for multiple creak spots
This method works because it closes the gap between the joist and subfloor without disturbing the finish floor at all.
Drive Screws Through the Finished Floor
When there’s no access from below, you’ll need to work from the top down. This works well on hardwood or vinyl plank floors, but is trickier on tile.
What you’ll need: Stud finder, drill, countersink bit, 3-inch wood screws, wood filler
How to do it:
- Use a stud finder to locate the floor joists beneath the creaky area
- Pre-drill and countersink a hole through the finish floor into the subfloor and joist below
- Drive the screw in firmly — pulling the subfloor tight against the joist
- Fill the countersunk hole with matching wood filler and sand smooth once dry
The key here is accuracy — driving a screw into solid joist, not just into the subfloor alone.
Use a Squeak-No-More Kit for Tile Floors
Tile floors can’t be screwed from the top without breaking tiles, and not everyone has access from below. That’s where a Squeak-No-More kit comes in. These kits use a specially designed screw that snaps off just below the surface of the subfloor after being driven in — leaving no visible hole and no damage to the tile above. They’re widely available at home improvement stores and cost around $20–$30.
Apply Construction Adhesive to Floor Joists
If the gap between the subfloor and joist is the problem — and you have access from below — construction adhesive is an excellent solution. Simply apply a bead of subfloor adhesive (like Liquid Nails Heavy Duty) along the top of the joist where it meets the subfloor, then press up firmly. Stack some heavy objects on the floor above to apply pressure while it cures. Once dry, the bond eliminates the flex that causes the creak.
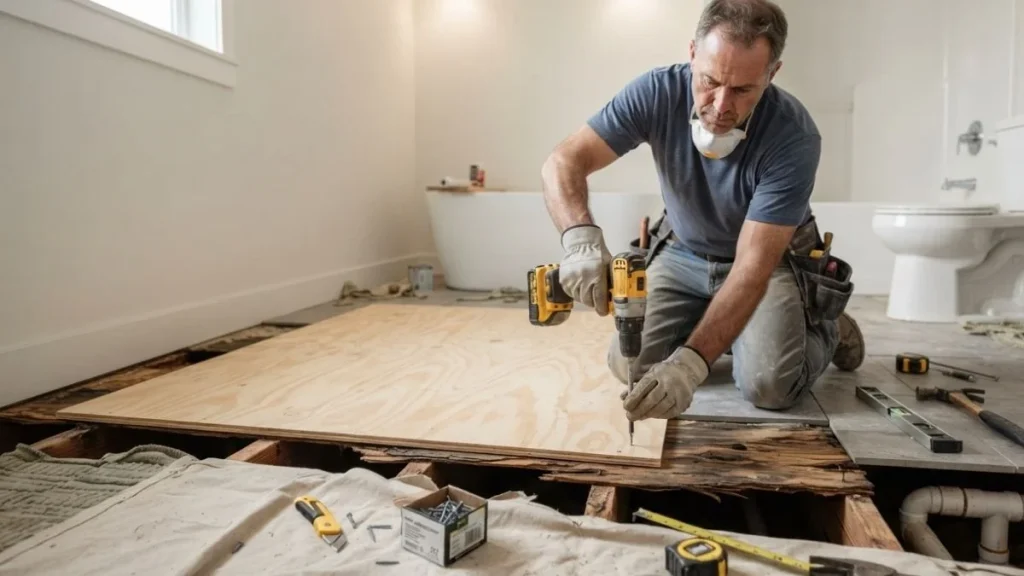
Replace Damaged Subfloor Sections
When moisture damage or rot is involved, no amount of screws or adhesive will solve the problem permanently. You’ll need to cut out the damaged section of subfloor and replace it with a new moisture-resistant panel — ideally AdvanTech or a similar product designed for high-humidity environments.
This job is manageable for experienced DIYers, but most homeowners are better off hiring a flooring contractor for this one. The cost typically ranges from $300 to $800 for a partial subfloor replacement, depending on the size of the damaged area.
Address the Moisture Source First
This cannot be stressed enough — if water damage is contributing to your creaking floor, fix the leak before you fix the floor. Repairing the subfloor while an active leak continues is like bailing out a boat without plugging the hole. Check the toilet base for rocking or seepage, inspect the shower pan for cracks, and look under sinks for dripping pipe connections. When in doubt, call a plumber before calling a flooring contractor.
DIY vs. Hiring a Professional
| Situation | DIY or Pro? |
| Single creak spot, no water damage | DIY |
| Loose fasteners, accessible from below | DIY |
| Tile floor, no basement access | DIY with Squeak-No-More kit |
| Soft or spongy floor feel | Call a Pro |
| Water stains on ceiling below | Call a Pro |
| Multiple widespread creak areas | Call a Pro |
| Suspected joist damage | Call a Pro |
How Much Does It Cost to Fix a Creaking Bathroom Floor?
- DIY repair: $20 – $100 (screws, adhesive, Squeak-No-More kit)
- Professional subfloor repair: $200 – $600
- Full subfloor replacement: $500 – $2,500+
- Joist repair or sistering: $1,000 – $5,000+
How to Prevent Your Upstairs Bathroom Floor from Creaking Again

Fixing the creak is only half the job. Keeping it from coming back requires a little ongoing attention to your bathroom’s moisture levels and structural integrity.
- Always use a bathroom exhaust fan during and after showers to reduce humidity
- Re-caulk around the toilet base, shower pan, and bathtub edges every 1–2 years
- Inspect under-sink plumbing at least once a year for slow drips
- Reseal tile grout annually to prevent water from seeping through to the subfloor
- If you’re doing a bathroom renovation, use moisture-resistant subfloor panels from the start
- Periodically press down on different areas of the floor to check for softness before a creak even develops
Small habits like these can add years to the life of your bathroom floor and save you from costly repairs down the road.
Read Also: How to Fix Uneven Tile Floor
Conclusion
An upstairs bathroom floor creaking is one of those problems that’s easy to put off — but smart homeowners know that early action always saves money. Whether the culprit is a loose screw, a warped subfloor panel, or a slow drip that’s been quietly doing damage for months, there’s almost always a solution that doesn’t require a full bathroom teardown.
Start by identifying where the creak is coming from and whether there are any signs of moisture damage. If it’s minor, a $20 fix from your local hardware store might be all you need. If the floor feels soft or you’re seeing water stains on the ceiling below, bring in a professional before the problem gets worse.
The bottom line: don’t ignore a creaking upstairs bathroom floor. It’s your house telling you something — and the earlier you listen, the better.