


If you’ve ever tripped a breaker in the middle of using your table saw, or if you’re thinking about adding an EV charger to your garage, you already know the problem. Your garage needs more power than a single circuit can handle. That’s exactly where a subpanel comes in.
Running a subpanel to your garage is one of the most practical electrical upgrades a homeowner can make. It gives your garage its own dedicated power source, lets you run multiple circuits at the same time, and keeps your main panel from getting overloaded.
Whether you have an attached garage or a detached one across the yard, this guide walks you through everything you need to know — from planning and costs to the actual installation steps.
What Is a Garage Subpanel and Why Do You Need One?
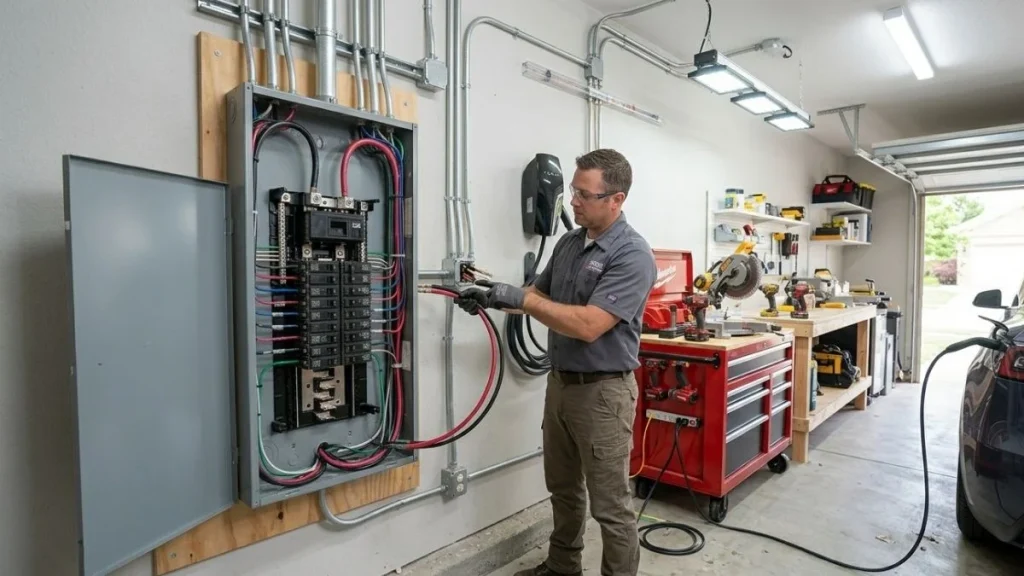
A subpanel, sometimes called a secondary panel or load center, is essentially a smaller version of your home’s main electrical panel. It gets its power from the main panel through a feeder circuit and then distributes that power to multiple branch circuits within your garage.
Think of it this way: your main panel is the hub that receives electricity from the utility company. A subpanel is an extension of that hub, placed closer to where you actually need the power. Instead of running five or six individual circuits from your main panel all the way to your garage, you run one heavy-duty feeder wire to the subpanel and then branch out from there.
So when do you actually need one?
- Your garage breaker keeps tripping when you run power tools
- You’re planning to install an EV charger (typically requires a dedicated 50-amp circuit)
- You want to set up a proper workshop with multiple outlets
- You’re converting your garage into a livable space with lighting, HVAC, and appliances
- You have a detached garage that needs power for multiple uses
If you only need one extra outlet or a single lighting circuit, a standalone circuit from the main panel may be enough. But if you’re thinking bigger — and most homeowners are — a subpanel is the smarter long-term investment.
How Much Does It Cost to Run a Subpanel to a Garage?

Cost is usually the first question homeowners ask, and it’s a fair one. The total price depends on several factors, but here’s a realistic breakdown to help you plan.
Average Cost Breakdown
| Installation Type | Estimated Cost Range |
| DIY (materials only) | $200 – $500 |
| Professional installation (attached garage) | $500 – $1,200 |
| Professional installation (detached garage) | $1,000 – $2,500 |
| Permit fees (varies by location) | $50 – $300 |
What Affects the Final Price?
Distance from the main panel is the biggest cost driver. An attached garage might only be 20–30 feet away, while a detached garage could be 100 feet or more. More distance means more wire, more conduit, and more labor.
Amperage size also matters. A 60-amp subpanel is cheaper to install than a 100-amp one, both in materials and in the size of the feeder wire required. For most garage setups, 100 amps is the sweet spot.
Underground vs. overhead wiring affects cost as well. Underground runs require trenching, which adds labor time and equipment costs. Overhead runs are faster but have clearance requirements and weather considerations.
Permit fees vary widely by municipality. Some areas charge a flat fee, while others base it on the scope of the work. Never skip the permit — we’ll cover why in a moment.
What You Need Before You Start
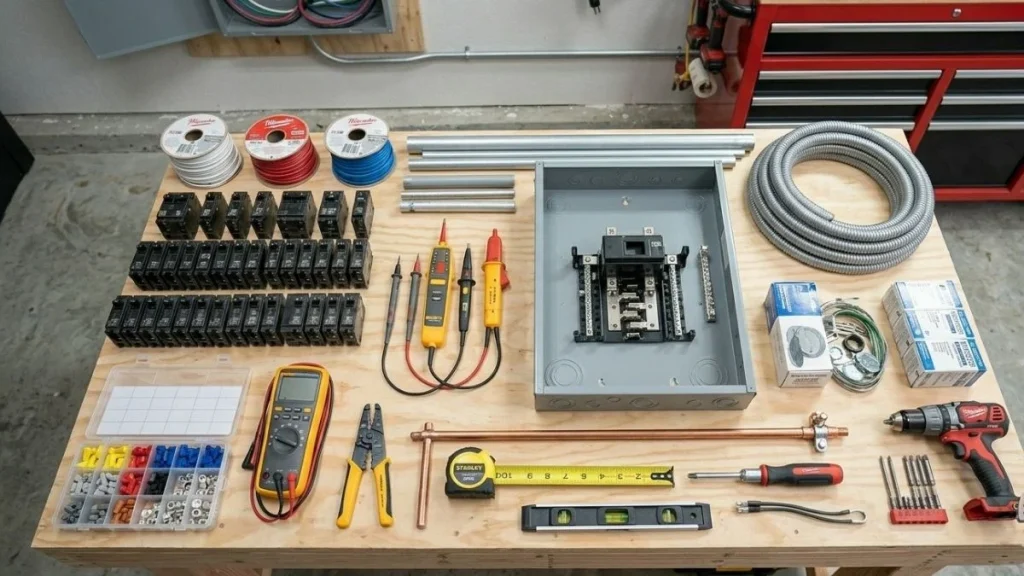
Before you touch a single wire, gather the right tools and materials. Going into this project unprepared is one of the most common reasons DIYers run into trouble.
Tools You’ll Need
- Voltage tester (non-contact type — non-negotiable for safety)
- Multi-meter
- Wire stripper and cutter
- Conduit bender (for EMT conduit)
- Drill with assorted bits
- Fish tape (for running wire through walls)
- Screwdrivers (flathead and Phillips)
- Level and measuring tape
- Shovel or trenching tool (for detached garage underground runs)
Materials and Parts List
- Subpanel box (60-amp or 100-amp, depending on your needs)
- Double-pole breaker for the main panel (sized to match your subpanel amperage)
- Feeder wire (typically 4-wire: two hots, one neutral, one ground)
- Conduit — EMT for interior runs, PVC or rigid metal for underground
- Weatherproof fittings and covers (especially for detached garages)
- Grounding rod and clamp (required for detached garages)
- Individual breakers for branch circuits inside the subpanel
Permits and Code Compliance
Here’s the thing many DIYers try to skip: you need a permit for this work in virtually every jurisdiction in the United States. This isn’t just bureaucratic red tape. There are real reasons it matters.
First, an uninspected electrical installation can void your homeowner’s insurance. If a fire starts in your garage and an inspector discovers unpermitted electrical work, your claim could be denied. Second, when you sell your home, unpermitted work can kill a deal or require expensive retroactive inspections. Third, and most importantly, a licensed inspector will catch mistakes that could cause electrocution or fire.
Pulling a permit is usually straightforward. You visit your local building department, describe the scope of work, pay the fee, and schedule an inspection after the work is complete. In many areas, homeowners are legally allowed to do their own electrical work on their primary residence — but you still need the permit.
How to Run a Subpanel to Your Garage — Step-by-Step
Plan Your Electrical Layout
Start by calculating how much power you actually need. Add up the wattage of everything you plan to run in the garage at the same time — power tools, lighting, EV charger, air compressor, etc. Divide by 240 to get the amperage. Then add 20–25% as a safety buffer and size up to the nearest standard panel size (60, 100, or 200 amps).
Next, map out the wire route from your main panel to where the subpanel will be mounted in the garage. For attached garages, the route is usually through interior walls or the ceiling. For detached garages, you’ll choose between underground burial and an overhead aerial run.
Turn Off Power and Prepare the Main Panel
Before opening your main panel, kill the main breaker. Then use your non-contact voltage tester to verify that the bus bars are de-energized. Note that the service entrance wires at the very top of the panel are ALWAYS live — even with the main breaker off. Do not touch them.
Identify an open double-pole breaker slot and install the appropriate breaker for your feeder circuit. A 100-amp subpanel needs a 100-amp double-pole breaker in the main panel. Route the feeder wires from this breaker through the wall and toward the garage.
Run the Feeder Wire
For an attached garage: Route the feeder wire through interior walls or the ceiling using conduit or cable staples. Follow NEC spacing requirements for staples (every 4.5 feet for NM cable, or as required by conduit type). Keep the wire protected in conduit wherever it passes through unfinished framing or exposed areas.
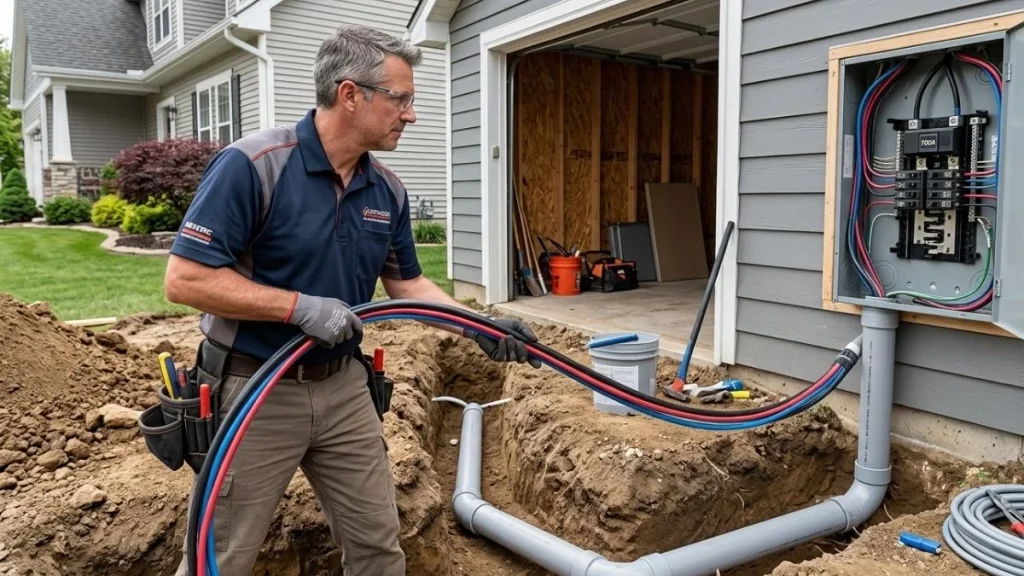
For a detached garage (underground run): The NEC specifies minimum burial depths based on conduit type:
| Conduit Type | Minimum Burial Depth |
| Rigid metal conduit (RMC) | 6 inches |
| PVC conduit (Schedule 80) | 18 inches |
| Direct burial cable (no conduit) | 24 inches |
Dig your trench, lay the conduit, pull the wire through, and backfill. Always mark the run with caution tape a few inches above the conduit before covering it completely.
For a detached garage (overhead run): Overhead wiring must clear at least 10 feet above grade for areas accessible to pedestrians only, and 12 feet above driveways. Use weatherproof service entrance cable rated for outdoor use.
Mount and Wire the Subpanel
Choose a mounting location in the garage that’s easily accessible and protected from moisture and physical damage. Mount the subpanel box securely to a stud or dedicated plywood backing board.
Connect the feeder wires as follows:
- Red and black (hot wires) connect to the main lugs or the main breaker inside the subpanel
- White (neutral wire) connects to the neutral bar
- Bare copper or green (ground wire) connects to the ground bar
Here is the most critical point of the entire installation: in a subpanel, the neutral bar and the ground bar must be kept separate. Unlike your main panel — where neutral and ground are bonded together — in a subpanel they must be on separate bars with no connection between them. Mixing them creates a dangerous condition called a bootleg ground that can cause shocks and equipment damage.
Make sure all connections are torqued to the manufacturer’s specification using a torque screwdriver. Loose connections are a leading cause of electrical fires.
Install the Branch Circuits
With the subpanel energized (not yet — wait until everything is connected), plan your individual circuits. A typical garage subpanel might include:
- Two 20-amp general-purpose outlet circuits
- One 15-amp lighting circuit
- One 50-amp circuit for an EV charger
- One or two dedicated 20-amp circuits for large tools
Per NEC 210.8, all 120-volt garage outlets must be GFCI protected. This can be done with GFCI breakers in the subpanel or GFCI outlets at each location. Label every circuit clearly on the panel directory before you close it up.
Test the System and Schedule Inspection
Before restoring power, do a final visual check of every connection. Make sure all wire terminations are secure, no bare wire is exposed outside of terminals, and the neutral and ground bars are separate.
Restore power to the feeder breaker in the main panel. Use your multi-meter to verify proper voltage at the subpanel — you should see approximately 120 volts between each hot leg and neutral, and 240 volts between the two hot legs.
Then schedule your inspection. The inspector will check wire sizing, burial depth (if applicable), neutral/ground separation, GFCI protection, and panel labeling. If everything is correct, you’ll get a sign-off and your garage upgrade is officially complete.
Common Mistakes to Avoid

Even experienced DIYers make these errors. Knowing them in advance can save you a failed inspection — or worse.
- Bonding neutral and ground in the subpanel — the single most dangerous and most common mistake
- Undersizing the wire for the feeder run — a 100-amp circuit requires minimum 2 AWG copper or 1/0 AWG aluminum for runs up to 100 feet
- Skipping the permit — insurance and resale consequences are real
- Not accounting for voltage drop on long runs — use a voltage drop calculator for any run over 75 feet
- Forgetting a grounding electrode system for detached garages — NEC requires a separate grounding rod at the detached structure
- Overcrowding the conduit — conduit fill limits exist for heat dissipation reasons
When to Call a Licensed Electrician
DIY subpanel installation is within reach for a skilled, safety-conscious homeowner. But there are situations where calling a licensed electrician is the right call.
You should hire a pro if your main panel is already at or near capacity and needs to be upgraded, if your home has aluminum branch wiring from the 1960s or 70s, if the trench for a detached garage requires working around buried utilities or crossing a public right-of-way, or if you’re simply uncomfortable working near energized components. A licensed electrician will typically charge $500–$1,500 for a straightforward garage subpanel installation — money well spent for peace of mind and guaranteed code compliance.
You May Like Also: Garage GFCI Outlet Keeps Tripping After Rain
Conclusion
Running a subpanel to your garage is one of the highest-value electrical upgrades you can make as a homeowner. It gives you the power capacity to run a serious workshop, charge an electric vehicle, heat the space in winter, and handle whatever projects come next — without ever worrying about a tripped breaker again.
The job is doable for a careful, safety-conscious DIYer. But take the time to plan properly, pull the permit, and respect the one rule that matters most: in a subpanel, neutral and ground stay separate. Get that right, and the rest will follow.


