There’s a moment every homeowner dreads — you go to lock your front door and the strike plate shifts under your finger. Maybe the screws spin without catching, or the door just doesn’t latch the way it used to. It feels like a minor annoyance, but here’s the truth: a loose or damaged strike plate is one of the easiest entry points for a break-in.
The wood behind your strike plate takes a beating over the years. Every time your door closes, the latch presses into that small mortised pocket. Add moisture, age, or one too many slammed doors, and that wood starts to fail. The good news is that in most cases, this is a very fixable DIY repair — and you don’t need to replace your entire door frame to get it done right.
What Is a Strike Plate and Why Does the Wood Behind It Matter?

The Role of a Strike Plate in Door Security
A strike plate is the metal plate mounted on the door jamb that receives the latch bolt or deadbolt when the door closes. It looks simple — just a flat piece of metal with a hole in it — but it plays a critical role in keeping your door shut and secure.
When your door is locked, it’s the strike plate (and the wood holding it) that stands between your home and a forced entry attempt. A standard door kick-in test shows that most residential doors fail at the door jamb, not the door itself. That means if the wood behind your strike plate is soft, rotted, or stripped out, even a solid deadbolt gives you false security.
A properly installed strike plate anchored with 3-inch screws into a healthy wood frame can resist several hundred pounds of force. A loose one held by two half-stripped screws? It can give way with a single hard kick.
Why the Wood Behind the Strike Plate Gets Damaged
Wood damage in this area doesn’t happen overnight. It builds up gradually, and by the time you notice the strike plate wiggling, the problem has usually been developing for months or even years.
- Repeated door use compresses and weakens wood fibers around the latch pocket over time
- Moisture infiltration on exterior doors causes the wood to swell, soften, and eventually rot
- Stripped screw holes from over-tightening, cheap short screws, or previous poor repairs
- Forced entry attempts that damage the jamb even if the door held
- Original installation errors like undersized screws or no pilot holes drilled
Signs You Need to Repair the Wood Behind Your Strike Plate
Don’t wait until the plate falls off. Watch for these early warning signs:
- Screws turn freely without tightening
- The strike plate shifts or rattles when you touch it
- Your door doesn’t latch cleanly on the first push
- You can see soft, discolored, or spongy wood around the plate
- A visible gap is forming between the plate and the door frame
Tools and Materials You’ll Need
Having the right supplies before you start saves you a mid-repair trip to the hardware store. What you need depends on how severe the damage is.
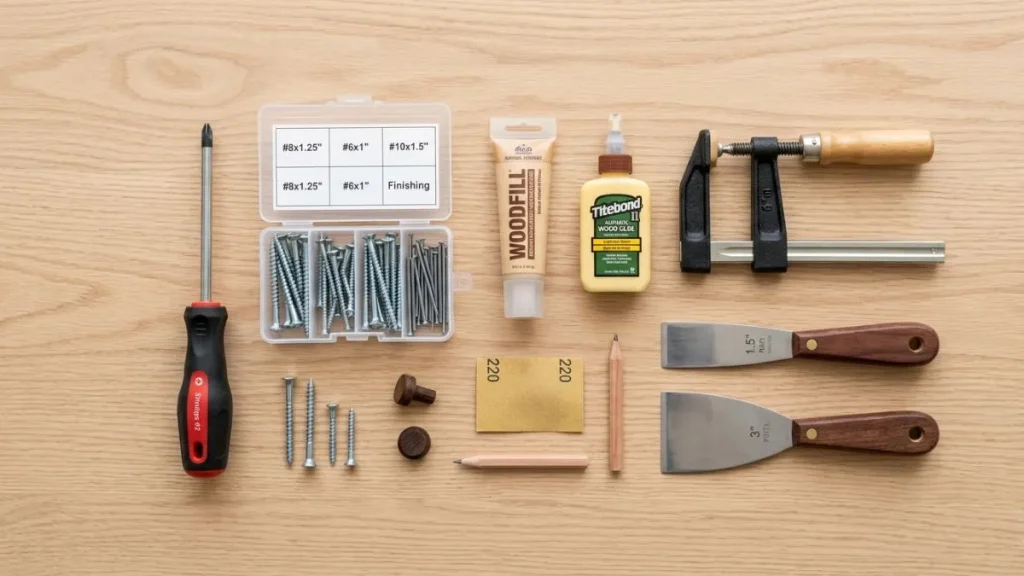
| Item | Purpose |
| Flathead & Phillips screwdriver | Removing and reinstalling the strike plate |
| Drill with bits | Boring out stripped holes or dowel holes |
| Chisel and mallet | Re-mortising after filling |
| Utility knife | Trimming and shaping filler |
| Sandpaper (medium/fine) | Smoothing repaired surfaces |
| Wood glue + toothpicks/matchsticks | Minor stripped hole repair |
| Two-part epoxy wood filler | Moderate to severe damage repair |
| Wood hardener | Stabilizing soft or rotted wood fibers |
| Wooden dowels | Stronger stripped hole repair |
| 3-inch security screws | Anchoring plate into wall stud |
| Heavy-duty strike plate | Security upgrade during reinstallation |
How to Assess the Damage Before You Start
Before you reach for any filler or drill, take five minutes to properly assess what you’re dealing with. The repair method that works for stripped screw holes will not work for rotted wood — and skipping this step leads to a repair that fails again in six months.
Remove the strike plate completely. Set the screws aside and take a close look at the wood underneath. Press on it with your thumb. Is it firm, or does it give? Check the screw holes — are they clean and tight, or have they been wallowed out? Look at the edges of the mortise (the recessed pocket the plate sits in). Are they crisp or crumbling?
Minor damage means the wood is structurally sound but the screw holes have lost their grip. The wood looks normal, maybe slightly compressed, but it’s not soft.
Moderate damage means the wood around the mortise is cracked, dented, or compressed to the point where the plate no longer sits flush. Screws may partially grip but not fully tighten.
Severe damage means the wood is soft, spongy, discolored, or crumbling when pressed. This is rot, and it needs to be treated differently from stripped holes.
Getting this assessment right is what separates a lasting repair from a temporary fix.
How to Repair Stripped Screw Holes (Minor Fix)
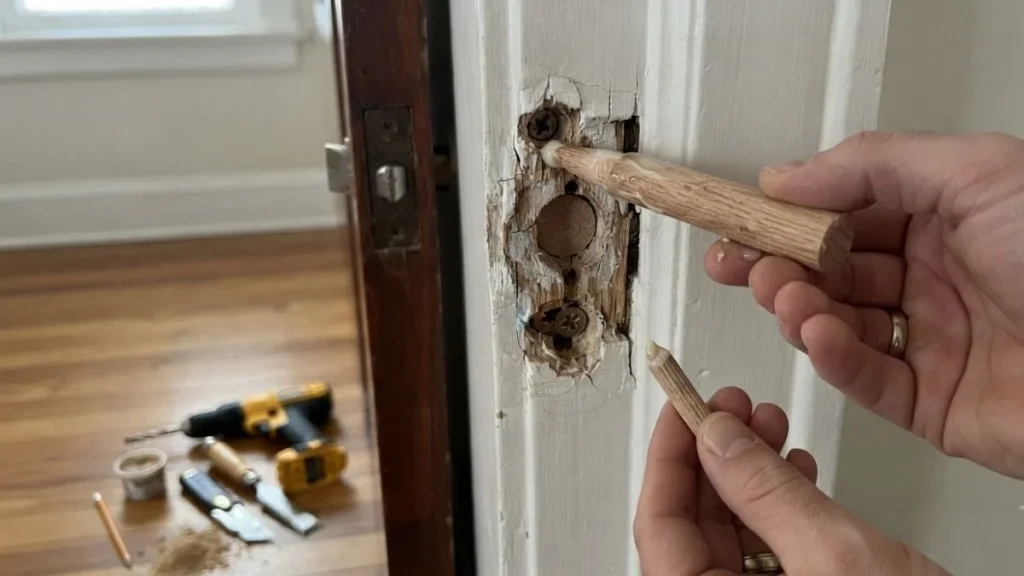
This is the most common repair, and fortunately, it’s also the easiest. When the wood itself is healthy but the screw holes are stripped out, you just need to rebuild the material inside those holes so the screws can grip again.
The Toothpick and Wood Glue Method
This old-school trick works surprisingly well for lightly stripped holes and takes less than 30 minutes from start to finish.
- Remove the strike plate and set it aside
- Coat 4–6 wooden toothpicks or matchsticks with wood glue
- Pack them tightly into the stripped screw hole
- Let the glue cure fully — at least 1 hour, ideally overnight
- Trim the excess wood flush with a utility knife or chisel
- Reinstall the strike plate using the original screws
The toothpicks compress inside the hole and the glue bonds them into a solid mass that gives the screw threads something to bite into again.
The Wooden Dowel Method (More Durable)
For holes that are more significantly stripped, a wooden dowel gives you a more reliable repair.
- Use a drill bit that matches your dowel diameter to clean out the stripped hole
- Cut a dowel to the depth of the hole, coat it with wood glue
- Tap it in with a mallet and let it cure completely
- Cut the dowel flush with a chisel or handsaw
- Drill a new pilot hole through the center of the dowel
- Reinstall the strike plate — the screw will grip the fresh wood
Pro tips:
- Never reinstall screws before the adhesive has fully cured — it’s the most common reason this repair fails
- Use screws that are slightly longer than the originals if the holes feel borderline
- Don’t overtighten. Snug is enough — cranking down strips it again immediately
How to Repair Moderate Wood Damage
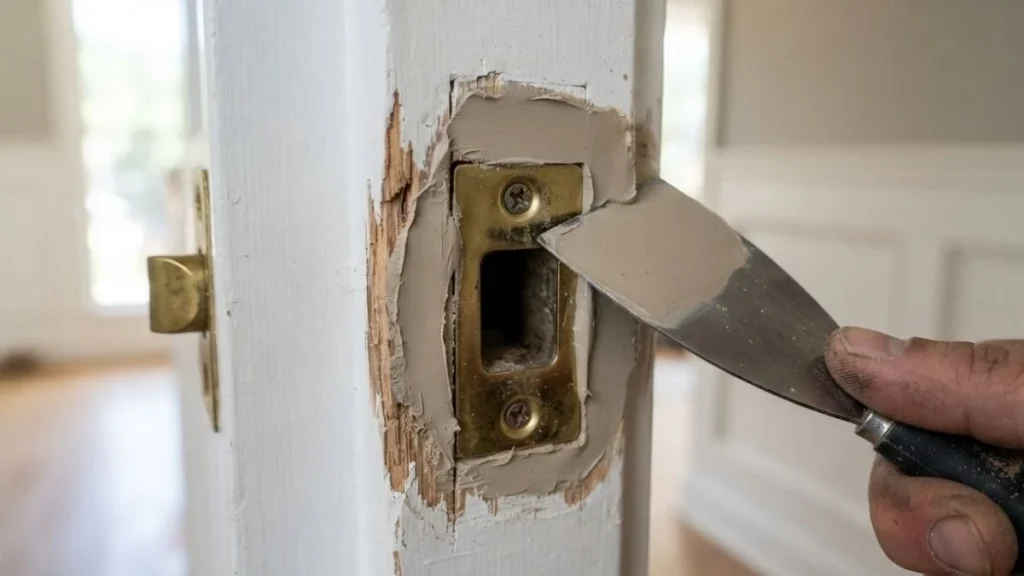
When the wood around the strike plate area is cracked, dented, or compressed but not rotted, two-part epoxy wood filler is your best friend. It bonds directly to wood, hardens to a consistency that holds screws well, and can be shaped and painted to blend seamlessly with your door frame.
Apply Wood Hardener First
If the wood feels even slightly soft or spongy, brush on a wood hardener before applying any filler. Wood hardener soaks into damaged wood fibers and consolidates them into a stable base. Without this step, your filler may not bond properly.
Apply it generously with a disposable brush, let it soak in for 15–20 minutes, and allow it to cure per the manufacturer’s instructions — usually 2 to 4 hours.
Mix and Apply Epoxy Wood Filler
Two-part epoxy fillers (like Minwax High Performance Wood Filler or PC-Woody) come in two components that you mix together to activate. Work quickly once mixed — you typically have 20–30 minutes of working time.
- Mix the two parts thoroughly on a disposable surface
- Pack the filler firmly into the damaged area, slightly overfilling
- Shape it roughly to match the surrounding wood profile
- Let it cure fully — usually 1 to 4 hours depending on the product
Re-Mortise and Reinstall
Once cured, epoxy filler is hard enough to chisel. Use a sharp chisel to carefully re-cut the mortise so the strike plate sits flush again. Test the plate fit before drilling any screw holes. When everything lines up, drill fresh pilot holes and reinstall with 3-inch screws for the best hold.
How to Repair Severely Rotted Wood
Severe rot is a different situation entirely. You can’t just fill over rotted wood — the rot needs to come out completely before any repair material goes in. If you apply filler over soft, compromised wood, the whole repair will eventually fail.
Assessing Whether It’s a DIY Job
You can handle this yourself if the rot is contained to the immediate strike plate area — roughly a 6-inch section of the door jamb. If the soft wood extends further up or down the frame, or if you find rot inside the wall cavity, that’s a job for a carpenter or contractor.
Cutting Out the Damaged Section
- Use a utility knife and chisel to cut away all soft, rotted wood — be thorough, don’t leave any questionable material behind
- Treat the exposed healthy wood with wood preservative and let it dry completely
- Cut a replacement block of matching wood (pine or the same species as your jamb) to fit the void
- Glue and fasten the replacement block securely — use construction adhesive and finish nails or screws
- Fill any remaining gaps with two-part epoxy
- Sand smooth, prime, and paint to protect from future moisture
Preventing the Rot From Coming Back
Rot on an exterior door frame almost always has a moisture source. Fix the cause, not just the symptom.
- Inspect and replace worn weatherstripping around the door
- Recaulk any gaps where the frame meets the siding
- Make sure the area above the door has adequate overhang
- Paint or seal all bare wood surfaces on exterior frames annually
How to Reinstall the Strike Plate for Maximum Security
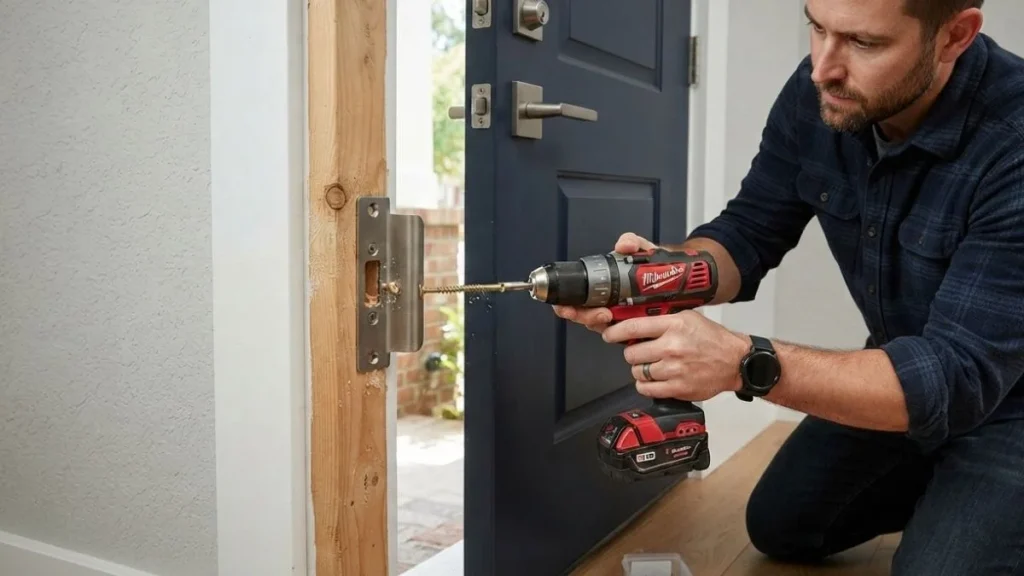
The repair is only as good as the reinstallation. This is where most homeowners leave security points on the table by going back to the same short screws and standard hardware they had before.
Upgrade to a Heavy-Duty Strike Plate
Standard strike plates are typically held by ¾-inch screws that only grip the door jamb — not the wall stud behind it. A reinforced strike plate or strike box costs $15–$30 and makes a significant difference in kick-in resistance.
Look for plates that offer:
- Four or more screw holes (more contact points)
- A box design that wraps around the latch bolt
- ANSI Grade 1 rating for residential security
Always Use 3-Inch Screws
This single upgrade is the most impactful thing you can do for door security. Three-inch screws pass through the door jamb and embed into the structural wall stud behind it — giving you a connection that’s dramatically stronger than the jamb wood alone. Replace all strike plate screws with 3-inch #8 or #10 wood screws every time.
Align the Strike Plate Correctly
Before final installation, confirm the latch bolt lines up with the strike plate opening. Close the door slowly and watch where the latch hits. If it’s catching the edge of the plate rather than entering cleanly, adjust the mortise position slightly with a chisel before screwing in permanently.
Once installed, test the repair by closing and latching the door firmly several times. Give the door a firm push from the inside — the latch and plate should hold without any flex or movement at the jamb.
Preventing Wood Damage Behind the Strike Plate in the Future
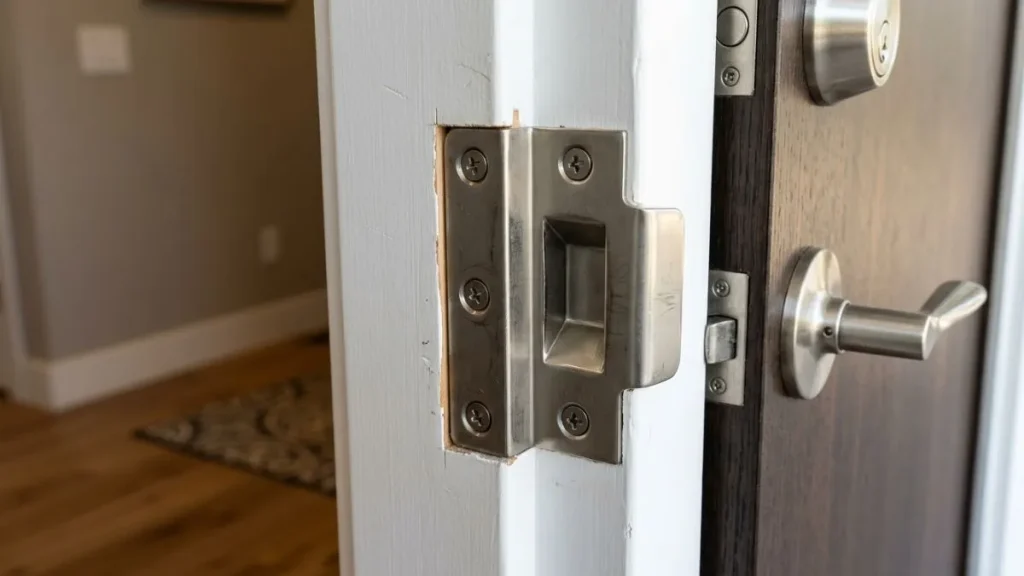
A little maintenance goes a long way in keeping your door frame healthy for years to come.
- Check and tighten all door hardware screws once a year — it takes five minutes and catches problems before they worsen
- Lubricate the latch mechanism with a dry lubricant or graphite spray annually so it engages smoothly without extra force
- Inspect exterior frames for moisture every spring — catch soft spots early before rot sets in
- Keep paint and sealant in good condition on all wood door frame surfaces
- Replace worn weatherstripping to prevent water from sitting against the frame
You Should Read Also: Rotted Roof Rafter Repair
Conclusion
A damaged strike plate might seem like a small problem, but it’s one that quietly undermines your home’s security every single day. The good news is that whether you’re dealing with a couple of stripped screw holes or a section of rotted door jamb, this is a repair that most homeowners can handle on a weekend afternoon with basic tools and the right materials.
Diagnose the damage honestly, choose the right repair method, and take the extra step of reinstalling with 3-inch screws and a heavy-duty strike plate. You’ll end up with a door that’s more secure than it was before the problem started — and the peace of mind that comes with knowing your entry points are solid.
Check your other exterior doors too. If one strike plate has given you trouble, the others may not be far behind.