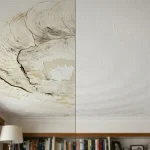
Is your roof starting to show signs of damage? If you’ve noticed sagging or water stains, your roof rafters might be rotting.
Ignoring this problem can lead to costly repairs and even dangerous structural issues. But don’t worry—fixing rotted roof rafters is possible, and you can take steps to protect your home right now. You’ll learn how to spot the signs, understand the repair process, and discover practical tips to keep your roof strong for years to come.
Signs Of Rotted Rafters
Rotted roof rafters can cause serious damage to your home’s structure. Early detection of rotted rafters helps prevent costly repairs and safety risks. Recognizing the signs of rotted rafters is essential to maintain a strong, safe roof. These signs often appear as visible damage, structural issues, or water-related problems like leaks and mold. Identifying these symptoms early can save your home from further decay.
Visible Damage
Visible damage is often the first clue that rafters may be rotting. Look for:
- Cracks and Splits: Wood that shows cracks or splits may be weakened by rot.
- Discoloration: Dark spots or stains on rafters usually indicate moisture damage.
- Soft or Spongy Wood: Press the wood gently; if it feels soft or crumbles easily, it is likely rotting.
- Wood Warping: Rafters that twist or bend out of shape show signs of decay.
Sometimes, these damages appear near roof joints or where water collects. Inspect attic spaces or exposed rafters under the roof for these signs. Use a flashlight and a small tool like a screwdriver to test wood firmness. If the tool sinks easily, that part of the rafter is rotted.
Structural Issues
Rotted rafters weaken the roof’s structure and can cause serious problems. Watch for these signs:
- Sagging Roof: A roof that dips or sags indicates weak rafters.
- Uneven Roofline: Rafters losing strength may cause a crooked or uneven roof shape.
- Cracked Ceiling or Walls: Stress from weakened rafters can cause cracks inside your home.
- Loose or Missing Shingles: Damaged rafters may fail to hold roofing materials properly.
Structural damage often worsens over time. This affects the home’s safety and can lead to roof collapse if ignored. Regular inspections are vital. A professional can measure rafter strength and look for hidden damage. Simple tests include tapping rafters to hear hollow sounds, which suggest internal rot.
Water Leaks And Mold
Water is the main cause of rafter rot. Signs of leaks and mold should never be ignored. Check for:
- Water Stains: Brown or yellow marks on ceilings or rafters signal leaks.
- Dripping Water: Actual water leaks inside the attic or ceiling are clear warning signs.
- Mold Growth: Black, green, or white mold patches on wood or insulation mean moisture is present.
- Damp or Musty Smells: Persistent odors often mean hidden moisture and mold.
Leaks allow water to enter wood, causing decay over time. Mold not only damages wood but can harm your health. Fix leaks quickly and dry affected areas to prevent further rot. Use a moisture meter to detect hidden wet spots inside rafters or attic walls.
Causes Of Rafter Rot

Rotted roof rafters can cause serious damage to a home’s structure. Understanding the causes of rafter rot helps prevent costly repairs. Rot happens when wood stays wet for long periods, making it weak and unsafe. Several factors contribute to this problem. Identifying these factors early protects the roof and the entire building.
Moisture Exposure
Moisture is the main cause of rafter rot. Wood rots when it absorbs water and stays damp for days or weeks. This dampness allows fungi to grow, breaking down the wood fibers.
Common sources of moisture include:
- Leaking roofs: Damaged or missing shingles let rainwater seep into rafters.
- Ice dams: Ice buildup traps water on the roof, causing leaks.
- Condensation: Warm air inside the attic meets cold surfaces, creating water droplets.
- Plumbing leaks: Pipes running through or near the roof can leak and wet rafters.
Constant moisture leads to soft, spongy wood that loses strength. Early signs include discoloration, musty smells, and small cracks. Ignoring these signs causes rot to spread.
Poor Ventilation
Ventilation plays a key role in preventing rafter rot. Attics with poor airflow trap heat and moisture. This creates a damp environment where fungi thrive.
Signs of poor ventilation include:
- Warm, stuffy attic space.
- Visible mold or mildew on wood.
- Condensation on attic surfaces.
- Faded or damaged insulation.
Without proper ventilation, moisture cannot escape. This causes wood to stay wet and soft. Rafters lose their strength over time, increasing the risk of collapse.
Ways to improve attic ventilation:
- Install ridge vents along the roof peak.
- Add soffit vents under the eaves.
- Use attic fans to circulate air.
- Keep vents clear of insulation or debris.
Good airflow dries out wood and reduces rot risk. It also lowers energy costs by keeping the attic cooler in summer.
Inadequate Roofing Materials
Choosing the right roofing materials helps prevent rafter rot. Low-quality or damaged materials allow water to enter and stay trapped inside.
Common problems with roofing materials:
- Poor-quality shingles: They crack or curl, letting water inside.
- Improper flashing: Gaps around chimneys and vents cause leaks.
- Thin underlayment: Fails to stop water seepage under shingles.
- Old or worn materials: Lose their protective qualities over time.
Table below shows roofing materials and their impact on rafter health:
| Material | Durability | Water Resistance | Effect on Rafters |
| Asphalt Shingles | Moderate (15-30 years) | Good when new | Protects rafters if well maintained |
| Wood Shingles | Lower (10-20 years) | Poor if not treated | Can trap moisture and cause rot |
| Metal Roofing | High (40+ years) | Excellent | Prevents water damage effectively |
| Clay Tiles | High (50+ years) | Very good | Protects rafters well but heavy |
Using high-quality materials and fixing damage quickly helps keep rafters dry and strong. Poor choices increase moisture risks and lead to rot.
Inspection Techniques
Inspecting rotted roof rafters is crucial before any repair work begins. Proper inspection techniques reveal the damage’s location and size. This step helps prevent further issues and ensures a safe roof structure. Careful and detailed inspection saves money and time in repairs. It also protects your home from leaks and collapse.
Safety Precautions
Safety is the top priority during roof rafter inspections. Working on roofs or in attics has risks such as falls, electric shocks, and exposure to harmful materials.
- Wear protective gear: gloves, safety goggles, and a hard hat.
- Use a sturdy ladder: place it on even ground and secure it well.
- Check the weather: avoid inspections during rain, wind, or snow.
- Use fall protection: harnesses or guardrails when working at height.
- Turn off electricity: if inspecting near wiring or light fixtures.
- Work with a partner: for help and emergency support.
Inspecting rotted rafters often requires entering tight spaces. Ensure good ventilation to avoid breathing dust or mold spores.
Tools For Assessment
Using the right tools makes inspecting rotted rafters easier and more accurate. Each tool helps check different signs of damage.
- Flashlight: illuminates dark attic or roof spaces.
- Moisture meter: detects dampness inside wood that is not visible.
- Hammer or screwdriver: probes wood to check for softness or rot.
- Binoculars: helps inspect hard-to-reach areas from the ground.
- Camera or smartphone: takes pictures for closer analysis or expert advice.
- Measuring tape: measures the size of damaged areas for repair planning.
Each tool plays a key role in spotting damage early. For example, a moisture meter can find hidden water problems before wood softens visibly. Probing tools reveal weak spots by pressing or tapping wood surfaces. Binoculars allow safe inspection of high rafters without climbing.
Identifying Extent Of Damage
Knowing how much damage rotted rafters have helps plan repairs correctly. Look for these signs during inspection:
- Visible decay: dark spots, cracks, or crumbling wood.
- Soft spots: wood that dents easily when pressed.
- Sagging rafters: uneven or bowed roof lines.
- Water stains: discoloration or mold near rafter joints.
- Wood odor: musty or damp smells inside attic.
Use probing tools to test suspect areas. Mark damaged spots to check their size. Measure the length and width of rotted sections for repair estimates.
Damage can be surface-level or deep inside the wood. Surface rot needs sanding and treatment. Deep rot often requires cutting out and replacing parts.
Repair Options

Rotted roof rafters need prompt attention to keep your roof strong and safe. Choosing the right repair option depends on the damage’s extent and your budget. Several methods exist to fix rotted rafters, each with its benefits and challenges. Understanding these options helps you pick the best solution for your home.
Sistering Rafters
Sistering rafters is a common repair method. It involves attaching a new rafter alongside the damaged one. This process strengthens the original structure without full replacement.
The steps include:
- Removing any loose or rotted wood from the damaged rafter.
- Cutting a new piece of wood to match the length and size of the existing rafter.
- Securing the new rafter tightly against the old one using nails or screws.
- Adding metal plates or brackets for extra support.
This method works well when the rot is limited and the original rafter still carries some load. Sistering is usually faster and less expensive than full replacement. It also keeps the roof shape intact.
| Pros | Cons |
| Less costly than replacement | Not suitable for severe rot |
| Maintains roof alignment | May require professional skill |
| Strengthens existing rafter | New wood must match old wood size |
Sistering rafters is ideal for moderate damage. It preserves most of the original wood and restores strength quickly.
Rafter Replacement
Rafter replacement is necessary when rot is severe or widespread. This method removes the damaged rafter completely and installs a new one.
Steps for replacement include:
- Carefully removing the old, rotted rafter.
- Measuring and cutting a new rafter to the exact size.
- Installing the new rafter in place with nails or screws.
- Ensuring proper alignment with the rest of the roof structure.
- Adding any metal connectors or braces as needed.
This repair option is more expensive and takes longer than sistering. It ensures the entire damaged wood is gone. The new rafter will be strong and safe for years.
Consider rafter replacement if:
- More than 50% of the rafter is rotted.
- The rot has weakened the roof’s stability.
- Previous repairs failed or the damage spreads.
Rafter replacement offers a permanent fix. It restores the roof’s full strength and prevents future problems from the same spot.
Epoxy And Wood Consolidants
Epoxy and wood consolidants repair small areas of rot without full wood removal. These products harden the damaged wood and fill gaps.
How they work:
- Wood consolidants soak into soft wood, strengthening it internally.
- Epoxy fillers fill holes or cracks after consolidants dry.
- Both create a hard surface that resists moisture and decay.
This method suits minor rot or when preservation of original wood is desired. It stops further damage and extends the rafter’s life.
Steps for using epoxy and consolidants:
- Remove loose, crumbly wood carefully.
- Apply wood consolidant to the affected area.
- Let it dry completely, following product instructions.
- Fill cracks or holes with epoxy filler.
- Sand smooth and paint or seal for protection.
This approach is cost-effective and less invasive. It requires careful surface preparation and proper curing time.
| Advantages | Limitations |
| Preserves original wood | Not for large or deep rot |
| Quick application | Needs skill for proper use |
| Prevents further decay | Surface must be clean and dry |
Epoxy and wood consolidants are best for small repairs and preventive care. They save wood and maintain roof integrity without major construction.
Step-by-step Repair Process
Repairing rotted roof rafters requires careful steps to restore your roof’s strength and safety. The step-by-step repair process guides you through removing damaged wood, preparing the area, installing new rafters, and securing the repair. This method ensures a long-lasting fix and prevents future damage.

Removing Damaged Wood
Start by identifying all the rotted sections of the rafters. Use a flashlight and probe to check the wood’s condition thoroughly. Soft, crumbly, or darkened wood indicates rot. Remove any damaged wood carefully to avoid harming the surrounding structure.
- Wear safety gear: gloves, goggles, and a dust mask.
- Use a pry bar and saw to cut out rotted parts.
- Dispose of old wood properly to prevent mold spread.
Check the wood’s extent with a screwdriver or awl. Push gently to detect weak spots. Remove all affected wood until only solid, healthy rafters remain. This step is crucial. Leaving any rot behind can cause problems later.
| Tool | Purpose |
| Pry Bar | Remove damaged wood pieces |
| Hand Saw | Cut through rotted sections cleanly |
| Flashlight | Inspect dark roof spaces |
Preparing The Area
After removing damaged wood, prepare the space for new rafters. Clear debris and dust thoroughly. This ensures better adhesion and a clean working area.
Check the surrounding wood for signs of moisture or mold. Treat any problem areas with a wood preservative to stop further rot. Let the preservative dry completely before continuing.
- Remove nails, screws, and old fasteners.
- Sand rough edges to smooth the surfaces.
- Measure the space precisely for new wood.
Proper preparation improves the fit and strength of new rafters. It reduces the risk of future damage and keeps the roof structure solid.
Installing New Rafters
Use quality, treated lumber for new rafters. Measure and cut the wood to match the removed sections exactly. Accurate cuts help maintain the roof’s shape and support.
- Lift the new rafter into place carefully.
- Align it with existing rafters and roof framing.
- Check the fit before securing it fully.
Fasten the new rafters with galvanized nails or screws. These resist rust and provide strong holding power. Use metal brackets or joist hangers for extra support if needed.
Keep the following points in mind:
- Maintain consistent spacing between rafters.
- Ensure rafters are level and flush.
- Double-check measurements before cutting.
Securing And Sealing
After installing new rafters, secure all connections tightly. Use a hammer or drill to drive nails or screws fully. Check for any loose parts and tighten them.
Seal joints and edges to protect against water and moisture. Apply a waterproof sealant or roofing tar along seams and fasteners. This prevents leaks and future rot.
Steps for sealing:
- Clean surfaces to remove dust or oil.
- Apply sealant evenly with a brush or caulking gun.
- Allow the sealant to dry as per the product instructions.
Finally, inspect the entire repair for gaps or weak spots. Add extra sealant or fasteners as needed. Proper sealing extends the life of your roof and keeps your home safe.
Preventing Future Rot
Rotted roof rafters cause serious damage to a home’s structure. Preventing future rot is essential after repairing these damaged rafters. Taking steps to stop moisture and decay from returning protects your roof and saves money on costly repairs. Simple changes can keep your roof dry and strong for years.
Improving Roof Ventilation
Good roof ventilation helps remove moisture that causes wood rot. Proper airflow keeps rafters dry and reduces the chance of mold growth. Without ventilation, warm air gets trapped, creating condensation on wood surfaces. This moisture leads to rot and weakens the rafters.
Here are ways to improve roof ventilation:
- Install ridge vents: These run along the roof peak and let hot air escape.
- Add soffit vents: Located under the eaves, they allow fresh air in.
- Use gable vents: Placed on the side walls, they improve cross ventilation.
- Ensure vents are not blocked: Clear debris, insulation, or old materials.
- Check attic fans: Use powered fans for extra airflow if needed.
Regular Maintenance
Keeping your roof in good shape prevents rotted rafters. Regular checks catch problems early before they worsen. Schedule roof inspections at least twice a year, especially after storms or heavy rain.
Key maintenance tips include:
- Inspect shingles: Replace missing or damaged shingles to stop water leaks.
- Clear gutters: Remove leaves and debris to avoid water overflow.
- Check flashing: Seal cracks around chimneys and vents to prevent leaks.
- Look inside the attic: Watch for damp spots, mold, or wood discoloration.
- Trim nearby trees: Avoid branches rubbing on the roof or blocking sunlight.
Using Treated Lumber
Treated lumber resists moisture and fungi better than regular wood. Using it for roof rafters helps prevent rot from starting again. Chemicals in treated wood protect it against insects and decay.
Benefits of treated lumber include:
- Longer lifespan: Lasts many years in damp conditions.
- Stronger protection: Stops fungi and insects from damaging wood.
- Cost-effective: Saves money over time by reducing repairs.
- Easy to work with: Cuts and nails like regular wood.
Types of treated lumber commonly used for rafters:
| Type | Treatment | Best Use |
| ACQ (Alkaline Copper Quaternary) | Copper-based preservative | Exterior framing and rafters |
| CCA (Chromated Copper Arsenate) | Strong wood preservative | Heavy-duty outdoor use |
| CA (Copper Azole) | Copper and azole chemicals | Residential roof framing |
Using treated lumber reduces the risk of future rot. It provides peace of mind for a stronger roof.
Cost Considerations
Repairing rotted roof rafters involves various cost factors that impact your budget. The main costs come from materials, labor, and the choice between DIY and professional services. Considering long-term savings also makes a big difference in overall value.
Materials And Labor
The cost of materials depends on the type and quality of wood and other supplies. Common materials include treated lumber, plywood, wood preservatives, and metal brackets. Prices vary based on quality and local availability.
- Treated lumber: Resists decay, costs more than regular wood.
- Wood preservatives: Extend the life of existing rafters.
- Fasteners and brackets: Provide extra strength and stability.
Labor costs form a significant part of the total expense. Skilled carpenters charge hourly or per project. Rates vary by region but usually range between $50 and $100 per hour.
| Cost Factor | Estimated Price Range | Notes |
| Treated Lumber (per board foot) | $2 – $5 | Depends on wood type and grade |
| Wood Preservative (per gallon) | $15 – $30 | Protects wood against rot |
| Labor (per hour) | $50 – $100 | Skilled carpenter rates vary by location |
Overall, expect material costs to range from $100 to $500 depending on damage size. Labor may add $300 to $1,000 or more. Clear budgeting avoids surprises.
DIY Vs Professional Repair
Choosing between DIY and professional repair affects both cost and quality. DIY reduces labor expenses but requires time, skill, and tools. Mistakes can worsen damage and increase future costs.
Benefits of DIY:
- Save money on labor charges
- Learn valuable home repair skills
- Control project timing
Drawbacks of DIY:
- Requires carpentry knowledge
- Needs special tools and safety gear
- Risk of incomplete or unsafe repairs
Professional repair offers:
- Expert assessment and precise work
- Proper tools and safety equipment
- Warranty or guarantee on repairs
Costs for professional services vary. Some charge a flat fee, others hourly. Always get multiple quotes and check references.
In summary, DIY suits small repairs and handy homeowners. Larger or complex rotted rafters need a professional to ensure safety and durability.
Long-term Savings
Investing correctly in rafter repair saves money over time. Proper repairs prevent further rot, structural damage, and costly roof replacements.
Key long-term benefits include:
- Extended roof lifespan: Sturdy rafters support the roof longer.
- Energy efficiency: Sealed repairs reduce drafts and heat loss.
- Increased home value: Maintained roofs boost property appeal.
- Lower insurance costs: Less risk of damage claims.
Neglecting repairs leads to problems such as:
- Water leaks causing interior damage
- Higher energy bills due to poor insulation
- Costly emergency repairs or full rafter replacement
Spending more upfront on quality materials and labor often cuts down future expenses. This approach avoids repeated repairs and preserves home safety.
Conclusion
Rotted roof rafters can cause serious damage if left untreated. Repairing them early saves money and keeps your home safe. Use proper tools and materials for a strong fix. Regular roof checks help spot problems fast. Don’t wait for leaks or sagging to appear.
Taking action now protects your house from bigger issues. Simple repairs today prevent costly replacements later. Keep your roof sturdy and your home dry. Stay safe and comfortable with a well-maintained roof.