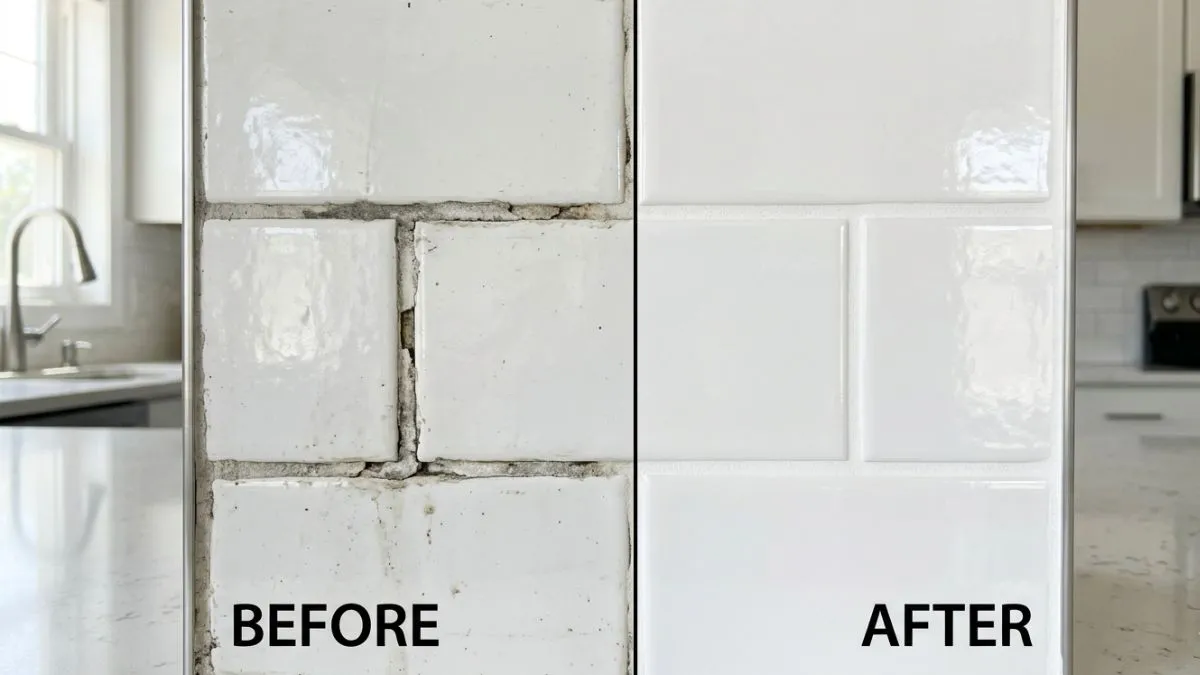
Is your kitchen backsplash looking worn out or cracked? Damaged grout doesn’t just make your kitchen look untidy—it can also lead to bigger problems like mold and water damage.
But don’t worry, fixing grout is easier than you think. You’ll discover simple, step-by-step tips to repair your kitchen backsplash grout quickly and effectively. Keep reading to bring back the fresh, clean look your kitchen deserves—and protect your home at the same time.
Assessing Grout Damage
Repairing grout on a kitchen backsplash starts with a clear assessment of the grout’s condition. Grout holds tiles in place and prevents water from seeping behind them. Over time, grout can crack, crumble, or become discolored.
These issues not only affect the look of the backsplash but can also lead to more serious damage. Assessing grout damage carefully helps decide the right action. It saves time and money by targeting the real problem early. Proper inspection prevents small issues from turning into costly repairs.
Identifying Cracks And Gaps
Cracks and gaps in grout show signs of wear and aging. These breaks let water seep behind tiles, causing damage. Look closely along the grout lines for tiny hairline cracks or larger breaks. Gaps can appear where grout has fallen out or worn away.
- Use a flashlight to see cracks clearly, especially in dim kitchens.
- Run your finger over grout lines to feel for rough or missing spots.
- Check edges where tiles meet counters or walls—these spots often crack first.
Below is a simple guide to classify cracks and gaps:
| Type | Description | Impact |
| Hairline Cracks | Very thin, barely visible cracks | Low risk but can grow if ignored |
| Wide Cracks | Cracks wider than 1/16 inch | Allows water penetration and tile loosening |
| Gaps | Missing grout pieces | High risk of water damage and mold |
Spotting these issues early prevents costly repairs. Fix small cracks quickly. Replace grout in wide cracks or gaps.
Checking For Mold And Mildew
Mold and mildew grow in damp, poorly sealed grout. They cause dark stains and a bad smell. Mold can harm health and damage grout further.
Look for:
- Discolored grout: Gray, black, or green patches.
- Musty smell: A sign of hidden mold behind tiles.
- Soft or crumbly grout: Mold weakens grout’s structure.
Testing for mold is easy. Use a mixture of water and bleach (1:1 ratio). Apply with a spray bottle on grout. Wait 10 minutes and wipe. If stains fade, it is mold.
Prevent mold growth by ensuring good kitchen ventilation. Wipe down backsplash regularly to keep it dry.
Determining Repair Or Replacement
Deciding between grout repair or full replacement depends on damage severity. Minor cracks and mold spots can often be repaired. Large gaps, crumbling grout, or widespread mold require replacement.
Consider these points:
- Extent of damage: Small cracks are repairable; extensive damage is not.
- Location: High moisture areas may need replacement for better protection.
- Age of grout: Older grout might be brittle and better replaced.
Use the table below to guide the decision:
| Condition | Recommended Action |
| Hairline cracks without mold | Spot repair with grout filler |
| Gaps or crumbling grout | Remove old grout and re-grout |
| Widespread mold and discoloration | Replace grout completely after cleaning |
Choosing the right action ensures grout lasts longer and protects tiles. Repair saves time and money. Replacement guarantees a fresh, durable backsplash surface.
Removing Old Grout
Removing old grout from a kitchen backsplash is the first step in repairing and refreshing your space. Old grout can crack, crumble, or discolor over time, making your backsplash look worn out. Taking out the damaged grout carefully helps prepare the area for new grout. This process improves the appearance and prevents water damage behind tiles.

It also ensures the new grout sticks well and lasts longer. Proper grout removal requires patience and the right tools to avoid damaging your tiles. Below are methods and tips to remove grout safely and clean the area for the next steps.
Manual Removal Techniques
Manual grout removal is a simple and cost-effective way to remove old grout without special tools. It works best for small areas or thin grout lines. You will need a grout saw or a utility knife with a sharp blade.
- Start by scoring the grout line gently with a grout saw or utility knife. Hold the tool at a slight angle.
- Work slowly along the grout line to avoid scratching the tiles. Use short, controlled strokes.
- Remove loose grout pieces with a small brush or vacuum to see your progress clearly.
- Repeat the process until most of the grout is removed to a depth of about 2-3 mm.
Manual methods take time but reduce the risk of tile damage. For grout removal, here is a quick comparison table of common manual tools:
| Tool | Best For | Pros | Cons |
| Grout Saw | Small grout lines | Affordable, easy to control | Slow process |
| Utility Knife | Thin grout, delicate tiles | Precise, minimal damage risk | Needs sharp blade, careful handling |
Using Power Tools Safely
Power tools speed up grout removal, especially for larger backsplash areas. Tools like rotary tools with grout removal attachments or oscillating multi-tools work well. Safety is crucial when handling power tools near tiles.
- Wear safety goggles and a dust mask to protect eyes and lungs from dust.
- Choose the right attachment for grout removal, usually a carbide or diamond blade.
- Set the tool to a low speed to avoid slipping and damaging tiles.
- Hold the tool firmly but gently and move it slowly along the grout lines.
- Keep fingers clear of the blade and work in a well-ventilated area.
Power tools remove grout quickly but require steady hands. Use short bursts and take breaks to avoid overheating the tool or tiles. Check your progress often to prevent cutting too deep.
Here are some tips for using power tools safely:
- Test the tool on a small, hidden area first.
- Keep cords away from the working area to avoid tripping.
- Turn off and unplug the tool before changing attachments.
- Use clamps to secure loose tiles or boards.
Cleaning The Area
Cleaning the backsplash after grout removal is essential before applying new grout. Dust, debris, and leftover grout pieces can prevent new grout from sticking properly.
Follow these steps for effective cleaning:
- Vacuum the grout lines with a brush attachment to remove loose dust and particles.
- Wipe the tiles using a damp cloth or sponge to clear remaining dust.
- Use a mild detergent mixed with water to remove grease or stains on tiles.
- Rinse with clean water and dry the surface thoroughly.
Leaving the area clean prevents mold and helps new grout bond well. Avoid using harsh chemicals that can damage tiles or leave residue.
Here is a simple cleaning checklist:
- Vacuum grout lines
- Wipe tiles with damp cloth
- Clean with mild detergent
- Rinse thoroughly
- Dry completely before grouting
Preparing The Surface
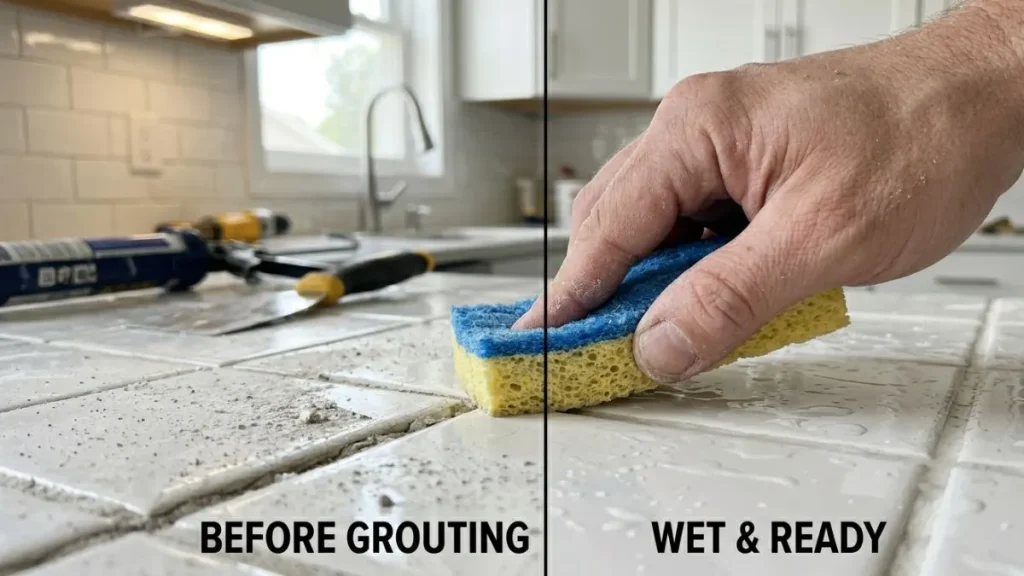
Repairing grout on a kitchen backsplash starts with proper surface preparation. The quality of your repair depends on how well you prepare the tiles and grout lines. A clean, dry, and smooth surface helps new grout stick better and last longer. Skipping these steps can cause the grout to crack or peel quickly. This section explains how to prepare your kitchen backsplash for grout repair in three simple steps.
Drying The Tiles
Before applying new grout, the tiles must be completely dry. Moisture can prevent grout from adhering properly and lead to weak spots or mold growth.
- Check for moisture: Use a dry cloth to wipe the tiles. If the cloth feels damp, wait longer.
- Air drying: Leave the kitchen well-ventilated for several hours or overnight. Open windows or use a fan to speed up drying.
- Spot drying: Use a hairdryer on a low heat setting to dry small wet areas quickly.
Here is a simple drying checklist:
| Step | Action | Purpose |
| 1 | Wipe tiles with dry cloth | Check if tiles are still wet |
| 2 | Ventilate the room | Speed up natural drying |
| 3 | Use a hairdryer if needed | Dry small wet spots quickly |
Tiles that feel cool or damp need more drying time. Make sure the grout lines are dry too. Dry surfaces allow grout to bind strongly and last longer.
Removing Dust And Debris
Dust, dirt, and old grout bits weaken the new grout’s bond. Cleaning the backsplash is essential before repair.
Follow these steps:
- Scrape away loose grout: Use a grout saw or utility knife to remove crumbly old grout.
- Brush the surface: Use a stiff brush to clear dust and debris from grout lines and tile edges.
- Vacuum or wipe: Use a vacuum cleaner or damp cloth to remove remaining particles.
- Clean with mild detergent: Wipe tiles with a solution of water and mild dish soap to remove grease and grime.
- Rinse and dry: Use clean water to rinse the area and dry with a soft towel.
Here is a quick cleaning checklist:
| Task | Tool | Purpose |
| Remove loose grout | Grout saw or utility knife | Clear crumbly grout pieces |
| Brush surface | Stiff brush | Remove dust and dirt |
| Vacuum or wipe | Vacuum or damp cloth | Eliminate fine debris |
| Wash tiles | Water and mild detergent | Remove grease and stains |
| Rinse and dry | Clean water and towel | Prepare surface for grout |
Always avoid harsh chemicals that can damage tiles. Clean, dust-free surfaces ensure the new grout sticks well and looks smooth.
Ensuring Proper Adhesion
Good adhesion between the tile and grout is key for a durable backsplash repair. Preparing the surface right increases grout strength.
Follow these tips for better adhesion:
- Use a primer: Some grout types require a primer or bonding agent. Check product instructions.
- Remove grease and oils: Use rubbing alcohol or a specialized tile cleaner on glossy or oily tiles.
- Check tile texture: Smooth tiles may need light sanding with fine sandpaper to create a rough surface for better grip.
- Avoid water: Do not soak the area before grout application. Slightly damp is okay but avoid wet surfaces.
- Work in small sections: Apply grout in small areas to maintain adhesion and avoid drying out too fast.
Here is a table summarizing adhesion tips:
| Tip | Why It Helps |
| Use primer or bonding agent | Improves grout grip on tiles |
| Clean with rubbing alcohol | Removes oils that block adhesion |
| Sand smooth tiles lightly | Creates rough surface for better bonding |
| Keep surface slightly damp | Prevents grout drying too fast |
| Apply grout in small sections | Ensures even and strong adhesion |
Proper adhesion reduces grout cracking and peeling. Take time to prepare the backsplash well before repair.
Applying New Grout
Repairing grout on a kitchen backsplash restores its beauty and protects the wall from moisture. Applying new grout is a key step in this process. It fills cracks and gaps between tiles, preventing dirt and water buildup. The process needs care and patience to ensure a smooth, lasting finish. Follow these steps to apply new grout effectively and make your backsplash look fresh and clean.
Mixing Grout Correctly
Mixing grout properly is essential for strong, durable repairs. The right consistency helps the grout stick well and fill gaps without cracking.
Start by reading the grout package instructions carefully. Use a clean bucket and add grout powder first. Then, slowly add water while stirring.
- Use clean, cold water for mixing.
- Mix with a margin trowel or a drill mixer for about 3–5 minutes.
- Ensure the grout has a smooth, peanut butter-like texture.
- Avoid mixing too thin or too thick grout.
Too thin grout can run and not fill gaps well. Too thick grout will be hard to spread and may crack as it dries.
| Grout Consistency | Description | Result |
| Too Thin | Runny, watery mix | Won’t fill gaps fully, weak bond |
| Ideal | Peanut butter-like texture | Easy to apply, strong, smooth finish |
| Too Thick | Dry, crumbly mix | Difficult to spread, prone to cracking |
Let the mixed grout sit for 5–10 minutes before use. Stir again briefly to keep the texture even. Use grout within 30 minutes to prevent drying out.
Filling Gaps Evenly
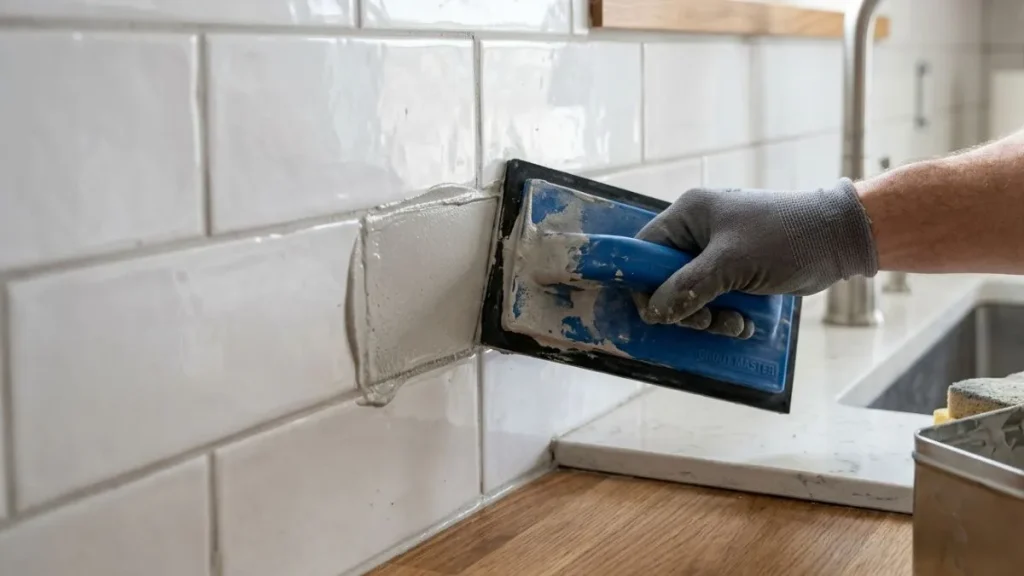
Filling grout gaps evenly ensures the backsplash looks neat and lasts long. Use a rubber grout float to push grout firmly into the joints.
Hold the float at a 45-degree angle. Spread grout diagonally across tiles, pressing it into the gaps.
- Work on small sections at a time, about 2 square feet.
- Fill all gaps completely to avoid air pockets.
- Remove extra grout from tile surfaces as you go.
Check grout lines for uniform thickness. Uneven filling causes weak spots and may lead to cracks.
- Apply firm pressure to compact grout.
- Use the float’s edge to scrape off excess grout.
- Wipe tiles with a damp sponge after initial setting (15–30 minutes).
Cleaning tiles during the process keeps grout lines clear and prevents haze buildup. Avoid washing grout out of the joints.
Smoothing And Shaping
Shaping grout lines properly improves backsplash appearance and durability. Use a damp grout finishing tool or your finger to smooth grout before it hardens.
Run the tool along grout lines with gentle pressure. This compacts grout and rounds edges, preventing cracks.
Steps to smooth and shape grout:
- Wait 10–15 minutes after applying grout to start smoothing.
- Keep the tool or finger moist to avoid pulling grout out.
- Shape grout to match original line width and contour.
- Remove excess grout left on tiles carefully.
Smoothing grout also helps water run off better, protecting backsplash from damage. Let grout cure according to package instructions, usually 24–72 hours.
Curing And Sealing
Repairing grout in your kitchen backsplash is essential for maintaining a clean and attractive cooking area. After fixing the grout, curing and sealing are crucial steps to ensure durability and protect against stains and moisture. Proper curing lets the grout harden fully, while sealing forms a barrier that keeps dirt and water out. These steps help your backsplash last longer and stay beautiful.
Drying Time Guidelines
After applying new grout, it needs time to dry and cure properly. Drying time depends on the grout type, temperature, and humidity. Usually, grout takes 24 to 72 hours to dry completely.
Follow these guidelines for best results:
- Keep the area dry and avoid touching the grout during drying.
- Ensure good air circulation but avoid direct drafts or strong sunlight.
- Maintain room temperature between 65°F and 75°F (18°C to 24°C).
Use this table to understand drying times for common grout types:
| Grout Type | Drying Time | Notes |
| Sanded Grout | 48 to 72 hours | Best for wide joints, longer curing needed |
| Unsanded Grout | 24 to 48 hours | Used for narrow joints, dries faster |
| Epoxy Grout | 24 hours | Dries fast but requires careful application |
Patience during drying prevents grout from cracking or weakening. Avoid cleaning or sealing too soon.
Choosing A Sealer
Sealers protect grout from stains, mold, and moisture. Selecting the right sealer depends on your grout type and kitchen use.
Consider these sealer types:
- Penetrating Sealers: Absorb into grout, block water and stains without changing appearance.
- Membrane Sealers: Form a surface layer, offer strong protection but may alter grout look.
- Natural Sealers: Eco-friendly options with mild protection, need frequent reapplication.
Compare these features in the table below:
| Sealer Type | Protection Level | Appearance | Reapplication Frequency |
| Penetrating | High | Natural look | Every 1-2 years |
| Membrane | Very High | Glossy or matte finish | Every 2-3 years |
| Natural | Medium | Matte finish | Every 6-12 months |
Choose a sealer that fits your kitchen’s needs and your grout type. Read product labels carefully for best results.
Applying Sealer For Protection
Applying sealer correctly ensures your grout stays protected and looks fresh. Follow these steps:
- Clean the grout: Remove dust, dirt, and residues. Use a damp cloth and let dry fully.
- Test the sealer: Apply a small amount on a hidden grout area to check appearance and reaction.
- Apply evenly: Use a small brush, sponge, or applicator bottle to spread sealer on grout lines only.
- Allow penetration: Let sealer soak in for 5-10 minutes, then wipe off excess with a clean cloth.
- Dry time: Wait at least 24 hours before exposing backsplash to water or heavy use.
Tips for best application:
- Apply sealer in thin layers for even coverage.
- Avoid applying on tile surface unless sealer is tile-safe.
- Work in small sections to prevent sealer from drying too fast.
- Use gloves to protect your skin.
Proper sealing prevents stains, moisture damage, and mold growth. Repeat sealing every 1-2 years for lasting protection.
Read Also: How To Clean Floor Tile Grout Without Scrubbing
Conclusion
Repairing grout on your kitchen backsplash keeps it clean and strong. Small cracks or stains can cause bigger problems later. Fix grout soon to avoid water damage and mold. Use simple tools and follow easy steps for good results. Regular care saves money and keeps your kitchen looking fresh.
A neat backsplash makes cooking more pleasant. Take time to check grout often and repair when needed. Your kitchen will stay beautiful and last longer this way.