

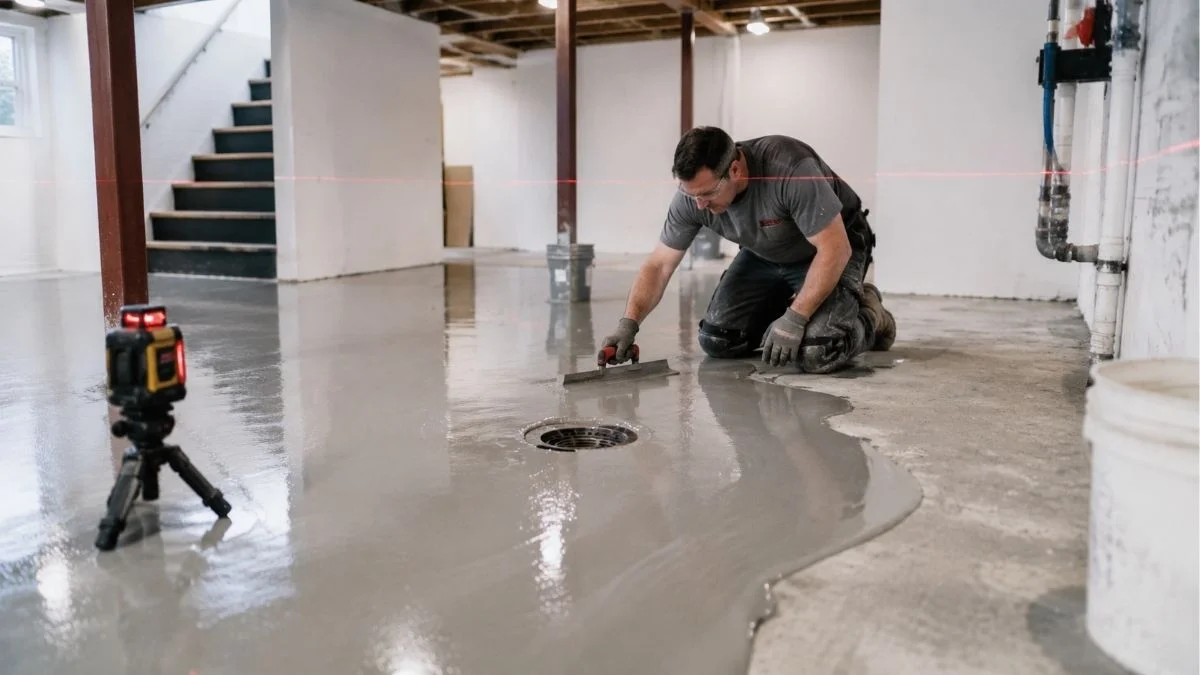
An uneven basement floor is one of those problems that starts small and quietly gets worse. Maybe you notice a slight dip near the far wall, water that pools in the wrong spot after a heavy rain, or a tile that keeps cracking no matter how many times you replace it. These are classic signs that your basement floor needs leveling — and if your basement has a floor drain, the job requires a little more planning than a standard pour.
The good news? Leveling a basement floor with a drain is absolutely something a motivated homeowner can tackle on a weekend. You don’t need to be a contractor. You do need the right materials, a clear understanding of how to protect that drain, and a step-by-step process that actually works.
This guide covers everything — from diagnosing the problem and prepping the surface to pouring the compound and finishing the floor correctly. Whether you’re planning a full basement renovation or just want a flat, safe surface to work with, this is the right place to start.
Understanding Your Basement Floor Drain Before You Start

Before you mix a single bag of leveling compound, spend some time understanding the drain you’re working around. This step alone can save you from a very expensive mistake.
Types of Basement Floor Drains
Not all basement drains are the same, and the type you have affects how you approach the leveling process.
- Standard P-trap floor drains — most common in residential basements, connected to the main sewer line
- French drain systems — perimeter drains that redirect groundwater away from the foundation
- Sump pump pit drains — collect water and pump it away from the home
- Ejector pit drains — handle sewage from below-grade bathrooms
How to Check If Your Drain Is Working Before You Start
Pour a bucket of water directly into the drain and watch what happens. If the water drains quickly and cleanly, you’re good to go. If it drains slowly or backs up, stop — do not begin leveling until that drain is cleared or inspected by a plumber. Pouring leveling compound over or near a compromised drain can permanently seal the problem in place.
Signs your drain needs attention before leveling:
- Standing water around the drain after a pour test
- Gurgling sounds from nearby pipes
- A strong sewage smell near the drain
Protecting the drain is non-negotiable. Leveling compound can flow into an open drain and harden inside the pipe, causing a blockage that requires professional drain repair. Always plug the drain before any pour begins.
How to Prepare Your Basement Floor Before Leveling

Preparation is where most DIY leveling projects either succeed or fail. A well-prepped floor means the compound bonds properly, levels evenly, and lasts for years. A poorly prepped floor means cracking, delamination, and doing the whole job over again.
Clear and Clean the Floor
Remove everything from the basement floor. Sweep thoroughly, then vacuum to remove all dust and debris. If there are oil or grease stains — common in basements used as workshops or garages — clean them with a concrete degreaser and let the surface dry completely. Self-leveling compound will not bond to a greasy surface, no matter how good your primer is.
Repair Cracks First
Any crack in the concrete should be filled before you pour. Use hydraulic cement for cracks that show signs of active moisture — it sets even in the presence of water. For dry hairline cracks, standard concrete patching compound works fine. Let all repairs cure fully (minimum 24 hours) before moving on.
Find Every High and Low Spot
Use a long level or laser level to map the floor. Walk the entire space and mark low spots with chalk. Measure the depth of each low area so you know how much compound you’ll need per section. This also helps you spot any high spots that might need grinding down before the pour.
Protect the Drain
Insert an expandable test plug into the drain opening and tighten it until it’s snug. Then apply foam backer rod around the outer edge of the drain cover to prevent compound from seeping into any gaps. Do not skip this step. Even a small amount of compound that flows into the drain pipe can harden and cause a blockage.
Apply Bonding Primer
Roll or brush concrete bonding primer across the entire floor surface, including areas around the drain. Let it dry until it becomes tacky — usually 30 to 60 minutes depending on humidity. The primer creates a mechanical bond between the old concrete and the new compound. Without it, your leveling layer can crack or lift within months.
Step-by-Step Guide to Leveling a Basement Floor with a Drain

With prep complete, you’re ready for the actual pour. Work methodically and don’t rush — self-leveling compound sets fast, usually within 15 to 30 minutes of mixing.
Mix the Compound
Follow the manufacturer’s water-to-powder ratio exactly. Too much water weakens the compound; too little makes it stiff and hard to spread. Mix with a drill and paddle attachment until the consistency is smooth with no lumps — similar to a thick pancake batter. Mix one batch at a time to avoid waste.
Start Pouring from the Far End
Begin at the point farthest from the basement stairs and work your way toward the exit. Pour the compound in sections, not all at once. Use a gauge rake to spread it evenly across the surface. The compound will begin to self-level within a few minutes, but the rake helps push it into corners and low areas that need the most fill.
Work Carefully Around the Drain
This is the most critical step in the entire process. Pour the compound around the plugged drain, keeping the flow controlled. Use a trowel to feather the edges directly around the drain opening, blending the compound smoothly so there’s no raised lip or ridge around the drain.
Here’s the key detail most guides miss: the finished floor around the drain should slope very slightly toward the drain — approximately 1/8 inch per foot. This ensures water on the basement floor still flows where it’s supposed to go. If the floor around the drain is perfectly flat or slopes away, you’ve created a pooling problem for yourself.
Let It Level and Cure
Once poured and spread, step back and let the compound do its job. Avoid walking on it for at least 24 hours. Keep the area ventilated and maintain a temperature between 65°F and 75°F for best results. In damp basements, run a dehumidifier during and after the pour to speed up drying without compromising the cure.
Remove the Drain Plug and Inspect
Once the compound has fully cured, carefully remove the drain plug. Clean any residue from around the drain edges with a utility knife or chisel. Pour water near the drain and confirm it flows freely. Check the overall floor with your level — if you followed the steps correctly, you should have a flat, even surface with proper drainage maintained.
Common Mistakes to Avoid
Even experienced DIYers make these errors. Knowing them in advance puts you ahead of the game.
- Skipping the bonding primer — the most common reason leveling jobs fail prematurely
- Not plugging the drain — compound in the pipe means a plumber bill on top of your leveling costs
- Mixing the compound too thin — reduces strength and causes cracking as it cures
- Pouring more than 1.5 inches in one pass — leads to shrinkage cracks; build up in layers instead
- Working in a cold or freezing basement — compound won’t cure properly below 50°F
- Installing flooring too soon — always wait the full cure time; rushing ruins both the compound and the floor above it
When to Call a Professional
Most basement floor leveling projects are DIY-friendly, but there are situations where professional help is the smarter call.
If your floor has height differences greater than 2 inches across a large area, a single self-leveling pour won’t cut it and improper layering can create structural issues. If you notice active water seeping through the slab or cracks that run diagonally and appear to be widening, those are signs of foundation movement — not a surface problem. No amount of leveling compound fixes a foundation issue, and covering it up only delays a more expensive repair down the road.
Professional floor leveling typically costs between $2 and $30 per square foot, depending on the severity of the unevenness, the size of the area, and local labor rates. For a standard 400-square-foot basement with moderate leveling needs, expect to spend $800 to $3,000 for professional work — compared to roughly $200 to $500 in materials for a well-executed DIY job.
Best Flooring Options After Leveling
Once your floor is level and fully cured, you have excellent options for the finished surface.
Luxury vinyl plank (LVP) is the top choice for most basements — it’s waterproof, comfortable underfoot, easy to install, and handles the minor humidity fluctuations common in below-grade spaces without warping.
Ceramic or porcelain tile is extremely durable and fully waterproof, making it ideal for basement bathrooms or utility areas near the drain.
Engineered hardwood gives you the warmth of wood with better moisture resistance than solid hardwood, though it still requires a good moisture barrier underneath.
Avoid solid hardwood and standard carpet without a sealed moisture barrier — both are prone to moisture damage in basements and will likely need replacing within a few years.
Conclusion
Leveling a basement floor with a drain is a manageable project when you approach it the right way. The key is preparation — clean the surface, fix the cracks, protect that drain, and apply your bonding primer before a single bag of compound is mixed. Follow the steps in order, work carefully around the drain to maintain proper slope, and give the compound the full time it needs to cure.
Done right, a leveled basement floor is the foundation for everything that comes next — new flooring, a finished living space, a home gym, or simply a safer, more functional utility area. Take your time with the prep, protect the drain, and the pour itself will go smoothly.


