
A window in a shower is one of the most water-vulnerable spots in any bathroom — according to the Tile Council of North America, improper waterproofing at penetrations like windows is among the leading causes of tile failure and structural water damage.
Most first-time tilers don’t realize that knowing how to tile around a window in a shower requires a completely different approach than tiling a flat wall — the sill, jambs, and transition edges all demand precise waterproofing and cuts that standard tutorials skip entirely.
Follow this guide and you’ll finish with a correctly waterproofed, cleanly tiled shower window that holds up for decades without leaks, mold, or grout failure.
Waterproofing Around Shower Windows
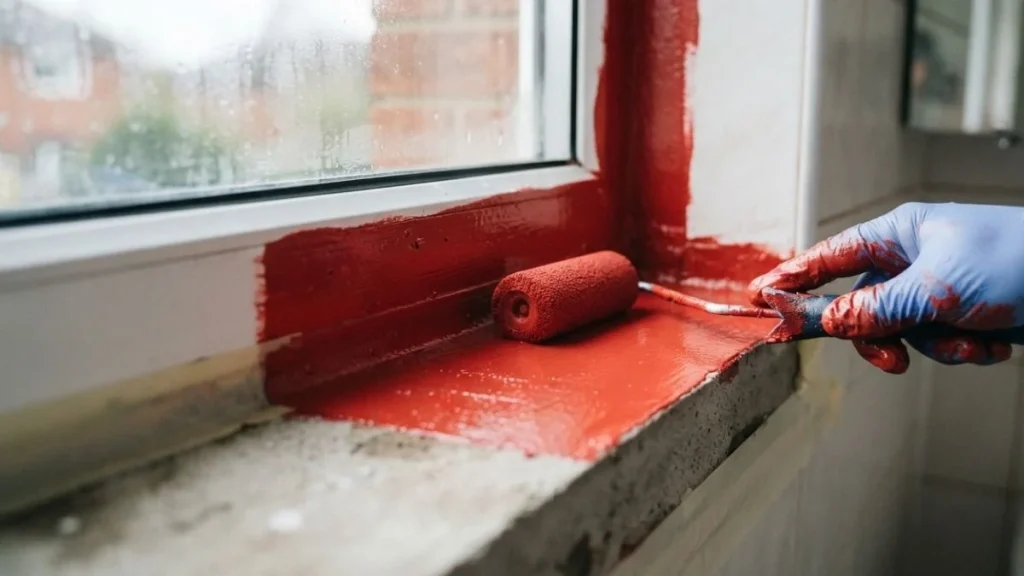
Skipping or rushing waterproofing is the single most expensive mistake in any shower tile project. A window opening breaks the continuous surface of your wall, creating multiple entry points where water can migrate behind tile and into your framing.
Why Moisture Infiltration Matters in Wet Environments
Building codes in most U.S. jurisdictions — including IRC Section R307 — require a continuous moisture barrier behind tile in wet areas. A shower window that isn’t properly sealed doesn’t just risk cosmetic grout cracking. Water infiltrating behind the tile can rot wood framing, feed mold colonies, and cause structural damage that costs thousands to remediate. The window sill is the highest-risk surface because water pools there directly.
Membrane and Sealant Selection for Window Frames
Not all waterproofing membranes perform equally around penetrations. Hydro-Ban by Laticrete and RedGard by Custom Building Products are two sheet-applied and liquid-applied options licensed tile contractors consistently recommend for window openings because both are compatible with standard thinset adhesives. Generic big-box membranes often lack manufacturer documentation confirming adhesive compatibility — a gap that can void your tile warranty.
For the window perimeter, use caulk — not grout. Grout is rigid and cracks at movement joints like window frames. A silicone or siliconized latex caulk, color-matched to your grout, flexes with the frame’s natural expansion and contraction.
Applying Waterproof Barriers Before Tiling Starts
Install cement board (such as Durock or HardieBacker) directly over the window framing first. Then apply your membrane in this exact order:
- Embed mesh tape over all seams and corners with unmodified thinset.
- Apply the liquid membrane in two coats, fully overlapping onto the window frame edges by at least 2 inches.
- Let each coat cure completely — RedGard turns from pink to solid red when ready.
- Perform a simple flood test by running water directly on the membrane surface and checking for any seepage before proceeding.
This layering sequence — cement board, membrane, thinset, tile — is the foundation of a waterproof window in a tile shower that holds up long-term.
Preparing the Window Opening with Cement Board
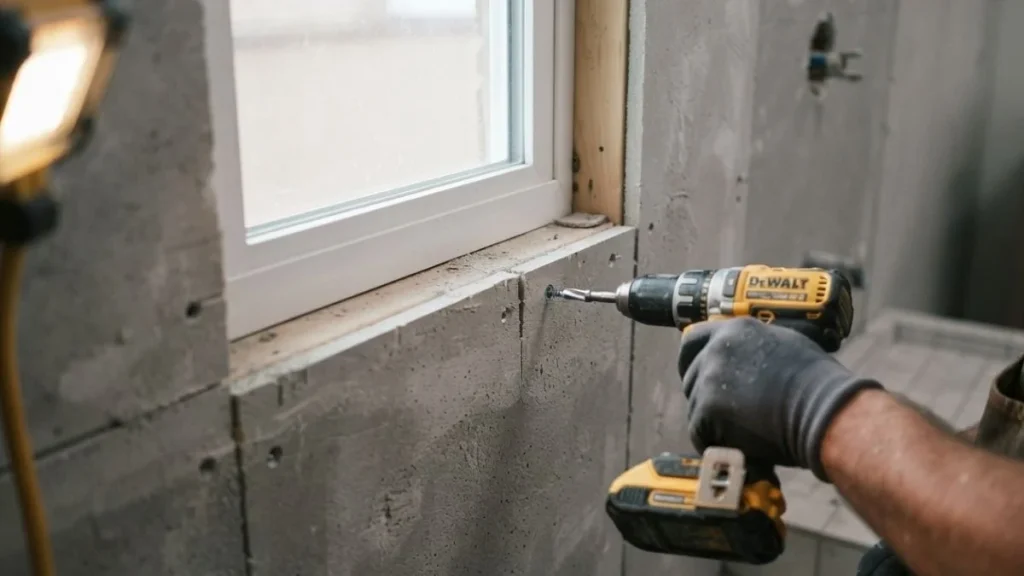
Cement board installation around a shower window is the structural foundation of the entire project. Get this step wrong and no amount of quality tile or membrane will save you from eventual water damage.
Measuring, Cutting, and Securing Backer Board Around the Frame
Measure each section of the window opening individually — the sill, the two jambs, and the header — rather than cutting one piece and hoping it fits. A carbide-tipped scoring tool or an angle grinder with a diamond blade gives the cleanest cuts on cement board around a shower window without cracking the sheet.
Fasten the board to wall studs using 1.5-inch corrosion-resistant screws spaced every 8 inches along studs and every 4 inches at edges, per Tile Council of North America installation guidelines. Never leave gaps between the backer board and window frame — even a 1/8-inch gap is an open channel for moisture. Fill any gaps with thinset before applying membrane.
Layering Protection: Backer Board, Flashing, Membrane Timing
Window flashing must go in before the backer board is fully secured. Install self-adhering bitumen flashing tape — such as Grace Vycor — directly onto the rough window frame and sill, lapping it up onto the framing by at least 3 inches. The backer board then installs over the flashing, not under it.
Here’s the problem most beginners create: they skip flashing entirely and rely on the membrane alone. That single layer approach works on flat walls but fails at window penetrations where frame movement is constant.
Seal every seam where cement board meets the window frame using alkali-resistant mesh tape embedded in unmodified thinset. This redundant moisture barrier — flashing beneath, membrane above — gives you two independent lines of defense against water infiltration before a single tile goes up.
Step-by-Step Tiling Process Around Windows
Tile layout around a window opening requires more planning than a flat wall because every edge is visible and every cut is permanent. Rushing the layout phase causes the most common beginner mistake: ending up with a sliver-thin tile at the window edge that looks unprofessional and breaks easily.

Layout, Marking, and Cutting Tiles for Window Perimeter
Start with a dry layout — set tiles without adhesive from the window centerline outward in both directions. This reveals exactly where cuts will land at the window frame edges. If the dry layout shows a cut narrower than half a tile width at either edge, shift your starting point by half a tile to balance the visual outcome.
Mark all cuts with a felt-tip marker directly on the tile face before touching the wet saw. A quality wet saw like the Dewalt D24000 produces clean, chip-free edges on ceramic and porcelain — essential where tile meets the window frame trim and every cut line is exposed.
Applying Thinset and Setting Tiles Around the Frame
Use a 3/16-inch V-notch trowel held at a 45-degree angle to the wall surface, combing the thinset in one consistent direction. Coverage should reach at least 95% of the tile back in wet areas — the thinset membrane window opening zone demands full coverage with zero voids where water could pool behind the tile.
Keep thinset at least 1/4 inch back from any location where you plan to apply caulk, specifically at the joint between tile and window frame. Thinset in a caulk zone prevents the sealant from bonding correctly and causes premature failure.
Trim vs. No-Trim Finishing Method Selection
Tile trim around a shower window serves two purposes: it caps the raw tile edge and creates a clean visual transition to the frame. Schluter Jolly and Schluter Rondec are the two most-used metal trim profiles for this application — Jolly for flat edges, Rondec for a softer rounded finish.
Without trim, exposed tile edges must be bullnose tiles — tiles with one factory-finished rounded edge. The result looks clean but requires precise grout joints.
For inside corners where tile meets the window frame, skip grout entirely. Apply a continuous silicone caulk bead instead. Grout at inside corners cracks within months because the window frame and tile substrate move independently. Caulk absorbs that movement without failing.
Handling Corners, Edges, and Finishing Details
The corners and edges around a shower window are where most beginner tile jobs visually succeed or fail. These details are also the areas most likely to allow water infiltration if handled incorrectly.
Inside and Outside Corner Techniques at Window
Outside corners — where the tile wraps around the front edge of the window sill or jamb — need a finished edge. Use either bullnose tiles or a metal trim profile like Schluter Jolly. Bullnose tiles match your field tile exactly but require precise cuts. Metal trim installs faster and protects the tile edge from chipping, which matters on a window sill where physical contact is frequent.
Inside corners, where the tile meets the window frame recess, must never be grouted. Apply a continuous silicone caulk bead instead — a 100% silicone product like GE Advanced Silicone 2 holds up in wet environments far longer than latex-based alternatives. Press the caulk into the joint with a wetted finger or a caulk finishing tool to achieve a concave profile that sheds water away from the frame.
Avoid leaving any sharp, unfinished tile edges near the window frame contact points. Sharp edges chip under the slight pressure of window operation and create micro-cracks that compromise your moisture barrier over time.
Grouting and Sealing the Window Perimeter
Wait a full 24 hours after setting tiles before grouting — longer if your bathroom lacks ventilation. Grout applied too early over uncured thinset shifts position and cracks prematurely.
Apply grout to all tile joints except the inside corners and the direct tile-to-frame joint. Once grout cures — typically 48 to 72 hours depending on the product — apply your caulk bead to every inside corner and frame transition.
Here’s what most beginners skip: sealing the grout itself after it cures. Apply a penetrating grout sealer like Aqua Mix Sealer’s Choice Gold to all grouted joints near the window. Reapply annually. This final step closes the microscopic pores in the grout surface and dramatically extends the waterproof integrity of the entire tile window sill area.
You May Like Also: Repairing Drywall around Shower
Frequently Asked Questions
Can You Tile Directly Over Drywall Around a Shower Window?
No. Standard drywall deteriorates rapidly when exposed to shower moisture, even behind tile. Use cement board — such as Durock or HardieBacker — as your substrate around any shower window, then apply a waterproofing membrane like RedGard or Hydro-Ban before setting tile.
What Is the Difference Between Caulk and Grout Around Window Edges?
Grout is rigid and bonds two fixed surfaces together — it cracks when used at movement joints like window frames. Caulk is flexible, absorbs the natural expansion and contraction of the window frame, and maintains a watertight seal at those transitions far longer than grout ever will.
How Do You Prevent Water Damage When Tiling Shower Windows?
Use a three-layer defense: self-adhering flashing tape on the rough frame, cement board over the framing, and a liquid-applied waterproofing membrane like Hydro-Ban overlapping onto the window frame edges by at least 2 inches. Finish every inside corner and frame transition with 100% silicone caulk — never grout — and reseal grout joints annually with a penetrating sealer.
Your Shower Window Is Now Waterproofed and Tiled
Waterproofing — not tile placement — is what determines whether a shower window holds up or fails within a few years. Before you mix a single batch of thinset, walk your window opening and confirm you have self-adhering flashing tape, cement board, and a liquid membrane like RedGard or Hydro-Ban on hand. Get those three materials in place first, and every tiling step that follows becomes straightforward.