

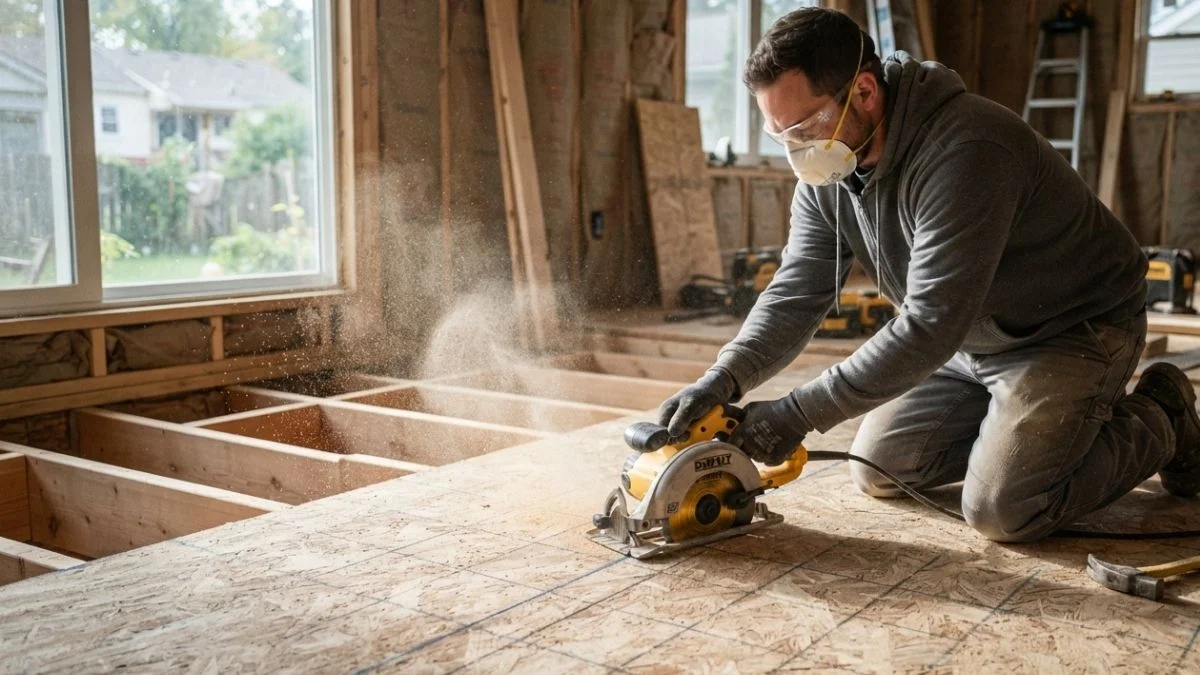
Particle board subflooring, standard in homes built between 1970 and 1990, degrades faster than plywood and can off-gas formaldehyde for years — making removal a health and structural priority, not just a cosmetic one.
Most homeowners hit the same wall: the material crumbles during removal, hides corroded fasteners, and sits directly over joists spaced for its specific thickness, complicating any new flooring install.
This guide walks you through every step of how to remove particle board subfloor safely — with the right tools, realistic costs, and a clear timeline.
Why Particle Board Subfloor Requires Special Handling
Particle board — also called chipboard — behaves nothing like plywood when you try to remove it. Understanding these four hazards before you start will save you hours of frustrating rework and protect your lungs.
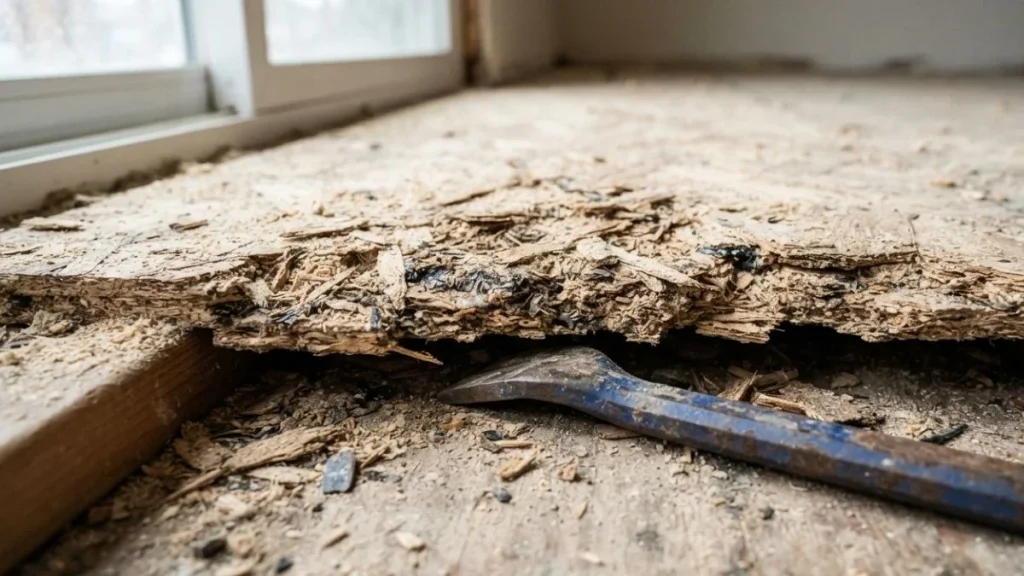
It Crumbles Instead of Lifting in Sheets
Plywood flexes and lifts in manageable panels. Particle board fragments under pressure. The wood chips and resin binders that make up its core have no structural fiber running through them, so pry bars split it into chunks rather than lifting clean sections. This fragmentation means more trips hauling debris, more dust on the work surface, and more time de-nailing individual pieces from the joists below.
Fastener Density Is Higher Than You Expect
Contractors in the 1970s and 1980s routinely fastened particle board underlayment using a combination of ring-shank nails, staples, and construction adhesive — sometimes all three on the same panel. That glued and nailed particle board does not pop free with a single pry. Expect to spend as much time on fastener removal as on the panel demolition itself.
Cutting Releases Formaldehyde and Fine Dust
Particle board formaldehyde off-gassing accelerates when the material is cut or disturbed. Urea-formaldehyde resin is the binding agent in most panels manufactured before 1990, and the EPA classifies formaldehyde as a probable human carcinogen. Use an N95 respirator at minimum — a P100 half-mask respirator is better for extended work. Set your circular saw cutting depth to just clear the panel thickness (typically 5/8 inch) so the carbide blade does not score the joists below and generate additional wood dust.
Adhesive Residue Left on Joists Creates a New Problem
Construction adhesive bonds tightly to Douglas fir and pine joists. If you skip cleaning this residue, your new subfloor panels will not sit flat, creating squeaks and high spots under hardwood flooring or tile. Plan for a scraping and sanding step before any new subfloor installation begins.
Three Removal Methods: Choosing Your Approach
No single method works for every installation. The right approach depends on fastener density, adhesive presence, and how much joist damage you can tolerate. Here is how each method works and when to use it.

Grid-Cutting Method (Circular Saw)
This is the most reliable method for heavily fastened or glued particle board underlayment. Set your carbide blade depth to 5/8 inch — enough to cut through standard subfloor thickness without scoring the joists below. Mark a grid pattern with 12 to 18 inch spacing across the entire panel surface using a chalk line. Cut in parallel rows first, then cross-cut perpendicular to create manageable sections. Work sequentially from one wall toward the exit to prevent cut sections from shifting and binding the blade. Once sectioned, use a flat pry bar to lift each piece, then pull or grind remaining fasteners flush with the joist surface.
De-Fastening and Whole-Piece Removal
Use this method only when fastener density is low and adhesive is minimal or absent — common in some early 1970s installations where staples were the primary fastening method. Locate every fastener along panel edges and field-nail lines before prying. A oscillating multi-tool with a metal-cutting blade cuts flush with the subfloor surface and severs nail shanks cleanly without splitting the chipboard. Pry slowly from the panel center outward to preserve joist integrity.
Sectional Hybrid Approach
The hybrid method is fastest when fastening is dense but adhesive is limited to panel seams only. Make two or three relief cuts across the panel width, stopping short of glued seams by 2 inches. Pry the cut sections free first, then address the glued seam strips separately with a floor scraper or oscillating tool. This targeted approach reduces fragmentation and cuts total removal time by roughly 30 percent compared to full grid-cutting on partially glued installations.
Cost, Time, and Condition Assessment
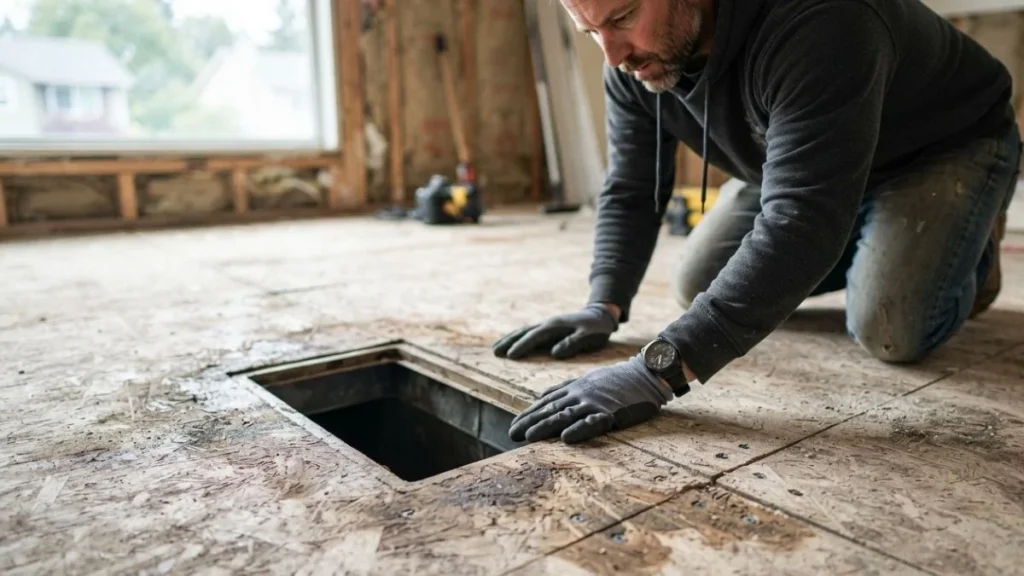
Accurate planning starts with knowing what you are actually dealing with before any tool touches the floor. Skipping this assessment is the single most common reason DIY subfloor projects run over time and budget.
Method Selection by Subfloor Condition
Start by pulling a floor register or threshold strip to expose the subfloor edge. Look for ring-shank nails, staples, screws, or dried adhesive beads — each requires a different removal strategy. Tap the surface every 12 inches with a rubber mallet and listen for hollow sounds, which indicate delamination or moisture damage beneath. Press firmly with your foot across the entire area; any flex greater than 1/4 inch between joists signals structural compromise that must be addressed before new flooring goes down. Soft spots with a spongy feel usually mean moisture has reached the joists, and those areas need inspection before removal begins.
Realistic Labor and Material Estimates
For a straightforward grid-cutting removal, expect 1 to 1.5 labor hours per 100 square feet on a clean installation. A glued and nailed particle board removal in the same area runs 2 to 3 hours. Tool rental costs for a circular saw run $40 to $60 per day from Home Depot or Menards; an oscillating multi-tool rents for $35 to $50 per day. Purchasing both tools outright makes financial sense if your project exceeds 400 square feet.
Particle board disposal methods vary significantly by region. Most municipal waste facilities charge $25 to $75 per truckload for construction debris, though some counties prohibit particle board in standard landfills due to formaldehyde content — call ahead before hauling. A contractor charges $1.50 to $3.00 per square foot for full removal and disposal, making DIY removal cost-effective for any project above 150 square feet where you already own basic tools.
Read Also: Repair Cabinet Door Hinge Holes Particle Board
Frequently Asked Questions
Can you remove particle board subfloor without a circular saw?
Yes. An oscillating multi-tool with a metal-cutting blade severs nail shanks cleanly and works well for smaller areas or tight spaces near walls. For full-room removal, the circular saw grid-cutting method is significantly faster and produces more manageable debris sections.
How deep should the circular saw blade be set for subfloor cutting?
Set the blade depth to 5/8 inch for standard particle board subfloor panels — just enough to cut through the full panel thickness without contacting the joists below. If your subfloor is 3/4 inch thick, confirm the measurement at an exposed edge before cutting.
Can particle board subfloor stay under new flooring?
Most flooring manufacturers explicitly prohibit installation over particle board underlayment because the material swells with moisture and has no structural rating. Hardwood flooring over particle board voids most manufacturer warranties, and tile installations will crack as the chipboard degrades. Full removal is the correct path in nearly every case.
Is particle board subfloor removal a health hazard?
Yes, cutting or breaking particle board releases formaldehyde and fine wood dust. Wear an N95 respirator at minimum, open windows for cross-ventilation, and seal HVAC vents in the work area before starting to prevent formaldehyde-laden dust from spreading through the home.
Ready to Strip and Reinstall
Fastener type and adhesive presence — not panel size — determine how long your removal actually takes, so always assess the subfloor edge before committing to a method. Pull a floor register today, identify your fastening pattern, and use that information to select the grid-cutting, de-fastening, or hybrid approach that matches your specific installation. Rent your tools, seal your HVAC vents, and have your N95 respirator on before the first cut.


