Are you planning to add more space to your home? Extending your roof is a key step in making your addition look seamless and strong.
But how do you make sure your new roof blends perfectly with the old one? And what are the important things you need to know before you start? You’ll discover simple, clear tips to help you extend your roof the right way.
Planning The Roof Extension
Extending a roof for an addition requires careful planning to ensure stability and proper integration with the existing structure. The planning phase sets the foundation for a successful roof extension project. It involves examining the current roof, deciding on the size of the new section, and confirming all work meets local regulations. Proper planning helps avoid costly mistakes and ensures the new roof section looks seamless and functions well.
Assessing Existing Roof Structure
Start by examining the current roof structure to understand its condition and design. This step helps determine if the existing roof can support an extension. Look for signs of damage such as:
- Cracks or sagging in roof beams
- Water stains or leaks
- Rot or mold on wooden parts
Check the roof type: is it flat, gabled, or hipped? Each type requires a different approach for extension. Also, identify the materials used, such as asphalt shingles, metal, or tiles. Matching materials ensures the new section blends well.
Consult a structural engineer or qualified roofer to evaluate load-bearing capacity. The professional may inspect:
- Roof framing and trusses
- Support beams and joists
- Fasteners and connectors
Determining Extension Size
Define the size of the roof extension based on the addition’s footprint and purpose. Measure the area where the new roof will cover. Consider these points:
- Will the extension cover a single room or multiple rooms?
- How high should the roof rise to match existing slopes?
- Is extra space needed for insulation or ventilation?
Use this simple checklist to plan dimensions:
- Measure width and length of the new addition
- Note roof pitch or angle of existing roof
- Calculate overhang needed for weather protection
Match the roof pitch to keep a uniform look. If the pitch differs, the extension may look odd or cause drainage issues.
Checking Local Building Codes
Verify local building codes before starting the roof extension. These rules control safety, structure, and appearance. Ignoring codes can lead to fines or having to redo work.
Contact your local building department or visit their website. Important code requirements include:
- Maximum roof height limits
- Required roof slope for water drainage
- Fire resistance and material standards
- Permit application and inspection process
Choosing Roof Materials
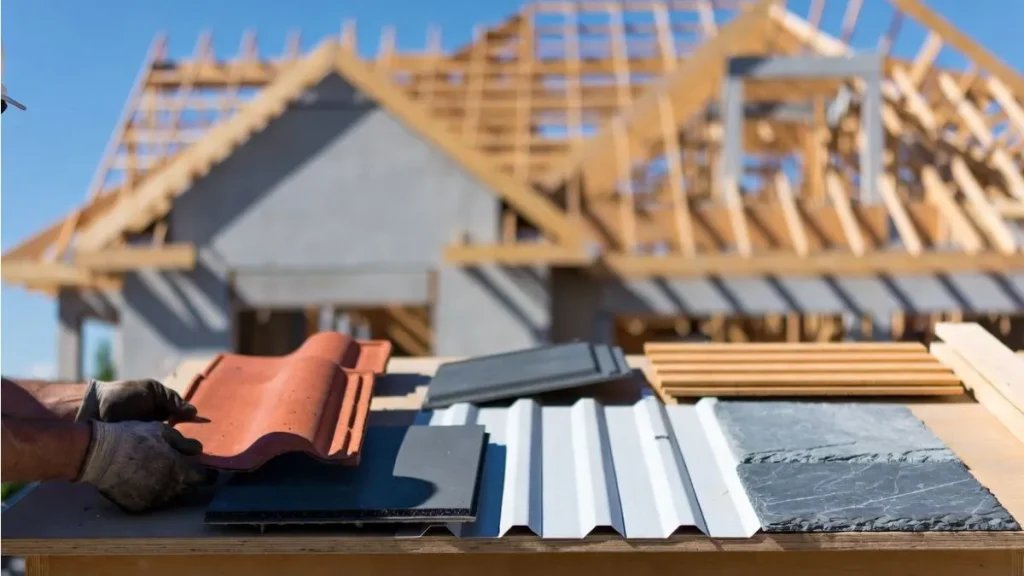
Extending a roof for an addition requires careful planning, especially when choosing roof materials. The materials must blend well with the existing roof and last long under local weather conditions. Picking the right roofing materials helps maintain the home’s look and protects the new structure effectively.
Matching Existing Roofing
Matching the new roof section with the existing one keeps your home’s appearance uniform. It also helps maintain the property value and prevents a patchy look. Begin by identifying the type of roofing material already on your house.
- Inspect the current roof: Note the material type such as asphalt shingles, metal, tile, or wood.
- Check the color and texture: Find a close match to keep the roof seamless.
- Measure the size and shape: Use shingles or tiles that match the existing size and style.
Selecting Durable Materials
Durability is key for any roof extension. The roof protects your home from rain, wind, sun, and snow. Choose materials that withstand local weather and last many years with little upkeep.
Consider these factors when selecting durable roofing materials:
- Weather resistance: Select materials that resist water, wind, and sun damage.
- Longevity: Opt for materials with a long lifespan to avoid frequent repairs.
- Maintenance needs: Choose low-maintenance materials to save time and money.
- Weight: Ensure your house structure supports the weight of heavy roofing materials.
Here is a quick overview of common durable roofing materials:
| Material | Average Lifespan | Pros | Cons |
| Asphalt Shingles | 20-30 years | Affordable, easy to install | Moderate durability, can fade |
| Metal Roofing | 40-70 years | Very durable, fire-resistant | Higher cost, noise during rain |
| Clay or Concrete Tiles | 50+ years | Long-lasting, attractive | Heavy, costly installation |
| Wood Shingles or Shakes | 25-40 years | Natural look, good insulation | Needs maintenance, fire risk |
Durable materials reduce future costs and add value to your home. Choose roofing that fits your budget but lasts long. Discuss options with a roofing expert to ensure proper installation and compatibility with your home.
Designing The Roof Extension
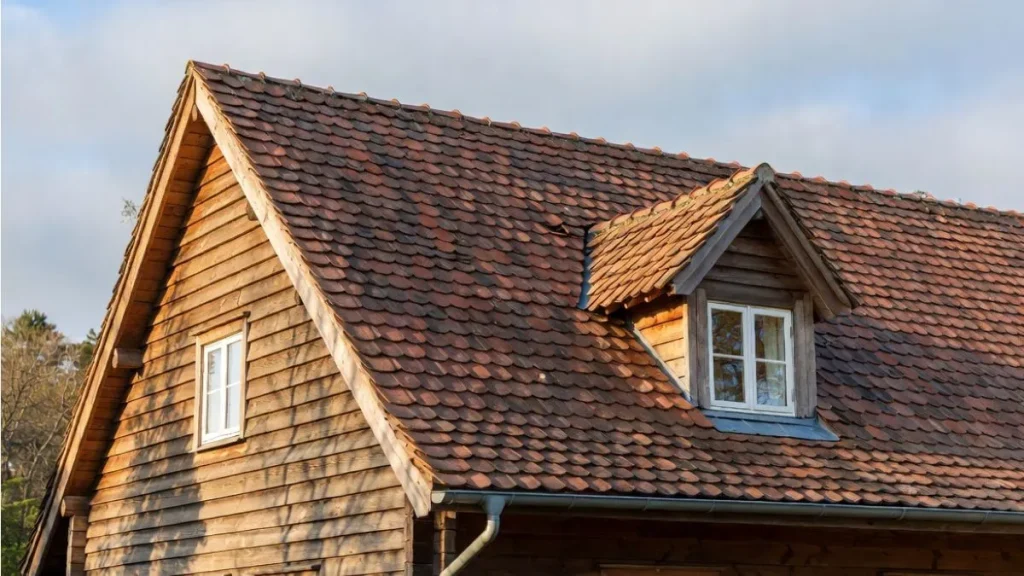
Two important factors to consider are the roof pitch and slope, and load-bearing capacity. These will guide the shape, materials, and support needed for the extended roof. Thoughtful design ensures safety, durability, and style for your home addition.
Roof Pitch And Slope
The roof pitch is the angle of the roof’s slope. It affects how water and snow slide off the roof. Matching the pitch of the new roof to the old one keeps your house looking balanced. Different roof pitches suit different climates and styles.
Common roof pitches:
- Low pitch: 2:12 to 4:12 – often used in modern homes, easier to build but drains slower.
- Medium pitch: 5:12 to 9:12 – common for many houses, good water drainage and easy maintenance.
- Steep pitch: 10:12 and above – found in areas with heavy snow, helps snow slide off quickly.
Choosing the right pitch depends on:
- Existing roof design.
- Local weather conditions.
- Building codes.
- Personal style preference.
| Pitch Ratio | Degree Angle | Best Use |
| 2:12 | 9.5° | Flat or modern roofs |
| 6:12 | 26.5° | Standard residential roofs |
| 12:12 | 45° | Steep roofs, snowy areas |
Roof slope also plays a role in water drainage and appearance. It is the vertical rise over the horizontal run. A proper slope prevents water pooling, which can cause leaks or damage. Keep the slope consistent for a smooth look and good performance.
Load Bearing Considerations
The extended roof must hold up under weight. This includes the roof materials, snow, wind, and any extra loads like solar panels. Make sure the structure can carry this weight safely.
Key load types:
- Dead load: Weight of the roof materials and structure.
- Live load: Temporary weight like snow, rain, or workers.
- Wind load: Pressure from wind pushing or pulling on the roof.
Check the existing walls and beams to see if they support the new roof extension. Adding beams or columns may be necessary. Use strong, quality materials like treated lumber or steel supports. Consult local building codes for load requirements.
Preparing The Site
Extending a roof for an addition requires careful preparation of the site. This step is crucial to ensure the construction goes smoothly and safely. Preparing the site involves clearing the area, measuring accurately, and protecting nearby spaces. Proper preparation saves time and prevents damage to existing structures and landscaping.
Clearing And Measuring
Start by clearing the area where the roof extension will happen. Remove all debris, plants, and any obstacles that could block your work. A clean site makes the job easier and safer. Use tools like rakes, shovels, and saws to clear the space thoroughly.
Next, measure the area carefully. Accurate measurements are key to a roof that fits well. Use a tape measure and a level to get precise dimensions. Measure both the length and width of the addition site.
Follow these steps for measuring:
- Measure the width of the existing roof edge.
- Measure the planned extension length outward from the roof edge.
- Check the height of the existing roof to match roof slopes.
- Note any overhangs or gutters that affect measurements.
Protecting Surrounding Areas
Protect areas around the work site to avoid damage during construction. Cover plants, outdoor furniture, and walkways with tarps or plastic sheets. This prevents dust, debris, and falling materials from causing harm.
Use barriers like plywood sheets or fences to block off the work zone. This keeps children, pets, and passersby safe. Mark the boundaries clearly with cones or tape.
Keep tools and materials organized in one place to avoid accidents. Store sharp or heavy items safely away from traffic paths.
Here is a checklist for protecting surrounding areas:
- Cover plants and garden beds with plastic or cloth
- Move outdoor furniture to a safe location
- Lay down drop cloths on walkways and patios
- Set up barriers or fencing around the site
- Use caution tape or cones to mark danger zones
- Store tools and materials in a secure spot
Taking these steps reduces cleanup time and prevents damage. It also creates a safer work environment for everyone involved. Protecting the site shows respect for your property and neighbors.
Framing The Extension
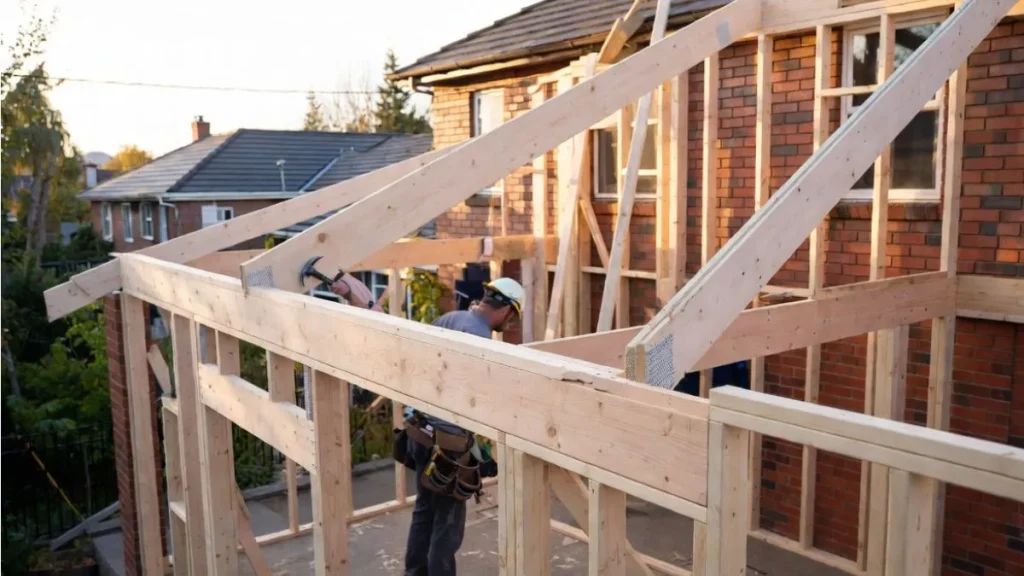
Extending a roof for an addition requires careful planning and strong framing. The framing supports the new roof and ensures it fits well with the old structure. Proper framing prevents leaks, improves durability, and keeps the building safe.
Building The Roof Frame
Start by selecting the right materials for the roof frame. Common choices include wood or metal, but wood is easier for most home additions. The frame includes rafters, ridge beams, and supports. These parts give the roof its shape and strength.
Follow these steps to build the frame:
- Measure the area of the addition carefully.
- Cut rafters to fit the slope and length of the new roof.
- Install a ridge beam at the highest point for support.
- Attach rafters from the ridge beam down to the walls.
- Add collar ties to prevent the rafters from spreading.
Connecting To Existing Structure
Joining the new roof frame to the old structure is critical. It must be strong and weather-tight. Start by inspecting the existing roof edge. Remove old shingles and roofing materials where the new frame will attach. This exposes the fascia and rafters underneath.
Follow these key steps:
- Install a ledger board on the existing wall. This board supports the new rafters.
- Secure the ledger with bolts, not nails, for better strength.
- Attach new rafters to the ledger using metal hurricane ties or brackets.
- Flash the joint between old and new roofs with metal flashing to prevent leaks.
- Check the roof pitch to align the new rafters with the old roof slope.
Proper connection ensures the new roof moves with the old roof during wind or snow loads. It also stops water from entering between the two roofs. Take time with this step for a long-lasting extension.
Installing Roofing Components
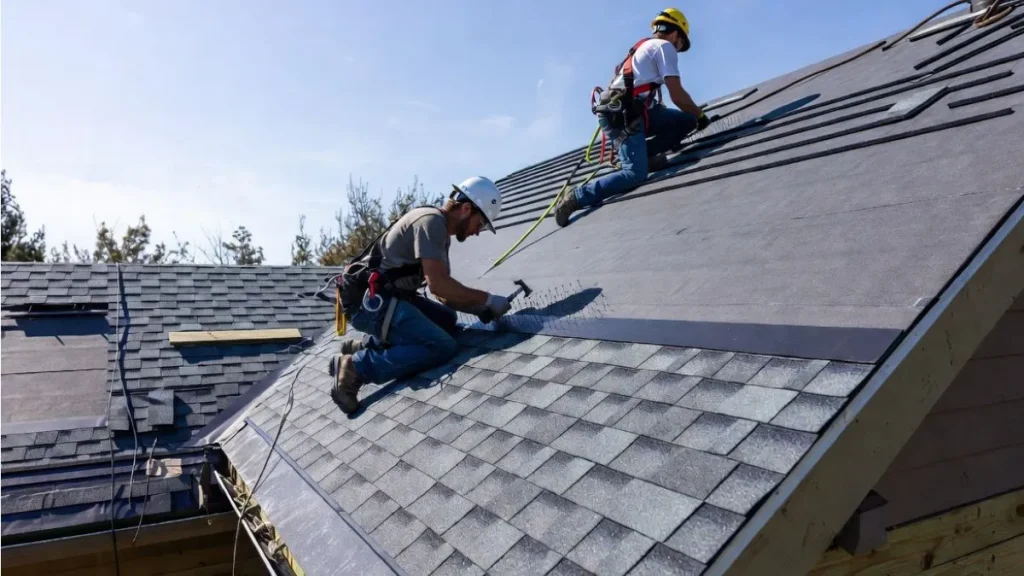
Extending a roof for an addition requires careful attention to installing roofing components. These parts protect the structure from water, wind, and weather damage. Proper installation ensures the new roof section blends well with the existing roof.
Sheathing And Underlayment
The first step in installing roofing components is adding sheathing. Sheathing is usually plywood or oriented strand board (OSB). It provides a flat, stable surface for the roof. The sheathing must be cut to fit the new addition exactly. Nails or screws secure it to the roof frame tightly. This layer supports all other roofing materials.
Next comes the underlayment. This thin, protective layer goes over the sheathing. It prevents water from getting inside if shingles fail or during heavy rain. Common underlayment materials include felt paper and synthetic sheets.
- Lay underlayment starting at the bottom edge of the roof.
- Overlap each row by several inches for better protection.
- Secure with roofing nails or staples.
- Seal edges with roofing tape or adhesive.
Using quality underlayment helps protect the roof from leaks. It also adds an extra layer against wind-driven rain and ice. Proper installation ensures the new roof section stays dry and strong.
| Component | Material | Purpose |
| Sheathing | Plywood or OSB | Supports roofing layers and provides structure |
| Underlayment | Felt paper or synthetic sheets | Prevents water infiltration under shingles |
Shingles And Flashing
Shingles form the visible, outer layer of the roof. They protect the structure from rain, snow, and sun damage. Choose shingles that match the existing roof in color and style. This creates a seamless look for the addition.
Install shingles starting at the roof’s edge. Work upwards, overlapping each row. Use roofing nails to secure shingles firmly. Check for even spacing and alignment to avoid gaps.
Flashing is a crucial part of roof installation. It seals joints and edges where water might enter. Common flashing areas include:
- Roof valleys
- Chimneys
- Roof-to-wall joints
- Around vents and skylights
Use metal flashing, usually aluminum or galvanized steel. Fit it tightly under shingles and over roof edges. Seal flashing edges with roofing cement or sealant to stop leaks.
Proper shingle and flashing installation keeps the roof watertight. It prevents costly water damage and extends the roof’s life. Take time to inspect each step and fix any loose or damaged parts immediately.
Ensuring Proper Drainage
Extending a roof for an addition requires careful planning to keep water away from your home. Ensuring proper drainage is key. Water that stays on the roof or near the walls can cause leaks and damage. Good drainage protects your new structure and the existing house. It also stops mold and wood rot.
Gutter Installation
Gutters collect rainwater from the roof and direct it away from the house. Proper gutter installation is essential for good drainage. Here are important points to consider:
- Choose the right size: Larger roofs need wider gutters to handle more water.
- Use quality materials: Aluminum and vinyl gutters resist rust and last longer.
- Install downspouts: Place them at corners and low points to move water away.
- Check the slope: Gutters should slope slightly toward downspouts to avoid standing water.
- Include gutter guards: These keep leaves and debris out, preventing clogs.
Waterproofing Techniques
Waterproofing stops water from seeping into the roof and walls. It adds an extra layer of protection. Several techniques help keep your roof dry and strong.
Start with a roof underlayment. This thin layer goes under the roofing material. It acts as a shield against water. Use materials like:
- Felt paper
- Rubberized asphalt membranes
- Synthetic underlayment
Seal all joints and edges with waterproof tape or sealant. Pay special attention to roof valleys and where the new roof meets old walls.
Another method is flashing installation. Flashing is metal strips that cover roof joints. It directs water away from seams and gaps. Common flashing areas include:
- Chimneys
- Skylights
- Roof intersections
- Edge trims
Use high-quality, rust-resistant metals like aluminum or copper for flashing. Proper installation of flashing reduces leaks and water damage risks.
Finally, apply a waterproof coating on the roof surface. These coatings create a barrier against rain and snow. Some popular coatings are:
- Liquid rubber
- Silicone sealants
- Polyurethane coatings
These coatings extend roof life and improve water resistance.
Recommended: Guide to Building an Addition Roof Higher than Existing Roof
Final Inspections And Maintenance
Extending a roof for an addition requires careful planning and skilled work. Once the new section is built, final inspections and regular maintenance are crucial. These steps protect your investment and keep the roof safe and durable. Proper checks ensure the structure is sound and the materials hold up against weather. Regular care helps avoid costly repairs and extends the roof’s life.
Checking Structural Integrity
After completing the roof extension, inspect its structural integrity thoroughly. A strong framework supports the roof and prevents future problems. Look for signs of weakness or damage in the new area and its connection to the old roof.
- Examine the rafters and trusses: They must be straight, secure, and free from cracks or warping.
- Check the joints and fasteners: Nails, screws, and metal connectors should be tight and rust-free.
- Look for water damage: Moisture weakens wood and metal. Inspect for stains, mold, or soft spots.
- Assess the roof deck: It should be even and firmly attached to the framing.
Using a checklist helps ensure no step is missed:
| Inspection Item | What to Look For | Action Needed |
| Rafters and Trusses | Cracks, warping, loose connections | Repair or reinforce damaged parts |
| Joints and Fasteners | Rust, looseness, missing nails | Tighten or replace fasteners |
| Water Damage | Stains, mold, soft spots | Fix leaks and replace damaged wood |
| Roof Deck | Uneven surfaces, loose boards | Secure or replace decking |
Call a professional if unsure about any signs. Proper structure keeps the roof safe and stable.
Routine Roof Care Tips
Maintenance helps the extended roof stay strong and leak-free. Follow simple care steps regularly. These habits stop small issues from becoming big problems.
- Clean gutters and downspouts: Remove leaves and debris to prevent water buildup.
- Inspect shingles or tiles: Replace broken or missing pieces quickly.
- Trim overhanging branches: Avoid damage from falling limbs and reduce debris on the roof.
- Check flashing and seals: Ensure around chimneys and vents to stop leaks.
- Remove moss and algae: Use gentle cleaning to protect roof surfaces.
Conclusion
Extending a roof for an addition takes careful planning and effort. Start by measuring the space and choosing the right materials. Keep safety your top priority during the work. Check local building rules before you begin. Take your time to ensure the roof fits well with the old one.
A strong roof protects your home and adds value. With patience and care, you can create a safe and lasting roof extension. It’s a smart step to improve your home’s space and comfort.