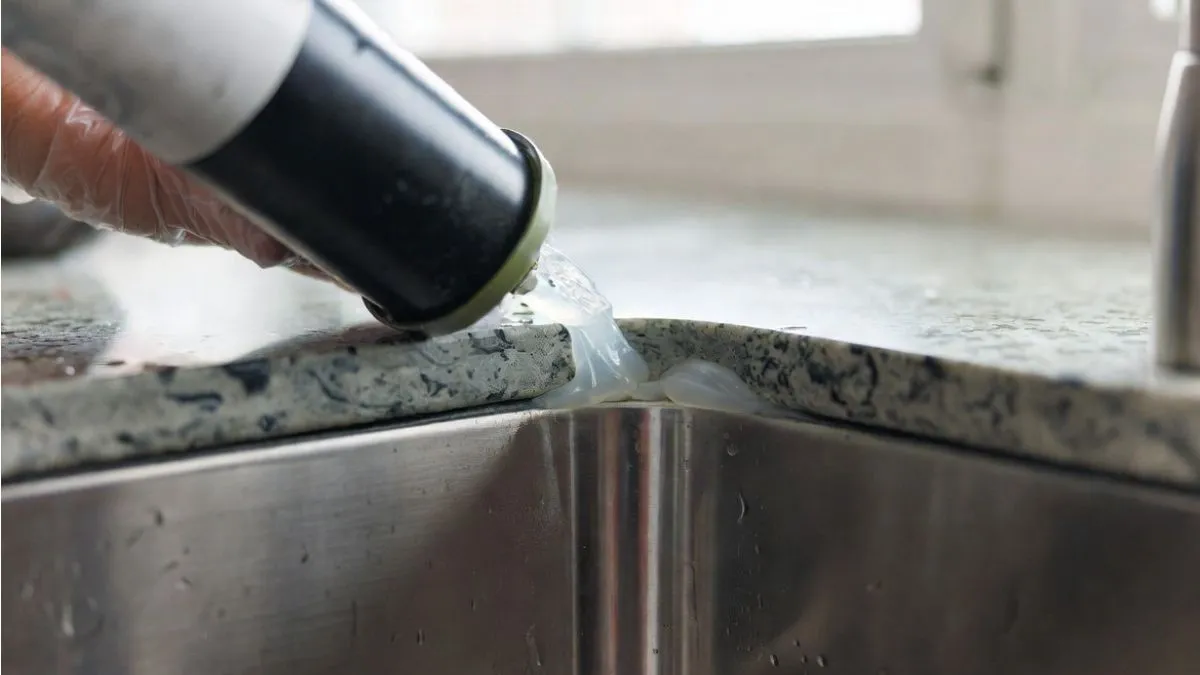
Have you noticed that annoying gap between your kitchen sink and countertop? It might seem small, but that space can collect water, crumbs, and dirt, making your kitchen harder to clean and even risking damage over time.
You probably want a quick, simple fix that keeps your kitchen looking neat and prevents future problems. You’ll discover easy and effective ways to fill that gap yourself—no special tools or skills needed. Keep reading, and you’ll learn how to protect your kitchen and enjoy a cleaner, more polished look every day.
Identify The Gap Size
Before filling the gap between your kitchen sink and countertop, it is important to identify the exact size of the gap. Knowing the gap size helps choose the right materials and tools for a neat finish. Gaps can vary in width and depth, so measuring carefully is key.
Measuring The Width Of The Gap
Use a ruler or tape measure to find the gap width. Place the tool at the widest part of the space between the sink and countertop. Record the measurement in millimeters or inches. This number tells you how much filler material you will need.
Checking The Depth Of The Gap
Depth matters because some fillers only work for shallow gaps. Use a small stick or a toothpick to gently check how deep the gap goes. Mark this length and note it down. This ensures you choose a filler that fits well without leaving holes.
Noting The Shape And Irregularities
Gaps may not be perfectly straight or even. Look for curves or uneven edges. These can affect how well the filler sticks and looks. Take photos or sketch the gap shape to prepare for any special adjustments during filling.
Recording Measurements For Different Areas
Gaps might vary along the sink edges. Measure width and depth at several points:
- Left corner
- Center area
- Right corner
Keep these notes handy. They help apply filler evenly and avoid gaps or overlaps after filling.
Choose The Right Materials
Selecting materials that fit your gap size and resist moisture is key. Here, we explore popular options to help you decide what works best for your kitchen.
Caulk Options
Caulk is a common choice for filling gaps around kitchen sinks. It is easy to apply and creates a flexible seal that adapts to small movements between the sink and countertop. Caulk comes in different types:
- Acrylic Latex Caulk: Easy to apply and clean with water. Paintable but not very water-resistant. Good for dry areas.
- Siliconized Acrylic Caulk: Has some water resistance. Can be painted and is more flexible than acrylic latex.
- 100% Silicone Caulk: Best for wet areas like sinks. Waterproof and flexible but not paintable.
The choice depends on your needs. For kitchen sinks, 100% silicone caulk is usually best because it handles water well and stays flexible. Acrylic caulks might crack or peel in wet conditions.
| Type | Water Resistance | Paintable | Flexibility |
| Acrylic Latex | Low | Yes | Low |
| Siliconized Acrylic | Medium | Yes | Medium |
| 100% Silicone | High | No | High |
Always clean the gap before applying caulk. Use painter’s tape to get a neat line. Smooth the caulk with a wet finger or tool. Let it dry fully before using the sink.
Backer Rods
Backer rods are foam strips used to fill wide gaps before caulking. They provide a base and reduce the amount of sealant needed. This helps the caulk last longer and stay flexible. Backer rods come in different sizes and shapes:
- Round or cylindrical foam rods
- Sizes from 1/4 inch to 1 inch or more
- Closed-cell foam, which does not absorb water
Silicone Sealants
Silicone sealants are ideal for kitchen sink gaps. They resist water, heat, and mold, making them perfect for wet areas. Silicone stays flexible and does not shrink or crack easily. Key features include:
- Waterproof and mildew-resistant
- Long-lasting flexibility
- Strong adhesion to metal, ceramic, and stone
- Available in clear and colors to match your countertop
Prepare The Area
Before filling the gap between the kitchen sink and countertop, proper preparation of the area is essential. This step ensures the new sealant sticks well and lasts longer. Dirt, grease, and old sealant can stop the new material from bonding correctly. Taking time to clean and remove old sealant leads to a neat and durable finish.
Clean The Surface
Start by removing all debris, dust, and grease from the gap and surrounding surfaces. A clean surface allows the new sealant to stick tightly and prevents mold growth later. Follow these steps for effective cleaning:
- Clear away any loose crumbs or dirt using a small brush or vacuum.
- Use warm, soapy water and a sponge to wipe the area thoroughly.
- Rinse with clean water to remove soap residue.
- Dry the surface with a clean cloth to avoid trapping moisture.
Remove Old Sealant
Old sealant must be completely removed to create a smooth base. Leftover sealant can cause uneven gaps and poor adhesion. Use these steps to clear old sealant safely:
- Use a utility knife or scraper to cut and lift the old sealant gently.
- Be careful not to scratch or damage the sink or countertop surface.
- Apply a sealant remover or rubbing alcohol to soften any stubborn residue.
- Scrub gently with a plastic scraper or cloth to remove softened sealant.
- Wipe the area with a clean cloth to remove any leftover material.
Apply Backer Rod
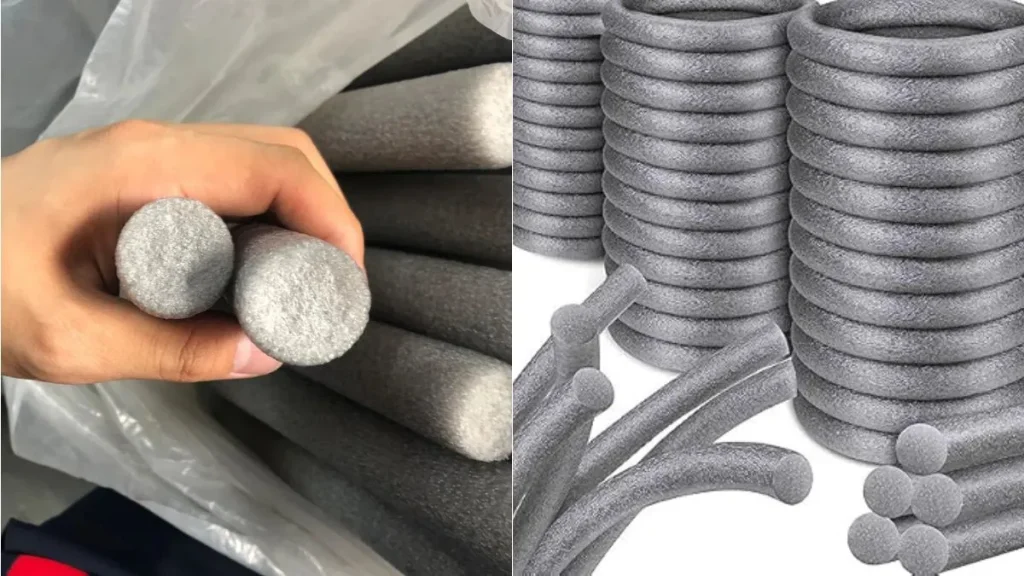
Filling the gap between the kitchen sink and countertop is important to stop water leaks and dirt build-up. One effective way to fill this gap is by using a backer rod. A backer rod is a flexible foam strip that fits into the space before applying sealant. It helps create a smooth, even base for the sealant and prevents it from sinking deep into the gap. This step makes the seal last longer and look neater.
What Is A Backer Rod?
A backer rod is a soft, foam material shaped like a rope. It comes in different thicknesses to fit various gap sizes. The backer rod sits inside the gap and fills most of the space. This reduces the amount of sealant needed and supports it well.
Choosing The Right Size Backer Rod
Select a backer rod that is slightly wider than the gap. It should fit snugly without stretching too much or being loose. Use this table to pick the correct size:
| Gap Width | Recommended Backer Rod Diameter |
| 1/8 inch (3 mm) | 3/16 inch (5 mm) |
| 1/4 inch (6 mm) | 3/8 inch (9 mm) |
| 1/2 inch (12 mm) | 5/8 inch (16 mm) |
How To Insert The Backer Rod
- Clean the gap thoroughly to remove dirt and old sealant.
- Cut the backer rod to the length of the gap.
- Press the backer rod gently into the gap using your fingers or a blunt tool.
- Make sure the rod sits 1/4 inch below the countertop surface.
Seal The Gap With Caulk
Sealing the gap between your kitchen sink and countertop with caulk prevents water damage and keeps your kitchen clean. Caulk fills the space, stopping water and debris from slipping through. This simple step improves your kitchen’s look and protects the cabinet below. Using the right technique ensures a neat and lasting seal.
Cutting The Caulk Tube
Cutting the caulk tube properly is important for a smooth application. Use a utility knife or scissors to cut the tip of the tube at a 45-degree angle. This angle helps control the flow of caulk. Start with a small opening and enlarge it if needed.
- Check the size of the gap before cutting the tip.
- Cut just enough to fill the gap without making a big mess.
- Use a nail or a wire to clear any blockage inside the tip.
Here is a simple table to guide the size of the cut based on gap width:
| Gap Width | Cut Opening Size |
| 1/8 inch (3 mm) | Small (about 1/8 inch) |
| 1/4 inch (6 mm) | Medium (about 1/4 inch) |
| 1/2 inch (12 mm) | Large (about 3/8 inch) |
Cutting the tube carefully helps avoid wasting caulk and makes the job easier.
Applying The Caulk Smoothly
Apply caulk steadily for a clean line. Hold the caulk gun at a 45-degree angle to the gap. Squeeze the trigger gently to push out the caulk evenly. Move the gun slowly along the gap to avoid lumps and gaps in the seal.
- Start at one end of the sink and work your way around.
- Keep steady pressure on the trigger for a smooth bead.
- Work in small sections to keep control.
Using painter’s tape on both sides of the gap helps create a neat edge. Apply tape parallel to the gap, then remove it after smoothing the caulk.
Remember, too much caulk creates a mess. Too little leaves gaps. Aim for a bead that just fills the space.
Tooling The Sealant
Tooling means shaping and smoothing the caulk bead after application. Use a caulk finishing tool or your finger dipped in water to smooth the sealant. This pushes the caulk into the gap and removes excess.
- Wait a few minutes after applying the caulk before tooling.
- Run the tool or finger along the bead in one smooth motion.
- Keep the tool wet to avoid sticking.
Tooling improves the seal’s strength and appearance. It also stops the caulk from pulling away as it dries. Clean excess caulk with a damp cloth before it sets.
Good tooling makes the gap look neat and helps the caulk last longer against water and heat.
Alternative Solutions
Small gaps between the kitchen sink and countertop can cause water leaks and attract dirt. Filling these spaces is important for cleanliness and kitchen safety. Besides standard caulking, many alternative solutions work well. These methods not only seal the gap but also add style and function to your kitchen area.
Using Decorative Trim
Decorative trim offers a neat and stylish way to cover gaps between the sink and countertop. It comes in various materials like wood, PVC, or metal. These trims fit snugly into the space and hide imperfections.
Benefits of decorative trim:
- Easy to install with glue or small nails
- Available in many colors and finishes
- Adds a polished look to the kitchen
- Protects edges from water damage
Choose trim that matches your kitchen style. For example, wooden trim suits traditional kitchens, while metal trim fits modern designs.
Installing Splash Guards
Splash guards are practical solutions to stop water from leaking into gaps near the sink. These guards are typically made of silicone, rubber, or plastic. They attach to the sink edge or countertop and create a barrier against water.
Why install splash guards?
- Stop water from dripping into hard-to-clean gaps
- Protect cabinets and walls from moisture damage
- Easy to remove and clean
- Cost-effective and quick to install
Types of splash guards:
| Type | Material | Features |
| Sink Edge Guard | Silicone | Flexible, fits around sink rim, waterproof |
| Countertop Splash Strip | Plastic or Rubber | Attaches to countertop edge, easy to clean |
| Custom Seal Strips | Foam or Rubber | Fills gaps, compresses for tight seal |
How to install splash guards:
- Dry the area around the sink and countertop.
- Choose a guard type that fits your gap size.
- Clean the surfaces with rubbing alcohol.
- Peel off adhesive backing or apply waterproof glue.
- Press the guard firmly along the gap edge.
- Let it set before exposing to water.
Installing splash guards keeps your kitchen dry and reduces cleaning effort. These guards also protect materials from water damage, extending sink and countertop life.
Conclusion
Filling the gap between your kitchen sink and countertop keeps your space clean. It stops water from leaking and causing damage. Use simple tools and materials for a neat finish. Take your time to measure and apply sealant carefully. A small effort now saves big repairs later.
You can enjoy a tidy, safe kitchen with no gaps. Try these easy steps and see the difference today.