Brick expands and contracts with every temperature swing, which means knowing how to caulk windows outside on brick requires a different approach than standard window caulking — the wrong product will crack and pull away within a single season.
Most homeowners discover this the hard way: they apply a basic acrylic caulk, it fails by spring, and water works its way behind the brick veneer where it causes damage that costs far more than a tube of caulk.
This guide covers the exact products, prep steps, and application technique that hold up against brick’s thermal movement — so you seal it once and don’t revisit it for 10 to 20 years.
Why Brick Demands Different Caulk
Brick is not a static material. A standard full brick wall can move up to ¼ inch across a 10-foot run between winter lows and summer highs — and that movement concentrates right at the window perimeter, where brick meets the window frame.
What Thermal Cycling Does to the Joint
Every time temperatures shift, the brick veneer gap around your window opens and closes slightly. Rigid materials crack under this repeated stress. Standard acrylic latex caulk has limited elongation — typically 15 to 25 percent — meaning it tears before it can stretch enough to accommodate brick’s movement. Once a caulk bead cracks, water finds the gap immediately.
Vinyl window frames compound the problem. Vinyl expands and contracts at a different rate than brick, so the joint between a vinyl window and a brick opening experiences stress from two directions simultaneously.
Why Flexible Caulk Is the Only Viable Option
Polyurethane caulk and silicone caulk both retain flexibility long after curing, which is exactly what weatherproofing windows on brick requires. Polyurethane sealants like Sikaflex 1a or NPC Solar Seal 900 can elongate 400 to 600 percent before failing — far beyond what acrylic latex offers. They also bond aggressively to masonry and painted wood frames, making them the go-to choice for caulking gaps between brick and window frames.
Silicone caulk handles extreme temperatures slightly better and resists UV degradation, but it cannot be painted. Polyurethane can.
The bottom line: flexible caulk for brick expansion is not optional — it is the minimum requirement for a seal that lasts.
Selecting the Right Caulk for Brick Windows
Choosing the best caulk for brick windows comes down to three factors: material flexibility, paintability, and how well the finished bead matches your mortar joints visually.
Polyurethane vs. Silicone: Trade-offs
Polyurethane caulk is the most practical choice for most homeowners doing exterior window caulking on brick. It bonds to masonry, wood, aluminum, and vinyl window frames without a primer, accepts paint within 24 to 48 hours, and cures to a matte finish that blends naturally with mortar color. Products like Sikaflex 1a, NPC Solar Seal 900, and Tremco Dymonic 100 are specified by professional masons for exactly this application.
Silicone caulk outlasts polyurethane in raw UV and temperature resistance — a quality silicone bead can hold for 20 or more years on a south-facing wall. The trade-off is significant: silicone cannot be painted, and its glossy surface reads as visually distinct against flat brick and mortar. On painted window trim it stands out clearly.
Use polyurethane when you need to paint the finished joint or match mortar color. Use silicone on unpainted aluminum or fiberglass frames where appearance is less critical.
Other Material Considerations
Elongation percentage is the single most useful number on a caulk data sheet. For window perimeter sealing on brick, look for a minimum elongation of 300 percent — this accommodates seasonal thermal expansion without tearing. Sikaflex 1a, for example, is rated at over 400 percent elongation.
Color matters more than most first-timers expect. Many polyurethane sealants come in limestone, tan, and gray to assist with mortar matching. Avoid bright white on red brick — it draws the eye to every imperfection in the bead.
Surface Prep and Caulk Removal
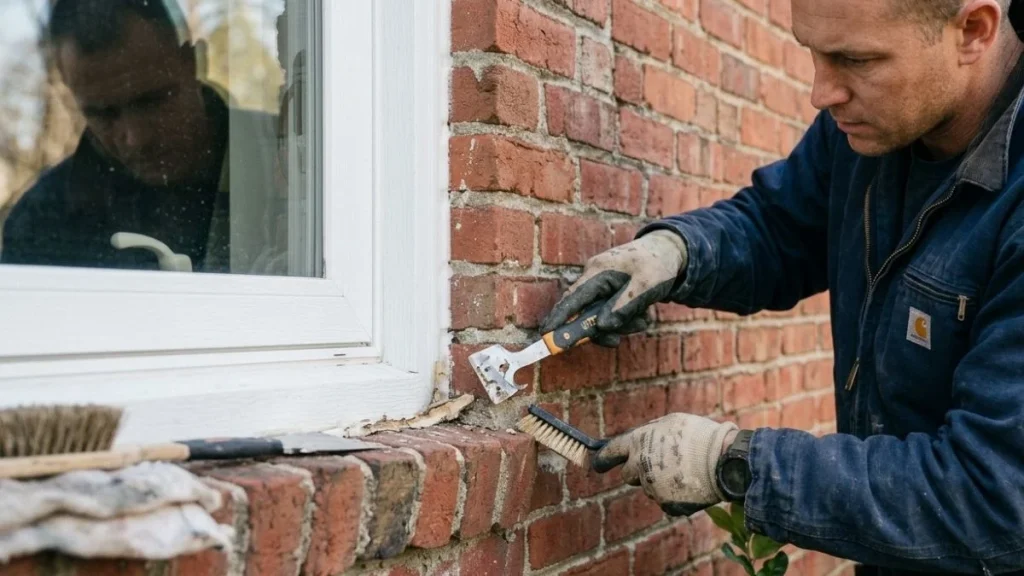
Prep determines whether your caulk lasts 2 years or 20. No flexible sealant — polyurethane or silicone — bonds reliably to dusty, damp, or residue-covered surfaces, regardless of how good the product is.
Preparing Brick and Window Frame
Start by removing all existing caulk. Use an oscillating tool with a rigid scraper blade or a dedicated caulk removal tool like the Recipro-Saw attachment from Hyde Tools — these cut cleanly along the brick veneer gap without gouging brick edges. Never use a metal chisel directly on brick faces; it chips the surface and creates voids the new bead can’t bridge.
Once the old material is out, clean the joint with a stiff nylon brush — not a wire brush on older soft brick, which can abrade the surface. Remove dust, loose mortar, and organic debris. A quick pass with a rag dampened with denatured alcohol removes oily residue from old sealant.
Here’s a step most first-timers skip: moisture testing. Polyurethane and silicone both require a dry surface. Press a small piece of plastic sheeting flat against the brick for 24 hours — if condensation forms underneath, wait before caulking.
On highly porous or previously bare brick, apply a masonry primer like Sikagard 552 before caulking. It seals the surface and dramatically improves adhesion.
Where NOT to Caulk
Weep holes are intentional. Brick veneer walls are designed to drain water through small openings at the base of the wall — typically gaps left in the mortar at the bottom course. Sealing these traps moisture inside the wall cavity, which accelerates deterioration far faster than any gap around a window frame.
Never caulk the bottom window sill joint if water management relies on that gap to drain outward. And leave brick-to-brick mortar joints alone entirely — these are structural movement zones that require repointing with mortar, not sealing with flexible caulk.
Step-by-Step Application Process

Good technique matters as much as product selection. A quality polyurethane sealant applied sloppily will underperform a mid-grade product applied correctly.
Taping and Setup
Painter’s tape application is the step that separates clean, professional results from messy ones. Apply tape to both the brick face and the window frame, leaving exactly ⅛ inch of clearance from each edge of the joint. This controls the bead width and keeps the finished line sharp against both surfaces.
For gaps wider than ½ inch, install backer rod first. Backer rod — a closed-cell foam rope available at any hardware store — fills the deep portion of the gap so the caulk bead is no more than ½ inch deep. A bead that is too deep can’t flex properly under thermal expansion and is more likely to fail at the bond line.
Use a smooth-rod caulk gun rather than a ratchet-drive model for polyurethane sealants. Smooth-rod guns like the Newborn 250 give you pressure control, which matters when running a consistent bead along an uneven brick veneer gap.
Running the Bead
Hold the gun at a 45-degree angle to the joint and move at a steady, consistent speed — too slow and the bead builds up, too fast and you get thin spots. Aim for a bead width roughly 25 percent wider than the gap itself to ensure full contact on both sides.
Tool the joint immediately with a wet finger or a caulk finishing tool, pressing the sealant firmly into the gap. This removes air pockets and improves contact adhesion on both the brick and window frame surfaces.
Remove the painter’s tape before the surface skins over — typically within 5 to 10 minutes for polyurethane in normal conditions. Pull the tape back at a 45-degree angle away from the bead to get a clean edge.
Professional Finish and Brick Aesthetics
A correctly sealed window perimeter that looks wrong is still a failure — especially on brick, where mortar joints set a strong visual standard the caulk bead has to match.
Matching the Mortar Texture
Fresh polyurethane caulk cures smooth and slightly shiny, which reads as obviously different from surrounding mortar joints. The fix is simple: while the bead is still wet and tooled flat, dust fine masonry sand lightly over the surface. Press it gently into the sealant with a dry finger, then brush away the excess once the bead has skinned over. The result is a matte, granular texture that blends with mortar far more convincingly than bare caulk.
Before the sealant cures fully, take a photograph of the finished joint in natural daylight. Color mismatches are much easier to spot in a photo than in person. If the tone is noticeably off, a second light pass with a tinted exterior masonry paint after full cure can correct it without compromising the seal.
Cleanup and When to Call a Professional
Clean uncured polyurethane sealant with mineral spirits on a rag — work quickly, as it becomes much harder to remove after 30 minutes of exposure. Never use acidic cleaners on brick; products containing muriatic acid etch the surface and can permanently stain the face of the brick around the window frame.
Call a professional mason when gaps exceed 1 inch, when you see cracked or spalling brick at the window opening, or when the existing mortar around the frame is crumbling. These conditions indicate structural movement or water damage that caulk alone cannot address — and sealing over them traps moisture and accelerates deterioration.
You May Like Also: How to Seal Siding & Brick Gaps
Ready to Seal Your Brick Exterior
The single factor that determines whether exterior window caulking on brick lasts or fails is product flexibility — polyurethane or silicone, never standard acrylic latex. Start today by inspecting each window perimeter for cracked or missing caulk, then pick up a tube of Sikaflex 1a and a package of backer rod sized to your largest gap before the next rain hits.