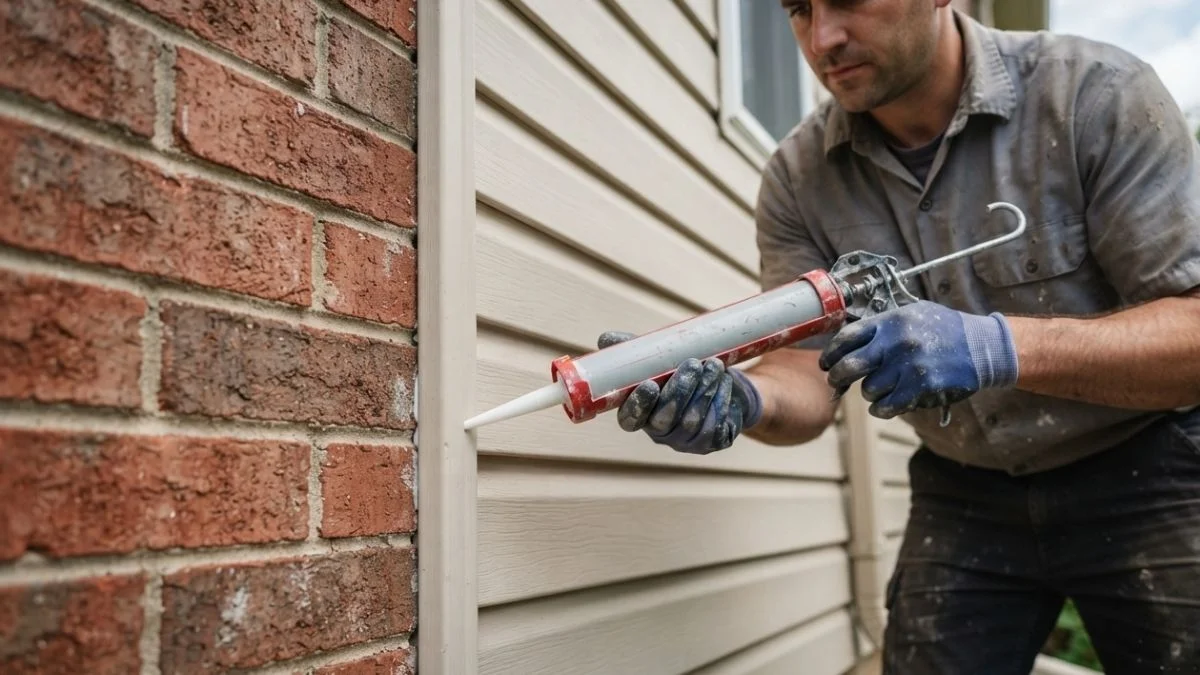
A gap as narrow as 1/16 of an inch between siding and brick is wide enough to let water infiltrate your wall cavity, and knowing how to seal where siding meets brick correctly is the difference between a 30-minute fix and a $10,000 mold remediation job.
Most homeowners facing this problem grab the wrong caulk at the hardware store — standard paintable latex fails against brick’s thermal movement and porous surface, leaving the gap open within a season.
This guide covers exactly which sealants bond to dissimilar materials like vinyl or fiber cement siding and masonry, how to prep the joint correctly, and the specific situations where caulk alone is not enough and flashing must be part of the repair.
Why Water Infiltrates the Siding-Brick Junction
Water finds the siding-brick junction because two fundamentally different materials meet there — and neither one seals the other by default.

Vinyl and Fiber Cement Siding Are Not Waterproof on Their Own
Vinyl siding is water-resistant, not waterproof. It acts as a rain screen — a first layer that deflects bulk water — but it relies on a secondary moisture barrier behind it to stop what gets through. Where vinyl or fiber cement siding meets brick, that secondary seal is almost always missing or has deteriorated, leaving the wall cavity exposed to water intrusion.
Brick Is Porous by Nature
Brick and mortar absorb water. A single wythe (one brick thick) of standard clay brick can absorb up to 20% of its weight in water. That absorbed moisture migrates inward, and where it contacts the siding interface without a proper sealant or flashing, it moves directly into the wall assembly.
The Air Gap Creates a Moisture Trap
The International Residential Code (IRC) requires approximately a 1-inch ventilation gap between masonry and framed wall systems. That gap is intentional — it allows drying. But without a correctly installed moisture barrier at the siding-brick interface above, wind-driven rain enters the gap from the top and sides, pools, and has nowhere to drain.
Here’s the problem: caulking between brick and siding addresses the exposed joint at the surface, but it does nothing for water already inside that cavity. Proper exterior sealing means managing moisture at every layer — sealant at the joint, flashing at horizontal transitions, and a continuous water-resistive barrier behind.
Choosing the Right Sealant Material
The sealant you choose determines whether this repair lasts 2 years or 20. At a brick-siding interface, you need a product engineered for dissimilar materials, thermal movement, and continuous moisture exposure.
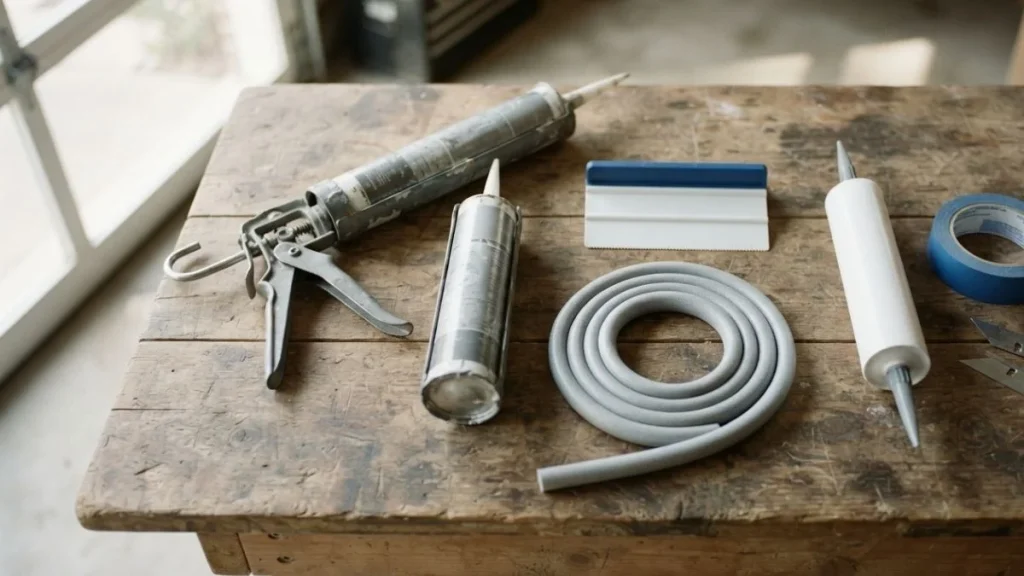
Polyurethane vs. Silicone Caulk: Which to Choose
Polyurethane caulk is the stronger choice for vinyl siding brick gap sealing and most brick-siding interfaces. It bonds aggressively to masonry, remains flexible through freeze-thaw cycles, accepts paint, and typically lasts 10–20 years. Silicone caulk masonry applications offer slightly longer lifespan (15–25 years) and superior water resistance, but silicone won’t accept paint and adhesion to some siding materials — particularly fiber cement — is weaker. For most DIY homeowners, polyurethane is the practical pick.
Specialty Products and Why Standard Acrylic Fails
Standard acrylic latex caulk fails at masonry joints within 1–3 seasons. It shrinks as it cures, bonds poorly to porous brick, and cracks under thermal expansion — the exact conditions present at any exterior siding-brick junction.
These three products are specifically formulated for this application:
| Product | Type | Paintable | Lifespan | Temperature Range |
|---|---|---|---|---|
| OSI QUAD Max | Polyurethane-hybrid | Yes | 20+ years | -40°F to 300°F |
| Loctite PL Polyurethane | Polyurethane | Yes | 10–20 years | -20°F to 180°F |
| Sikaflex-15LM | Polyurethane | Yes | 15–20 years | -40°F to 212°F |
All three cure to a flexible, watertight seal that handles the differential movement between masonry and siding without cracking. OSI QUAD Max is particularly well-regarded for caulking between brick and aluminum siding because of its strong adhesion to both metal and porous masonry surfaces.
Sealing Process: Preparation Through Cure
Proper prep accounts for 80% of whether a caulk seal holds long-term. Rushing surface preparation is the single most common reason exterior sealing fails prematurely.
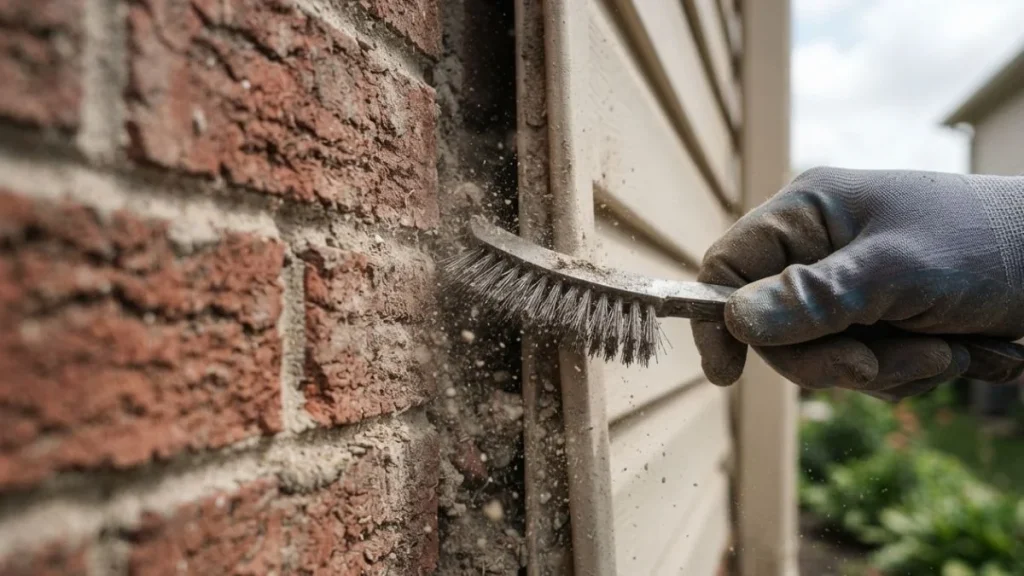
Surface Prep: Cleaning and Old Caulk Removal
Start by removing all existing caulk. Use a utility knife to score along both edges, then pull the bead free with a caulk removal tool. A heat gun set to low softens stubborn polyurethane residue without damaging siding. Once the old material is out, scrub the joint with a stiff wire brush to clear mortar dust and loose debris, then blow the gap clean with compressed air. Finish with an isopropyl alcohol wipe on both surfaces.
The joint must be completely dry before you apply anything. If the brick or siding is wet, wait a full 24 hours. Applying sealant over damp masonry is the fastest way to guarantee adhesion failure.
Application Technique and Tools
Cut the caulk tube nozzle at a 45-degree angle to match your gap width — typically 1/4 to 1/2 inch for a standard siding-brick junction. Use a smooth-rod caulk gun for consistent pressure. Pull the gun toward you along the joint in one continuous motion rather than pushing it, which prevents air pockets. Immediately tool the bead flat with a wet finger or a caulk finishing tool, pressing the sealant firmly into the gap.
Do not overfill expansion joints. The sealant needs room to compress and stretch with thermal movement — a joint packed too full will split under pressure.
Curing Time and Climate Factors
Polyurethane caulk reaches a surface skin in 1–2 hours but requires 24–48 hours for full cure. Silicone needs 24–72 hours depending on joint depth and ambient humidity. Both products cure more slowly in cold or dry conditions — below 50°F or above 85°F, add at least 24 hours to the manufacturer’s stated window before painting or exposing the joint to heavy rain.
Flashing vs. Caulk: When Each Solves the Problem
Caulk and flashing solve different parts of the water infiltration problem — using one where you need the other guarantees failure.
When Caulk Alone Is Sufficient
Vertical wall junctions — where siding runs alongside a brick chimney or a brick veneer accent wall — are appropriate candidates for caulk-only sealing. At these joints, water runs down and away from the interface rather than pooling against it. A properly prepped and tooled bead of polyurethane caulk at a vertical brick-siding junction manages moisture effectively for 10–20 years with no additional flashing required.
When Flashing Is Non-Negotiable
Horizontal transitions are a different situation entirely. Anywhere a roof plane, a window head, or a ledger board meets a brick-siding interface, water collects and sits. The IRC and most local building codes mandate continuous flashing at these locations precisely because no sealant — regardless of brand or formulation — withstands constant hydrostatic pressure (water pressing against a surface under its own weight) indefinitely.
Brick siding flashing installation at these transitions uses pre-bent galvanized steel or aluminum flashing embedded into the mortar joint above and lapped over the siding below. This physically redirects water away from the wall assembly rather than relying on a chemical bond to hold it out.
The Professional Standard: Combined Approach
Experienced masons and siding contractors use both. Flashing handles the bulk water load at high-risk horizontal transitions, and polyurethane or silicone caulk seals the flashing edges — the points where metal meets masonry or siding — to close any remaining gaps. Neither element works as well alone as they do together. If you are repairing a roof-wall-brick junction and skip the flashing, no amount of exterior sealing with caulk will provide a permanent fix.
Common Failures and How to Avoid Them
Most caulk failures at a siding-brick junction trace back to 4 specific mistakes — all of them preventable with the right material choice and basic prep discipline.
Wrong Caulk Type for the Substrate
Pure silicone caulk does not bond reliably to vinyl siding. It adheres well to glass and metal, but vinyl’s smooth, low-porosity surface causes silicone to peel away within 1–2 seasons, reopening the joint to water intrusion. Similarly, applying standard acrylic latex to masonry is a short-term fix at best — it cannot handle the thermal expansion differential between brick and siding material. Match the product to the substrate: polyurethane for most brick-siding interfaces, silicone only where the joint contacts metal flashing or glass exclusively.
Inadequate Surface Preparation
Old caulk residue, mortar dust, or any surface contamination breaks the chemical bond between sealant and substrate before the product even cures. In practice, a joint that looks clean to the eye often still carries enough dust or oil to compromise adhesion. The isopropyl alcohol wipe described in the prep section is not optional — it is the step that separates a 2-year seal from a 15-year seal.
Overfilling Expansion Joints
A sealant bead packed too deeply into an expansion joint has no room to flex. Polyurethane and silicone both rely on elongation — the ability to stretch and compress — to stay watertight through freeze-thaw cycles. Overfilled joints crack within 2–3 years. For gaps deeper than 1/2 inch, install a foam backer rod first to control fill depth before applying sealant.
Caulking in Wet or Extreme Temperature Conditions
Applying any exterior sealant during rain, high humidity, or temperatures outside the 50°F–85°F window traps moisture at the bond line. The caulk skins over on the surface while remaining uncured underneath, producing adhesion loss that isn’t visible until water infiltration reappears months later. Check the forecast — you need at least 24 dry hours after application for reliable cure.
Frequently Asked Questions
Should I caulk where siding meets brick?
Yes — any gap where siding meets brick on an exterior wall needs to be sealed to prevent water infiltration, air leakage, and pest entry. Unsealed joints allow wind-driven rain to reach the wall cavity, where it causes mold, rot, and insulation damage over time.
What type of caulk works best for brick and vinyl siding?
Polyurethane caulk is the best choice for brick and vinyl siding interfaces. Products like OSI QUAD Max or Loctite PL Polyurethane bond strongly to both masonry and vinyl, remain flexible through freeze-thaw cycles, and accept paint — qualities that standard acrylic latex and pure silicone cannot match at this joint.
When is flashing necessary instead of just caulk?
Flashing is required at any horizontal transition where water can collect — roof-to-wall junctions, window heads, and ledger board connections where brick meets siding. Vertical wall joints where siding runs alongside brick can typically be sealed with caulk alone, but horizontal surfaces exposed to standing or pooling water need physical flashing to redirect bulk water away from the wall assembly.
How long does caulk last between brick and siding?
A properly applied polyurethane sealant at a brick-siding junction lasts 10–20 years under normal conditions. Lifespan shortens significantly with poor surface prep, wrong product selection, or application outside the recommended temperature window of 50°F–85°F.
Read Also: Flashing Where Siding Meets Brick
Know When to Call a Professional
Caulk solves surface joint gaps — it does not fix water damage, failed flashing, or compromised wall assemblies already harboring mold or rot. If you find soft framing, staining on interior walls, or the gap reopens within one season of a fresh seal, stop and schedule a licensed contractor or building envelope specialist to assess the wall system before applying more sealant over a deeper problem. Start your repair by picking up OSI QUAD Max or Loctite PL Polyurethane at a local hardware store and addressing the visible joint first — but treat persistent leaks as a structural warning, not a caulking problem.