


Is your garage showing signs of wear and tear? Cracks, crumbling blocks, or moisture problems in your cinder block garage can turn into costly repairs if you don’t act quickly.
You might feel overwhelmed wondering where to start or how to fix these issues without making things worse. This guide is made just for you. We’ll walk you through simple, effective steps to repair your cinder block garage, protect your investment, and keep your space safe and sturdy.
Keep reading to discover how easy it can be to restore your garage and avoid bigger headaches down the road.
Common Issues In Cinder Block Garages
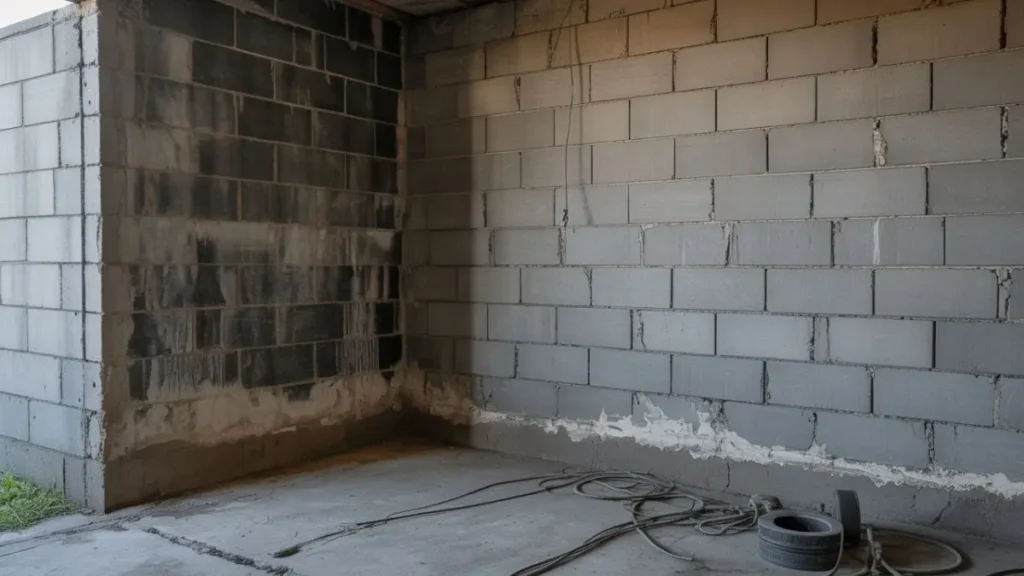
Cinder block garages are popular for their strength and cost-effectiveness. Despite their durability, these structures face common problems that affect their safety and appearance.
Cracks And Structural Damage
Cracks in cinder block walls are a frequent sign of structural problems. These cracks can appear as thin lines or wide gaps. Small cracks may only cause cosmetic issues, but larger cracks can weaken the garage’s stability.
Common causes of cracks include:
- Foundation settling or shifting
- Heavy loads or impacts
- Freeze-thaw cycles causing expansion and contraction
- Poor construction or low-quality materials
Types of cracks to watch for:
| Crack Type | Description | Potential Risk |
| Hairline Cracks | Very thin, surface-level cracks | Mostly cosmetic |
| Vertical Cracks | Run up and down the wall | Possible foundation movement |
| Horizontal Cracks | Run left to right, often near mortar joints | Structural weakness, serious concern |
| Stair-Step Cracks | Follow mortar joints in a stair-step pattern | Foundation or wall settling |
Repairing cracks early prevents bigger damage. Use epoxy injections or mortar patching for small cracks. Large or horizontal cracks need professional inspection and repair.
Water Penetration Problems
Water can enter cinder block garages through cracks, joints, or porous blocks. Water penetration causes mold, mildew, and damage to stored items. It also weakens the block and mortar over time.
Signs of water problems include:
- Damp walls or floors
- Musty odors inside the garage
- Peeling paint or efflorescence
- Rust on metal objects
Common sources of water entry:
- Rainwater seeping through cracks
- Ground moisture rising through the foundation
- Poor drainage around the garage
- Faulty or missing sealants
Efflorescence And Staining
Efflorescence appears as white, powdery deposits on cinder block surfaces. It happens when water moves through the block, carrying salts to the surface. As water evaporates, salts are left behind.
Efflorescence itself is not harmful but signals moisture issues. Stains can also result from rust, dirt, or mildew, affecting the garage’s look.
Common causes of efflorescence and staining:
- Excess moisture inside or outside the garage
- Poor drainage or ventilation
- Use of salt-based cleaning products
- Metal corrosion near the blocks
Assessing Damage Severity

Assessing damage severity is a crucial step in cinder block garage repair. It helps determine the extent of the problem and guides the right repair approach. Proper assessment saves time, effort, and money by addressing issues early. This process involves carefully examining cracks, shifts, moisture damage, and other signs that affect the garage’s structure.
Visual Inspection Techniques
Start by inspecting the entire surface of the cinder block walls. Use a bright flashlight during the check to spot small cracks or discoloration. Look for these key signs:
- Cracks: Hairline cracks are common but wide or deep cracks can show serious damage.
- Bulging or Bowing: Blocks that push outward indicate pressure or structural weakness.
- Moisture Stains: Dark patches or efflorescence (white powder) suggest water leaks or dampness.
- Missing or Crumbling Mortar: Gaps between blocks weaken the wall’s strength.
- Uneven Floors: Check if the garage floor slopes or sinks, which may point to foundation problems.
Use a level tool to check if walls are straight. Mark any problem spots on a map or sketch of your garage for reference. Take photos as well to track changes over time.
Tools And Materials Needed

Having proper equipment makes the process smoother and helps achieve a long-lasting fix. Using quality materials prevents future damage and keeps your garage sturdy. Below, find essential tools and materials needed for cinder block garage repair.
Basic Repair Tools
Start with essential tools that make the repair easier and more precise. Each tool serves a specific purpose, from removing damaged blocks to smoothing mortar. Having these tools ready speeds up the work and improves the repair quality.
- Hammer and Chisel: For removing damaged mortar and broken blocks carefully.
- Trowel: Used to apply and smooth out mortar evenly between blocks.
- Wire Brush: Cleans dust and debris from blocks before repair.
- Level: Ensures that blocks are straight and aligned properly.
- Measuring Tape: Measures block spaces and repair areas accurately.
- Bucket and Mixing Tool: For mixing mortar to the correct consistency.
- Safety Gear: Gloves, safety glasses, and dust masks protect during repair.
Recommended Repair Materials
Using the right materials is crucial for a strong, lasting repair. Materials should match the existing cinder blocks and mortar to blend well. Below are common materials needed for repairing a cinder block garage.
- Cinder Blocks: Replacement blocks that match size and type of existing ones.
- Masonry Mortar Mix: A mix designed to bond blocks firmly together.
- Water: Needed to mix with mortar to the right consistency.
- Concrete Patch: For filling small cracks and holes in blocks.
- Sealant: Protects repaired areas from water damage and weather.
Step-by-step Repair Process

Repairing a cinder block garage requires a clear, step-by-step process to ensure lasting results. Each stage matters, from cleaning the blocks to sealing them against moisture. Following a proper repair sequence helps restore strength and appearance.
Cleaning And Preparing The Surface
Start by thoroughly cleaning the cinder block surface. Dirt, dust, and loose mortar can prevent repair materials from bonding well. Use a stiff brush or broom to remove loose debris. For tougher stains or mold, scrub with a mixture of water and mild detergent. Rinse the surface with clean water and allow it to dry completely.
Preparing the surface also means checking for loose or crumbling blocks. Remove any loose pieces carefully. Smooth rough edges with a chisel or hammer to create an even area for repair. Proper preparation improves adhesion and ensures repairs last longer.
- Remove dirt, dust, and loose mortar
- Scrub with mild detergent solution if needed
- Rinse and let dry fully
- Clear away loose or damaged block pieces
- Smooth edges with chisel or hammer
Filling Cracks And Gaps
Cracks and gaps weaken the garage walls and let moisture in. Start by removing loose material inside cracks using a wire brush or air blower. This creates a clean area for filling. Choose a suitable patching compound or mortar mix depending on crack size.
Apply the filler with a putty knife or trowel. Press firmly to fill cracks completely and smooth the surface level with the blocks. Larger gaps may need multiple layers. Allow each layer to dry before adding the next.
Replacing Damaged Blocks
Severely damaged cinder blocks lose strength and must be replaced. Mark the damaged block area and remove mortar around it with a hammer and chisel. Carefully extract the broken block without harming nearby blocks.
Clean out debris from the empty space. Apply fresh mortar on the bottom and sides of the replacement block. Set the new block in place, tapping gently to align it with the wall. Fill gaps around the block with mortar and smooth joints to match the existing wall.
Allow the mortar to cure fully before applying any finishes or paint. This step restores the wall’s structure and appearance effectively.
| Step | Action |
| 1 | Remove mortar around damaged block |
| 2 | Extract broken block carefully |
| 3 | Clean debris from space |
| 4 | Apply mortar and place new block |
| 5 | Fill gaps and smooth joints |
| 6 | Let mortar cure completely |
Sealing And Waterproofing
After repairing blocks, sealing protects the garage from water damage and stains. Choose a high-quality masonry sealer suitable for cinder blocks. Clean the surface again to remove dust before sealing. Apply the sealer evenly with a brush, roller, or sprayer.
Focus on all repaired areas and the entire wall for uniform protection. Some sealers require two coats. Allow the first coat to dry fully before applying the second. Good sealing prevents moisture penetration and extends the life of repairs.
- Clean surface before sealing
- Use masonry sealer made for cinder blocks
- Apply with brush, roller, or sprayer
- Cover all repaired and exposed areas
- Apply second coat if needed
- Let each coat dry properly
Sealing also helps maintain the garage’s appearance by reducing dirt absorption. Regular inspection and resealing every few years keep the garage in good condition.
Cost Estimates And Budgeting
Repairing a cinder block garage requires careful planning, especially around cost estimates and budgeting. Knowing the expenses upfront helps you avoid surprises and manage your finances better. Costs vary widely based on the damage extent, repair method, and materials used. Budgeting smartly ensures the project finishes on time and within your limits.
DIY Vs Professional Repairs
Choosing between DIY and professional repairs affects your budget and the repair quality. Doing the work yourself saves money but demands time, skills, and tools. Professionals bring experience, speed, and quality but cost more upfront.
| Factor | DIY | Professional |
| Labor Cost | Free (your time) | $30 – $70 per hour |
| Time Required | Several days to weeks | 1 to 3 days |
| Quality | Variable | High |
| Tools Needed | Specialized tools | Provided by contractor |
Material Costs Breakdown
Materials form a major part of the repair budget for a cinder block garage. Understanding each item’s cost helps you plan accurately. Prices depend on your location and the quality of materials chosen.
Common materials include:
- Cinder blocks: Basic building units
- Mortar mix: Binds blocks together
- Rebar: Adds strength to walls
- Concrete patch: Repairs cracks and holes
- Sealant: Prevents moisture damage
| Material | Average Cost | Unit |
| Cinder blocks | $1.50 – $3.00 | Per block |
| Mortar mix | $5 – $10 | Per 80 lb bag |
| Rebar | $0.75 – $1.50 | Per foot |
| Concrete patch | $10 – $20 | Per bag |
| Sealant | $15 – $30 | Per gallon |
Additional costs may include delivery fees and tool rentals. Planning for these helps avoid budget overruns. Always buy a little extra material to cover mistakes or adjustments.
Conclusion
Cinder block garage repair keeps your structure strong and safe. Fix cracks and damage early to avoid big problems later. Use the right materials and tools for best results. Regular checks help catch issues before they grow. Taking care of repairs saves money and stress in the long run.
A solid garage protects your vehicle and belongings well. Simple steps make repair work easier and faster. Stay on top of maintenance to keep your garage lasting.


