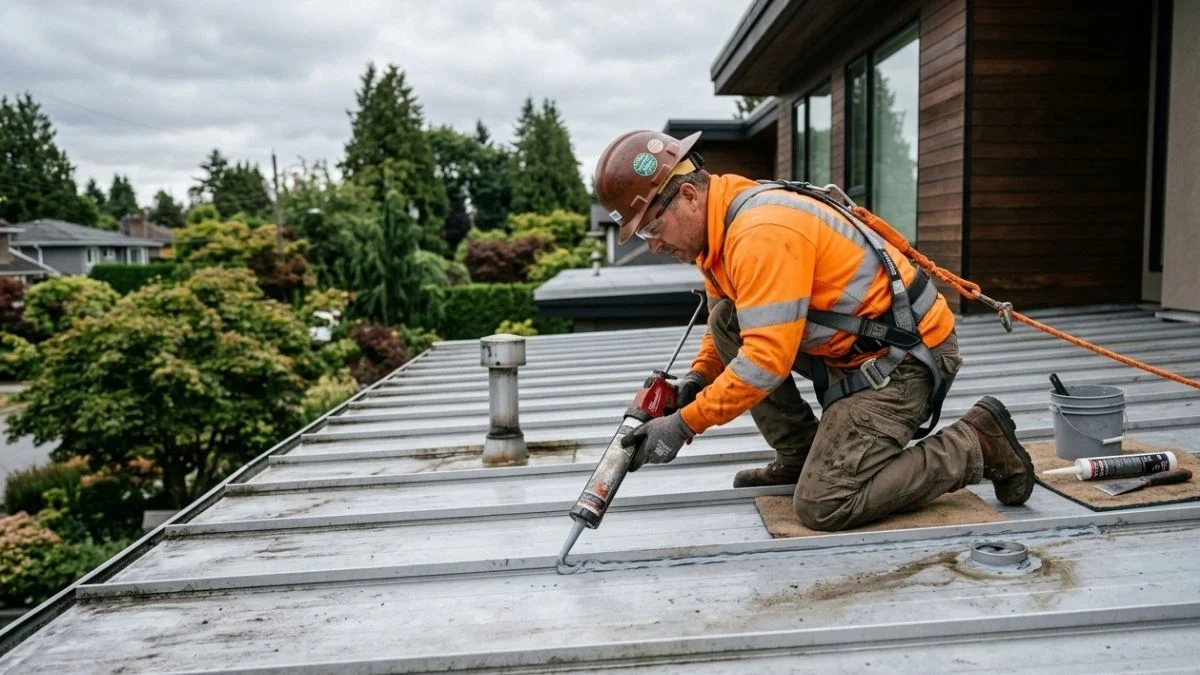
A single unaddressed roof leak can cause mold growth within 24 to 48 hours, according to the EPA — and insulated aluminum roof panels leaking at seams or fastener points are one of the most common sources of hidden interior water damage in both residential and light commercial buildings.
Most property owners don’t discover the failure point until water stains appear on ceilings or insulation becomes saturated, by which point the damage already extends well beyond the visible wet spot.
This guide walks you through 5 concrete sealing steps — including specific product recommendations, root cause identification, and safety precautions — so you can stop the leak, protect your structure, and make an informed decision about DIY repair versus calling a licensed roofing contractor.
Finding and Preparing the Leak Site

Locating Exact Failure Points
Water entry and the visible wet spot inside your building are rarely in the same place. Water travels along panel undersides, insulation layers, and structural members before dripping — sometimes traveling 10 feet or more from the actual breach.
Start your inspection at these high-failure zones:
- Fastener holes and metal panel fasteners — backing seals degrade over time, especially on low-slope roofs where water pools rather than sheds
- Roof panel seam leaks — insulated aluminum panel seam leaks typically occur where the continuous sealant bead has cracked or separated due to thermal expansion in aluminum roof systems
- Aluminum roof tie-in leaks — anywhere a panel meets a wall, curb, skylight, or HVAC penetration is a structural transition point where roof flashing is the primary water barrier
- Panel joints on low slopes — low slope roof drainage problems accelerate sealant breakdown because standing water creates sustained pressure against joints
During rain, mark the interior drip point and measure its distance from known roof features. No rain? Run a garden hose slowly over suspect zones in sections, starting at the lowest point and working upward.
Surface Preparation Before Sealing
Clean, dry aluminum bonds; dirty, wet aluminum fails. This step determines whether your repair lasts 2 years or 15.
Use a wire brush or plastic scraper to remove old metal roof joint sealant, oxidation, and debris. Follow with a degreasing solvent — isopropyl alcohol or acetone works on aluminum — and let the surface dry completely. Applying sealant over any moisture, even condensation, breaks the adhesive bond immediately.
Tape the perimeter of your repair zone with painter’s tape to keep sealant edges clean and control bead width. This matters especially when working near a waterproofing membrane or panel roof flashing tape installation, where a messy overlap can trap water rather than shed it.
3-Step Sealing Repair Process
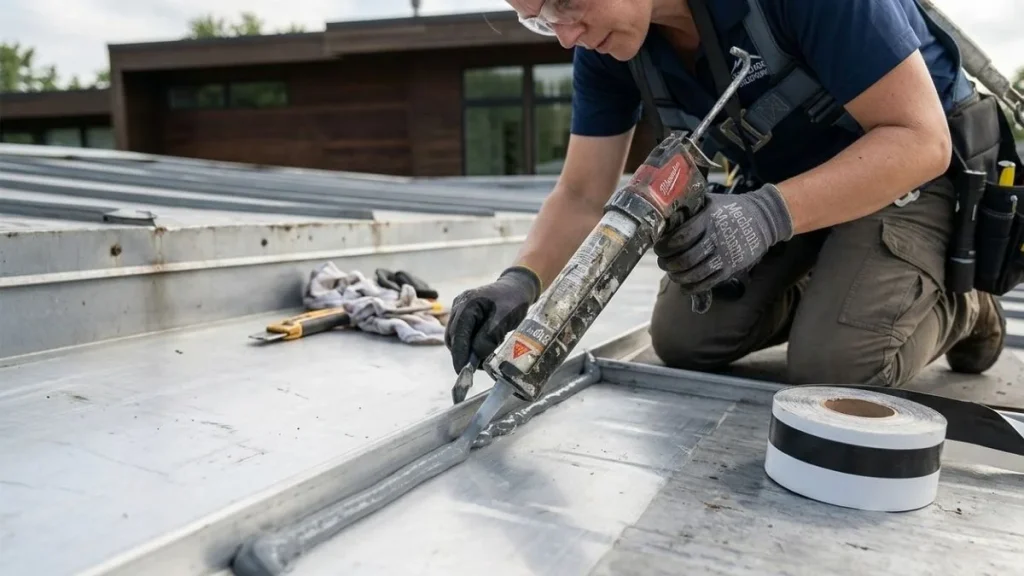
Step 1: Apply a Continuous Sealant Bead
Sealant choice determines how well the repair handles thermal expansion in aluminum roof systems. Aluminum expands and contracts significantly with temperature swings — up to 1.2 inches per 100 feet of panel length — so a rigid sealant will crack within one season.
Use these sealant types based on your repair zone:
- Polyurethane sealant (such as Tremco Dymonic 100 or Sika Sikaflex-221) — best for roof panel joints and seam edges where movement is constant
- Silicone sealant — stronger adhesion on flat aluminum surfaces but less flexible; avoid on active expansion joints
- Specialty metal roof formulas (such as Geocel 2300 or Henry 209) — designed specifically for metal roof joint sealant applications and compatible with coated aluminum panels
Load your caulk gun and extrude a consistent bead — minimum 3/8 inch wide and 1/4 inch deep — along the entire joint length without stopping. Spot patching insulated aluminum panel seam leaks never holds; water finds the gaps within one freeze-thaw cycle. Tool the bead smooth immediately with a wet finger or plastic tool to press sealant into substrate contact.
Step 2: Install Panel Roof Flashing Tape
Self-adhesive flashing tape adds a second waterproof layer over fastener failures and seam edges. Products like 3M 8067 All Weather Flashing Tape or Zip System flashing tape conform to uneven surfaces including raised metal panel fasteners and seam ridges.
Press the tape centered over the joint, then overlap each edge 2 to 3 inches onto flat panel surface. Use a roller or firm pressure tool to eliminate air pockets completely — any trapped air becomes a water entry point under wind uplift.
Step 3: Cure, Then Test
Allow full cure per your sealant product label — typically 24 to 48 hours for polyurethane, up to 72 hours in cool or humid conditions. Then run a slow hose test over the repaired zones for 10 minutes and check inside immediately. Monitor the interior for residual moisture and mold growth over a 2-week period before considering the repair complete.
DIY vs. Professional Repair Decision Matrix

Not every leak requires a contractor, but misreading the severity turns a $50 sealant repair into a $15,000 roof replacement. Use the criteria below to make an honest assessment before climbing on the roof.
When DIY Is Feasible
A self-repair is appropriate when all 3 conditions are true:
- Panels are under 10 years old — aluminum panels in this age range typically retain structural integrity and coating adhesion, meaning new metal roof joint sealant will bond properly
- Leak points are isolated — 1 to 2 identifiable failures at a seam edge, fastener, or flashing transition rather than distributed dripping across multiple zones
- No visible panel deformation — flat, stable panels without buckling, separation, or rust streaking indicate the substrate can hold a repair
If your insulated aluminum panel seam leaks are localized and the panels show no surface deterioration, a DIY sealing repair using the 5-step process above is a reasonable first response.
When to Call a Professional
Stop and contact a licensed roofing contractor if you observe any of the following:
- Panels are 15 or more years old with widespread sealant breakdown across multiple roof panel joints
- Roof panel fastener failures show active rust, elongated holes, or pull-through — signs the metal panel fasteners have lost structural grip
- Sagging deck sections or soft spots underfoot indicate waterproofing membrane or decking failure beneath the panels
- Aluminum roof tie-in leaks at walls or curbs show separation greater than 1/4 inch, suggesting thermal expansion aluminum roof movement has exceeded the original flashing design
The Gray Zone
Panels aged 10 to 15 years with 3 or more leak points sit in a gray zone. A professional inspection costs $150 to $400 on average and gives you documented evidence of whether targeted sealing or full panel replacement is the cost-effective path forward.
Recommended: How to Fix a Leaking Aluminum Patio Roof
Frequently Asked Questions
What causes insulated aluminum roof panels to leak even after sealing?
The most common cause is applying sealant over a dirty, wet, or oxidized surface — the bond fails within one season. Thermal expansion in aluminum roof systems also cracks rigid sealants at active joints; if the wrong product was used, the repair will open back up regardless of application quality.
How long do insulated roof panels last before replacement becomes necessary?
Most insulated aluminum panels carry manufacturer warranties of 20 to 40 years, with Chief Buildings and Nucor both publishing 25-year standard warranties on their insulated metal panel systems. Real-world service life depends heavily on maintenance frequency, coastal or chemical exposure, and whether fastener and seam sealant has been reapplied on schedule.
Will aluminum roof coating or Flex Seal work on existing seam leaks?
Brush-applied aluminum roof coatings like Henry Elastomeric Roof Coating can extend the life of aging panels and reduce minor surface porosity, but they do not replace proper seam sealant or flashing repair at active joint failures. Flex Seal and similar aerosol products lack the adhesion and flexibility required for metal panel joints under thermal movement and are not a reliable long-term fix.
Next Steps: Assess Your Leak and Act
Most insulated aluminum roof panel leaks fail at fasteners, seam edges, and tie-in transitions — and almost all of them are made worse by delayed action or incomplete surface preparation before sealing. Today, walk your roof and mark every fastener point, seam gap, and flashing edge showing rust, cracked sealant, or separation, then cross-reference what you find against the DIY vs. professional decision matrix in this guide. If you identify more than 3 failure points or panels older than 15 years, schedule a professional inspection before attempting any sealant repair.