Mounting a service mast, security camera bracket, or decorative shutter to exterior siding without hitting a stud is one of the fastest ways to cause costly structural damage — yet most standard stud finders fail completely through vinyl, aluminum, or Hardie board siding.
The real problem is that exterior walls hide studs behind multiple layers — sheathing, housewrap, and siding — that defeat the sensors most homeowners already own, leaving them guessing where to drill or resorting to expensive contractor calls.
This guide covers 5 tested methods for how to find studs behind siding, ranked by cost, ease, and real-world effectiveness, so you can mount outdoor fixtures confidently without removing a single panel.
Five Methods to Locate Studs Through Siding
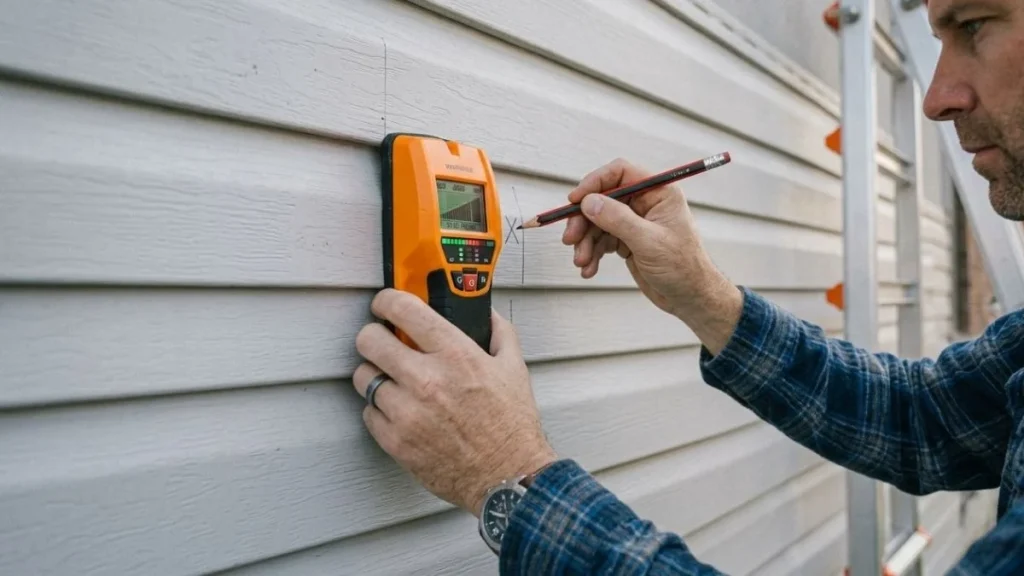
Electronic Stud Finder Through Siding
Standard stud finders — like the basic Zircon StudSensor — detect density changes through drywall at roughly 3/4 inch depth. Exterior walls add sheathing (typically 1/2 to 3/4 inch OSB), housewrap, and siding on top of that, pushing the total depth well beyond what budget models handle.
Deep-scanning models like the Zircon i65 or Franklin Sensors ProSensor 710 penetrate up to 1.5 inches, making them viable for vinyl and aluminum siding. Hardie board (fiber cement) runs 5/16 to 1/2 inch thick and is non-metallic, so deep-scanning electronic finders still work — but metal siding blocks the signal entirely, making electronic wall framing detection useless on aluminum lap panels.
Neodymium Magnet Approach
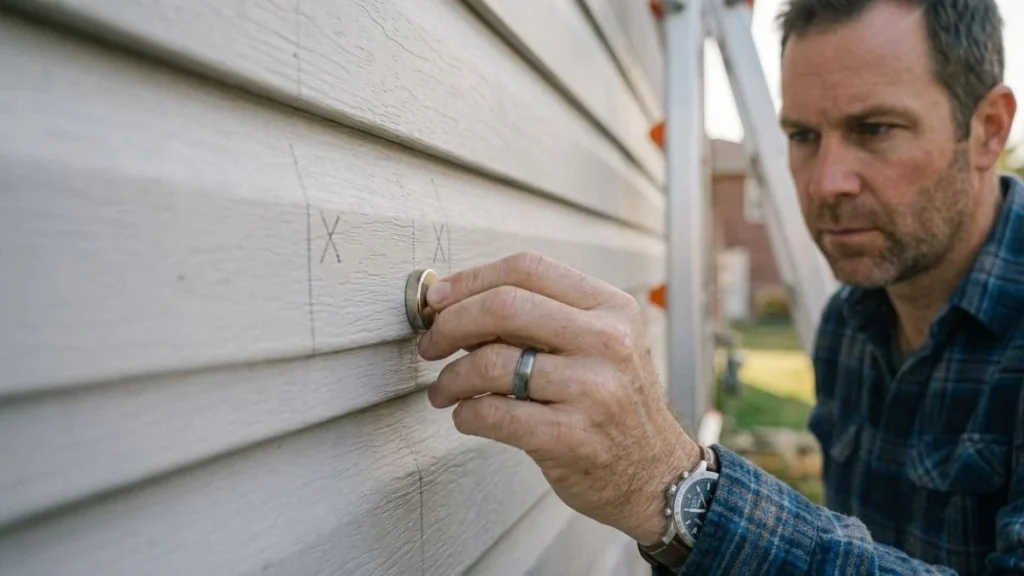
A neodymium rare-earth magnet locates the nails or screws fastening the sheathing to studs — those fasteners are the proxy for stud location. Standard refrigerator magnets lack the pull strength to work through siding layers. Use at minimum a 1/2-inch diameter N52-grade neodymium magnet.
Process:
- Drag the magnet slowly across the siding in horizontal rows spaced 2 inches apart.
- Mark each point where the magnet sticks or resists movement.
- Connect vertical clusters of marks — that vertical line indicates a stud centerline.
- Confirm spacing: studs typically run 16 inches on center in residential framing.
This method works reliably on vinyl and Hardie board. It fails on aluminum siding because the metal surface creates false pulls across the entire panel.
Manual Tapping and Test Drilling
Tap the siding firmly with a knuckle or a rubber mallet. A hollow sound indicates a cavity between studs. A denser, shorter thud indicates backing — likely a stud behind that point. This technique requires patience and a quiet environment to hear the difference clearly.
Once tapping identifies a likely stud location, confirm with a 3/32-inch test drill bit. Drill slowly at an angle through the siding. Resistance that continues past the sheathing layer confirms solid framing. Always check for electrical conduit or plumbing with a borescope or by consulting your home’s utility map before drilling. Seal every test hole immediately with exterior-grade silicone caulk to block water intrusion.
Visual Inspection of Fastener Patterns
Siding installers nail or screw through panels directly into studs. On weathered vinyl or wood siding, those fastener heads often become visible as small bumps or rust shadows. A straight vertical line of fasteners running up the wall marks a stud.
Doubled studs appear at window and door edges, corners, and wall intersections — always start measuring 16-inch intervals from a corner or opening to establish the stud spacing pattern for the rest of the wall.
Siding Removal Tool Method (Malco)
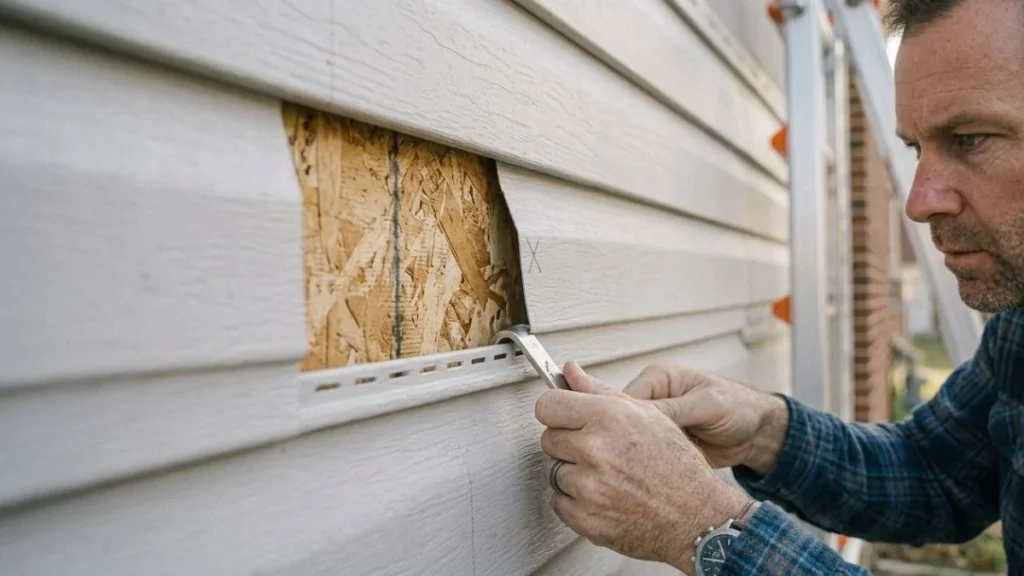
The Malco TSF1 zip tool unzips interlocking vinyl siding panels without cracking or deforming them, exposing the sheathing underneath for direct visual inspection and measurement. This is the most accurate non-destructive stud location method for vinyl installations.
This approach makes sense when you are mounting something heavy — a service mast bracket, a large structural anchor — where precision justifies the extra step. The Malco TSF1 retails around $20, far less than a contractor callout fee. Reinstall the panel by snapping it back onto the locking channel — no fasteners needed for the siding itself.
How Siding Material Affects Stud Detection
Not every method works on every siding type. The material between you and the framing determines which tool gives accurate results and which wastes your time.
Vinyl Siding
Vinyl is the most forgiving material for non-destructive stud location. It is thin (typically 0.040 to 0.046 inches), non-conductive, and non-metallic, so deep-scanning electronic stud finders and neodymium magnets both penetrate it without interference. The interlocking panel design also makes the siding unzipping technique with a Malco TSF1 zip tool fast and reversible. For most exterior mounting points on vinyl-clad walls, the magnet method or a Franklin Sensors ProSensor 710 will get you to the stud centerline in under five minutes.
Hardie Board (Fiber Cement)
Hardie board is denser than vinyl — panels run 5/16 to 1/2 inch thick — and that added mass reduces electronic stud finder accuracy on budget models. Deep-scanning finders still work, but expect more false readings. The neodymium magnet method remains reliable here because fiber cement contains no metal to interfere with the pull. Tapping also works well on Hardie board: the density difference between a stud and an open cavity is more pronounced than on vinyl.
Aluminum Siding
Aluminum is the hardest material for wall framing detection. The conductive metal surface scrambles electronic stud finder signals entirely and creates uniform magnetic attraction across every panel, making the magnet method unreliable. Manual tapping and visual fastener inspection are your only practical non-destructive options. If the project is load-bearing, use the Malco zip tool workaround — except aluminum siding uses a similar interlocking profile, so a standard vinyl zip tool still unzips most aluminum panels without damage.
Cedar and Wood Siding
Wood siding offers a natural advantage: fastener heads are often visible to the naked eye, especially on weathered surfaces where paint has faded around nail heads. Cedar lap siding is typically nailed directly through the face into studs, leaving a clear vertical stud spacing pattern to follow. Electronic finders work through wood siding reliably, and tapping produces clear sound differentiation. On wood siding, visual inspection alone is often enough to find framing behind exterior siding before reaching for any tool.
Standard Stud Spacing and How to Use It as a Confirmation Tool
Knowing stud spacing patterns turns one confirmed stud location into a roadmap for the entire wall. Most residential framing in the United States follows 16-inch on-center spacing, meaning the distance from the center of one stud to the center of the next is exactly 16 inches. Some homes built with energy efficiency upgrades use 24-inch on-center spacing — if your first two confirmed studs are 24 inches apart, assume that pattern continues.
Why the 16-Inch Standard Exists
The International Residential Code (IRC) sets 16-inch on-center framing as the default for load-bearing exterior walls. This spacing balances structural strength with standard 4×8 sheet material alignment — OSB and plywood sheathing panels land exactly on stud edges at 16-inch intervals. That same math means exterior mounting points spaced 16 or 32 inches apart will almost always hit solid framing.
Using One Confirmed Stud to Find the Rest
Once any single method — magnet, electronic finder, or test drill — confirms one stud, measure outward in 16-inch increments in both directions. Mark each estimated location with painter’s tape. Verify 2 or 3 of those marks with a quick magnet pass or tap test before drilling. This combined approach is faster and more reliable than running a full detection sweep across the entire wall.
Where Standard Spacing Breaks Down
Corners, window rough openings, and door frames always contain doubled or tripled studs packed tightly together. These clusters sit outside the regular 16-inch rhythm. Headers — the horizontal framing members above windows and doors — also interrupt the pattern. Always start your 16-inch measurement from a known field stud, not from a corner or opening edge, to avoid building your spacing estimate on an irregular anchor point.
Tool Comparison and When to Remove Siding Instead of Detecting Through It
Method Comparison by Siding Type
| Method | Cost | Vinyl | Hardie Board | Aluminum | Wood |
|---|---|---|---|---|---|
| Deep-scan electronic finder | $30–$80 | Excellent | Good | Fails | Excellent |
| Neodymium magnet (N52) | $5–$15 | Excellent | Excellent | Fails | Good |
| Manual tapping + test drill | $0–$10 | Good | Good | Good | Excellent |
| Visual fastener inspection | $0 | Good | Poor | Poor | Excellent |
| Malco TSF1 zip tool | $20 | Excellent | N/A | Good | N/A |
Load Capacity and Fastener Requirements
The weight of what you are mounting determines how precise your stud location needs to be. Light fixtures and decorative shutters under 10 pounds can use exterior-rated anchors if stud location proves difficult. Anything heavier — a security camera arm, a cable service mast bracket, a dryer vent hood — needs a lag screw driven at least 1.5 inches into solid framing. The National Electrical Code (NEC) requires service mast brackets to be fastened directly into structural framing, not sheathing alone, making accurate exterior wall stud location non-negotiable for that application.
When Siding Removal Is the Right Call
Non-destructive detection is worth the effort for most mounting projects. Here’s the problem: when you are installing multiple anchor points across a wide span — a long cable run, a deck ledger connection, or a series of bracket mounts — spending 20 minutes per point on detection adds up fast. In those cases, unzipping a full run of vinyl with the Malco TSF1, snapping a chalk line directly on the sheathing, and reinstalling the panels takes less total time and produces contractor-grade accuracy.
Contractor Tips for Maximum Accuracy Without Removal
Experienced siding installers use a combination of methods rather than relying on one tool. Start with visual fastener inspection to establish one confirmed stud, apply the 16-inch spacing pattern to estimate the rest, then verify each estimated point with a magnet pass before drilling. For find framing behind exterior siding on unfamiliar walls — older homes, remodels, or non-standard framing — always confirm with a test drill before committing a lag screw. That three-step process costs nothing beyond a $10 neodymium magnet and eliminates guesswork on every exterior mounting point.
You May Read Also: Install an Exhaust Vent in Vinyl Siding
Frequently Asked Questions
Can a standard stud finder work through vinyl siding?
A standard stud finder like the basic Zircon StudSensor typically fails through vinyl siding because the combined depth of sheathing, housewrap, and siding exceeds its detection range. Use a deep-scanning model like the Franklin Sensors ProSensor 710, which penetrates up to 1.5 inches, for reliable results.
Do neodymium magnets really work through siding?
Yes — an N52-grade neodymium magnet detects the steel nails or screws fastening sheathing to studs through vinyl and Hardie board siding with consistent accuracy. Standard refrigerator magnets lack the pull strength to work through multiple siding layers, so the magnet grade matters significantly.
Should I remove siding or locate studs non-invasively?
For single mounting points — a bracket, a light fixture, a camera mount — non-invasive detection with a magnet or deep-scan finder is faster and causes no damage. Remove siding only when installing multiple anchor points across a wide span, where direct chalk-line measurement on the sheathing saves more time than repeated detection passes.
What is the best method for finding studs behind aluminum siding?
Aluminum siding blocks both electronic stud finders and neodymium magnets, leaving manual tapping, visual fastener inspection, and test drilling as your only reliable non-destructive options. If the project is load-bearing, unzipping the aluminum panels with a zip tool and measuring directly on the sheathing produces the most accurate result.
Making Your Mounting Decision
No single tool works on every siding material — matching your method to your specific siding type is what separates a secure mount from a failed one. Start with a $10 N52 neodymium magnet: drag it across your siding in a grid pattern, mark every fastener hit, and use 16-inch spacing intervals to confirm the stud centerlines before you drill anything. If your project involves aluminum siding or multiple heavy anchor points, skip straight to the zip tool method and measure directly on the sheathing.