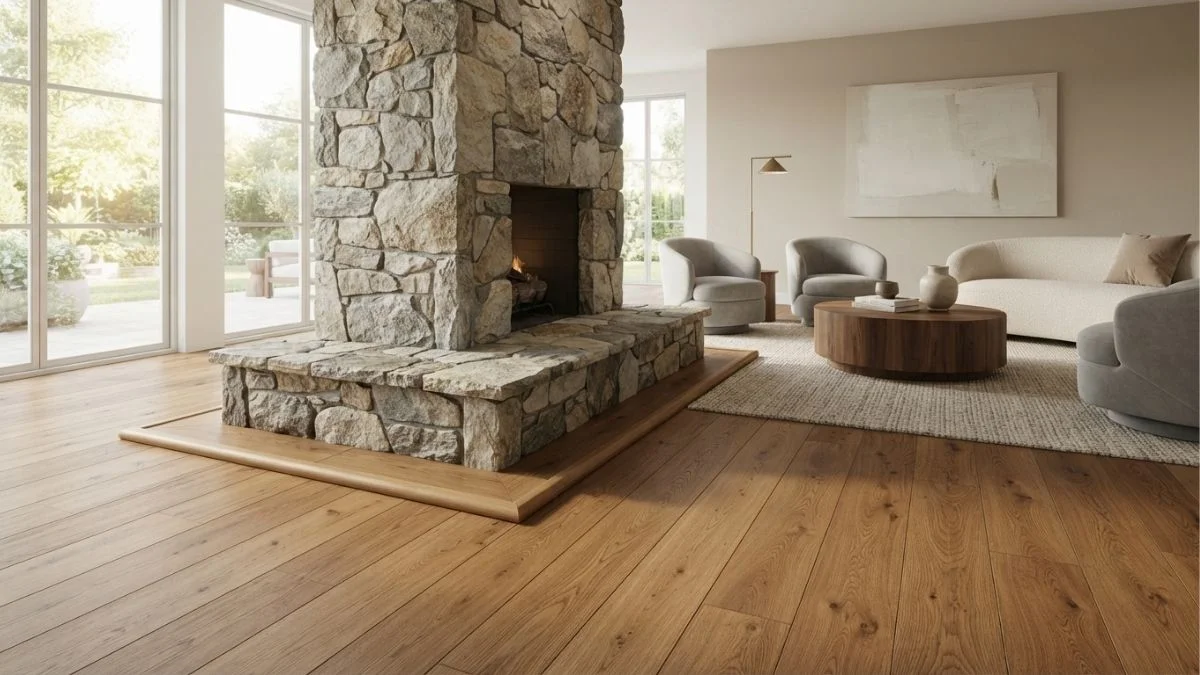
The trim around your fireplace hearth is one of those finishing details that most people don’t notice — until it’s done wrong. A clean, well-fitted hardwood floor trim around a fireplace pulls the entire room together. A poorly installed one, though, can make even an expensive flooring job look unfinished.
If you’ve just laid new hardwood floors or you’re finally getting around to that fireplace refresh, this guide walks you through everything you need to know — from picking the right trim type to nailing the final piece in place without splitting the wood or leaving ugly gaps.
This isn’t a guide for contractors. It’s written for homeowners who want to do the job right the first time without making the mistakes that cost real money to fix.
Why Hardwood Floor Trim Around the Fireplace Matters
It’s More Than Just Looks
Most homeowners think of floor trim as a purely cosmetic detail. In reality, the trim around your fireplace hearth is doing several important jobs at once.
First, hardwood floors naturally expand and contract with changes in temperature and humidity. When hardwood flooring runs up close to a fireplace hearth — which is typically made of tile, brick, or stone — you need a proper transition to accommodate that movement. Without trim, the flooring edge is left exposed. Over time, that exposed edge can chip, warp, or lift, especially near a heat source like a fireplace.
Second, the hearth and the hardwood floor are almost never at the exact same height. There’s almost always a slight level difference, and trim bridges that gap cleanly. It creates a finished edge that protects the flooring from foot traffic wear along the exposed side.
Third, from a purely visual standpoint, trim defines the boundary between the floor and the hearth. It frames the fireplace and gives the whole space a more intentional, designed look. Rooms with properly trimmed fireplace hearths consistently look more polished than those without.
The Risk of Skipping or Getting It Wrong
Leaving the fireplace hearth untrimmed — or rushing through the installation — creates both functional and aesthetic problems. Exposed hardwood edges near a heat source dry out faster than the rest of the floor. That means cracking and splitting over time.
From a resale perspective, buyers and home inspectors notice sloppy finishing details. Poorly fitted trim, large visible gaps, or mismatched profiles can raise questions about the quality of the entire flooring job. It’s a small detail that carries a surprisingly large impression.
Types of Hardwood Floor Trim Used Around a Fireplace
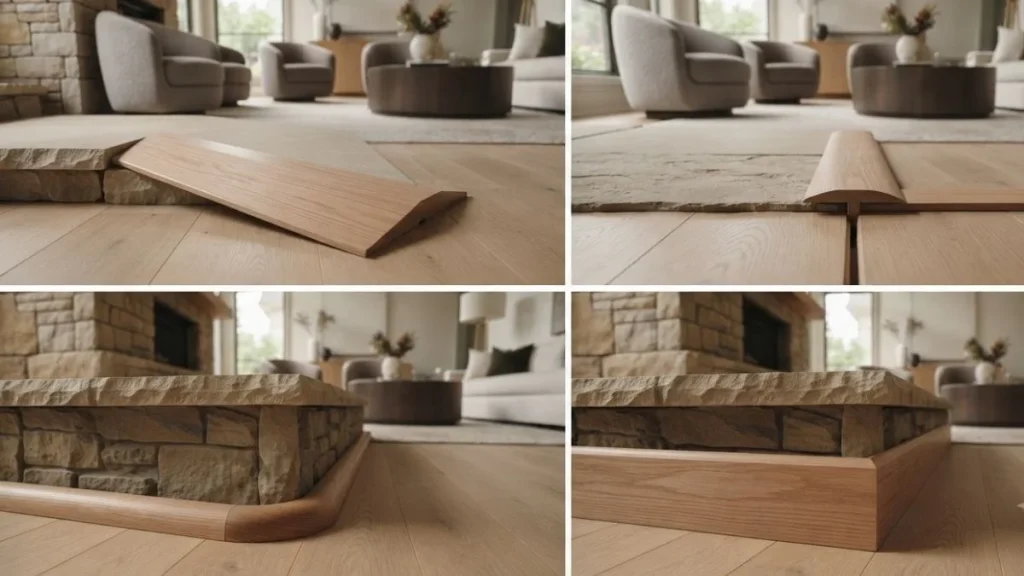
Choosing the right trim profile is the most important decision you’ll make before any cutting or nailing begins. The wrong profile won’t sit flush, won’t cover the gap properly, or will look visually out of place.
Reducer Strips
A reducer strip is the most common trim used where hardwood flooring meets a raised fireplace hearth. It tapers from the height of the hardwood floor down to the lower surface of the hearth, creating a smooth, sloped transition. Reducers work best when the hearth sits slightly higher or lower than the finished floor surface.
When shopping for a reducer, try to match the wood species and finish of your existing hardwood floor as closely as possible. Most flooring manufacturers sell matching reducer profiles for their product lines, which makes this easier.
T-Molding
T-molding is used when the hardwood floor and the hearth surface are at the same height. The T-shaped profile slots into a track and covers the gap between the two surfaces without creating a raised edge on either side. It’s a clean solution for flush transitions but only works when the two surfaces genuinely meet at the same level.
Quarter Round and Shoe Molding
Quarter round is a small, curved molding that sits at the base of the hearth where it meets the floor. It’s commonly used to cover the expansion gap along the hearth edge. It’s an inexpensive option and works well in many situations — but it’s worth noting that quarter round can look thin and low-budget if not properly matched to the floor’s finish and color.
Shoe molding is a slightly flatter alternative to quarter round. It sits a little lower profile and tends to look more refined in formal living spaces.
Custom Hearth Transition Strips
For irregular, angled, or curved hearths, standard off-the-shelf trim profiles simply won’t work. In those cases, a custom-milled transition strip is the right call. Custom strips can be made from solid hardwood or engineered wood to match your floor exactly. They cost more than standard profiles but are often the only way to get a clean result on a non-standard hearth shape.
Tools and Materials You’ll Need
Getting the right tools together before you start saves multiple trips to the hardware store and keeps the job moving cleanly.
Tools:
- Miter saw (for accurate angle cuts)
- Coping saw (for inside corner cuts)
- Tape measure and pencil
- Finish nailer or nail gun
- Pull bar and tapping block
- Safety glasses and hearing protection
- Utility knife
Materials:
- Your chosen trim profile
- Color-matched wood filler
- Paintable or stainable caulk
- Finishing nails or construction adhesive
- Sandpaper (120 and 220 grit)
- Stain and finish to match your existing hardwood floor
How to Measure and Plan the Trim Layout
Measuring the Hearth Perimeter
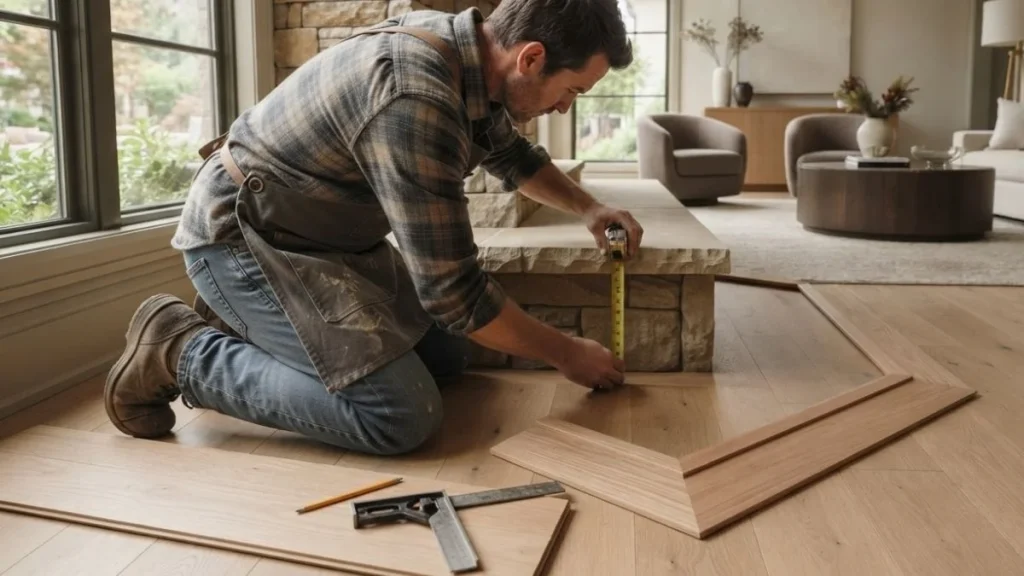
Start by measuring all three exposed sides of the hearth — the front edge and the two side returns. Write down each measurement separately rather than combining them. Add about 10% to your total for waste from cuts and any mistakes.
If your hearth is a standard rectangular shape, the measuring process is straightforward. Run your tape along each edge, mark your measurements, and note where the corners land.
Planning Your Cuts Before You Start
Before you make a single cut, dry-fit every piece of trim around the hearth. This means cutting approximate lengths, setting them in position, and checking how every joint and corner looks before any nails or adhesive go in. Dry fitting takes an extra 20 minutes but saves hours of fixing mistakes.
Look specifically at corner joints. Inside corners should be coped or mitered cleanly. Outside corners — if your hearth has any — need tight miter joints with no visible gaps.
How to Handle Angled or Non-Standard Hearths
Not every hearth sits at a perfect 90-degree angle to the wall. If yours doesn’t, use a bevel gauge to measure the exact angle before setting up your saw. Transfer that angle directly to your miter saw rather than guessing.
For curved hearth edges, a coping saw and some patience are your best tools. Score the trim lightly, make gradual cuts, and test-fit frequently. Trying to force a straight trim piece around a curve always results in gaps.
Installing Hardwood Floor Trim Around a Fireplace: Step-by-Step
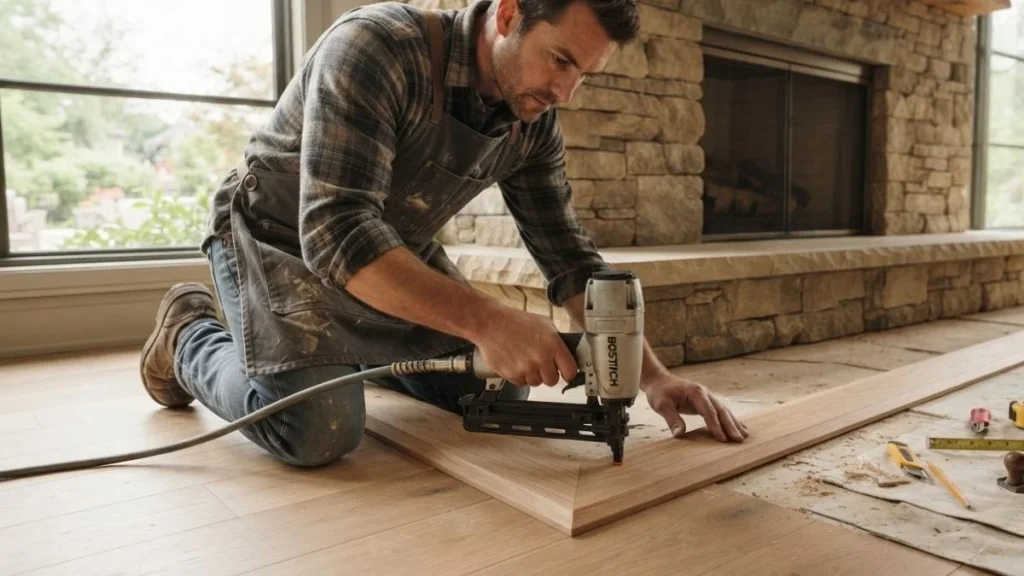
Step 1 — Prep the Area
Clean the hearth edge and the surrounding floor surface thoroughly. Remove any dust, debris, or adhesive residue from previous flooring work. Check for high spots along the hearth base that could prevent the trim from sitting flat. If the subfloor is uneven near the hearth, sand or plane it down before proceeding.
If your hardwood flooring was recently installed, make sure it has fully acclimated to the room’s temperature and humidity before installing trim. Rushing this step and then adding trim can result in the floor shifting after the trim is locked in.
Step 2 — Cut the Trim Pieces
Set up your miter saw at the correct angle for each cut. For standard rectangular hearths, most cuts will be straight 90-degree crosscuts, with 45-degree miters at the corners.
Cut each piece slightly long, test-fit it, then trim it to final length. It’s always easier to take a little more off than to deal with a piece that’s too short. Label each cut piece with a pencil mark so you know exactly where each one goes.
Step 3 — Attach the Trim
For most trim profiles around a fireplace hearth, a finish nailer with 1.5-inch to 2-inch finish nails works well. Space nails every 8 to 10 inches along the trim length. Keep nails at least three-quarters of an inch from the ends of each piece to avoid splitting.
If you’re working on a stone or tile hearth where nailing isn’t possible, construction adhesive is your alternative. Apply adhesive in a zigzag pattern along the back of the trim, press it firmly into place, and use painter’s tape to hold it while the adhesive cures.
Step 4 — Fill, Sand, and Finish
Once all trim pieces are secured, fill every nail hole with color-matched wood filler. Let the filler dry fully, then sand it flush with 120-grit sandpaper followed by 220-grit for a smooth finish. Wipe away all dust before applying any stain or finish.
If your trim came unfinished, apply a stain that matches your existing hardwood floor. Test the stain on a scrap piece of the same wood first — stain colors can look very different on different wood species. Follow the stain with two coats of the same finish used on your floor (polyurethane, oil, or hardwax).
Step 5 — Caulk the Edges
Apply a thin bead of color-matched or paintable caulk along the top edge of the trim where it meets the hearth surface and along the back edge where it meets the floor. Caulk fills any remaining hairline gaps and gives the installation a truly finished, professional appearance.
Use a damp finger or a caulk tool to smooth the bead immediately after application. Wipe away any excess before it dries.
Common Mistakes to Avoid When Installing Fireplace Floor Trim
Choosing the Wrong Trim Profile
Using a quarter round when a reducer is needed, or installing T-molding where there’s a height difference, creates a trim that looks wrong and doesn’t function properly. Always confirm the height relationship between your floor and hearth before buying any trim.
Skipping the Dry Fit
This single step prevents the majority of expensive trim mistakes. Dry fitting shows you exactly where joints won’t close, where angles are off, and where you need to adjust your cuts — before anything is permanently attached.
Poor Nail Placement
Nailing too close to the end of a trim piece almost always causes splitting. Keep all nails at least three-quarters of an inch from any end. Set nail heads just below the surface with a nail set — not so deep that they create a large divot, but deep enough that wood filler sits flush.
Ignoring Wood Movement
Hardwood moves. Leave a small expansion gap between the edge of the hardwood flooring and the hearth — typically about a quarter inch — and let the trim cover it. If you butt the flooring directly against the hearth and nail trim on top, seasonal expansion has nowhere to go and the floor or trim will buckle.
Mismatched Stain or Finish
Always test stain on a scrap piece before applying it to the actual trim. Different wood species absorb stain at different rates. Even the same species can vary in color between boards. Taking five minutes to test before committing saves the frustration of pulling up trim because the color is completely off.
Hardwood Floor Trim Around Fireplace — Design and Style Tips

The functional side of trim installation is straightforward once you understand the process. The design side is where many homeowners leave value on the table.
Match your trim to the same species and finish as your hardwood floor wherever possible. Most major flooring brands sell coordinating trim profiles designed to match their floors exactly — use them. The color and sheen level should be consistent. If your floor has a matte finish, a satin-sheen trim will look noticeably different even if the color matches.
For a more custom, designer look, some homeowners intentionally use a contrasting trim — a darker walnut trim against light maple floors, for example. This can look sharp and intentional when done well, but it requires careful planning and a strong overall design vision for the room.
Also consider how the trim profile coordinates with the other moldings in the room. If your baseboards have a traditional, detailed profile, a plain flat trim around the hearth will look out of place. Try to match or at least complement the visual weight of the other trim elements in the space.
Cost Breakdown — Hardwood Floor Trim Around a Fireplace
| Item | DIY Cost Estimate | Pro Installation Cost |
| Reducer strip (standard) | $20 – $60 | $150 – $300 (labor + material) |
| Quarter round / shoe molding | $10 – $30 | $100 – $200 |
| Custom transition strip | $60 – $150 | $250 – $500+ |
| Stain and finish (if unfinished) | $15 – $40 | Included in labor |
| Caulk and wood filler | $10 – $20 | Included in labor |
DIY installation around a standard rectangular hearth typically costs between $50 and $150 in materials and can be completed in a half day. Hiring a flooring professional makes sense for non-standard hearth shapes, angled installations, or when the existing floor finish is difficult to match.
Recommended Read: Floor Trim around Brick Fireplace
Conclusion
Getting the hardwood floor trim right around your fireplace is one of those finishing details that genuinely elevates the whole room. Done well, it looks like it was always meant to be there. Done poorly, it draws attention to itself for all the wrong reasons.
The process isn’t complicated — choose the right trim profile, measure carefully, dry-fit everything before nailing, and take the time to match your stain and finish. Those four steps alone will put you ahead of most DIY trim installations.
If your hearth has an irregular shape or you’re working with a high-end floor finish that’s difficult to match, there’s no shame in bringing in a flooring professional for this part of the job. The cost is reasonable, and the result will be worth it.