For many homeowners, the garage is no longer just a dark shed to park a small sedan. It has evolved into a multi-functional space used for housing large SUVs, lifted trucks, boats, and modern workshop tools. However, while vehicles and lifestyles have grown larger, older garage door openings have remained stubbornly tight.
If you find yourself folding in your side mirrors every time you park, or if you recently purchased a larger vehicle that simply will not fit, enlarging your garage door opening is the ultimate structural solution.
Expanding a garage opening is a major architectural modification. It involves altering your home’s load-bearing structure, moving framing, and upgrading mechanical systems. In this comprehensive, professional guide, we will break down the core reasons to expand your garage opening, the structural challenges you will face, and a detailed, step-by-step roadmap to executing this project successfully.
Why Enlarge a Garage Door Opening? (The Core Benefits)
Before investing time and money into a structural renovation, it is important to understand the tangible value this project brings to your property.
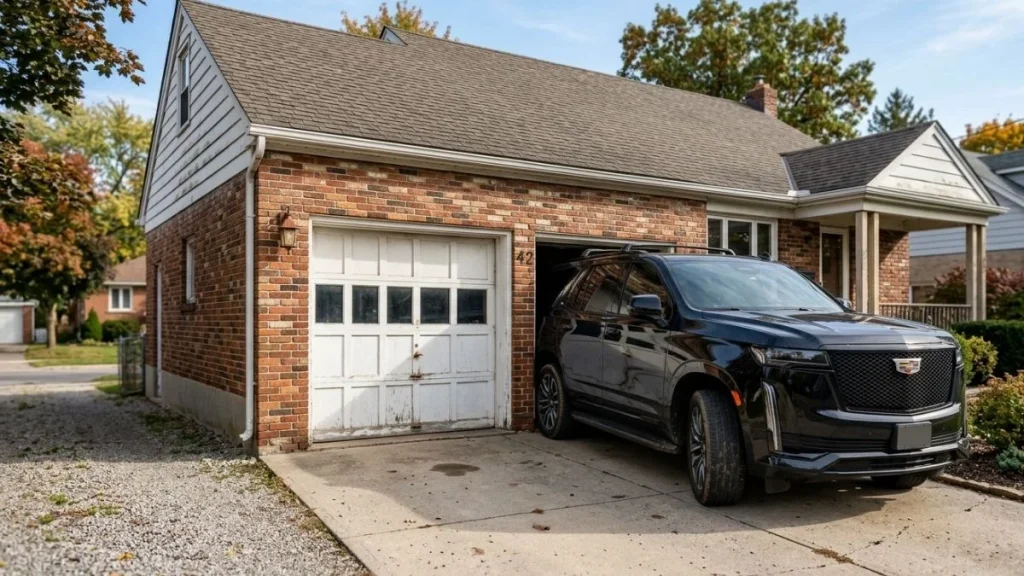
Accommodating Modern Vehicle Dimensions
Vehicle trends over the past two decades have shifted dramatically toward larger profiles. Standard garage doors from the 1970s through the 1990s were often built with a width of 8 feet for single doors and 16 feet for double doors, with a standard height of 7 feet.
Modern full-size trucks (like the Ford F-150 or Ram 1500) and large SUVs (such as the Chevy Suburban or GMC Yukon) often struggle to clear these dimensions comfortably, especially if they have roof racks or aftermarket suspensions. Widening the door to 9 or 10 feet, or raising the height to 8 feet, eliminates the daily stress of tight parking.
Preventing Vehicle and Property Damage
A narrow garage opening leaves zero margin for error. A slight miscalculation while backing out can result in scraped paint, broken side mirrors, or structural damage to the garage door tracks and trim. The cost of repairing a luxury vehicle’s bodywork or replacing a premium garage door panel can quickly equal the cost of widening the opening permanently.
Boosting Property Resale Value
In the international real estate market, an oversized, accessible garage is a premium selling point. Homebuyers look for properties that require no immediate modifications. A garage that can easily accommodate two large modern vehicles or a boat increases your home’s curb appeal and market velocity.
Improving Accessibility and Versatility
An enlarged opening makes your garage vastly more versatile. It allows easier loading and unloading of groceries, strollers, and construction materials without banging doors against drywall. Furthermore, if you plan to convert part of your garage into a workshop, home gym, or storage facility, a wider entryway makes moving heavy machinery or large equipment seamless.
Structural Challenges and Crucial Considerations
You cannot simply cut away the drywall and install a larger door. A garage front is a critical engineered system. Understanding the hidden challenges prevents catastrophic structural failures.
The Critical Role of the Garage Header
The most important structural element above your garage door is the header. The header is a heavy horizontal beam that spans the top of the door opening. Its job is to bear the immense weight of the roof, the ceiling joists, and any living space built directly above the garage.
When you widen a garage door opening, the existing header becomes useless because it is too short to span the new distance. You must replace it with a longer, stronger header.
- The Challenge: Calculating the new header size requires precise engineering. For wider spans, standard dimensional lumber (like $2\times10$ or $2\times12$ boards) is often inadequate. Builders must use LVL (Laminated Veneer Lumber) or steel I-beams to handle the structural load over a 10-foot to 18-foot span without sagging over time.
Ceiling Height and Headroom Requirements
Enlarging a door is not just about width; it is often about height.
- The Challenge: To install a taller garage door (e.g., upgrading from 7 feet to 8 feet), you need adequate headroom—the vertical space between the top of the door opening and the lowest point of the ceiling. Standard sectional garage doors require at least 12 inches of headroom for standard tracks, and up to 15 inches for an automatic opener. If your ceiling is too low, raising the door opening might require converting to a low-headroom track system or modifying the roof trusses, which dramatically increases the project’s complexity.
Sideroom Constraints
Sideroom is the space on the left and right sides of the garage door opening inside the wall where the vertical tracks are mounted. Standard doors require at least 3.75 to 4.5 inches of clear space on each side. If you widen a door too close to the corner of the garage structure, you may run out of room to securely bolt the tracks and spring assemblies to the framing.
Single Double-Door vs. Two Single Doors
Many homeowners with a two-car garage face a specific choice: Should I convert two narrow single garage doors into one massive double door?
- Pros of a Single Double Door: It creates a much larger, unobstructed driving lane. You do not have to worry about hitting a central brick column (mullion) when backing out.
- Cons and Structural Challenges: Converting two openings into one requires removing the central supporting post. That post was likely holding up the middle of your roof load. Removing it means you must replace two small headers with one massive, continuous header capable of spanning 16 to 18 feet.
The Solutions – Step-by-Step Engineering and Modification Process
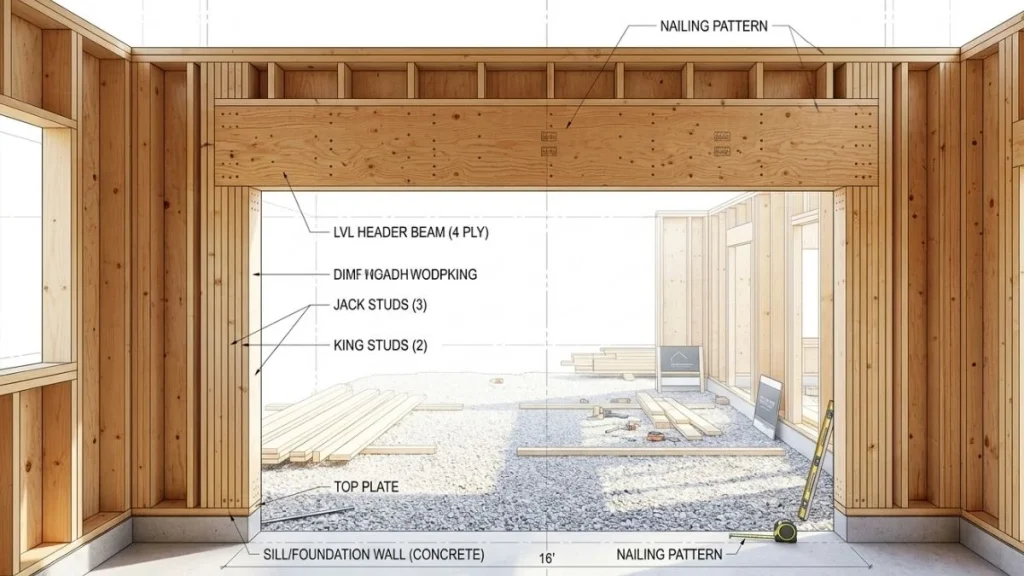
Modifying a load-bearing garage wall requires a systematic, highly calculated engineering approach. You cannot simply cut away structural studs without shifting the weight of the house safely. Below is the professional engineering and construction methodology used by licensed contractors to successfully enlarge a garage door opening.
Structural Assessment, Load Calculations, and Permitting
Before a single tool touches the wall, a structural engineer must evaluate the property. The engineer will calculate the dead load (the weight of the roof, floor joists, and permanent materials) and the live load (temporary forces like wind and snow) resting above the garage. Based on these calculations, they will issue a stamped blueprint specifying the exact dimensions and material grade for the new header.
Additionally, because this project alters the structural envelope of your home, you must submit these engineering drawings to your local building department to secure a structural modification permit. Working without a permit can lead to costly municipal fines, complications during home resale, and potential insurance denials if structural failure occurs.
Demolition and Existing Frame Removal
With the shoring wall safely carrying the house’s weight, the demolition phase begins:
- Electrical Rerouting: Any live wires running through the front wall—such as lines for exterior sconces, safety sensors, or outlets—must be shut off at the main breaker panel, cut, and safely capped or rerouted.
- Exterior Stripping: The exterior finishing materials (vinyl siding, wood trim, stucco, or brick veneer) are carefully cut back around the perimeter to expose the raw framing beneath.
- Header Extraction: The old, short header beam is unbolted, pried loose from the framing, and removed along with the center vertical column (mullion) if you are converting two single doors into one large double door.
Framing the New Structural Opening
Once the old framing is cleared, the new rough opening must be built to the exact specifications required by the garage door manufacturer. The anatomy of a professionally engineered garage door frame consists of three critical components:
| Framing Component | Structural Purpose in an Enlarged Opening |
| King Studs | Continuous vertical studs running directly from the floor plate to the top wall plate. They flank the entire assembly and provide lateral stability. |
| Jack Studs (Trimmers) | Shorter vertical studs nailed directly inside the King Studs. The heavy horizontal header beam rests directly on top of these. A wider opening requires multiple Jack Studs on each side to distribute the weight. |
| Cripple Studs | Short, non-structural vertical studs installed between the top of the new header and the ceiling plate. They fill the remaining gap and provide a surface for hanging drywall. |
The carpenters will precisely anchor the new King and Jack studs into place using heavy-duty framing nails or structural screws, ensuring the opening is perfectly plumb, level, and square.
Installing the New Engineered Header
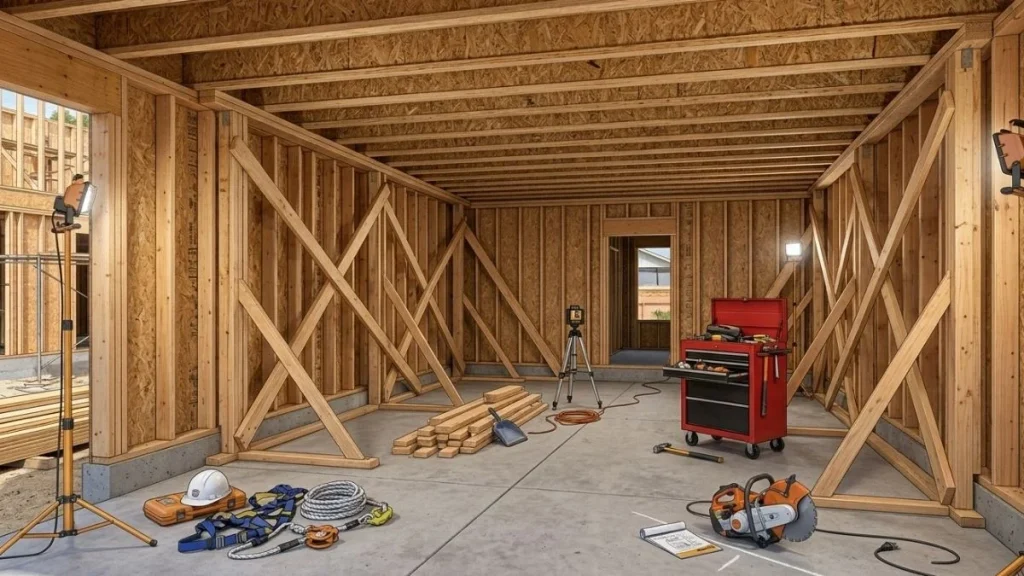
Because a wider opening spans a greater distance, a standard piece of dimensional lumber will sag under the weight. Contractors install an LVL (Laminated Veneer Lumber) beam or a steel I-beam. A 16-foot or 18-foot engineered LVL header is incredibly heavy and requires material lifts or a multi-person crew to raise.
The header is lifted into place until it rests flush on top of the newly installed Jack studs. It is fastened securely to the surrounding King studs using heavy-duty structural screws (such as SDS or LedgerLOK screws) to prevent twisting. Once the header is locked in and inspected, the temporary interior shoring wall can be carefully dismantled, transferring the structural weight smoothly onto the new, wider beam.
Flashing, Weatherproofing, and Exterior Finishing
A larger opening alters the exterior weather barrier of your home. To prevent water infiltration, which leads to wood rot and hazardous mold, proper flashing is mandatory.
- House Wrap: The newly exposed framing is sealed with a weather-resistant house wrap (like Tyvek) to block moisture while allowing the wood to breathe.
- Z-Flashing and Tape: Heavy-duty rubberized flashing tape is applied around the top header corners and side jambs. Metal Z-flashing is installed above the header trim to divert cascading rainwater away from the garage opening.
- Siding Integration: The exterior siding, brickwork, or stucco is woven back into the existing facade, making the modification look like an original feature of the home rather than a recent renovation.
Track Installation and Torsion Spring Calibration
The final phase moves from structural carpentry to mechanical installation:
Torsion Spring Counterbalance: Because a wider or taller door is significantly heavier than the original, a brand-new, precisely rated torsion spring system must be installed. Torsion springs operate under extreme mechanical tension and can cause catastrophic injury if mishandled. A certified technician must wind the springs using specialized tensioning rods to perfectly balance the door, allowing your automatic garage door opener to lift it effortlessly without burning out its motor.ication Process
Track Alignment: Heavy-gauge steel vertical and horizontal tracks are securely anchored to the fresh framing studs and reinforced ceiling joists.
Troubleshooting Common Pitfalls and Mistakes
Many homeowners and uncertified contractors make critical mistakes during this renovation. Avoid these common errors to ensure your project is a success:
Reusing the Old Automatic Opener Incorrectly
If you are replacing a lightweight 8-foot aluminum door with a heavy 16-foot insulated steel or custom wood door, your old horsepower (HP) garage door opener may not be strong enough. Standard single doors often use a 1/2 HP motor, whereas large double doors or heavy custom insulated options require a 3/4 HP or 1-1/4 HP motor (or a direct-drive wall-mount opener) to safely handle the load over a long period.
Failing to Double-Check “Rough Opening” vs. “Finished Opening”
A common construction error is building the wood frame to the exact dimensions of the door itself.
- The Rule: The rough opening (the raw lumber frame) must match the exact dimensions of the door you are buying. The finished opening (after adding the stop molding and weather stripping) will be slightly smaller so that the door seals tightly against the outside elements when closed. Always consult the manufacturer’s specification sheet before cutting wood.
Ignoring the Concrete Foundation Condition
A wider door shifts the structural loads to new points on your garage floor. If the concrete slab near the sides of your new opening is cracked, settling, or uneven, the weight of the new columns can cause the foundation to sink further. Ensure the concrete foundation is stable, level, and structurally sound before transferring new weight down to it.
Cost-Benefit Analysis and ROI (Return on Investment)

Enlarging a garage door opening is a mid-to-high budget renovation. While exact numbers vary based on geographical location, materials, and local labor rates, here is a general breakdown of the financial landscape for this project internationally:
Approximate Cost Distribution
- Engineering Fees & Permits: $500 – $1,500 (Crucial for legal compliance and safety)
- Structural Materials (LVL Header, Studs, Hardware): $400 – $1,200
- Labor (Framing, Structural Alteration, Demolition): $1,500 – $4,000
- New Garage Door & Professional Installation: $1,200 – $5,000+ (Depending on material, insulation value, and design)
Return on Investment (ROI)
Data from international remodeling indices consistently show that garage door upgrades and structural garage improvements yield an average ROI of 85% to 95% at resale. When combined with the functional value of saving your vehicles from dents and scratches, the project frequently pays for itself within a few years of completion.
Read Also: 8×7 Garage Door Rough Opening
Conclusion
Modifying your home to create an enlarged garage door opening is a major undertaking, but it provides a permanent solution to one of the most frustrating problems of modern home design. By systematically addressing the structural engineering requirements, installing an upgraded header, and working within the parameters of your garage’s headroom and foundation, you can transform a cramped, hazardous parking space into an open,
accessible, and high-value asset.Unless you are an advanced DIYer with extensive experience in structural framing and shoring, always hire a licensed contractor and a structural engineer to execute this project. Doing so ensures your home remains safe, your permits are pristine, and your new oversized door functions flawlessly for decades to come.