Is your roof showing signs of damage, but you’re worried about the hassle and cost of fixing it? What if you could repair your roof sheathing from inside your home, saving time and avoiding risky climbs on the roof?
You’re about to discover simple, effective steps that anyone can follow to restore your roof’s strength without calling in expensive help. Keep reading to learn how to protect your home and feel confident in your repair skills, even if you’re not a professional.
Assessing Roof Sheathing Damage
Repairing roof sheathing from inside requires a careful assessment of the damage first. This step ensures the repair is effective and safe. Assessing roof sheathing damage helps find weak spots, water leaks, and structural problems. It also guides the next repair steps. Knowing the extent of damage saves time and money.
Identifying Signs Of Damage
Look for visible and hidden signs of damage on the roof sheathing. Water stains or dark spots often mean leaks. Soft or sagging areas suggest wood rot or decay. Cracks or splits in the wood weaken the roof’s strength.
Warping or bending shows the wood has been exposed to moisture for a long time. Loose or missing nails also indicate problems. Check for mold or mildew, which grow in damp areas and can cause health risks.
- Water stains: Brown or black spots on wood or ceiling.
- Soft spots: Press with a screwdriver; wood should feel firm.
- Cracks and splits: Visible lines or breaks in the sheathing.
- Warping: Wood bends or twists out of shape.
- Mold growth: Green, black, or white fuzzy patches.
- Loose nails: Nails sticking out or missing.
Use a flashlight to see in dark corners or under insulation. Sometimes damage hides beneath ceilings or panels. Tap the wood gently with a hammer to check for hollow sounds. Hollow spots often mean decay or gaps underneath. Take notes or photos to track damage locations. This helps during repair.
Tools For Inspection
Several tools help inspect roof sheathing damage accurately. A good flashlight is key for seeing inside dark attic spaces. A moisture meter measures wood dampness and spots wet areas not visible to the eye. A screwdriver or awl tests wood softness by pressing into the surface. A hammer can check for hollow or weak spots with gentle taps.
| Tool | Purpose | How to Use |
| Flashlight | Illuminate dark areas | Shine on wood surfaces and corners |
| Moisture Meter | Detect moisture levels in wood | Press meter probes on sheathing |
| Screwdriver/Awl | Test wood firmness | Press into wood to check softness |
| Hammer | Tap for hollow sounds | Gently tap wood and listen |
| Camera or Phone | Document damage | Take clear photos of problem areas |
Wear gloves for protection and carry a small notebook to record findings. Use a step ladder to reach high attic spaces safely. Inspect carefully and methodically, covering all roof areas from inside.
Safety Precautions
Working inside an attic or roof space can be risky. Take safety steps to avoid accidents and injuries. Ensure stable footing by using a sturdy ladder to enter the attic. Watch for weak spots in the floor or ceiling that may break. Wear a dust mask to avoid breathing in insulation fibers or dust. Gloves protect hands from sharp nails or splinters.
- Use proper lighting: Bring a flashlight or headlamp to see clearly.
- Wear protective gear: Gloves, dust mask, and safety glasses.
- Check attic floor: Step only on joists or solid surfaces to avoid falling through.
- Ventilate the space: Open windows or vents to reduce dust and fumes.
- Have a helper: Someone nearby in case of emergency.
Turn off electricity in the attic if electrical wiring is present. Avoid touching wires or wet areas near wiring. Keep tools organized to prevent tripping. Take breaks if the space is hot or cramped. Following these safety tips protects health and prevents accidents during roof sheathing inspection and repair.
Removing Damaged Sheathing
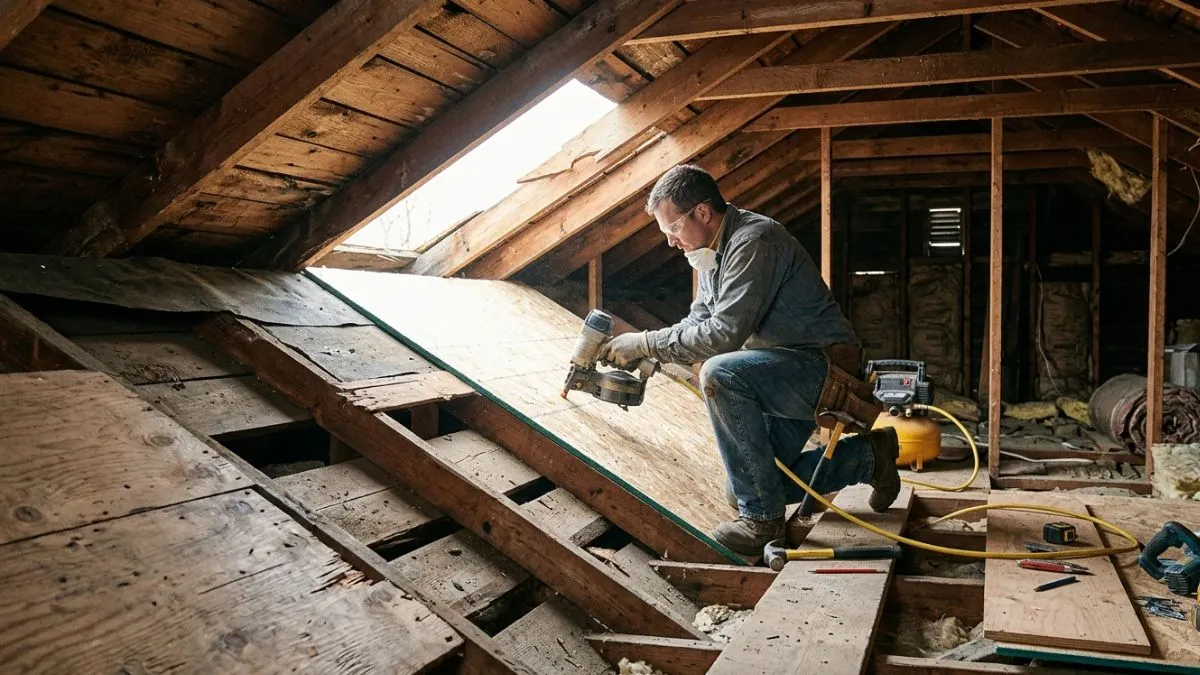
Removing damaged roof sheathing from inside is a crucial step in roof repair. It prevents further damage and prepares the surface for new materials. Careful removal ensures the roof structure stays strong and safe.
This process requires attention to detail and proper tools. Safety comes first, so wear protective gear before starting. The goal is to take out only the damaged sections without harming the good parts. This saves time and money in repairs.
Locating And Marking Affected Sections
Start by inspecting the roof sheathing from inside the attic. Look for signs like:
- Water stains or discoloration on the wood
- Soft or spongy spots when pressed
- Mold or mildew growth
- Visible cracks or holes
Use a bright flashlight to see all areas clearly. Mark each damaged section with a pencil or chalk. Draw clear outlines around the parts to remove. This helps avoid cutting healthy sheathing by mistake.
Keep a checklist to track the marked sections. It may look like this:
| Section Location | Damage Type | Size (sq. ft.) | Marked (Yes/No) |
| Near chimney | Water stains, soft wood | 4 | Yes |
| Center roof area | Mold growth, cracks | 3 | Yes |
| Edge by vent | Small holes | 1.5 | Yes |
Marking helps to plan the removal and replacement work efficiently. Double-check the markings before cutting.
Cutting Techniques
Use the right tools to cut out damaged sheathing safely. A circular saw with an adjustable depth works well. Set the blade depth to avoid cutting into rafters or wiring behind the sheathing.
Follow these steps for clean cuts:
- Wear safety glasses and gloves.
- Cut along the marked lines carefully.
- Make straight cuts to fit new panels easily.
- Remove nails or screws before cutting to avoid tool damage.
- Work slowly to control the saw and prevent accidents.
For small damaged areas, a handsaw or oscillating multi-tool can be useful. These tools give more control in tight spaces.
Keep a bucket or container nearby to collect screws and nails. This keeps the workspace tidy and safe.
| Tool | Best Use | Safety Tip |
| Circular Saw | Large sections, straight cuts | Set blade depth carefully |
| Handsaw | Small areas, precise cuts | Cut slowly to avoid slips |
| Oscillating Tool | Tight spaces, detailed cuts | Keep firm grip during use |
Disposal Of Old Materials
Remove all damaged sheathing pieces carefully. Place them in heavy-duty garbage bags or a construction debris bin. Avoid leaving debris inside the attic to prevent accidents.
Follow local guidelines for disposal. Some areas require special handling for treated wood or moldy materials.
Steps for proper disposal:
- Wear a dust mask to avoid breathing in dust or mold spores.
- Seal bags tightly to contain debris.
- Transport waste to a designated landfill or recycling center.
- Clean the workspace thoroughly after removal.
Recycling options may exist for plywood and OSB sheathing. Contact local waste management for advice.
Proper disposal keeps your home safe and supports environmental care. It also prepares the site for a smooth installation of new roof sheathing.
Installing Replacement Sheathing
Repairing roof sheathing from the inside requires careful replacement of damaged panels. Installing replacement sheathing restores the roof’s strength and prevents leaks. This step involves precise measuring, cutting, and securing new panels. Proper installation ensures the roof remains solid and safe for years. Follow each part carefully to get the best result.

Measuring And Cutting New Panels
Start by measuring the damaged area accurately. Use a tape measure to find the length and width of the section that needs replacing. Add a small extra margin (about 1/8 inch) to each measurement. This allows for slight adjustments during installation.
- Mark the measurements clearly on the new sheathing panel using a pencil.
- Use a straight edge or square to draw cutting lines.
- Cut panels with a circular saw or handsaw for clean edges.
Keep these tips in mind:
| Step | Tool | Tip |
| Measure damaged area | Tape measure | Measure twice for accuracy |
| Mark panel | Pencil & straight edge | Draw clear straight lines |
| Cut panel | Circular saw or handsaw | Wear safety goggles |
Accurate measuring and cutting reduce gaps and ensure a snug fit. This helps the roof stay weather-tight and strong.
Securing Panels Properly
After cutting, place the new panels carefully over the roof frame. Make sure the panel edges line up with the existing sheathing. Use galvanized nails or screws to attach panels firmly to the rafters or trusses. Space fasteners about 6 inches apart along edges and 12 inches apart in the center.
- Start fastening from one corner and work your way across.
- Drive nails or screws flush with the panel surface, not too deep.
- Avoid over-tightening to prevent panel damage.
Use a hammer or screw gun for quick and secure fastening. If panels are large, enlist help to hold them steady during installation. Proper fastening prevents movement and reduces the risk of damage from wind or weight.
| Fastening Detail | Recommended Spacing | Tool |
| Panel edges | 6 inches apart | Hammer or screw gun |
| Panel center | 12 inches apart | Hammer or screw gun |
Ensuring Structural Integrity
Strong roof sheathing supports the entire roof system. Check that the new panels fit tightly with no large gaps. Use construction adhesive on the rafter tops before placing panels to add bonding strength. This reduces panel movement and noise.
Inspect all fasteners to confirm they are secure. Replace any bent or loose nails or screws. Add blocking or bridging between rafters if needed to support panel edges.
- Use plywood or OSB panels rated for roof use.
- Maintain panel thickness consistent with existing sheathing.
- Ensure panels overlap rafters fully for better load transfer.
Properly installed replacement sheathing restores roof stiffness and protects against wind uplift. It also provides a solid base for roofing materials, preventing future leaks and damage.
Sealing And Finishing Touches
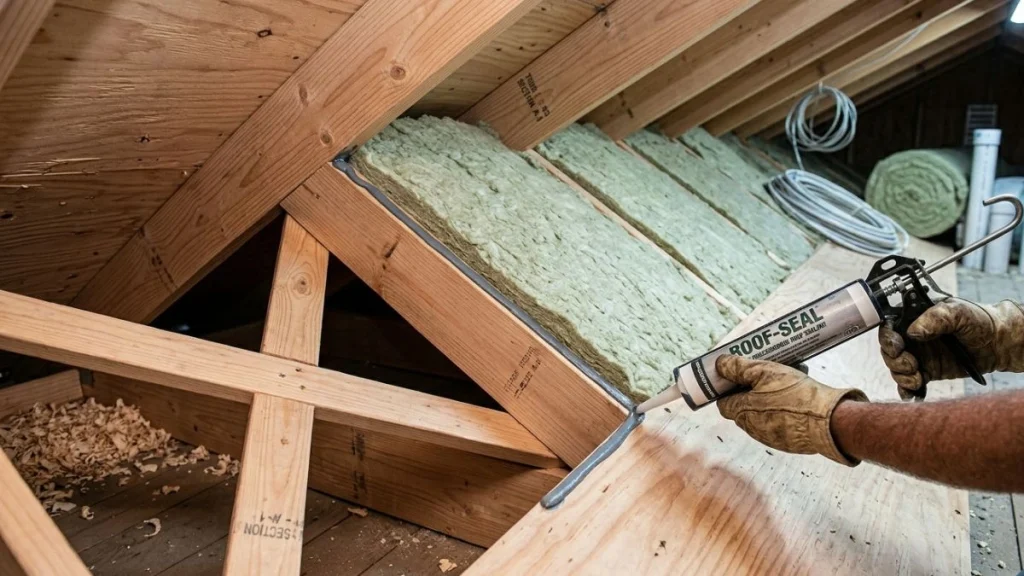
Sealing and finishing touches are crucial steps in repairing roof sheathing from the inside. After fixing the damaged panels, these steps protect the roof structure against moisture, drafts, and pests. Proper sealing increases the roof’s durability and energy efficiency.
Applying Sealants And Barriers
Applying sealants and barriers is essential to protect the roof sheathing from water and air leaks. Start by choosing a high-quality sealant designed for roofing materials. Silicone or polyurethane sealants are common choices due to their strong adhesion and flexibility.
Steps to apply sealants and barriers:
- Clean the surface: Remove dust, dirt, and loose debris from the repaired sheathing.
- Apply primer: Use a primer if recommended by the sealant manufacturer.
- Seal all joints: Carefully apply sealant along all seams, nails, and screw holes.
- Add a moisture barrier: Install a self-adhesive membrane or roofing felt over the sealed area.
- Ensure complete coverage: Overlap barriers by at least 2 inches to prevent gaps.
Use a caulking gun for precise sealant application. Smooth the sealant with a putty knife or gloved finger to fill cracks fully. Allow the sealant to dry according to the product instructions before proceeding.
| Sealant Type | Best Use | Dry Time |
| Silicone | Waterproofing and flexibility | 24 hours |
| Polyurethane | Strong adhesion and durability | 12-24 hours |
| Acrylic | Paintable surfaces | 1-2 hours |
Checking For Gaps And Weak Spots
After applying sealants and barriers, inspect the roof sheathing for any gaps or weak spots. These areas can allow moisture or pests to enter, causing damage over time. Use a bright flashlight and a steady hand to carefully scan the entire repaired surface.
Focus on these common trouble areas:
- Edges of the sheathing panels
- Seams between panels
- Nail or screw holes
- Corners and joints
Use your fingers or a small tool to gently press around the repaired area. Soft spots may indicate weak sheathing or poor sealant adhesion. Mark any suspect areas with chalk or tape for rework.
To fix gaps or weak spots, follow these tips:
- Remove loose or damaged sealant with a putty knife.
- Reapply sealant or add extra barrier material as needed.
- Replace any damaged sheathing sections if necessary.
- Press firmly to ensure good contact between layers.
- Allow sufficient drying time before finishing.
Regularly checking and repairing weak spots extends the life of the roof and prevents costly repairs later.
Cleaning Up The Work Area
Cleaning up the work area is the final step after repairing roof sheathing. A clean space helps maintain safety and prepares the roof for any further work. Remove all tools, leftover materials, and debris carefully to avoid damage or accidents.
Follow these cleanup tips:
- Collect nails, screws, and small debris with a magnetic sweeper or hand picker.
- Dispose of used sealant tubes and scrap sheathing properly.
- Sweep or vacuum dust and dirt from the work area.
- Check for any spills or sealant drips and clean them immediately.
- Store tools in a safe, dry place for future use.
Keeping the work area tidy reduces the risk of slipping or puncturing the roof. It also prevents leftover materials from blocking ventilation or drainage. Take a final look around to ensure no hazards remain. A neat, clean site reflects quality work and care in roof repair.
You May Like Also: Rotted Roof Rafter Repair
Conclusion
Repairing roof sheathing from inside helps protect your home from damage. It keeps water and pests out, saving money on future repairs. Take your time and check all areas carefully. Use the right tools and materials for a strong fix.
Small problems can grow if you ignore them. Stay safe by wearing protective gear during work. This simple step helps keep your roof stable and your house dry. Regular checks prevent bigger issues later. Your efforts make your home safer and last longer.