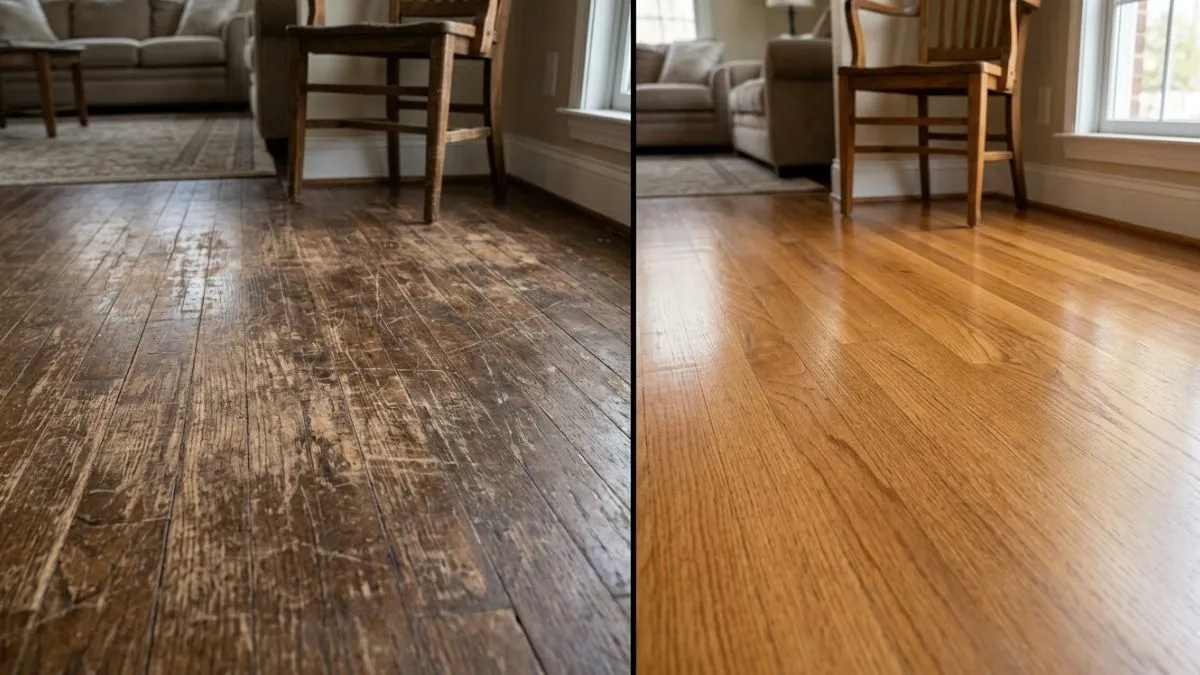
Is your Bruce hardwood floor looking worn out or scratched? You might feel worried about how to fix it without making things worse.
The good news is that repairing Bruce hardwood floors is easier than you think. With the right steps, you can bring back the beauty and shine of your floors quickly. You’ll learn simple, effective ways to repair your floors and protect your investment.
Assessing Floor Damage
Repairing Bruce hardwood floors starts with a careful assessment of the damage. Knowing the type and extent of damage helps choose the right repair method. Assessing floor damage means checking for scratches, dents, water problems, warping, and gaps.
This step saves time and money by targeting the exact areas that need fixing. Understanding the damage also helps prevent future problems and keeps floors looking great for years. Let’s explore how to spot different types of damage on Bruce hardwood floors.
Identifying Scratches And Dents
Scratches and dents are the most common types of damage on Bruce hardwood floors. These can happen from moving furniture, dropping heavy objects, or everyday wear and tear. Scratches are thin, surface-level lines, while dents are small depressions or marks in the wood.
- Light Scratches: Usually appear as fine lines on the floor’s finish. They do not cut deep into the wood.
- Deep Scratches: Penetrate through the finish and sometimes into the wood itself.
- Dents: Small indentations caused by impact or heavy pressure.
Use a bright light held at an angle to spot scratches and dents clearly. Run your hand over the floor to feel for dents. Here is a simple table to help identify the type of damage:
Regular cleaning and using floor protectors under furniture can reduce scratches and dents. Early repair prevents further damage and keeps floors smooth.
Spotting Water Damage
Water damage on Bruce hardwood floors can cause serious problems. It occurs when water seeps into the wood, causing swelling, discoloration, and weakening of the boards. Spotting water damage early can help save the floor from costly repairs.
Signs of water damage include:
- Discoloration: Dark or white spots on the floor surface.
- Soft or Spongy Areas: Boards feel soft or weak when stepped on.
- Peeling or Bubbling Finish: The floor’s finish lifts or bubbles up.
- Musty Smell: A damp, moldy odor near the floor.
Water damage can come from spills, leaks, or high humidity. Use a moisture meter to check hidden moisture levels under the floorboards. Here is a checklist to spot water damage:
- Inspect areas near sinks, bathrooms, and windows.
- Check for stains or discoloration on the floor surface.
- Press gently on the floor to find soft spots.
- Look for peeling or bubbling in the floor finish.
- Smell for any damp or moldy odors.
Early water damage can be fixed by drying the area and refinishing. Severe damage may require board replacement. Prevent water damage by cleaning spills quickly and controlling indoor humidity.
Checking For Warping And Gaps
Warping and gaps in Bruce hardwood floors affect both appearance and safety. Warping happens when wood bends or twists. Gaps form between boards due to shrinking or shifting. Both problems usually result from moisture changes.
Look for these signs:
- Raised or Curved Boards: Floorboards lift or bend upward.
- Visible Gaps: Spaces between floorboards that should be tight.
- Uneven Surface: Some areas feel higher or lower when walked on.
Use a straight edge or level to check for warping. Measure gaps with a ruler or gap gauge. Here is a quick guide:
| Problem | Cause | Signs | Fix |
| Warping | Moisture changes, poor installation | Curved boards, uneven surface | Replace warped boards, control humidity |
| Gaps | Wood shrinkage, temperature changes | Visible spaces between boards | Fill gaps with wood filler or replace boards |
Keep indoor humidity between 35% and 55% to reduce warping and gaps. Proper installation and maintenance extend the life of Bruce hardwood floors.
Gathering Repair Tools
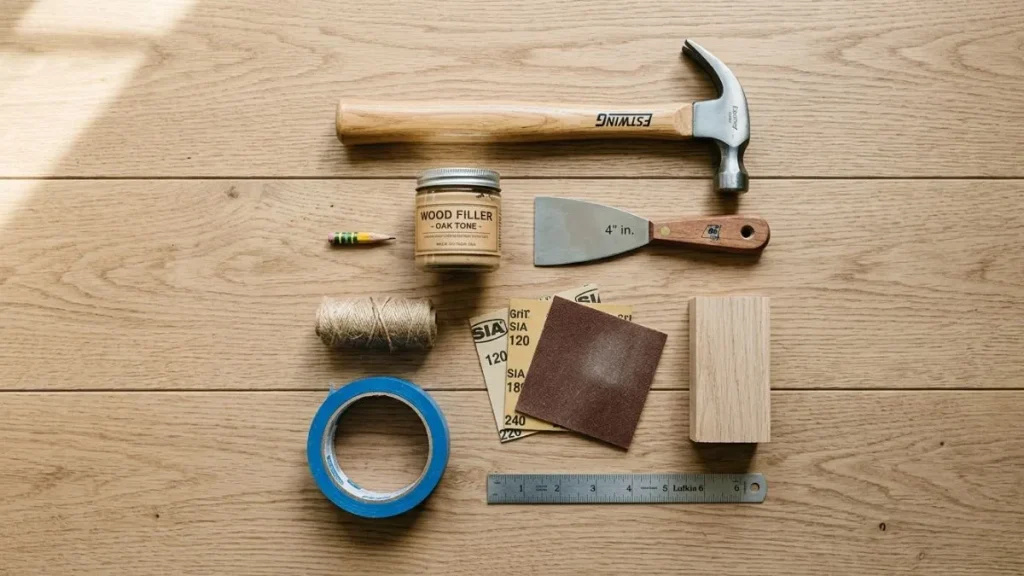
Repairing Bruce hardwood floors starts with having the right tools. Gathering repair tools is the first step to ensure a smooth and successful restoration. Using proper tools saves time and avoids further damage. Each tool has a specific purpose, from filling gaps to sanding and finishing. Preparing these tools before starting makes the repair process easier and more efficient.
Essential Repair Kits
Essential repair kits contain the basic tools and materials needed for most Bruce hardwood floor repairs. These kits help fix scratches, dents, and small gaps quickly. A good repair kit usually includes:
- Wood filler: Fills cracks and holes to restore a smooth surface.
- Putty knife: Applies wood filler evenly in damaged areas.
- Wax sticks or crayons: Match the floor color and cover minor scratches.
- Sandpaper: Smooths the filler and blends it with the floor.
- Cleaning cloth: Removes dust and debris before repair.
Here is a simple comparison of popular repair kits:
| Kit Name | Included Items | Best For | Price Range |
| Basic Floor Repair Kit | Wood filler, putty knife, sandpaper | Small scratches and cracks | $15 – $25 |
| Complete Hardwood Repair Kit | Wood filler, wax sticks, putty knife, sandpaper | Scratches, dents, and gaps | $30 – $50 |
Tip: Choose a kit with colors matching your Bruce hardwood floor for best results.
Recommended Sanding Equipment
Sanding is a key step in repairing Bruce hardwood floors. The right sanding tools remove old finish and smooth rough patches. This prepares the floor for filling and refinishing. For DIY repairs, consider these sanding options:
- Orbital sander: Easy to control and good for small areas.
- Detail sander: Fits tight corners and edges.
- Sanding blocks: Manual option for delicate spots.
- Sandpaper grits: Use coarse grit (60-80) to remove finish, fine grit (150-220) for smoothing.
Safety is important. Always wear a dust mask and goggles when sanding. Work slowly and evenly to avoid damaging the wood.
Here is a sanding grit guide for hardwood floor repair:
| Step | Sanding Grit | Purpose |
| Remove old finish | 60-80 | Strip surface and rough spots |
| Smooth filler | 120-150 | Blend repaired areas |
| Final finish | 180-220 | Prepare for stain or sealant |
Choosing The Right Finish
Choosing the right finish protects repaired Bruce hardwood floors and restores their beauty. The finish type affects durability, shine, and maintenance. Common finishes include:
- Polyurethane: Durable and water-resistant, perfect for high-traffic areas.
- Oil-based finish: Adds warm color and deep shine but takes longer to dry.
- Water-based finish: Dries fast, low odor, and clear finish that keeps wood color natural.
- Wax finish: Traditional option, easy to apply but less durable.
Consider these factors when picking a finish:
- Room use and foot traffic.
- Desired color and gloss level.
- Drying time and ease of application.
- Environmental and health concerns (low VOC finishes).
Use this table to compare common finishes:
| Finish Type | Durability | Drying Time | Appearance | Maintenance |
| Polyurethane | High | Moderate (4-6 hours) | Glossy to satin | Low |
| Oil-Based | High | Long (24 hours+) | Rich, warm tone | Medium |
| Water-Based | Moderate | Fast (1-2 hours) | Clear, natural | Low |
| Wax | Low | Fast | Soft, matte | High |
Note: Test the finish on a small area before full application to check color and texture.
Fixing Minor Scratches
Minor scratches on Bruce hardwood floors can make your beautiful wood look dull and worn. These small marks are common but easy to fix with the right methods. Fixing minor scratches quickly helps keep floors looking fresh and protects the wood from further damage. Simple repairs do not need special tools or skills. Just a few supplies and some care can restore your floor’s shine and smoothness. Here are effective ways to repair small scratches and bring life back to your hardwood floors.
Using Wood Fillers
Wood fillers are a great choice for repairing shallow scratches and small gouges in Bruce hardwood floors. They fill in the damaged area and create a smooth surface that blends well with the rest of the floor.
To use wood fillers effectively, follow these steps:
- Clean the Scratch: Remove dust and debris with a soft cloth or vacuum.
- Choose the Right Filler: Pick a wood filler that matches your floor color closely.
- Apply the Filler: Use a putty knife to press the filler into the scratch.
- Remove Excess: Wipe off extra filler around the scratch before it dries.
- Let it Dry: Allow the filler to dry completely as per instructions.
- Sand Smooth: Lightly sand the filled area to blend it with the floor surface.
Here is a quick comparison of common wood filler types:
| Filler Type | Best For | Drying Time | Finish Quality |
| Water-Based | Light scratches | 30 minutes | Good |
| Solvent-Based | Deeper scratches | 1 hour | Excellent |
| Epoxy | Heavy damage | Several hours | Very durable |
Tips: Always test filler on a hidden spot first. Match the color as close as possible. Avoid overfilling to prevent noticeable patches.
Applying Stain Markers
Stain markers are handy for fixing fine scratches that don’t need filling. They work like pens filled with wood stain and color in the scratches to hide them.
Benefits of stain markers:
- Easy and quick to use
- Available in many wood tones
- Dries fast with minimal mess
Steps to use stain markers correctly:
- Clean the Scratch: Remove any dirt or oils.
- Shake the Marker: Mix stain well before use.
- Apply Carefully: Draw along the scratch with the marker tip.
- Wipe Excess: Use a clean cloth to remove extra stain around the scratch.
- Let it Dry: Wait 10-15 minutes before touching the area.
Stain markers come in many shades. Here is a simple guide to pick the right color:
| Floor Color | Marker Shade |
| Light Oak | Light Brown |
| Medium Walnut | Medium Brown |
| Dark Cherry | Dark Brown or Red |
Note: Multiple applications may be needed for deeper scratches. Always test on a small hidden area first.
Polishing Techniques
Polishing Bruce hardwood floors helps hide minor scratches and restores a smooth, shiny surface. It also adds a protective layer that reduces future damage.
Effective polishing involves these steps:
- Clean the Floor: Sweep or vacuum to remove dirt and dust.
- Choose a Suitable Polish: Use a product made for hardwood floors.
- Apply Polish: Use a soft cloth or applicator pad to spread polish thinly and evenly.
- Buff the Floor: Rub in circular motions to create shine and smoothness.
- Allow to Dry: Let polish dry completely before walking on the floor.
Here is a list of common polishing products:
- Water-based floor polish – safe, quick drying
- Wax-based polish – adds deeper shine but takes longer to dry
- Spray polish – easy to use for touch-ups
Tips for best results:
- Test polish on a small area first
- Use clean, lint-free cloths
- Polish regularly to maintain floor appearance
- Avoid over-polishing to prevent buildup
Repairing Deep Gouges And Cracks
Repairing deep gouges and cracks in Bruce hardwood floors helps restore their beauty and strength. These damages happen from heavy furniture, pet claws, or dropped objects. Fixing them quickly stops dirt buildup and stops cracks from growing. Deep gouges need more care than small scratches. Proper repair keeps floors safe and looks new again.
Filling Large Gaps
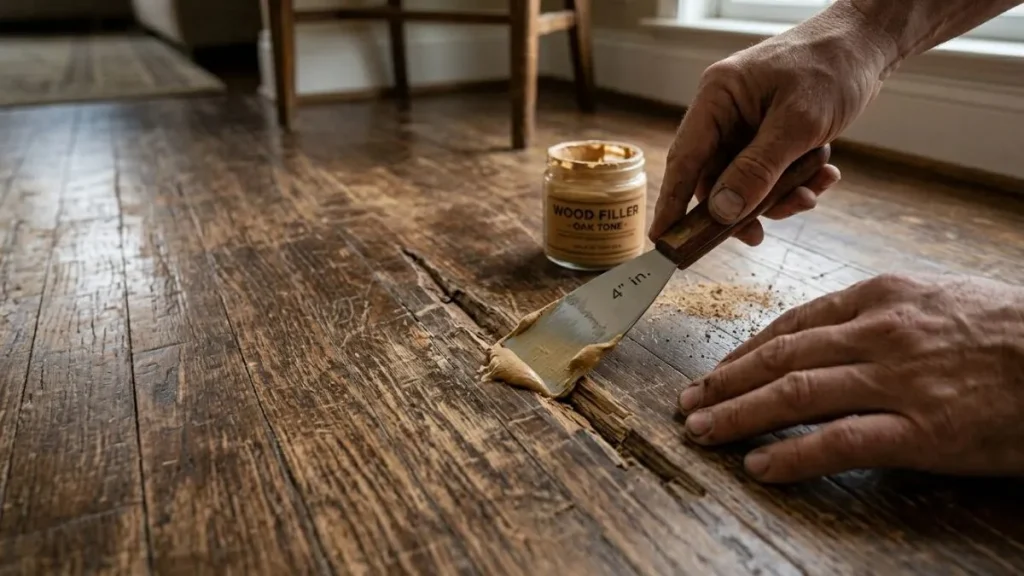
Large gaps and deep cracks require strong fillers to restore the floor’s surface. Use a wood filler or putty made for hardwood floors. These fillers come in different colors to match Bruce hardwood floors well. Follow these steps for best results:
- Clean the damaged area by removing dust and loose wood.
- Apply wood filler with a putty knife, pressing it into the gap fully.
- Level the filler so it is slightly above the floor surface.
- Let the filler dry completely, usually 4 to 6 hours.
- Sand the area smooth to match the floor’s texture.
Tips for choosing fillers:
| Type | Best Use | Drying Time |
| Water-based filler | Small to medium gaps | 4 hours |
| Epoxy filler | Deep, large cracks | 6-8 hours |
| Wax filler sticks | Quick fixes, minor gaps | Immediate |
Fillers protect the wood from moisture and prevent further damage. Choose the right color and type for a seamless fix.
Replacing Damaged Planks
For very deep gouges or broken planks, replacement is the best solution. Damaged planks weaken the floor’s structure and look unsightly. Follow this method to replace planks:
- Locate the damaged plank and mark its edges.
- Use a circular saw to cut along the plank’s edges carefully.
- Remove the damaged plank using a pry bar.
- Clean the subfloor and prepare it for the new plank.
- Install a new Bruce hardwood plank matching color and grain.
- Secure the plank with nails or adhesive as needed.
- Sand and finish the new plank to blend with the rest of the floor.
Replacing planks keeps the floor stable and looks uniform. Always keep extra planks for future repairs.
Sanding For Smoothness
Sanding is important after filling gaps or replacing planks. It smooths the floor and prepares it for finishing. Use a floor sander or hand sanding for small areas. Sand with fine-grit sandpaper (120-150 grit) to avoid damage.
- Start sanding along the wood grain for best results.
- Remove dust with a vacuum or damp cloth after sanding.
- Inspect the floor for uneven spots and sand again if needed.
Sanding helps the floor absorb finish evenly and restores a smooth surface. It also removes minor scratches and imperfections.
Important: Wear a mask and eye protection while sanding to avoid dust inhalation.
Addressing Water Damage
Water damage is a common issue that affects Bruce hardwood floors. It can cause warping, discoloration, and weakening of the wood. Addressing water damage quickly helps preserve the floor’s beauty and strength. Proper steps include drying the floor, preventing mold growth, and refinishing damaged spots. Each step plays a key role in restoring the floor to its original state.
Drying Methods
Effective drying stops further damage to Bruce hardwood floors. Start by removing any standing water using a wet vacuum or mop. Next, increase air circulation in the room by opening windows and using fans. Dehumidifiers are helpful to pull moisture from the air and wood.
- Use fans: Place multiple fans around the room to speed up drying.
- Open windows: Allow fresh air to enter and help moisture escape.
- Run dehumidifiers: Keep humidity levels below 50% to prevent swelling.
- Remove baseboards: This allows air to reach hidden wet areas under the floor.
Drying may take several days depending on the damage. Avoid walking on the floor until it is completely dry. Moisture meters can measure how much water remains inside the wood. Use these tools to confirm the floor is dry before moving to the next repair step.
Mold Prevention
Mold can grow quickly on wet hardwood floors. It damages the wood and causes health risks. Prevent mold by keeping the floor dry and clean. After drying, disinfect the floor using a mixture of water and mild bleach or vinegar. This kills mold spores and bacteria.
Follow these mold prevention tips:
- Clean spills immediately to avoid moisture build-up.
- Keep humidity low with dehumidifiers or air conditioners.
- Use mold-resistant finishes or sealants on the floor.
- Inspect hidden areas such as under furniture or rugs often.
Early mold detection helps reduce costly repairs. Watch for signs like a musty smell, discoloration, or soft spots on the floor. Treat any mold spots promptly to stop spread.
Refinishing Affected Areas
Water damage often leaves stains and rough spots on Bruce hardwood floors. Refinishing restores the floor’s smooth surface and rich color. First, sand the damaged areas gently to remove the top layer of wood and stains.
Next, clean the dust completely before applying a wood stain or finish that matches the original floor. Use a polyurethane or water-based finish for protection. Apply several coats for durability and allow each coat to dry fully.
| Step | Description | Tools Needed |
| 1. Sanding | Remove damaged surface layer carefully | Orbital sander, sanding paper (120-150 grit) |
| 2. Cleaning | Clear dust and debris for smooth finish | Vacuum, tack cloth |
| 3. Staining | Apply stain to match floor color | Brush or cloth, wood stain |
| 4. Sealing | Protect surface with clear coat | Polyurethane, brush |
Refinishing may require patience. Allow proper drying time to avoid sticky or uneven surfaces. This process brings back the floor’s beauty and extends its life after water damage.
Refinishing Hardwood Floors
Repairing Bruce hardwood floors often involves refinishing hardwood floors to restore their original beauty and extend their life. Refinishing removes surface damage, scratches, and dullness. This process brings out the rich color and grain of the wood. It also protects the floor from future wear. Refinishing includes sanding the wood, applying stain and sealant, and proper curing and maintenance. Each step plays a vital role in achieving a smooth, durable finish that lasts for years.
Sanding Procedures
Sanding is the first and most important step in refinishing Bruce hardwood floors. It removes the old finish, scratches, and uneven spots. Start by clearing the floor of all furniture and debris. Use a drum sander for large areas and an edge sander for corners and edges. Sand the floor evenly to avoid dips and gouges.
- Begin with coarse-grit sandpaper (around 36 grit) to remove the old finish quickly.
- Progress to medium-grit sandpaper (60-80 grit) to smooth out rough areas.
- Finish with fine-grit sandpaper (100-120 grit) for a polished surface ready to absorb stain.
Keep the sander moving steadily to prevent uneven sanding or burns on the wood. Vacuum the floor thoroughly between each sanding stage to remove dust and particles.
| Sanding Stage | Purpose | Grit Size |
| First Pass | Remove old finish and deep scratches | 36-40 grit |
| Second Pass | Smooth rough areas | 60-80 grit |
| Final Pass | Create smooth surface for stain | 100-120 grit |
Proper sanding creates a clean canvas, essential for a flawless refinish.
Applying Stain And Sealant
After sanding, the next step is to apply stain and sealant. Stain adds color and highlights the wood grain. Sealant protects the wood from moisture, dirt, and wear. Choose a stain that matches your desired color and complements the room.
Follow these steps for best results:
- Test the stain on a small, hidden area to check color.
- Use a clean cloth or brush to apply the stain evenly along the grain.
- Wipe off excess stain with a dry cloth to avoid blotches.
- Allow the stain to dry fully, usually 24 hours.
Next, apply a sealant such as polyurethane or water-based finish. Sealants come in satin, semi-gloss, or gloss finishes. Use a high-quality brush or roller for an even coat.
- Apply thin, even coats to prevent bubbles and streaks.
- Lightly sand between coats with fine sandpaper (220 grit) for smoothness.
- Apply 2-3 coats for strong protection.
Proper application of stain and sealant enhances floor durability and beauty.
Recommended: Bad Hardwood Floor Refinishing
Curing And Maintenance
Curing is the time the finish needs to harden fully. This step is critical for long-lasting protection. Avoid walking on the floor for at least 24-48 hours after the final coat. Heavy furniture or rugs should wait 7 days to prevent damage.
During curing:
- Keep the room well-ventilated to speed drying.
- Maintain a stable temperature and humidity to avoid finish issues.
- Avoid direct sunlight on the floor to prevent uneven curing.
Once cured, regular maintenance keeps the floor looking great. Follow these tips:
- Sweep or vacuum daily to remove dirt and grit.
- Use a damp mop with a wood floor cleaner weekly.
- Place pads under furniture legs to prevent scratches.
- Clean spills immediately to avoid stains.
Routine care preserves the refinished floor’s shine and strength for years.
Conclusion
Repairing Bruce hardwood floors takes time and care. Small scratches and dents can be fixed easily. Sanding and refinishing bring back the wood’s shine. Use the right tools to avoid more damage. Clean floors regularly to keep them looking fresh.
A well-maintained floor lasts many years. Simple repairs save money on full replacement. Trust your skills and take it step by step. Enjoy the beauty of your floors every day. Your hard work will show in the results.