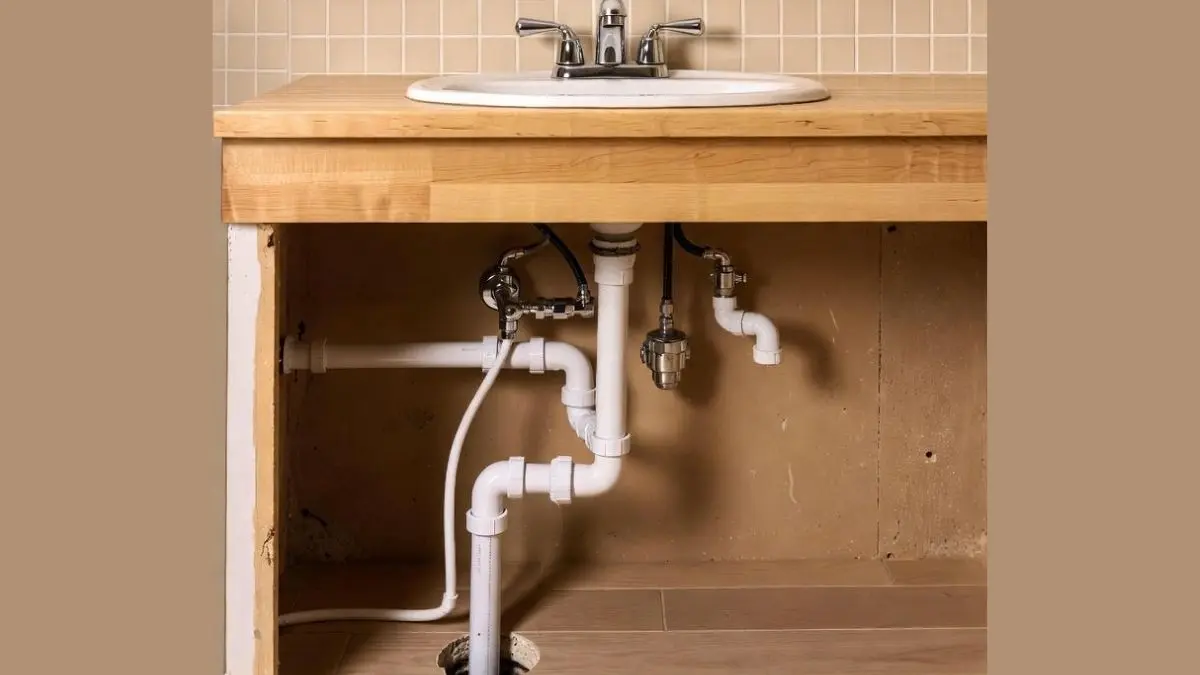
Are you planning to install or update your bathroom vanity and wondering how the plumbing will fit through the floor? Getting your bathroom vanity plumbing right is key to avoiding leaks, clogs, and costly repairs down the line.
Whether you’re a DIY enthusiast or hiring a pro, understanding how plumbing works through the floor can save you time, money, and frustration. You’ll discover simple tips and clear explanations that make this tricky part of bathroom remodeling easier than you think.
Planning Floor Plumbing
Planning floor plumbing for a bathroom vanity is a critical step in any bathroom renovation or new build. It involves designing the layout of water supply and drain pipes that will run through the floor to connect the vanity’s sink.
Measuring Drain And Water Lines
Accurate measurements are essential for installing bathroom vanity plumbing through the floor. Start by measuring the distance from the wall to the center of the drain pipe. This position determines where to cut or drill the floor for the drain line.
Next, measure the height of the drain pipe from the floor surface. This height affects how the vanity sink drain will connect without causing clogs or leaks.
Water supply lines must also be measured carefully. Measure the distance between the hot and cold water lines, usually spaced about 8 inches apart. Confirm the height of these lines above the floor to match the vanity faucet’s inlet connections.
- Drain line measurements: Distance from wall, height from floor, pipe diameter.
- Water line measurements: Spacing between hot and cold lines, height above floor.
- Vanity dimensions: Width and depth affect pipe placement.
| Measurement Type | Typical Range | Purpose |
| Drain Distance from Wall | 18-24 inches | Align drain with sink drain opening |
| Drain Height from Floor | 10-12 inches | Ensure proper slope and connection |
| Water Line Spacing | 6-8 inches | Match faucet inlet spacing |
| Water Line Height | 12-16 inches | Allow easy pipe connection |
Choosing Pipe Materials
Selecting the right pipe materials affects the durability and safety of bathroom vanity plumbing through the floor. Pipes must resist corrosion, handle water pressure, and fit building codes. Common pipe materials include PVC, PEX, copper, and ABS. Each has advantages and disadvantages.
- PVC (Polyvinyl Chloride): Popular for drain lines. Lightweight, easy to cut and glue. Not suitable for hot water supply.
- PEX (Cross-linked Polyethylene): Flexible and resistant to freezing. Used for hot and cold water supply. Easy to install but needs special fittings.
- Copper: Durable and long-lasting. Used for water supply lines. More expensive and requires soldering skills.
- ABS (Acrylonitrile Butadiene Styrene): Similar to PVC but black. Used mainly for drain pipes.
Choose pipe materials that suit your budget, skill level, and local plumbing codes. Use durable materials for water supply lines to prevent leaks and damage. For drains, PVC or ABS pipes work well and are easy to install.
Locating Existing Plumbing
Finding existing plumbing before installing floor pipes saves time and prevents damage. Locate drain and water lines hidden under the floor or behind walls. Use tools and methods to detect pipes and avoid cutting into them accidentally.
- Visual Inspection: Look for access panels, exposed pipes, or plumbing fixtures near the vanity location.
- Stud Finder with Wire Detection: Some models can detect pipes within walls or floors.
- Pipe Locators: Electronic devices designed to find metal pipes underground or in building structures.
- Consult Building Plans: Review blueprints or plumbing diagrams if available.
Mark the locations of all detected pipes clearly. Measure distances from walls and corners for reference. Avoid cutting or drilling where pipes run. Plan new plumbing routes around existing pipes to reduce repairs and complications.
Preparing The Floor
Preparing the floor is a key step in bathroom vanity plumbing through the floor. Proper preparation ensures smooth installation and avoids damage to the floor or plumbing system.
Cutting Access Holes
Cutting access holes allows plumbing pipes to pass through the floor easily. Start by marking the exact spot where pipes will go. Use a tape measure and pencil to draw the hole shape on the floor surface. Accuracy is vital to avoid unnecessary damage.
Follow these steps:
- Locate pipes and mark the center point on the floor.
- Use a hole saw or jigsaw to cut the marked area.
- Wear safety glasses and a dust mask during cutting.
- Remove debris and smooth edges with sandpaper.
Common hole sizes:
| Pipe Type | Hole Diameter |
| 1/2 inch Supply Line | 1 inch |
| 3/4 inch Drain Pipe | 2 inches |
| Vent Pipe | 3 inches |
Leave some extra space around the pipe for fitting and insulation. Avoid cutting too large holes as this weakens the floor structure. Properly cut holes help plumbers run pipes without leaks or obstructions.
Ensuring Structural Integrity
Maintaining the floor’s strength is critical after cutting holes. The floor must support the vanity and withstand daily use. Weak floors cause sagging or damage.
Follow these tips:
- Check joist locations: Avoid cutting holes near or through joists.
- Use joist reinforcement: Add extra framing around the hole to support weight.
- Install metal plates: Protect joists from nails or screws during plumbing work.
- Limit hole size: Keep holes as small as possible while allowing pipe passage.
Structural integrity depends on proper framing and careful cutting. Joists carry the floor load. Damaging them reduces strength and can cause costly repairs.
Dealing With Subfloor Types
Different subfloor materials require different handling methods. The three common types are plywood, OSB (Oriented Strand Board), and concrete. Each reacts differently to cutting and plumbing work.
Plywood Subfloor:
- Easy to cut with standard saws.
- Edges should be sealed to prevent moisture damage.
- Reinforce edges if large holes are needed.
OSB Subfloor:
- More sensitive to moisture than plywood.
- Seal edges after cutting to avoid swelling.
- Use waterproof adhesive when reinstalling pieces.
Concrete Subfloor:
- Requires special tools like a hammer drill or concrete saw.
- Cut holes carefully to avoid cracks.
- Use sleeves or sleeves and sealants to protect pipes.
Installing Drain Pipes
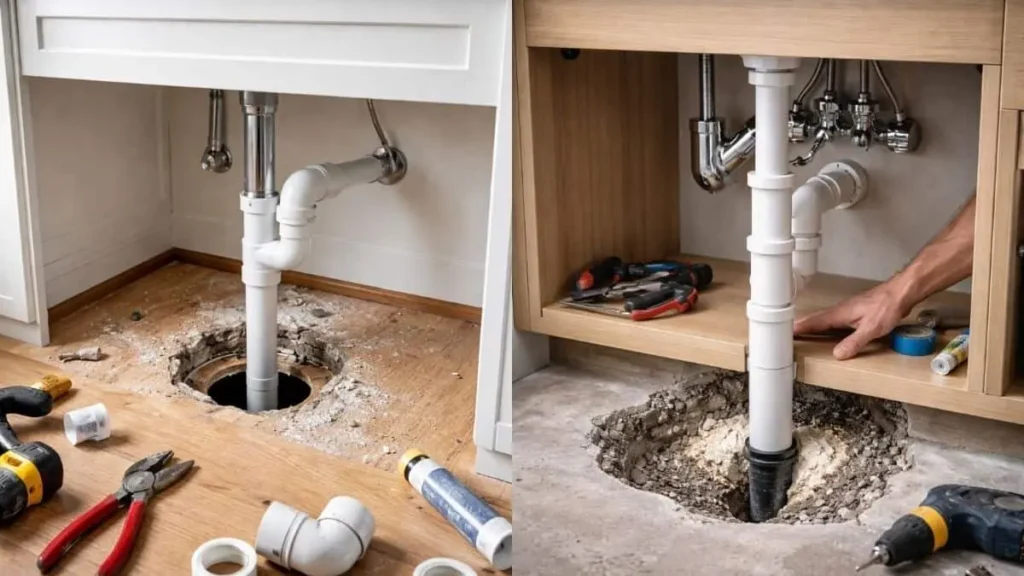
Installing drain pipes for a bathroom vanity that drains through the floor requires careful planning and precise work. The drain system must remove wastewater efficiently and prevent odors from entering the room.
Setting Up The Drain Trap
The drain trap is a curved pipe under the sink that holds water to block sewer gases from coming back into the bathroom. Setting up the drain trap correctly is essential for a healthy and odor-free space.
- Choose the right trap type: Most vanities use a P-trap made of PVC or metal.
- Attach the trap to the sink drain: Connect the trap directly below the sink drain tailpiece using slip nuts and washers.
- Ensure a tight seal: Use plumber’s tape or sealant on threaded connections to prevent leaks.
- Check trap alignment: The trap must line up with the drain pipe going through the floor without strain.
Connecting To Main Drain Line
The drain pipe from the trap must connect to the home’s main drain line beneath the floor. This connection carries wastewater away safely and prevents clogs.
Steps to connect the drain pipe to the main line:
- Locate the main drain pipe: Find the pipe under the floor where the vanity drain will connect.
- Measure and cut pipes: Use a PVC pipe cutter to cut the drain pipe to the correct length for a smooth fit.
- Use proper fittings: Employ wyes or sanitary tees to join the drain pipe at the correct angle.
- Apply primer and cement: Clean pipe ends with primer, then use PVC cement to glue the joints firmly.
- Test the connection: Pour water through the drain to check for leaks or slow drainage.
Maintaining Proper Slope
Drain pipes need a slight slope to allow wastewater to flow freely by gravity. Without this slope, water can pool and cause blockages.
The ideal slope is about 1/4 inch drop for every foot of pipe length. This angle keeps water moving without being too steep or too flat.
- Use a level tool: Check the pipe slope during installation to maintain a consistent angle.
- Adjust pipe supports: Secure pipes with brackets or hangers to keep the slope steady.
- Avoid sagging: Pipes that dip or sag trap water and debris, leading to clogs.
Running Water Supply Lines
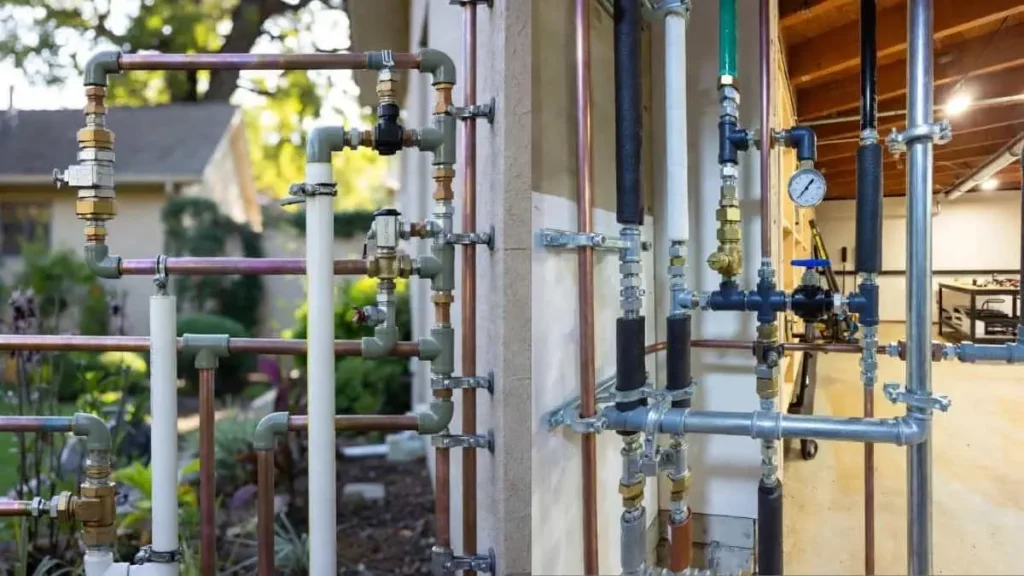
Running water supply lines for bathroom vanity plumbing through the floor require careful planning. These lines carry hot and cold water from the main supply to your sink. Proper installation ensures steady water flow and prevents common issues like leaks or freezing.
Hot And Cold Water Routing
Routing hot and cold water supply lines correctly is crucial for a functional vanity plumbing system. Both lines must run from the main water source through the floor to the sink’s faucet. Typically, the hot water line is on the left, and the cold water line is on the right.
Here are key points to consider:
- Distance: Keep hot water lines as short as possible to reduce heat loss.
- Separation: Avoid running hot and cold lines too close together to prevent temperature mixing.
- Insulation: Insulate hot water lines to maintain temperature and improve energy efficiency.
- Access: Ensure easy access for repairs by not embedding lines too deep in the floor.
The following table shows typical materials and their recommended uses for hot and cold water lines:
| Material | Suitable For | Temperature Range | Notes |
| PEX | Hot and Cold Water | Up to 200°F | Flexible, easy to install |
| Copper | Hot and Cold Water | Up to 250°F | Durable, corrosion-resistant |
| CPVC | Hot and Cold Water | Up to 180°F | Cost-effective, less flexible |
Proper routing minimizes pressure drops and ensures hot water arrives quickly at the faucet. This setup improves user comfort and reduces water waste.
Using Flexible Vs Rigid Pipes
Choosing between flexible and rigid pipes affects installation ease and system durability. Both pipe types have advantages and challenges in bathroom vanity plumbing through the floor.
- Made from materials like PEX.
- Bend easily around corners without fittings.
- Faster installation reduces labor time.
- Less prone to bursting due to freezing.
- Requires special clamps or fittings to secure.
- Common types include copper and CPVC.
- Strong and durable for long-term use.
- Needs fittings for bends, increasing potential leak points.
- More resistant to damage from impacts.
- May require soldering or gluing during installation.
Preventing Leaks And Freezing
Leaks and freezing are common problems in bathroom vanity plumbing through the floor. Proper methods reduce these risks and protect your home from water damage.
- Use quality fittings and connectors.
- Apply plumber’s tape or sealant on threaded joints.
- Tighten connections to manufacturer specifications.
- Test the system for leaks before closing the floor.
- Inspect pipes regularly for signs of wear or damage.
- Insulate pipes running through cold floor areas.
- Use foam sleeves or heat tape on exposed pipes.
- Seal gaps around pipes to block cold air.
- Maintain consistent indoor temperatures during winter.
- Consider installing frost-proof valves or shut-off valves.
Recommended Read: Toilet Water Supply Line Through Floor
Sealing And Testing
Sealing and testing are crucial steps in bathroom vanity plumbing through the floor. These steps prevent leaks and water damage under the floor. Proper sealing keeps the plumbing secure and stops moisture from seeping into the subfloor.
Water Tightness Checks
Water tightness checks confirm that no water escapes from the plumbing joints or pipes passing through the floor. This step is essential to avoid leaks that can damage the flooring and structure below.
Here is how to perform water tightness checks effectively:
- Turn on the water supply: Open the faucet connected to the vanity plumbing slowly.
- Inspect all joints: Look closely at each pipe joint and connection for any drips or wet spots.
- Use a dry cloth or paper towel: Wipe around the joints to detect any moisture quickly.
- Pressure test: Close all valves and monitor the pressure gauge if available. Pressure should hold steady without dropping.
- Check drain flow: Run water through the drain and watch for leaks under the floor or around the trap.
Sealing Floor Penetrations
Sealing floor penetrations protects the structure from water damage and air leaks. This process fills the gaps where pipes pass through the floor.
Steps for sealing floor penetrations:
- Clean the area: Remove dust, dirt, and debris around the pipe openings.
- Choose the right sealant: Use a waterproof silicone or polyurethane sealant designed for plumbing.
- Apply backer rod: Insert foam backer rod in large gaps before sealing. This reduces sealant use and improves durability.
- Seal around pipes: Apply the sealant evenly around each pipe using a caulking gun.
- Smooth the sealant: Use a putty knife or finger to smooth and press the sealant into gaps for a tight seal.
- Allow drying time: Let the sealant cure fully as per manufacturer instructions, usually 24 hours.
Final Inspection Tips
The final inspection ensures the entire plumbing installation is safe, sealed, and functioning well before closing the floor.
Key points for a thorough final inspection:
- Visual check: Look for any visible signs of leaks, gaps, or poor seals.
- Test water flow: Run water through the supply and drain lines multiple times.
- Pressure stability: Confirm no pressure loss in supply pipes.
- Check venting: Ensure drain vents are clear and functional.
- Inspect seals: Verify all floor penetrations are fully sealed and dry.
- Listen for sounds: Unusual dripping or hissing may indicate leaks.
Conclusion
Proper planning makes bathroom vanity plumbing through the floor easier. Check pipe size and location before starting work. Use the right tools to avoid leaks and damage. Take safety steps to prevent accidents during installation. Small mistakes can cause big problems later.
A well-installed floor plumbing keeps water flowing smoothly. Stay patient and follow each step carefully. This way, your bathroom will work well for years.