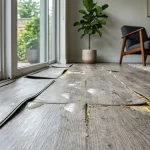
You’re walking across your kitchen floor and something feels off — a soft spot under your foot, a faint bubbling near the edge, or a musty smell you just can’t shake. Sound familiar? If so, there’s a good chance you have water sitting under your linoleum floor.
Water under linoleum floors is one of those problems homeowners tend to brush off — until it becomes a very expensive repair. The tricky part is knowing whether you can handle it yourself or whether it’s time to pick up the phone and call a professional. That’s exactly what this guide covers.
How Does Water Get Under Linoleum Floors?
Understanding where the water is coming from is the first step — because if you don’t fix the source, the problem will keep coming back no matter how many times you repair the floor.

The most common culprit is a slow leak from a nearby appliance. Dishwashers, refrigerators with ice makers, and washing machines all have water supply lines that can develop small cracks or loose connections over time. These leaks often go unnoticed for weeks because the water travels along the underside of the floor rather than pooling visibly on top.
Bathroom floors face a different set of risks. Poor caulking around the base of a toilet or bathtub allows water to seep through every time someone splashes or cleans the floor. Over time, this moisture finds its way beneath the linoleum and starts breaking down the adhesive that holds it in place.
Plumbing leaks from pipes running beneath the floor are another major source. A pinhole leak in a copper pipe or a loose joint under the subfloor can release moisture continuously — and since it’s hidden, the damage builds up slowly without any obvious signs at first.
In basements and ground-level rooms, groundwater seepage and condensation are also common causes, especially in homes without proper vapor barriers. High humidity alone can cause enough moisture buildup under flooring to cause problems over time.
The reason linoleum is particularly vulnerable is because it’s not fully waterproof. Unlike modern luxury vinyl plank flooring, traditional linoleum is made from natural materials — linseed oil, cork dust, and wood flour — that absorb moisture when exposed to it for long periods. Once water gets past the seams or edges, it sits trapped beneath the surface with nowhere to go.
Warning Signs You Have Water Under Your Linoleum Floor

The challenge with water under linoleum is that the damage often happens silently. By the time you notice obvious signs, the moisture has usually been there for a while. Knowing what to look for can help you catch the problem earlier.
Visual signs are usually the first clue. Look for sections of the floor that appear to be bubbling, lifting, or bowing upward. Discoloration — dark patches or staining that seem to come from beneath the surface — is another red flag. Check the edges where the linoleum meets the baseboards or walls; if they’re peeling or pulling away, moisture has likely softened the adhesive underneath.
Physical signs are just as telling. Walk slowly across the floor and pay attention to how it feels. A soft, spongy, or slightly springy sensation underfoot — especially in areas near appliances or plumbing — suggests the subfloor below has absorbed moisture and begun to weaken. You might also hear unusual sounds: squeaking, crinkling, or hollow spots that weren’t there before.
Smell is often the earliest warning sign of all. A persistent musty or mildew-like odor at floor level, especially in bathrooms or kitchens, frequently appears before any visible damage shows up. If the smell gets stronger after rain or humid weather, that’s a strong indicator that moisture is trapped somewhere beneath your feet.
Don’t wait for all three types of signs to appear before acting. Even one of these warning signs warrants a closer look.
Why You Shouldn’t Ignore Water Under Linoleum Floors

A lot of homeowners make the mistake of telling themselves the floor looks fine and putting off the repair. Here’s why that’s a costly decision.
Subfloor damage is the biggest concern. Most homes have a plywood or OSB (oriented strand board) subfloor beneath the flooring. Both of these materials absorb water and begin to swell, warp, and eventually rot when exposed to moisture for extended periods. Once rot sets into the subfloor, it can spread to the floor joists — the structural framing members that support your floor. At that point, you’re no longer dealing with a flooring repair; you’re dealing with a structural repair that can cost thousands of dollars.
Mold is the other major risk. Mold can begin growing under linoleum in as little as 24 to 48 hours under the right conditions — warm temperature, darkness, and moisture. The problem is that mold under a floor is hidden, so it can develop for months without anyone realizing it. Some mold species produce allergens and irritants that affect air quality throughout the home. Black mold (Stachybotrys chartarum), while less common, poses more serious respiratory health risks and requires professional remediation.
Financially, waiting always makes things worse. A small area of water damage caught early might cost a few hundred dollars to repair yourself. The same problem ignored for six months could mean replacing the entire subfloor and floor covering — easily a $3,000 to $8,000+ repair depending on the size of the area and the extent of the structural damage.
Assessing the Damage — What You’re Really Dealing With

Before you decide whether to DIY or call a professional, you need to understand how bad the damage actually is. Here’s a straightforward way to assess it.
The tap test is simple: use your knuckles or a rubber mallet to gently tap across the floor surface. A solid sound means the subfloor is intact. A hollow or dull thud indicates moisture has compromised the wood beneath. Mark any problem areas with tape.
A moisture meter is the most reliable tool for this job and costs around $20 to $50 at most hardware stores. Press the probes through a small hole or against an exposed edge of the subfloor. Readings above 19% moisture content in wood indicate a problem that needs to be addressed.
Once you’ve done these basic checks, you can generally categorize the damage into one of three levels:
| Damage Level | What It Looks Like | Typical Action |
| Minor | Small area, firm subfloor, no mold, adhesive mostly intact | DIY repair possible |
| Moderate | Larger area, soft spots, some discoloration, adhesive failing | DIY with caution, or get a pro assessment |
| Severe | Widespread moisture, visible mold, sunken/rotted subfloor | Call a professional immediately |
When You Can DIY — Water Under Linoleum Floor Repairs
DIY makes sense when the damage is minor and caught early. If the affected area is small (think: one or two square feet), the subfloor still feels firm, and there’s no sign of mold, you have a good chance of handling this yourself with the right approach.
Step-by-Step DIY Repair Process
Step 1 — Stop the source first. This cannot be overstated. Drying out the floor means nothing if water keeps coming in. Identify the leak — whether it’s a dishwasher hose, a toilet seal, or a pipe — and fix it before touching the floor.
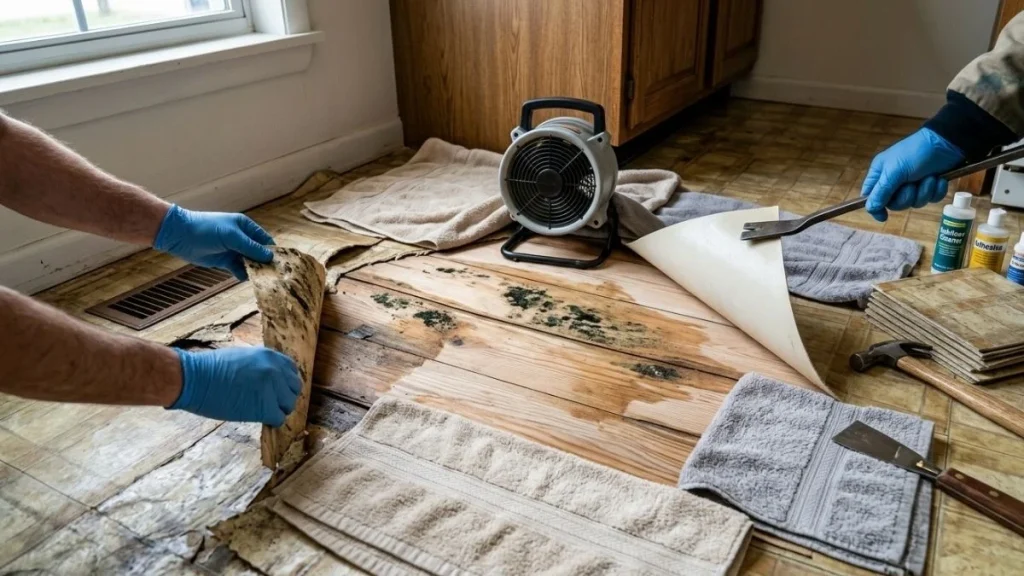
Step 2 — Remove the affected linoleum. Use a utility knife to score and cut away the damaged section. A heat gun set to low can help soften old adhesive and make lifting easier. Be patient — rushing this step can damage the subfloor further.
Step 3 — Dry the subfloor thoroughly. Set up box fans and a dehumidifier to circulate dry air over the exposed subfloor. Depending on how wet it is, this can take anywhere from 24 hours to several days. Don’t rush this step. Use your moisture meter to confirm readings are below 15% before moving on.
Step 4 — Inspect and treat. Once dry, check the subfloor closely for soft spots, dark staining, or mold. If you see early-stage mold (small areas of surface mold with no structural damage), you can treat it with a mold-inhibiting primer or a diluted bleach solution, followed by a mold-resistant sealer.
Step 5 — Repair or replace the subfloor section. Small areas of damage can be patched with floor-leveling compound. Larger damaged sections will need to be cut out and replaced with new plywood — cut to fit and screwed (not just nailed) into the joists.
Step 6 — Reinstall the linoleum. Use a high-quality flooring adhesive recommended for linoleum. Seal the edges and seams with a waterproof caulk or seam sealer to prevent future moisture intrusion.
Basic tools and materials you’ll need:
- Moisture meter
- Dehumidifier and box fans
- Utility knife and floor scraper
- Heat gun
- Mold-resistant primer
- Subfloor patching compound or replacement plywood
- Linoleum adhesive and seam sealer
For a minor DIY repair, expect to spend $100–$300 in materials and a weekend of your time.
When to Call a Professional — Don’t Risk It

There are situations where DIY isn’t the right call — and trying to handle them yourself can make things significantly worse.
Call a professional if:
- You find visible mold covering more than a small patch (roughly 10 square feet or more)
- The subfloor feels spongy, sunken, or crumbles when pressed
- The water source was a burst pipe or sewage backup
- The damage has spread to walls or you suspect floor joist involvement
- You removed the linoleum and the problem looks much bigger than expected
Professionals have access to industrial-grade drying equipment — commercial dehumidifiers and air movers that can dry out a subfloor in a fraction of the time a consumer-grade setup would take. More importantly, water damage restoration companies use thermal imaging cameras and professional moisture mapping tools to find hidden moisture pockets that a homeowner would easily miss.
Who to call depends on the situation:
A water damage restoration company (look for IICRC-certified contractors) is the right call for flooding, burst pipes, or any situation involving widespread moisture. They handle the drying, mold remediation, and can coordinate with your insurance company.
A flooring contractor specializes in subfloor repair and floor replacement. For situations where the moisture source is already fixed but the floor and subfloor need replacing, this is who you want.
A licensed plumber should be your first call if you haven’t identified and fixed the leak yet. No floor repair will last if the water source isn’t addressed.
What does professional repair cost?
| Service | Estimated Cost Range |
| Water damage restoration | $1,000 – $4,000+ |
| Subfloor replacement (per sq ft) | $15 – $30 per sq ft |
| Full linoleum replacement | $3 – $7 per sq ft installed |
| Mold remediation | $500 – $6,000 depending on severity |
Homeowner’s insurance may cover sudden water damage (like a burst pipe) but typically won’t cover gradual leaks caused by lack of maintenance. Check your policy and document everything before starting repairs.
Preventing Water From Getting Under Your Linoleum Floors Again

Once the repair is done, a few simple habits can prevent this from happening again.
Inspect the caulking around your toilet, bathtub, and sink base at least once a year. Cracked or missing caulk is one of the most common entry points for water. Reapplying caulk is a 15-minute job that can save you thousands.
Check appliance water supply hoses annually. Rubber hoses on washing machines and dishwashers degrade over time — replacing them with braided stainless steel hoses ($10–$20) is cheap insurance. If you’re away for an extended period, consider turning off the water supply to appliances you won’t be using.
If you’re replacing the flooring anyway, this is a good time to consider whether linoleum is the right material for wet areas. Waterproof luxury vinyl plank (LVP) has become a popular alternative — it looks great, is completely waterproof, and is easier to replace in sections if damage does occur. Ceramic or porcelain tile remains the gold standard for bathrooms and other high-moisture areas.
Also Read: Toilet Water Supply Line Through Floor
Conclusion
Water under linoleum floors is a problem you don’t want to leave to chance. The good news is that if you catch it early and the damage is limited, a DIY repair is absolutely doable over a weekend. But when mold is involved, the subfloor is compromised, or the water source isn’t clear, calling a professional isn’t a luxury — it’s the smarter financial decision.
Use the damage assessment steps in this guide to take an honest look at what you’re dealing with. When in doubt, at least get a professional opinion before committing to a repair approach. Acting fast — whatever path you choose — is always the right move when water is involved.