Have you ever opened the cabinet under your kitchen sink only to find a puddle of water and pipes that have come apart? It’s frustrating, messy, and can quickly turn into a bigger problem if not fixed right away.
If your pipes under the kitchen sink came apart, you might be wondering what caused it and how to stop it from happening again. You’ll discover simple steps to identify the problem, fix it yourself, and keep your kitchen dry and worry-free.
Common Causes Of Pipe Separation
Pipes under the kitchen sink can come apart for several reasons. Pipes may disconnect suddenly or slowly over time. Identifying the root cause allows for quick repairs and keeps your plumbing safe. The most frequent reasons include loose connections, worn out seals, improper installation, and corrosion or damage.
Loose Connections
Loose connections are a major cause of pipe separation under the kitchen sink. Pipes connect through joints and fittings, which must be tight to prevent leaks. Over time, vibrations from water flow or movement can loosen these connections.
Signs of loose connections include:
- Water dripping or pooling under the sink
- Visible gaps between pipe sections
- Unusual noises when water runs
To fix loose connections, check all joints and tighten them carefully. Avoid over-tightening, which can crack fittings.
Worn Out Seals
Seals prevent water from leaking where pipes connect. These seals wear out from constant use and exposure to water. Worn seals lose their shape and no longer create a tight barrier.
Common seal types include rubber washers, O-rings, and gaskets. Each has a limited lifespan depending on water quality and use.
Symptoms of worn seals:
- Slow leaks forming around joints
- Water stains or dampness under the sink
- Musty or moldy smells due to moisture
Replacing worn seals is often a simple fix:
- Turn off water supply before repair
- Remove old seals and clean surfaces
- Install new seals matching pipe size
Improper Installation
Improper installation can cause pipes to separate soon after fitting. Pipes must align correctly and fit tightly during installation. Mistakes lead to weak joints and early failure.
Common installation errors:
- Using wrong pipe sizes or types
- Failing to secure pipes firmly
- Skipping use of plumber’s tape or sealant
Incorrect angles or stress on pipes can also cause separation. Pipes under the sink should have enough space and support to avoid strain.
Corrosion And Damage
Corrosion and damage weaken pipes and cause separation. Metal pipes rust over time, especially in moist environments like under the sink. Rust causes pipe walls to thin and crack.
Plastic pipes may crack or break from impact or aging. Damage can also come from pests or accidental knocks during cabinet use.
Signs of corrosion and damage:
- Rust-colored water stains
- Visible cracks or holes in pipes
- Water pooling from unseen leaks
Signs Of Pipes Coming Apart
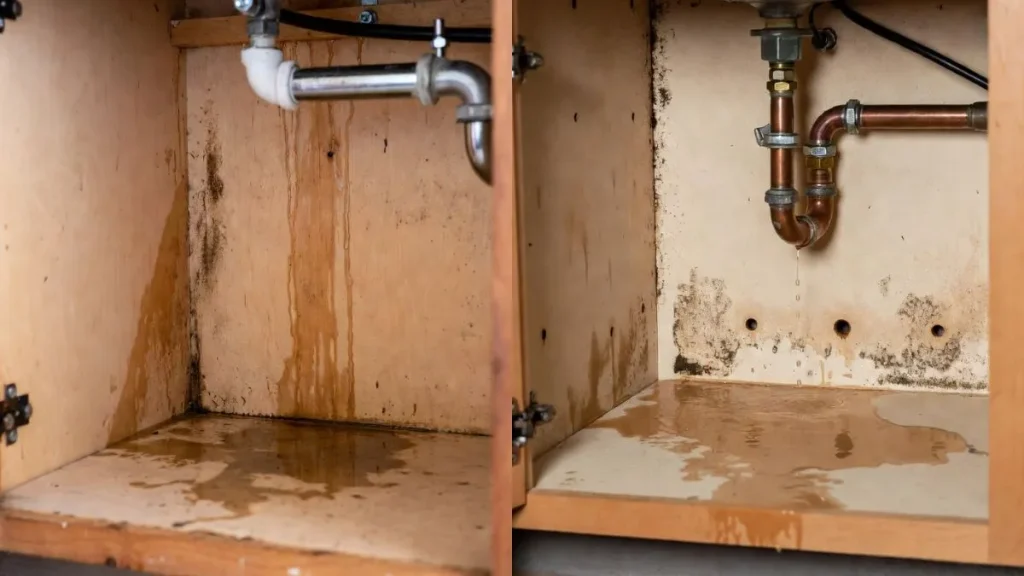
The pipes under a kitchen sink play a crucial role in draining water safely away. When these pipes start to come apart, it can cause several problems that affect your home’s plumbing system. Knowing the signs of pipes coming apart helps you catch issues early and avoid costly repairs.
Water Leaks
One of the clearest signs that pipes under your kitchen sink are coming apart is the presence of water leaks. Even small leaks can cause damage over time. You might notice:
- Water pooling under the sink or on the cabinet floor.
- Dripping sounds when no water is running.
- Damp spots or discoloration on walls or cabinet surfaces.
Leaks happen because the pipe connections become loose or the pipes crack. If left unchecked, leaks can cause:
- Wood damage to cabinets.
- Mold and mildew growth.
- Increased water bills.
Unpleasant Odors
Bad smells near your kitchen sink can mean pipes are coming apart. Pipes that separate or crack allow sewer gases to escape. These gases have a strong, unpleasant odor. Signs include:
- A foul, rotten smell near or under the sink.
- Smell getting stronger after using the sink.
- Persistent odors even after cleaning.
Unpleasant odors come from sewer gases like methane and hydrogen sulfide. These gases are harmful if inhaled in large amounts. The odors can also signal:
- Trapped food or debris in broken pipes.
- Water not properly sealing the drain traps.
- Pipe joints that are loose or cracked.
Water Pressure Issues
Pipes coming apart under the sink can affect water pressure. Low or inconsistent pressure often means leaks or blockages. Common symptoms include:
- Water flow that suddenly weakens.
- Pressure that varies when using other fixtures.
- Dripping faucets with low pressure.
Leaks reduce the water reaching the faucet. Broken pipes may also cause air to enter the system, disrupting pressure. Blocked or damaged pipes lead to:
- Slow drainage and backups.
- Uneven water flow.
- Noise in pipes (gurgling or banging).
Step-by-step Repair Process

The pipes under a kitchen sink can come apart due to wear, loose fittings, or accidental force. Fixing this issue quickly helps prevent water damage and keeps your kitchen functional. The step-by-step repair process guides you through simple actions to get the pipes back in place and sealed properly. Each step focuses on safety and effectiveness, ensuring your plumbing works well again.
Turn Off Water Supply
Start by stopping the water flow to avoid flooding. Locate the shut-off valves under the sink. These valves control water coming to the faucet and pipes.
- Turn the valves clockwise to close them.
- If no valves are under the sink, find the main water shut-off in your home.
After closing the valves, open the faucet to drain any remaining water in the pipes. This step lowers water pressure and prevents spills during repair. Use a bucket or towel to catch leftover water. Always double-check the valves are fully closed before proceeding.
Remove Damaged Pipes
Next, remove the broken or loose pipes carefully. Use a wrench or pliers to loosen slip nuts connecting the pipes. Turn the nuts counterclockwise to unscrew them. Support the pipe while loosening to avoid dropping it.
Keep these tips in mind:
- Place a bucket under pipes to catch water.
- Inspect pipes for cracks, corrosion, or worn-out washers.
- Note the pipe layout for easier reassembly.
If pipes are PVC, gently twist and pull to separate them. For metal pipes, use the wrench without applying too much force. Damaged pipes must be replaced with the right size and type. Label or photograph the setup for reference.
Clean And Prepare Connections
Before reassembling, clean the pipe ends and fittings thoroughly. Dirt, old putty, or corrosion can cause leaks. Use a cloth or brush to remove debris.
Steps to prepare connections:
- Wipe pipe ends and fittings with a rag.
- Use sandpaper or steel wool on metal surfaces to remove rust.
- Apply plumber’s tape (Teflon tape) on threaded joints for a tight seal.
- Check washers and replace if worn or brittle.
Proper cleaning and preparation prevent leaks and ensure pipes fit snugly. Avoid using too much tape—wrap it around threads 2-3 times. Clean connections create a smooth surface for pipes to join securely.
Reassemble And Secure Pipes
Put the pipes back together following the original layout. Slide pipes into place and hand-tighten slip nuts. Use a wrench to give a gentle final turn. Avoid overtightening; it can crack pipes or damage threads.
Remember these tips:
- Align pipes correctly to prevent strain.
- Use new washers if needed to improve sealing.
- Check for smooth pipe connections without gaps.
Secure all joints firmly but carefully. For PVC pipes, use proper PVC cement on joints if required. Allow any adhesive to dry before testing. Tight connections help avoid leaks and keep your sink working well.
Test For Leaks
After reassembly, turn the water supply back on slowly. Watch all joints and pipes closely for any drips or moisture. Run water through the sink for a few minutes to check pressure and flow.
If leaks appear:
- Turn off water immediately.
- Retighten slip nuts or fittings gently.
- Reapply plumber’s tape if threads seem loose.
Testing ensures your repair is solid and prevents future water damage. Keep a towel or bucket ready during this step. Fix small leaks right away to avoid bigger problems later.
Preventing Future Pipe Issues

When pipes under the kitchen sink come apart, it causes leaks and water damage. Preventing future pipe issues helps save money and avoid stress. Taking simple steps can keep your plumbing strong and leak-free. Regular care and the right materials make a big difference.
Regular Inspections
Checking pipes often helps find problems early. Small leaks or loose joints can turn into big issues. Set a schedule to inspect pipes under the sink at least every three months.
- Look for water stains, damp spots, or mold under the sink.
- Feel pipes for moisture or corrosion.
- Check pipe connections and tighten any loose fittings.
- Listen for dripping sounds that show leaks.
Use a flashlight to see hard-to-reach areas clearly. Keeping a small notebook or using a phone app to record inspection dates and notes helps track pipe health over time.
| Inspection Task | What to Check | Action if Issue Found |
| Visual Check | Leaks, stains, rust | Clean area, dry pipes, tighten or replace parts |
| Connection Tightness | Loose nuts or clamps | Use wrench to tighten carefully |
| Pipe Condition | Cracks, corrosion, wear | Replace damaged sections promptly |
Regular inspections catch issues before water damage starts. This saves time and repair costs.
Proper Installation Techniques
Correct pipe installation prevents many common problems. Pipes must fit well and connect tightly to avoid leaks. Using the right tools and following guidelines ensures a safe setup.
Steps for proper installation:
- Measure pipe lengths carefully before cutting.
- Use pipe cutters or saws designed for plumbing.
- Clean pipe ends and fittings before joining.
- Apply plumber’s tape or sealant on threaded joints.
- Hand-tighten connections, then use a wrench for a firm fit.
- Check alignment to avoid stress or bending.
Incorrect installation leads to loose joints and faster wear. Avoid overtightening, which can crack pipes or fittings.
Using Quality Materials
Choosing good materials is key to long-lasting plumbing. Low-quality pipes and fittings wear out quickly and break easily. Invest in trusted brands and proper pipe types for kitchen sinks.
Common pipe materials and their uses:
| Material | Advantages | Disadvantages |
| PVC | Cheap, easy to install, corrosion-resistant | Not heat-resistant, can crack under stress |
| PEX | Flexible, durable, resists freezing | Needs special fittings, can be damaged by UV light |
| Copper | Strong, heat-resistant, long-lasting | Expensive, requires soldering skills |
Buy pipes and fittings from reputable stores. Avoid cheap products without quality certification. Store materials properly to prevent damage before use.
Using quality materials reduces leaks, corrosion, and pipe failure. It protects your home and lowers repair needs.
Read Also: Air Volume Control Valve Leaking Water?
Conclusion
Fixing pipes under the kitchen sink needs quick action. Small leaks can cause big problems later. Tighten connections and check seals often. Use the right tools to avoid damage. Call a plumber if you feel unsure. Keep your kitchen dry to stop mold growth.
Regular checks save money and stress. Clean, working pipes make your kitchen safer. Don’t wait for the leak to get worse. Simple care keeps your sink working well.