Is your kitchen sink feeling loose or wobbly on your granite countertop? This common problem can cause leaks, damage, and a lot of frustration if you don’t fix it quickly.
You might be wondering why it’s happening and how to secure your sink without calling expensive help. You’ll discover simple, practical steps to tighten your kitchen sink and protect your beautiful granite surface. Keep reading—you’ll learn easy solutions that save you time, money, and stress.
Signs Of A Loose Sink
A loose kitchen sink installed in granite countertops can cause many problems over time. It affects the sink’s stability and may lead to damage in the countertop or plumbing. Recognizing the signs of a loose sink early helps prevent costly repairs. These signs show that the sink no longer fits tightly to the granite surface.
Visible Gaps Between Sink And Granite
One clear sign of a loose sink is visible gaps between the sink edge and the granite countertop. Normally, the sink sits flush against the granite with no space in between. Over time, the sealant or mounting clips can weaken, creating small openings.
Common reasons for visible gaps include:
- Sealant cracking or peeling away
- Loose mounting clips or brackets
- Granite countertop warping or shifting
- Improper initial installation
These gaps allow water, dirt, and debris to enter. This can cause stains or damage to the granite. Water trapped in the gaps may lead to mold or mildew growth under the sink area.
Check for gaps carefully:
| What to Look For | Why It Happens | Possible Damage |
| Small spaces between sink and granite | Sealant or clips failing | Water damage and stains |
| Uneven edges or sink movement | Loose mounting hardware | Granite chipping or cracking |
Regularly inspect the sink edge for any new or growing gaps. Early attention stops bigger problems.
Sink Rocking Or Moving
A loose sink often rocks or moves when pressure is applied. This happens because the mounting clips or adhesive no longer hold the sink firmly in place.
Signs of a rocking or moving sink:
- Sink shifts when you push or pull on it
- Edge lifts slightly from the countertop
- Noise or creaking sounds when touched
A moving sink is unsafe. It can cause damage to pipes or the granite surface. The movement also stresses the sealant, causing it to crack or peel faster.
How to test for sink movement:
- Gently press down on different parts of the sink
- Try to wiggle the sink side to side
- Listen closely for any unusual sounds
Fixing a rocking sink requires tightening or replacing the mounting clips. Sometimes, resealing the sink is also necessary.
Water Leakage Under Sink
Water leaking under the sink is a strong sign that the sink is loose or improperly sealed. Gaps or movement allow water to seep through the sink edge or plumbing connections.
Common signs of leakage include:
- Wet or damp cabinet floor below the sink
- Musty or moldy smell inside the cabinet
- Visible water stains on the cabinet walls or floor
Leakage can damage wood cabinets and promote mold growth, affecting indoor air quality.
Check these areas for leaks:
| Leak Source | What to Inspect | Fix Needed |
| Sink edge | Sealant cracks or gaps | Reapply sealant or tighten mounting |
| Plumbing joints | Loose pipe connections | Tighten or replace fittings |
Early leak detection helps avoid costly water damage repairs.
Unusual Noises When Using Sink
Unusual noises during sink use often point to looseness. Sounds like creaking, popping, or rattling indicate the sink is not firmly attached to the granite countertop.
Common noise causes:
- Sink shifting under weight
- Loose mounting hardware moving
- Sealant cracking or separating
These noises may happen more when running water, washing dishes, or pressing on the sink basin. The sounds warn of wear and damage risks.
Noise troubleshooting tips:
- Listen closely while applying gentle pressure
- Check if noises happen at specific spots
- Inspect mounting clips and sealant for damage
Fixing loose parts stops noise and protects the sink and granite from damage.
Step-by-step Repair Process
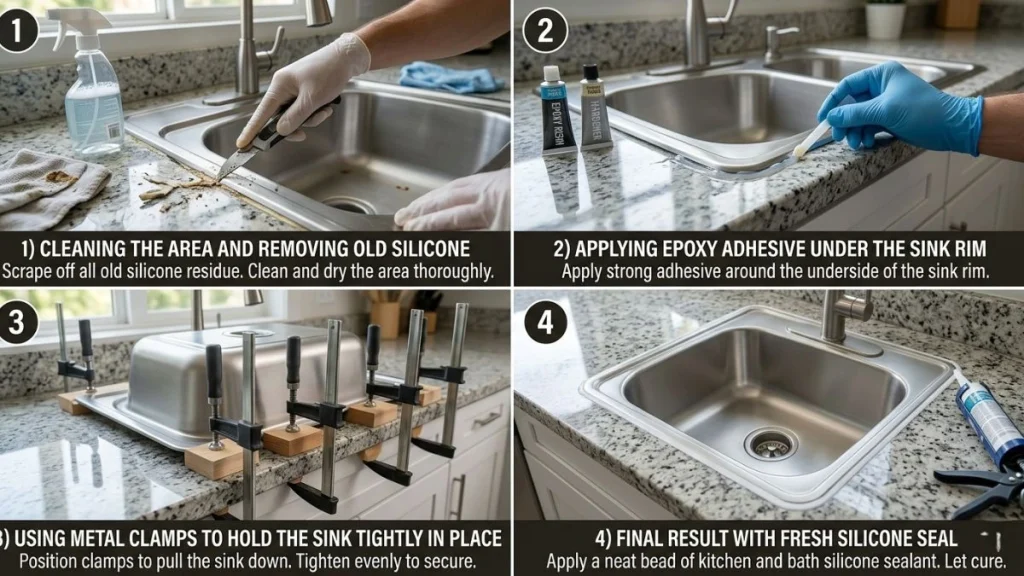
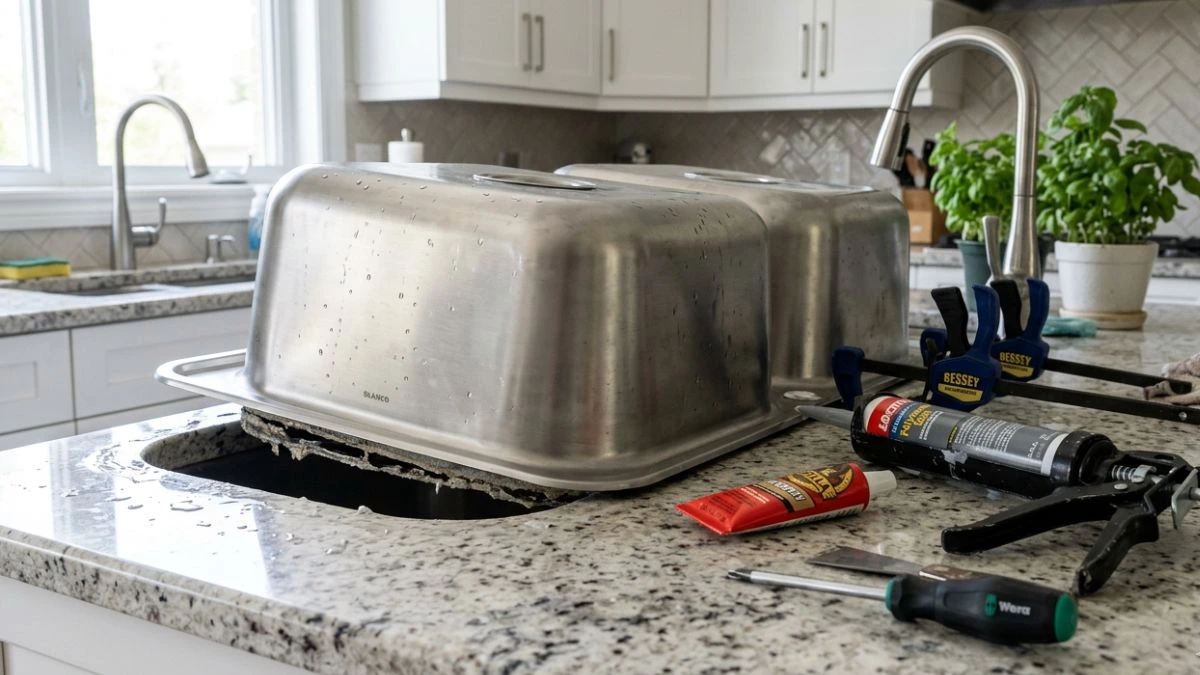
A loose kitchen sink set into a granite countertop can cause water leaks and damage over time. Fixing it quickly protects your countertop and plumbing. The step-by-step repair process helps you secure the sink properly. Each step focuses on safety and precision to restore a tight seal between the sink and granite. This guide breaks down the repair into easy actions you can follow.
Turn Off Water Supply
Before starting any repair, turn off the water supply to prevent leaks or flooding. Locate the shutoff valves under the sink. These usually control hot and cold water lines separately.
- Turn both valves clockwise until fully closed.
- If no valves exist under the sink, shut off the main water supply to your home.
- Open the faucet to release any remaining water and relieve pressure.
Use a wrench if valves are tight, but avoid forcing them to prevent damage. Confirm water is off by trying to turn on the faucet. No water should flow.
| Step | Action | Tip |
| 1 | Locate shutoff valves | Look under sink cabinet |
| 2 | Turn valves clockwise | Use wrench if needed |
| 3 | Open faucet to drain water | Check no water flows |
This step ensures safety and prevents water damage during the repair process.
Remove Sink Clips
Sinks set in granite countertops are often held by metal clips underneath. Removing these clips frees the sink for resealing.
Follow these instructions carefully:
- Clear out the cabinet below the sink for easy access.
- Use a flashlight to locate all clips securing the sink.
- Use a screwdriver or wrench to loosen and remove each clip.
Keep clips and screws in a safe place for reattachment later. Some clips may be rusty or stuck; apply a penetrating oil and wait 10 minutes before loosening.
Carefully lift the sink edge slightly to confirm clips are fully removed. Avoid pulling hard to prevent damaging the granite or sink.
| Tool | Purpose |
| Screwdriver | Remove clip screws |
| Wrench | Loosen bolts on clips |
| Penetrating oil | Ease removal of rusty clips |
Removing clips properly avoids damage and prepares the sink for resealing.
Clean Sink And Granite Edges
Cleaning the contact surfaces is essential. Old sealant, dirt, and grime prevent a tight seal.
Steps to clean:
- Use a plastic scraper to remove old caulk or sealant on the sink rim and granite edge.
- Wipe surfaces with a cloth soaked in rubbing alcohol or a mild cleaner.
- Allow surfaces to dry completely, usually 30 minutes.
Inspect for damage such as cracks or chips in granite or sink edges. Repair these before resealing.
Using the right cleaning method prevents leaks and ensures the new sealant bonds well.
| Cleaning Material | Use |
| Plastic scraper | Remove old sealant |
| Rubbing alcohol | Clean and disinfect edges |
| Cloth | Wipe surfaces dry |
Apply New Sealant
Use a high-quality silicone or plumber’s sealant made for kitchen sinks and granite.
Follow these instructions:
- Cut the sealant tube nozzle at a 45-degree angle for smooth application.
- Apply an even bead of sealant along the granite edge where the sink sits.
- Press the sink firmly into place, ensuring contact with the sealant.
Keep your finger or a caulk tool handy to smooth the sealant bead for a clean finish.
Sealant cures in 24 hours, so avoid using the sink during this time.
| Sealant Type | Recommended Use |
| 100% Silicone Sealant | Waterproof and flexible |
| Plumber’s Putty | Good for small gaps, less flexible |
Reattach Sink With Clips
Once the sealant is applied and the sink is positioned, reattach the clips to secure the sink.
- Align clips with mounting holes under the granite countertop.
- Tighten screws or bolts gradually, alternating sides to keep even pressure.
- Do not overtighten, which can crack granite or deform the sink rim.
Check that the sink is level and flush with the countertop edges. Adjust clips as needed.
Keep tools handy to make small adjustments during tightening.
| Step | Action | Important Note |
| 1 | Position clips | Ensure proper alignment |
| 2 | Tighten screws evenly | Avoid overtightening |
| 3 | Check sink level | Adjust clips if needed |
Test Stability And Leak
After the sealant cures and clips are secure, test the sink for stability and leaks.
Steps to test:
- Gently press around the sink edges to check for movement.
- Turn on the water supply valves.
- Run water in the sink and observe the seal for leaks.
- Check under the sink for drips or moisture.
If leaks appear, tighten clips slightly or apply additional sealant where needed. Stability means no wobbling or shifting when pressure is applied.
Testing ensures the repair is complete and your sink is safe for daily use.
Preventing Future Sink Looseness
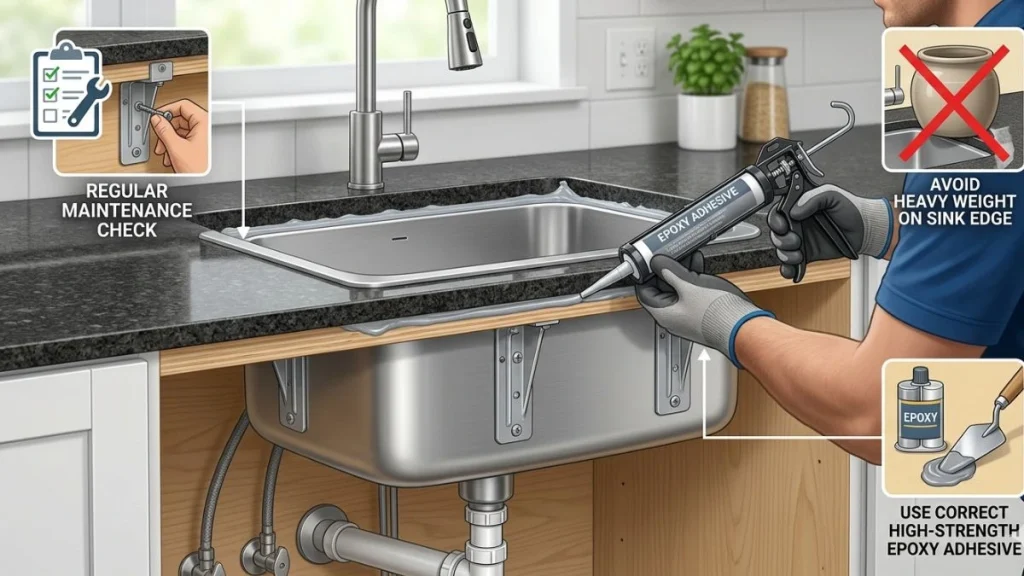
Granite kitchen sinks add beauty and durability to any kitchen. But over time, sinks may become loose, causing inconvenience and damage. Preventing future sink looseness is key to keeping your kitchen safe and functional. Simple steps can help maintain sink stability and avoid costly repairs.
Regular Maintenance Checks
Regularly inspecting your granite sink helps catch problems early. Look for signs of looseness such as wobbling, gaps, or cracks around the sink edge. Check the mounting clips and brackets under the sink for rust or damage. Tighten any loose screws or bolts carefully.
Follow this simple maintenance checklist every 3-6 months:
- Press around the sink edges to check for movement.
- Inspect mounting hardware for corrosion or wear.
- Look for cracks in granite or sealant gaps.
- Clean the sink and surrounding area to prevent dirt buildup.
| Maintenance Task | Frequency | Purpose |
| Edge Pressure Test | Every 3 months | Detect looseness early |
| Hardware Inspection | Every 6 months | Prevent rust and damage |
| Sealant Check | Every 6 months | Maintain water tightness |
Regular checks keep your sink secure. Small fixes prevent bigger problems later.
Avoid Excessive Weight On Sink Edges
Granite sinks are strong but not designed to hold heavy loads on their edges. Avoid placing heavy pots, pans, or cutting boards on the sink rim. Excess weight stresses mounting hardware and the granite itself.
Follow these tips to protect your sink edges:
- Use the countertop, not the sink edge, to hold heavy items.
- Place cutting boards fully on the countertop surface.
- Avoid leaning or sitting on the sink edges.
- Distribute weight evenly inside the sink basin.
Here is a quick guide to safe weight limits:
| Sink Area | Recommended Max Weight |
| Sink Edges | 5 lbs (2.3 kg) |
| Sink Basin Bottom | 25 lbs (11.3 kg) |
Protecting the edges extends the sink’s lifespan. It keeps mounting hardware intact and prevents cracks.
Use Quality Mounting Hardware
Strong mounting hardware holds your granite sink firmly in place. Using poor-quality clips, brackets, or screws can cause looseness over time. Choose corrosion-resistant materials like stainless steel or brass for long-lasting support.
Key points for mounting hardware:
- Material: Stainless steel or brass resists rust and corrosion.
- Size: Use hardware sized for your sink’s weight and thickness.
- Quantity: Install enough clips and brackets to distribute weight evenly.
- Condition: Replace any bent, broken, or rusty parts immediately.
Below is a comparison of common mounting hardware types:
| Hardware Type | Durability | Corrosion Resistance | Cost |
| Plastic Clips | Low | Low | Low |
| Steel Clips (Coated) | Medium | Medium | Medium |
| Stainless Steel Clips | High | High | High |
Invest in quality hardware for secure and stable sink installation.
Proper Sealant Application
Sealant keeps water from seeping between your granite sink and countertop. Poor sealant application leads to water damage and loosening. Use a high-quality, waterproof silicone sealant made for kitchen sinks.
Steps for proper sealant application:
- Clean and dry the area around the sink edge thoroughly.
- Apply a smooth, continuous bead of sealant between the sink and countertop.
- Use a caulk smoothing tool or your finger to flatten the bead for good adhesion.
- Allow the sealant to cure completely as per manufacturer instructions.
Sealant tips to remember:
- Do not use acrylic or latex caulk in wet areas.
- Reapply sealant every 1-2 years to maintain water tightness.
- Check sealant regularly for cracks or gaps.
Proper sealant protects your granite and mounting hardware from water damage. It helps keep the sink tight and secure for years.
Read Also: Kitchen Sink Leak When Water Off
Conclusion
A loose kitchen sink can cause leaks and damage over time. Tightening the sink helps keep it stable and prevents water problems. Regular checks can catch issues early before they grow worse. Use simple tools and follow clear steps for fixing the sink.
This saves money and avoids big repairs later. Taking care of your sink protects your granite countertop too. Keep your kitchen safe and clean with small, easy fixes. Don’t wait until the problem gets bigger or harder to fix. Act now for a strong, secure kitchen sink.