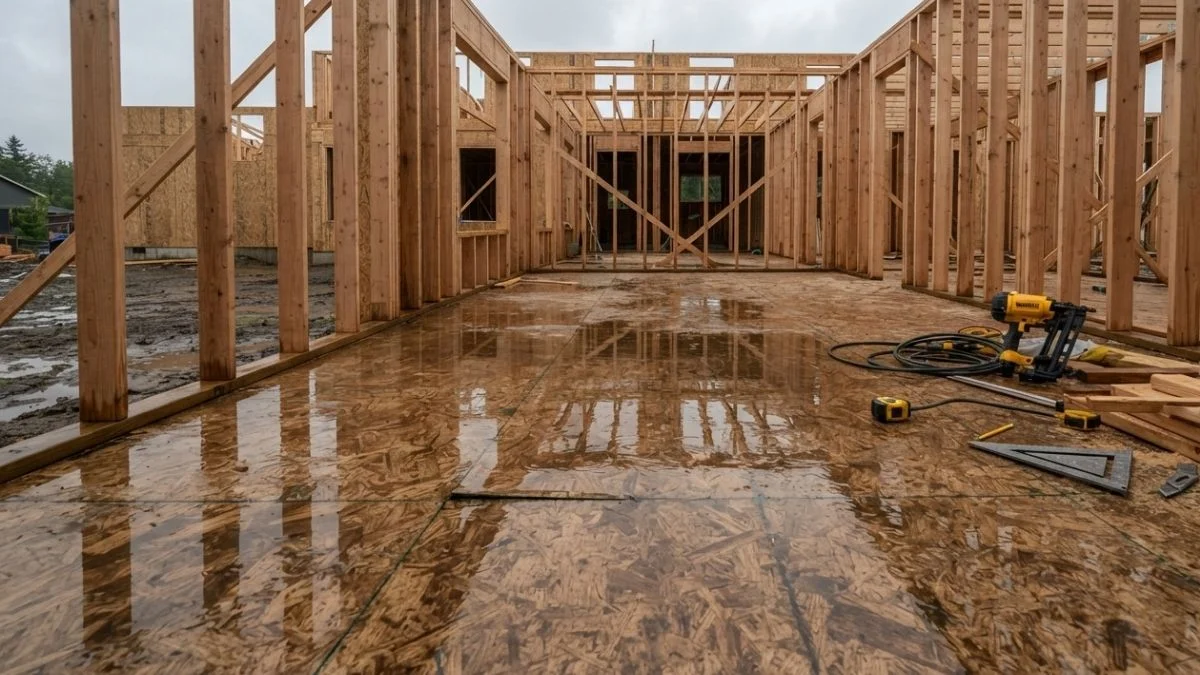
A subfloor getting wet during construction is not a defect — it is an expected part of the building process on virtually every residential job site in the country.
The real problem is that most homeowners and first-time builders see standing water or swollen panel edges after a rainstorm and assume permanent damage has already occurred, when in most cases the material is still well within recoverable limits.
This article gives you a clear, material-specific standard for what normal moisture exposure looks like, what the actual warning signs of damage are, and exactly when to escalate a concern to your contractor or inspector.
OSB vs. Plywood: Moisture Behavior and Recovery
These two materials react to water in fundamentally different ways. Knowing which one is on your job site determines whether a wet subfloor is a minor inconvenience or a replacement decision.
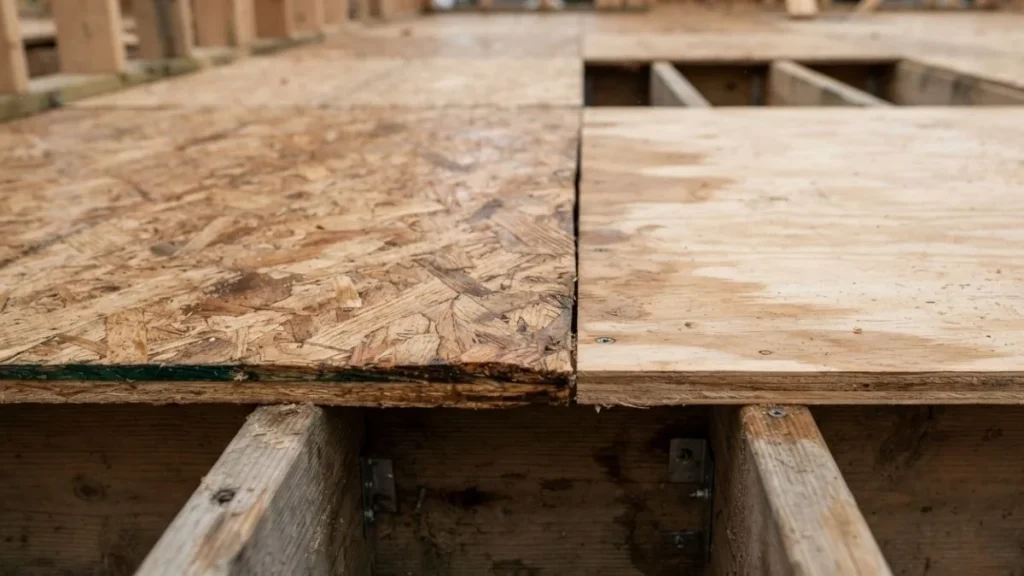
OSB Edge Swelling: Fast to Absorb, Slow to Forgive
OSB (oriented strand board) absorbs moisture rapidly through its exposed edges via capillary action — the same physics that pulls water up a paper towel. The face of an OSB panel is resin-sealed and relatively resistant, but cut edges on a job site are raw and unprotected. Edge swelling of 1/4 inch or more after rain is common and, in most cases, reversible. If the panel dries within a few weeks and the swelling is limited to edges, a contractor can plane or sand the affected areas flat before flooring installation begins.
Huber AdvanTech panels are engineered specifically to resist this problem, using a higher resin-to-fiber ratio and sealed edges that dramatically reduce capillary uptake compared to standard OSB.
Plywood: More Stable When Wet, but Delamination Is Permanent
Plywood handles short-term saturation better than OSB overall — it swells less and dries with better dimensional stability. The serious risk is prolonged saturation, which causes the outer veneer to separate from the core. That separation, called delamination, is irreversible. Once it occurs, replacement is the only correct fix.
How Long Can a Wet Subfloor Take to Dry?
Drying time depends on 3 factors: temperature, humidity, and airflow. In arid climates like Arizona, a saturated OSB subfloor can recover in days with open-air exposure. In the Pacific Northwest, where ambient humidity stays high for weeks, the same panel may take a month or longer — and without active ventilation or fans, may never fully dry before mold sets in.
Remediation vs. Replacement: The Decision Matrix
| Condition | Action Required |
|---|---|
| Surface discoloration, minor edge swell | Sand or plane flat before flooring install |
| Soft spots or spongy feel underfoot | Replace panel — structural integrity is compromised |
| Visible delamination (plywood only) | Replace panel immediately |
| Standing water present less than 48 hours | Dry thoroughly, inspect, then assess |
| Standing water present more than 48 hours | Test for mold, evaluate replacement |
Drying Wet Subfloors: Practical Strategy and Timeline
Speed matters more than method here. The faster a wet subfloor reaches equilibrium moisture content, the lower the risk of mold, material degradation, and flooring failures down the line.
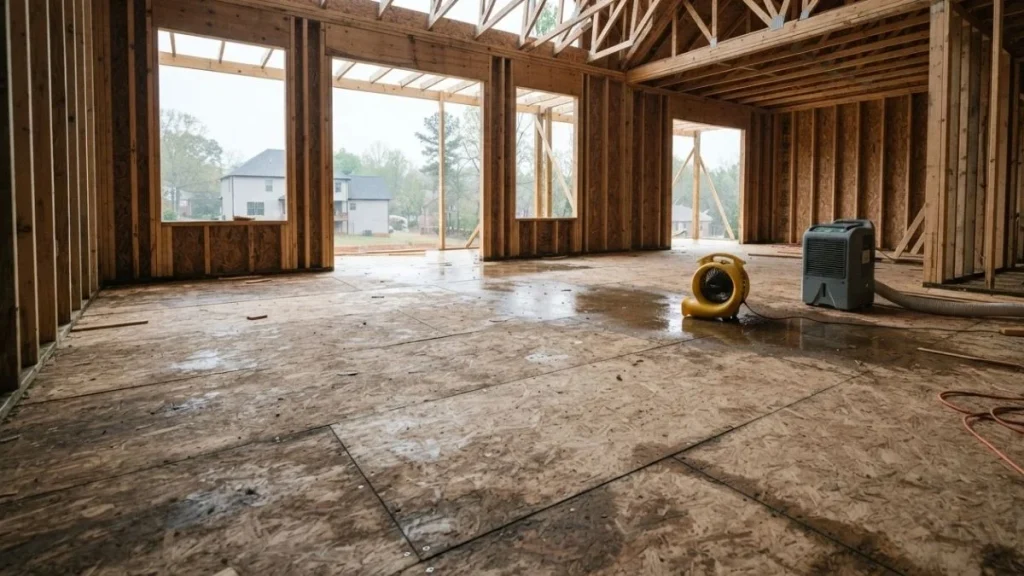
Active Ventilation: The First and Most Important Step
Cross-site airflow is the fastest low-cost drying method available during the open framing phase. Temporary window and door openings on opposite sides of the structure create natural cross-ventilation that pulls humid air out continuously. Add jobsite fans — at minimum one per saturated bay — to accelerate surface evaporation. For localized saturation, a contractor-grade dehumidifier positioned directly over the wet area removes moisture from the air around the panel, which directly speeds evaporation from the material itself.
The open framing phase is actually the best possible time for a subfloor to get wet, because nothing is enclosed yet. Once walls, insulation, and HVAC are in place, drying the same panel takes significantly longer.
How Long Does a Wet Subfloor Take to Dry?
Under favorable conditions — temperatures above 60°F, low ambient humidity, and active airflow — most wood subfloors reach acceptable moisture levels within 7 to 21 days. In cold or wet climates like the Pacific Northwest or upper Midwest, that timeline extends to 4 to 6 weeks. When a schedule delay of that length would push flooring installation past a critical milestone, mechanical drying equipment becomes cost-justified. Rental dehumidifiers and drying fans typically run $50–$150 per day, far less than the cost of replacing panels or refinishing buckled hardwood.
Concrete Subfloors Require a Completely Different Approach
Concrete generates its own moisture through the curing process — it is not simply drying out from rain exposure. A vapor barrier placed between the concrete slab and any wood subfloor system is critical for preventing ongoing moisture transfer into finished flooring materials.
Concrete also dries far more slowly than wood. The standard test for determining whether a concrete subfloor is ready for flooring adhesive is the calcium chloride test, which measures moisture vapor emission rate (MVER) in pounds per 1,000 square feet per 24 hours. Most flooring manufacturers require results below 3 to 5 lbs before installation. Skipping this test and installing prematurely is one of the leading causes of adhesive failure and floor buckling in new construction.
Damage vs. Normal Construction Exposure: What to Watch
Not every visual change to a subfloor means damage has occurred. The key is knowing which signs are cosmetic and which ones indicate structural or biological failure that requires action before flooring goes down.
Signs That Are Normal and Do Not Require Replacement
These conditions are consistent with standard jobsite exposure and do not compromise structural integrity:
- Surface discoloration — gray or brown staining from tannin release or mineral deposits after drying
- Light surface flaking — top resin layer lifting slightly after rapid drying; does not affect panel strength
- Minor edge swelling — raised edges along panel seams that can be planed or sanded flat before installation
Photo documentation of these conditions is worth doing regardless. A dated photo log protects you in contractor disputes and gives an inspector clear before-and-after reference points.
Red Flags That Require Professional Assessment
These conditions go beyond normal construction exposure and warrant either immediate professional evaluation or panel replacement:
- Soft or spongy sections — press firmly with your thumb across the panel surface; any give indicates fiber collapse or early fungal activity beneath the surface
- Deep saturation rings in OSB — dark concentric rings that persist after drying signal prolonged standing water and likely internal fiber breakdown
- Visible delamination — in plywood, any separation between veneer layers is irreversible and the panel must be replaced
- Musty odor after the drying period — mold growth can occur within 24 to 48 hours of saturation; odor after drying confirms active biological activity
Who Is Responsible — and Who Pays?
Here’s what most homeowners discover too late: standard homeowners insurance policies explicitly exclude weather-related damage that occurs during the construction phase. The financial responsibility sits with whoever holds the builder’s risk policy — typically the general contractor on a custom build, or the builder on a spec home.
Before your project breaks ground, verify two things in your contract: that builder’s risk coverage is active from the date materials are delivered to the site, and that it includes subfloor and structural panel replacement. If damage occurs and the contractor disputes responsibility, escalate to the material supplier only if a manufacturing defect contributed to the failure — rain damage alone is a jobsite protection issue, not a product defect claim.
Practical Protection Measures During Construction
Prevention costs a fraction of remediation. The window between subfloor installation and roof deck completion is the highest-risk period for moisture exposure, and the measures taken during that window determine whether water damage becomes a schedule footnote or a budget crisis.
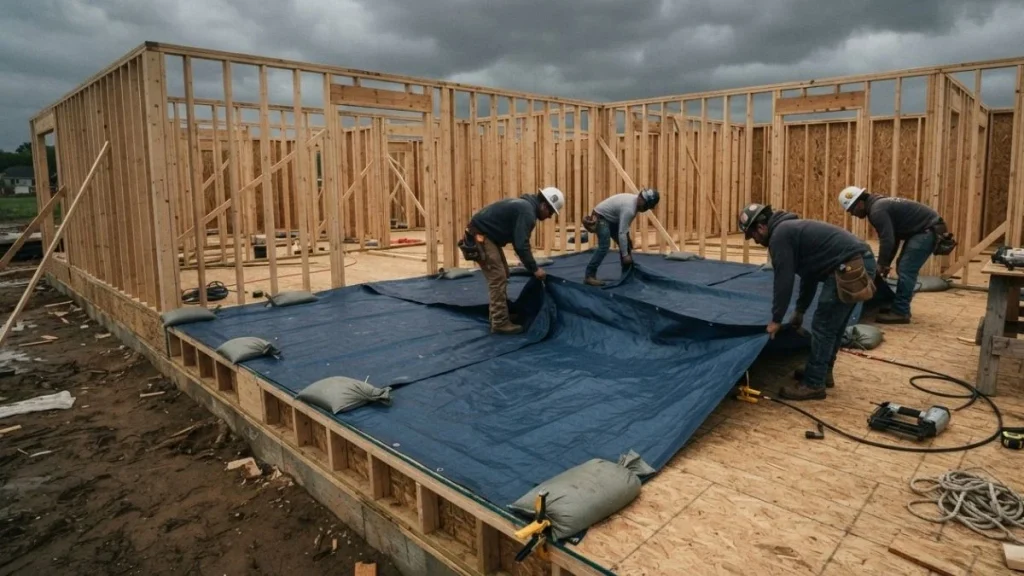
Temporary Tarping: Timing and Technique
Tarping should begin the same day subfloor panels are installed — not after the first rain forecast appears. The critical protection window runs from framing completion through roof deck installation and the first layer of roofing felt or synthetic underlayment.
Effective tarping requires 3 specific practices:
- Overlap seams by at least 12 inches in the direction of expected water flow to prevent wind-driven rain from finding gaps
- Grade the tarp surface so water drains toward the structure’s perimeter rather than pooling at panel seams or low points in the frame
- Secure edges below the subfloor level using weighted sandbags or mechanical clips — loose edges channel water directly onto the panels underneath
The cost of heavy-duty polyethylene tarps for a standard 2,000-square-foot home runs $200–$500. Replacing even 4 panels of damaged subfloor, including labor, typically costs $800–$1,500. The math is straightforward.
House Wrap, Vapor Barriers, and Roofing Sequencing
Vapor barrier placement is not a one-size-fits-all decision — it depends on climate zone and the direction moisture moves through your wall and floor assembly. In cold climates, the vapor barrier belongs on the warm interior side. In hot-humid climates like the Gulf Coast, it belongs on the exterior side to block inward-driven moisture.
The single highest-impact variable for subfloor protection is roof completion date. Every day the structure sits open to weather extends material degradation risk. Coordinate with your general contractor to confirm roofing is sequenced as tightly as possible after framing — any schedule gap there directly increases cumulative moisture exposure.
Moisture-curing adhesives, used to bond subfloor panels to joists, actually perform better in the presence of ambient humidity. But that chemistry does not make the panels themselves moisture-proof. Adhesive selection reduces one failure mode — panel movement and squeaking — while jobsite protection measures address the separate problem of material saturation and degradation.
Key Takeaway: When to Act vs. When to Wait
The single most important decision point is this: if a wet subfloor is firm underfoot, shows no delamination, and carries no odor after drying, monitor it — do not replace it. Walk every affected panel today, press firmly on the surface in a grid pattern every 12 inches, and document what you find with dated photos before your next contractor meeting. If anything feels soft or spongy, stop the flooring schedule and get a professional moisture reading with a pin-type meter before proceeding.