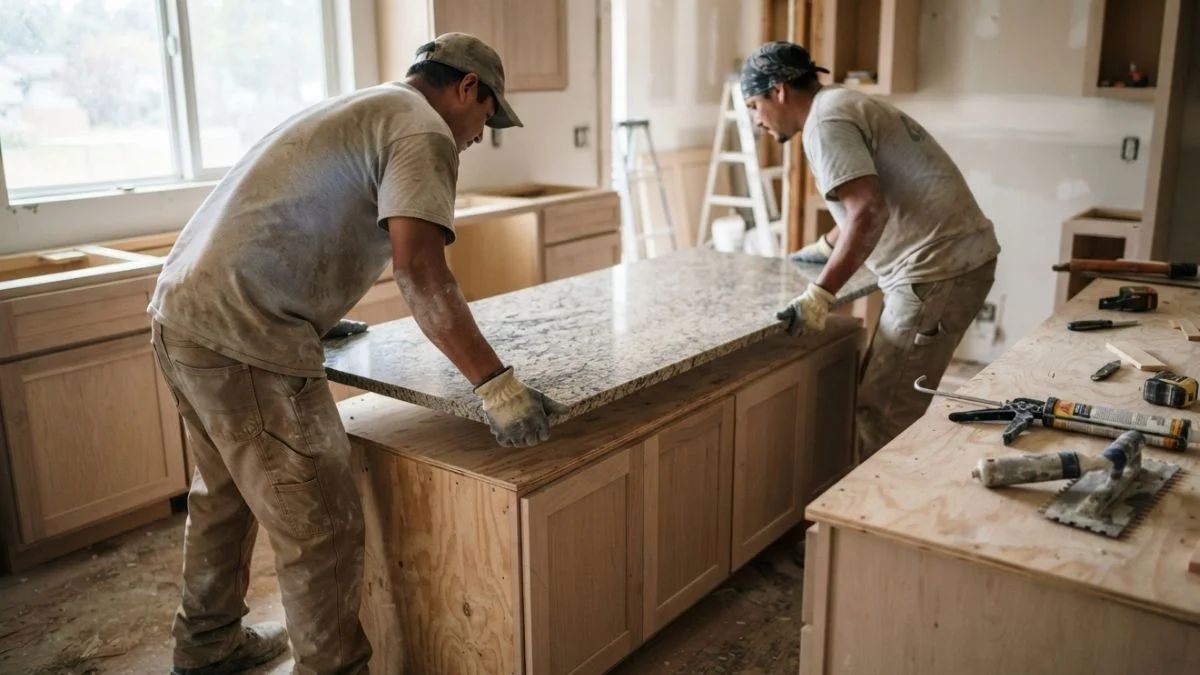
Granite slabs weigh between 15 and 20 pounds per square foot, and installing granite countertops on existing cabinets without verifying structural support first is the single most common reason DIY projects end in cracked stone, damaged cabinets, or failed seams.
Most homeowners and property managers assume their existing cabinets are ready to go — they rarely are, and skipping the inspection phase costs far more to fix than it would have cost to catch.
This guide walks you through every step, from assessing whether your cabinets can carry the load to cutting, setting, and sealing the stone, so you can either complete the job confidently or hire a contractor knowing exactly what the work should involve.
Assessing and Preparing Your Existing Cabinets

Can Your Cabinets Handle Granite Weight?
Granite weighs 15–20 pounds per square foot, so a standard 30-square-foot kitchen countertop adds 450–600 pounds to your cabinet structure. Most factory-built cabinets are engineered for laminate or tile, not stone.
Check for these red flags before proceeding:
- Sagging or bowed cabinet tops
- Visible gaps between the cabinet run and the wall
- Soft spots, discoloration, or swelling that indicate water damage
- Particle board construction — it compresses under sustained heavy loads and will not hold mechanical fasteners reliably
A quick diagnostic: press firmly along the full length of each cabinet top rail. Any flex or movement means the structure needs reinforcement before granite goes anywhere near it. Solid wood and plywood-framed cabinets in good condition generally pass. Particle board almost never does without adding a plywood substrate for granite countertops — typically 3/4-inch BC-grade plywood glued and screwed across the full cabinet top.
Removing Old Countertops and Inspecting Cabinet Integrity
Start by cutting any existing caulk or adhesive at the backsplash and wall seams with a utility knife. Most laminate tops attach from underneath with screws through corner brackets — remove those before prying. Work slowly to avoid racking the cabinet frames.
Once the old surface is off, inspect every cabinet top for rot, warping, and soft spots. Pay close attention to areas beneath the sink and dishwasher. Leveling is non-negotiable: granite countertop preparation steps require a cabinet surface within plus or minus 1/8 inch across the entire run. Use wood shims at low points and secure them with construction adhesive. Check level in both directions with a 4-foot level before moving forward.
Building the Right Support Structure
Why Plywood Substrate Is Non-Negotiable
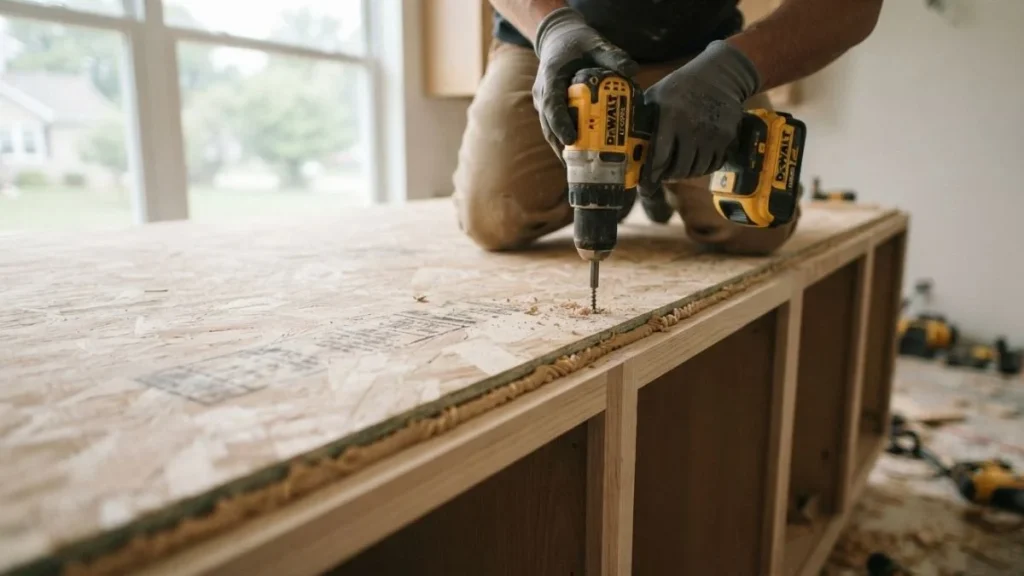
A 3/4-inch exterior-grade plywood substrate for granite countertops is the industry standard for one specific reason: granite countertop weight distribution. Without a continuous solid layer beneath the stone, the slab spans gaps between cabinet top rails and concentrates stress at unsupported points. That stress causes cracks — usually starting at cutouts for sinks or cooktops where the stone is already under the most strain.
Particle board fails here because it compresses and swells. OSB (oriented strand board) is not an acceptable substitute either, since it lacks the shear strength plywood provides. Daltile and most major fabricators specify plywood as the required substrate before they will warranty an installation. Skipping it voids that protection and creates a genuine structural risk.
Installing and Securing the Substrate
Cut the plywood to fit the full cabinet top width — it should cover every cabinet from front rail to back, edge to edge. Apply a bead of construction adhesive, such as Loctite PL Premium or Liquid Nails Heavy Duty, directly to the cabinet top rails before setting the plywood down.
Fasten with 1-5/8-inch coarse-thread screws driven from above, spaced every 8 inches along each rail. Keep screws at least 1 inch from any edge to avoid splitting.
After fastening, run a 4-foot level across the full surface in multiple directions. Sand down any high spots and fill low spots greater than 1/16 inch with a floor-leveling compound before the granite arrives. The fabricator’s template depends on this surface being dead flat — any irregularity telegraphs directly into the finished installation.
The Installation Process: Step-by-Step

Templating and Fabrication
Before any stone is cut, a fabricator creates a precise template of your cabinet layout — either with cardboard strips and hot glue or, increasingly, with digital laser templating tools like those from Laser Products Industries. This template captures every angle, notch, and cutout. Most fabricators require 1–3 business days for templating and 5–10 business days for fabrication after that. Do not schedule installation until your plywood substrate is fully secured and leveled.
Setting the Granite
On installation day, work in this exact sequence:
- Dry-fit each slab section before applying any adhesive — confirm overhangs are consistent and seams align.
- Apply a 1/4-inch bead of construction adhesive, such as Loctite PL530 Mirror, Marble and Granite Adhesive, along the plywood substrate in a serpentine pattern. Do not apply adhesive to cabinet rails directly — the plywood carries the load.
- Set the granite onto the substrate with at least two people per slab. A standard 26-inch-deep slab section is too heavy and unwieldy for one person to place accurately.
- Check level immediately in both directions. Tap with a rubber mallet to adjust — do not slide the slab, which smears adhesive unevenly.
Caulking and Sealing
At the granite-to-wall and granite-to-cabinet junctions, use 100% silicone caulk — not latex or acrylic. Silicone flex-seals the countertop transition and tolerates the minor movement that occurs as cabinets settle. Standard paintable caulk cracks within months under these conditions.
Seal the granite surface within 24 hours of installation. Porous stones like absolute black or Kashmir white require a penetrating impregnator sealer such as Tenax Proseal or StoneTech BulletProof. Non-porous granites need less frequent sealing but still benefit from one application at installation.
Materials, Tools, and Budget Reality
What You Actually Need
The installation materials list breaks into three categories:
Substrate and adhesives:
- 3/4-inch BC-grade or better exterior plywood (never OSB or MDF)
- Construction adhesive rated for stone — Loctite PL Premium or Liquid Nails LN-2000 both use a modified polymer formula that reaches full cure in 24 hours at 70°F and bonds to wood, concrete, and stone
- 100% silicone caulk in a color matched to your granite edge for countertop transition sealing
Sealing materials by stone type:
- Porous granites (Kashmir White, Giallo Ornamental): penetrating impregnator sealer such as StoneTech BulletProof, applied annually
- Dense, low-absorption granites (Absolute Black, Blue Pearl): a single application of Tenax Proseal at installation typically lasts 3–5 years
Tools: 4-foot level, circular saw with fine-tooth blade for plywood, drill, rubber mallet, caulk gun, margin trowel.
Real Cost Breakdown
DIY material costs for a 30-square-foot kitchen typically run $50–$120 for substrate materials, adhesive, caulk, and sealer. The granite slab itself ranges from $40–$100 per square foot installed through a fabricator, depending on stone grade and edge profile.
Here’s the problem. Hidden costs catch most budget renovators off guard:
- Cabinet reinforcement lumber and hardware: $80–$200
- Old countertop removal fees (if contracted out): $150–$400
- Re-fabrication costs if a slab cracks during installation due to poor substrate prep: $500–$1,500
According to HomeAdvisor, full professional granite installation averages $3,250 nationally, but cabinet reinforcement and removal push real-world totals 15–25% higher on older kitchens.
DIY vs. Professional Installation: Where Each Makes Sense
What Professionals Must Handle
Two steps in granite installation are not realistic DIY territory regardless of skill level: template creation and seam work.
Digital laser templating equipment costs $15,000–$30,000 and requires trained operators. A flawed template means a fabricated slab that does not fit — and fabricators will not recut without charging full price again. Seaming, which joins two slab sections with color-matched epoxy and a seam setter tool, requires practiced technique to produce an invisible joint. Visible or uneven seams permanently reduce the countertop’s appearance and resale value.
Where Skilled DIYers Can Contribute
Substrate preparation and installation are genuinely achievable for homeowners comfortable with basic carpentry. Installing the plywood substrate for granite countertops, leveling cabinet surfaces, applying construction adhesive, setting slabs with a helper, and completing edge sealing with 100% silicone caulk all fall within reach of a mechanically capable DIYer.
In practice, splitting the work makes the most financial sense: handle all cabinet reinforcement and substrate prep yourself, then hire a fabricator for templating, cutting, and seam work.
Timeline Comparison
| Phase | Professional | DIY |
|---|---|---|
| Cabinet assessment and prep | 1 day | 2–3 days |
| Substrate installation | Half day | 1 day |
| Templating and fabrication | 1–2 weeks (lead time) | 1–2 weeks (same) |
| Slab setting and sealing | 1 day | 1–2 days |
| Total active work time | 3–5 days | 7–14 days |
Red Flags That Require a Professional
Call a professional immediately if you encounter any of these conditions:
- Existing water damage or rot in cabinet frames
- L-shaped, U-shaped, or island layouts requiring 3 or more seams
- Cabinet runs that are out of level by more than 1/4 inch across their length
- Previous countertop failure or evidence of cabinet movement
You Should Read Also: How to Fill Gap Between Kitchen Sink and Countertop
Ready to Get Started
Every granite installation failure traces back to one root cause: inadequate substrate and cabinet prep before the stone arrives. Start there — walk your existing cabinets today, press along every top rail for flex, identify any particle board construction, and document what reinforcement is needed before you contact a single fabricator. That one inspection, done honestly, determines whether your project succeeds or becomes a costly re-do.