Pressure testing PEX water lines with air is governed by a clear industry standard — the Plastics Pipe Institute’s Recommendation F — yet most DIY forums and contractor job sites still circulate conflicting PSI figures that can damage fittings or fail inspection.
The real problem is that homeowners, plumbers, and renovation contractors are piecing together procedures from Reddit threads and YouTube comments, with no single source that covers PSI limits, safety labeling, pressure regulator requirements, and the local code variations that determine whether your test will actually pass.
This guide delivers a complete, inspection-ready air pressure testing procedure built on PPI Recommendation F and manufacturer guidance from sources like Uponor and Viega, so you leave with a tested, documented system — not a second attempt.
PSI Standards for PEX Air Testing
100 PSI vs 1.5× Working Pressure Rule
The PPI (Plastics Pipe Institute) Recommendation F defines the authoritative standard for air testing PEX systems — not the “just pump it to 100 PSI” advice that dominates plumbing forums.
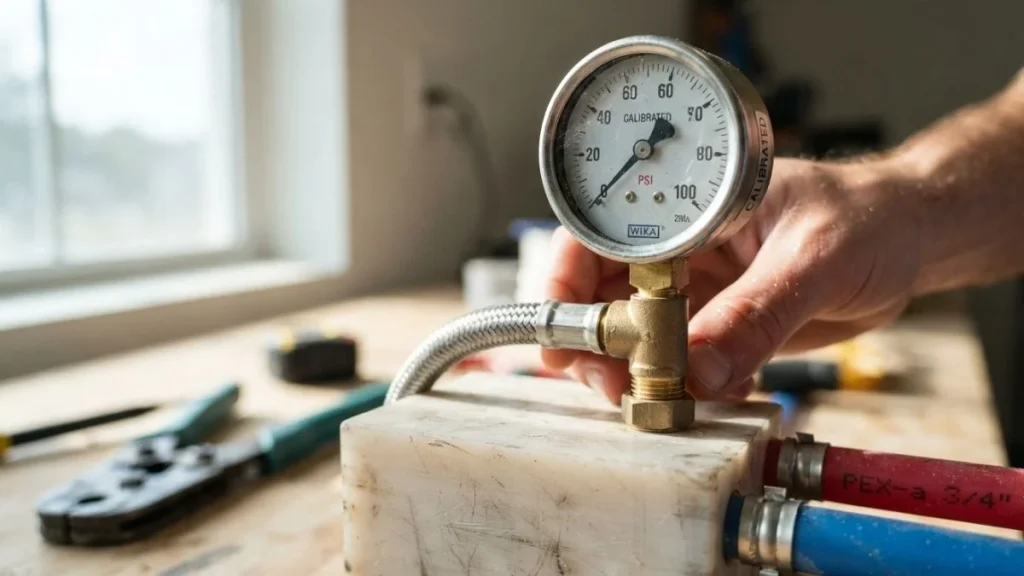
PPI Recommendation F specifies a test pressure of 1.5 times the working pressure of the system. In most residential installations, working pressure runs between 60 and 80 PSI. That puts your correct test pressure at 90 to 120 PSI — a range, not a fixed number. If your home’s supply pressure is 60 PSI, testing at 90 PSI is correct. Defaulting to 100 PSI on a 60 PSI system is technically acceptable, but applying 100 PSI to a system with marginal fittings or older manifold connections creates unnecessary stress.
Here’s the problem. Many jurisdictions have adopted their own air testing requirements that differ from PPI Recommendation F. Some local codes cap compressed air testing of water lines at 50 PSI for safety reasons — compressed air stores significantly more energy than water under the same pressure, making a failure more dangerous than in hydrostatic pressure testing. Always verify your local inspection requirements before selecting a test pressure.
Standard Pressure by Installation Type
| Installation Type | Typical Working Pressure | Recommended Test Pressure |
|---|---|---|
| New residential rough-in | 60–80 PSI | 90–120 PSI |
| Repair or retrofit work | 60–80 PSI | 90–100 PSI |
| Low-pressure systems (<60 PSI) | 40–60 PSI | 60–90 PSI |
Manufacturer guidance adds another layer. Uponor specifies a maximum air test pressure of 100 PSI for their AquaPEX tubing. Viega’s PEX press systems list 100 PSI as the upper ceiling for pneumatic testing. Mr. PEX aligns closely with PPI Recommendation F, recommending 1.5 times working pressure with a hard cap at 100 PSI.
Test pressure is not operating pressure. A system rated to handle 80 PSI of flowing water is not automatically safe at 80 PSI of compressed air — the energy stored in compressed air makes a sudden fitting failure significantly more hazardous than the equivalent water pressure event. This distinction is why inert gas pressure testing (using nitrogen) is sometimes preferred on commercial jobs: nitrogen is non-flammable and dry, eliminating moisture contamination risk entirely.
Step-by-Step Air Pressure Testing Procedure

Equipment Setup and System Preparation
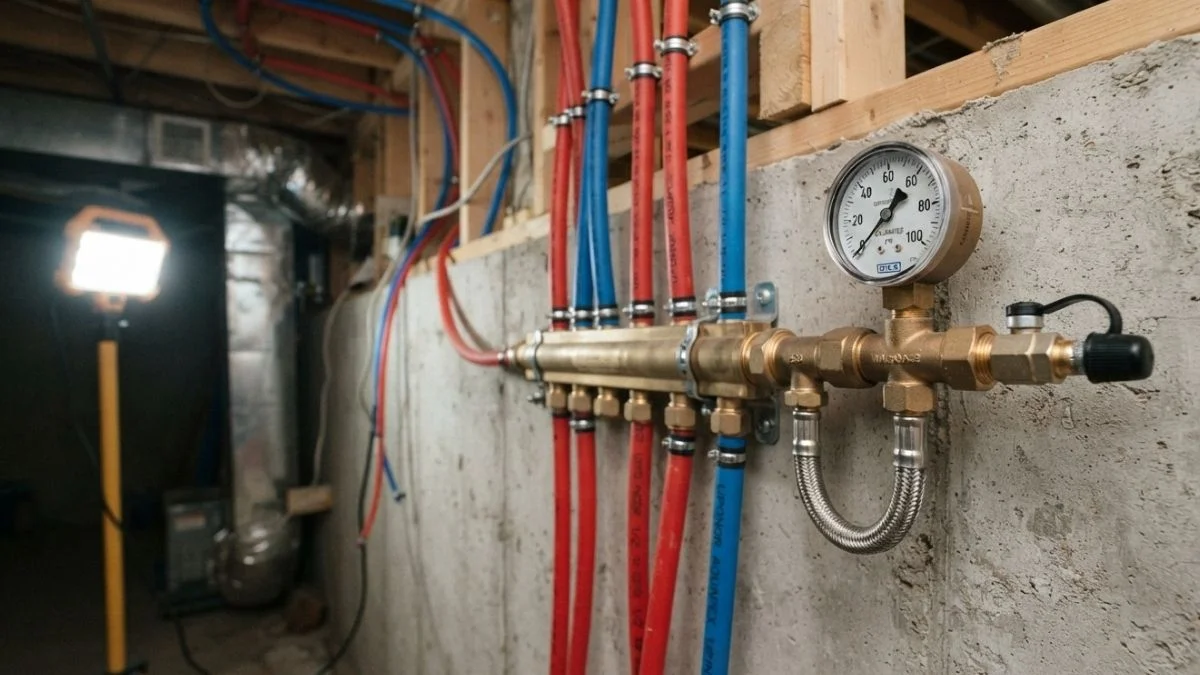
Before pressurizing anything, gather the right equipment. A standard PEX air pressure test kit includes four components:
- A test block (also called a test plug) sized to your PEX diameter — typically 1/2-inch or 3/4-inch
- A Schrader valve fitting for connecting your air source
- A calibrated pressure gauge rated to at least 200 PSI
- An inline pressure regulator, ASME-certified or equivalent, to control fill rate
Use an air compressor with a tank — not a pancake compressor at full blast. Set your regulator below target pressure before connecting to the line. Cap all open ends with test plugs before pressurizing. Uncapped ends will fail immediately and violently under compressed air.
Isolate the test section at the manifold or shutoff valves. If you are testing a whole-house rough-in, close the main and test from one manifold port at a time.
Pressurizing and Monitoring
Connect the test block to the PEX line first, then attach the gauge, then connect the air supply. Increase pressure slowly — raise it in 10 PSI increments, pausing briefly at each step. Rushing to target pressure masks early-stage leaks.
Once you hit target PSI, close the air supply valve and record the gauge reading. This is your time-zero baseline. Hold pressure for a minimum of 15 minutes — many inspectors require 30 minutes. A valid pressure decay test shows zero measurable drop on a calibrated gauge over that window.
Detecting Pressure Loss and Locating Leaks
Any pressure drop during the hold period requires investigation before the test passes. A drop of more than 2 PSI over 15 minutes on a closed system indicates a real leak, not temperature fluctuation.
Apply soapy water — dish soap diluted 50/50 with water works reliably — directly to every fitting, crimp ring, coupling joint, and manifold connection. Watch for bubbles. Pay extra attention to these high-failure points:
- Crimp ring fittings where the ring was not fully seated
- Push-fit couplings (such as SharkBite) on dusty or scratched tubing
- Manifold port connections under mixed torque conditions
- Any section of tubing that passed through wood framing and may have been nicked
For concealed lines inside walls or slabs, thermal imaging cameras — available at tool rental shops — can locate leak-driven temperature differentials without demolition. A pressure drop with no visible surface leak almost always points to a concealed fitting failure.
Safety and Compliance Considerations
Compressed Air vs Inert Gas: Understanding the Risk
Compressed air stores far more energy than water at the same pressure — a concept called pneumatic energy storage. When a PEX fitting fails under hydrostatic pressure testing, water releases and pressure drops immediately. When the same fitting fails under compressed air at 100 PSI, the stored energy releases explosively, turning fittings and tubing into projectiles.
Nitrogen is the preferred alternative for high-stakes or commercial air testing. It is dry, non-flammable, and inert — eliminating both moisture contamination and combustion risk. For residential DIY work, compressed air is acceptable at the PSI ranges discussed, provided you follow all safety steps. Never use oxygen or any mixed gas for pressure testing.
Labeling, Regulators, and Failure Prevention
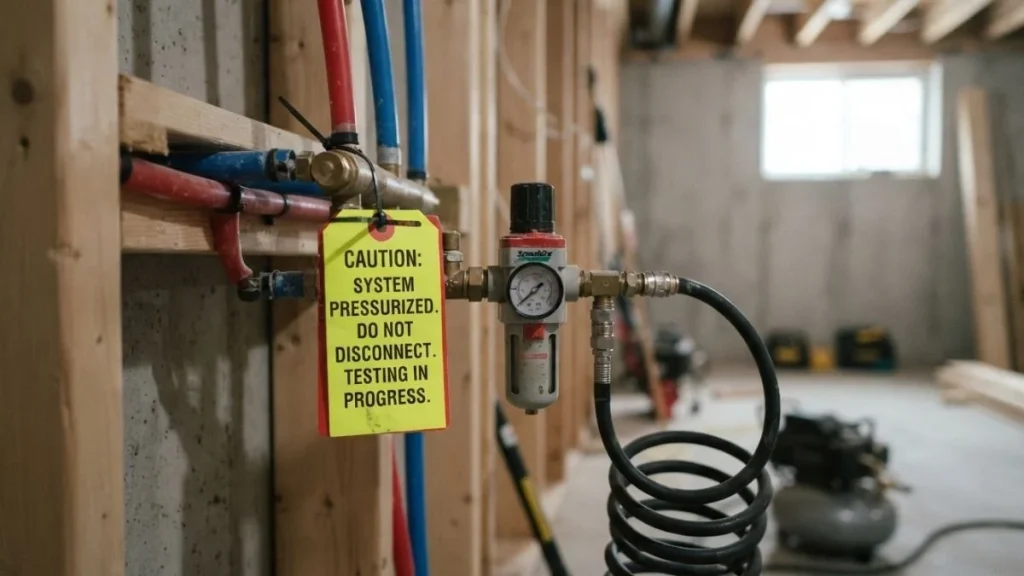
Any pressurized system must be visibly labeled during testing. Attach a tag or tape to every access point reading “SYSTEM UNDER PRESSURE — DO NOT OPEN.” This prevents a second person from opening a valve or cap during the test hold period.
Your pressure regulator is the single most important safety device in the setup. Use only a regulator with a certified pressure relief function — if the downstream pressure exceeds the set point, it vents automatically. Inspect the regulator diaphragm before every test. A failed diaphragm delivers full tank pressure directly to the line.
Permits, Inspections, and When to Call a Professional
Most jurisdictions require a permit for new rough-in plumbing, which means a scheduled inspection before walls close. The inspector — not your gauge reading — officially passes the test. Verify your local requirements through your city or county building department before testing, because some jurisdictions prohibit air testing entirely and mandate hydrostatic testing only.
DIY air pressure testing is appropriate for:
- New rough-in work in open walls before drywall
- Repair sections isolated from the live system
- Retrofit installations where the system has been fully depressurized
Call a licensed plumber when working on systems connected to a pressure-reducing valve (PRV), when testing pressure exceeds 100 PSI, or when lines run through inaccessible spaces like post-tension slabs.
Air vs Water Pressure Testing: When to Use Each
What Building Codes Actually Require
Code requirements for pressure testing water lines vary significantly by jurisdiction, and this is not a detail to guess on. The International Plumbing Code (IPC) allows air testing at 50 PSI for 15 minutes as an alternative to hydrostatic testing. The Uniform Plumbing Code (UPC), adopted across much of the western United States, defaults to hydrostatic pressure testing and places stricter limits on compressed air testing of water supply lines.
The result is that a testing method perfectly acceptable in Texas may not satisfy an inspector in California. Pull your local amendment to whichever base code your jurisdiction has adopted before selecting your method.
Where Air Testing Has a Clear Advantage
Air testing wins at the rough-in stage for 3 concrete reasons:
- No drying time — water left in PEX lines during rough-in attracts mold inside closed walls
- Faster setup — connecting a compressor and test block takes minutes versus filling and draining an entire system
- Immediate visibility — pressure decay shows up on the gauge instantly, without waiting to see water stains
For renovation contractors working on tight inspection schedules, air testing the rough-in the same day as framing inspection is standard practice.
The Hybrid Approach Most Inspectors Accept
In practice, experienced plumbers use air testing for initial leak detection and water testing for final code sign-off. The logic is straightforward: find and fix every fitting failure with air first, then fill the system with water for the formal hydrostatic pressure test that satisfies the inspector.
This two-stage approach reduces callbacks, protects finished surfaces from water damage during leak chasing, and meets the hydrostatic standard that many jurisdictions require for final acceptance. According to the Plastics Pipe Institute, both methods are recognized testing protocols — the choice depends on project stage and local code, not personal preference.
Read Also: Automatic Air Vent Cap Tight Or Loose
Pressure Test, Pass Inspection, Move Forward
The single factor that causes most failed PEX air pressure tests is not faulty tubing — it is skipping the step of verifying local code requirements before selecting a test pressure and method. Before pressurizing any line, contact your city or county building department, confirm whether your jurisdiction follows the IPC or UPC, and set your regulator to 1.5 times your system’s working pressure with a hard ceiling of 100 PSI. Document your gauge readings, hold time, and test date — inspectors want that record, not just a verbal pass.