Is your AC not cooling like it used to? A hole in your AC condenser might be the culprit.
Fixing this issue quickly can save you from expensive repairs and keep your home comfortable. You don’t need to be a professional to handle this. You’ll learn simple, step-by-step ways to repair the hole in your AC condenser. By the end, you’ll feel confident to tackle the problem yourself and get your system back to working like new.
Identifying The Damage
Repairing a hole in an AC condenser starts with properly identifying the damage. This step is crucial because knowing the exact location and size of the hole helps decide the best repair method. The condenser is a key part of the air conditioning system, where refrigerant flows to release heat.
Locating The Hole
Finding the hole in the AC condenser can be challenging. The condenser has many small tubes and fins, which can hide damage. Start by visually inspecting the condenser for obvious signs like:
- Oil stains or wet spots on the surface, which show where refrigerant is leaking.
- Bent or damaged fins that might indicate impact or corrosion.
- Corrosion or rust patches on the metal parts.
Use a flashlight to see into tight spaces. If the hole is too small to see, try these methods:
- Spray soapy water on the condenser surface.
- Turn on the AC system and watch for bubbles forming.
- Listen for hissing sounds from escaping refrigerant.
Assessing The Size And Severity
After locating the hole, assess its size and severity to choose the right repair method. Holes in condensers vary from tiny pinholes to large punctures. Each type needs a different approach.
Use a ruler or caliper to measure the hole size. Here is a simple guideline:
| Hole Size | Severity | Repair Recommendation |
| Less than 1 mm | Minor leak | Sealant or epoxy patch |
| 1 mm to 5 mm | Moderate leak | Professional soldering or patch |
| More than 5 mm | Severe leak | Condenser replacement recommended |
Check the surrounding area for corrosion or additional damage. Even a small hole can worsen if near rust. Also, consider the refrigerant loss rate. Fast leaks require urgent repair to avoid system failure.
Use a pressure gauge to check system pressure. Low pressure may confirm a large leak. Keep in mind the condenser’s age and condition before deciding on repair or replacement.
Gathering Repair Materials

Repairing a hole in an AC condenser requires the right materials to ensure a lasting fix. Gathering all necessary tools and supplies before starting makes the process smoother. This preparation helps prevent delays and avoids damage during the repair. Focus on quality and compatibility of each item with your AC system. Proper materials also improve safety and effectiveness.
Essential Tools
Having the correct tools is crucial for repairing a hole in the AC condenser. Using improper tools can cause more damage or make the repair fail. Prepare a workspace that is clean and well-lit. Wear protective gloves and eye protection to avoid injuries. Here is a list of must-have tools:
- Wrenches and Screwdrivers: For removing or loosening condenser parts.
- Sandpaper or Wire Brush: To clean the damaged area before repair.
- Vacuum Pump: To remove air and moisture after patching.
- Leak Detector: To find the exact location and size of the hole.
- Rags or Cloth: For cleaning and drying surfaces.
- Pipe Cutter or Tin Snips: Useful if you need to trim damaged metal.
Recommended Sealants And Patches
Choosing the right sealant or patch ensures the hole does not leak refrigerant again. Not all products work well on AC condensers. Pick sealants that can handle pressure and temperature changes inside the unit. Some sealants dry quickly and form a strong bond with metal. Patches can cover larger holes and add extra protection.
Common sealants include epoxy, silicone, and specialized AC repair putty. Epoxy works well on small holes and cracks. Silicone sealants resist heat and vibration, perfect for condenser use. Repair putty molds easily and hardens fast for quick fixes.
For patches, metal-backed adhesive patches or aluminum tape designed for HVAC repairs work best. Apply patches only after cleaning and drying the area fully. Below is a comparison table for popular options:
| Material | Best For | Dry Time | Durability |
| Epoxy Sealant | Small holes and cracks | 5-30 minutes | High |
| Silicone Sealant | Heat resistance and vibration | 30 minutes to 2 hours | Medium to High |
| Repair Putty | Quick moldable fixes | 2-5 minutes | Medium |
| Metal-Backed Patch | Larger holes or damaged panels | Immediate adhesion | High |
| Aluminum HVAC Tape | Temporary fixes and sealing | Immediate adhesion | Low to Medium |
Use sealants and patches according to product instructions. Avoid cheap or generic products to prevent repeat repairs. Proper materials keep your AC running cool and efficient.
Preparing The Condenser
Repairing a hole in an AC condenser starts with proper preparation of the unit. Preparing the condenser ensures the repair lasts longer and works effectively. This stage involves careful handling and cleaning to make the damaged area ready for patching or sealing. Taking time to prepare the condenser properly can prevent further damage and improve the cooling system’s performance.

Safety Precautions
Working on an AC condenser involves risks. Safety must be the first priority to avoid injuries or damage to the system. Before starting, disconnect the power supply to the AC unit. This prevents electric shocks and accidental activation of the fan or compressor.
Wear protective gear such as gloves and safety glasses. The condenser has sharp metal fins that can cause cuts. Gloves protect your hands, and glasses shield your eyes from debris.
Follow these safety steps:
- Turn off the AC unit and unplug it from the power source.
- Wear gloves to protect your hands from sharp edges.
- Use safety glasses to shield your eyes during cleaning and repair.
- Work in a well-ventilated area to avoid inhaling dust or chemicals.
- Keep children and pets away from the work area.
Cleaning The Area Around The Hole
Cleaning the damaged area is essential for a strong repair. Dirt, dust, and grease can stop sealants or patches from sticking properly. Use a soft brush or compressed air to remove loose debris from the condenser’s surface.
Next, clean the area around the hole with a mild detergent and water. Use a cloth or sponge to wipe the surface gently. Avoid using harsh chemicals that can damage the metal or fins.
Steps for cleaning:
- Brush away loose dirt and dust with a soft brush.
- Spray compressed air to clear small particles.
- Mix mild detergent with water in a bucket.
- Use a cloth dipped in the solution to clean the area around the hole.
- Rinse with clean water and dry with a clean towel.
Ensure the area is completely dry before starting the repair. Moisture can weaken adhesives or cause rust. Take your time to make the surface smooth and clean. This preparation improves the repair’s strength and durability.
Repair Techniques

Repairing a hole in an AC condenser involves careful selection of techniques based on the hole’s size and location. Effective repair techniques restore the condenser’s function and prevent further damage. These methods vary from simple sealing to more complex metalwork. Choosing the right approach saves time and money while extending the life of your AC unit.
Using Epoxy Or Sealant
Epoxy and sealants provide a quick and easy fix for small holes or cracks in an AC condenser. These materials bond tightly to metal surfaces, creating a durable barrier against leaks. The process requires cleaning the damaged area well to ensure proper adhesion.
- Step 1: Turn off the AC unit and let it cool down.
- Step 2: Clean the hole and surrounding area with a wire brush or sandpaper.
- Step 3: Apply an epoxy or sealant designed for metal and refrigerant systems.
- Step 4: Allow the product to cure for the recommended time, usually several hours.
Epoxy offers a flexible and waterproof seal. It resists heat and pressure changes inside the condenser. For best results, use a product labeled safe for refrigerant exposure. Keep in mind, epoxy suits only small holes or hairline cracks. Larger holes require stronger repair methods.
Applying A Patch
Using a patch is a strong method to seal medium-sized holes in the AC condenser. This technique involves placing a metal or rubber patch over the hole and securing it tightly. Patches provide a physical barrier that holds the system pressure and stops leaks effectively.
Follow these steps for a proper patch repair:
- Turn off power and release refrigerant safely.
- Clean and dry the area around the hole thoroughly.
- Cut a patch slightly larger than the hole.
- Use adhesive or clamps to fix the patch over the hole.
- Check the seal after curing or tightening.
Patching works best on flat surfaces. Metal patches match the condenser material and resist heat well. Rubber patches provide flexibility but may wear out faster. This method is reliable and can extend condenser life until a professional service is possible.
Soldering Or Brazing Small Holes
Soldering or brazing is a professional technique for repairing small holes in metal AC condensers. This method melts a filler metal into the damaged area, forming a strong, permanent seal. It works well on copper or aluminum condenser coils.
Steps to solder or braze a hole:
- Drain and remove refrigerant safely from the system.
- Clean the hole and surrounding metal thoroughly to remove dirt and oxidation.
- Heat the area with a torch until the metal is hot enough for solder or brazing rod to melt.
- Apply solder or brazing material to fill the hole completely.
- Allow the joint to cool naturally before restoring the system.
This method creates a strong metal bond that resists pressure and temperature changes inside the condenser. It requires skill and proper equipment but provides a long-lasting repair. Avoid overheating to prevent damage to nearby components. Soldering suits holes up to a few millimeters wide; larger damage needs replacement parts.
Testing The Repair
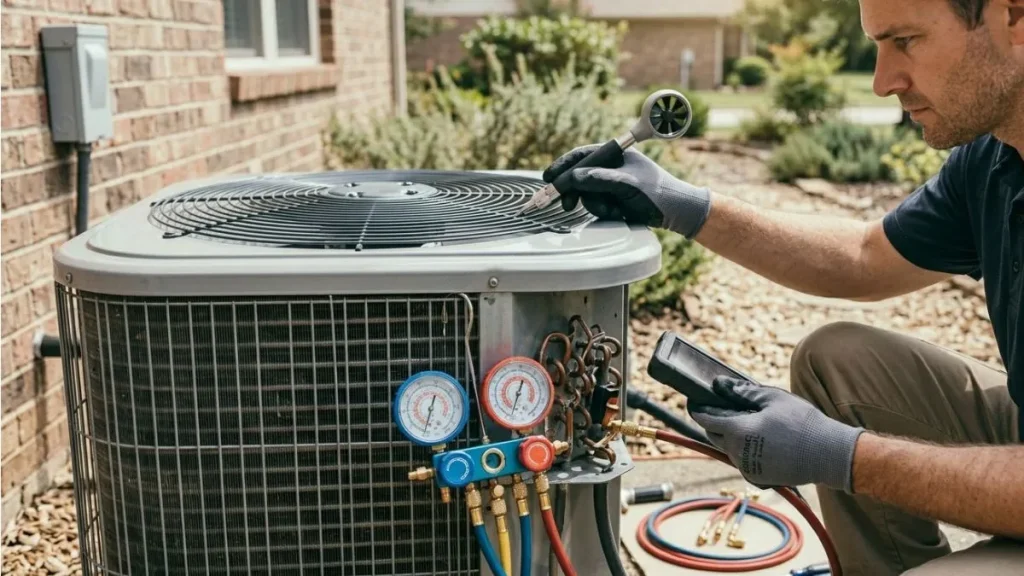
After repairing the hole in the AC condenser, testing the repair ensures the system works well and stays leak-free. This step is important to avoid further damage and keep the AC running smoothly. Proper testing checks if the patch holds and if the system pressure is correct. Follow these steps carefully to confirm the repair’s success.
Checking For Leaks
Start by inspecting the repaired area for any signs of leaks. Leaks reduce cooling efficiency and can cause serious damage. Use these methods to check for leaks:
- Visual Inspection: Look closely at the patched spot. Watch for oil stains or moisture, which often show leaks.
- Soap Solution Test: Mix water and dish soap, then apply to the repaired area. Bubbles mean air is escaping.
- Pressure Test: Use a pressure gauge to check system pressure. A drop in pressure signals a leak.
- Electronic Leak Detector: Use a device that senses refrigerant gas escaping from tiny holes.
Keep the system under pressure for at least 30 minutes to ensure no slow leaks appear. If bubbles form or pressure drops, the repair needs adjustment. Detecting leaks early prevents expensive repairs later.
Recharging The System
After confirming no leaks, recharge the AC system with the correct amount of refrigerant. Proper recharging is vital for efficient cooling and system safety. Follow these steps to recharge:
- Check Refrigerant Type: Use the type recommended by the AC manufacturer.
- Connect the Gauges: Attach the charging hoses to the low and high-pressure ports.
- Vacuum the System: Remove air and moisture using a vacuum pump before adding refrigerant.
- Add Refrigerant Slowly: Open the valve and add refrigerant in small amounts. Monitor pressure gauges constantly.
- Monitor System Pressure: Keep pressure within the manufacturer’s recommended range for your AC model.
When To Replace The Condenser

A damaged condenser can cause poor cooling and higher energy bills. Sometimes, repairing a hole in the condenser is possible, but other times replacement is the better choice. Recognizing the right moment to replace the condenser saves time and money. It also prevents further damage to your AC system.
Signs Of Irreparable Damage
Not all damage to an AC condenser can be fixed. Some signs show the condenser needs replacement instead of repair. Watch for these clear signs:
- Large or multiple holes: Small holes can be patched, but big or many holes weaken the unit.
- Severe corrosion: Rust eats away metal, making repairs ineffective and short-lived.
- Warped or bent fins: These reduce airflow and cooling efficiency, often beyond repair.
- Repeated leaks: If leaks come back after repair, the unit is compromised.
- Age of the condenser: Units older than 10 years usually face more problems and less efficiency.
Cost Vs. Repair Considerations
Deciding between repairing or replacing the condenser depends on cost and long-term benefits. Repairs may seem cheaper but can add up if the problem returns. Replacement costs more upfront but saves money over time.
Consider these points:
- Repair costs: Small hole patches usually cost less than $150.
- Replacement costs: A new condenser ranges from $600 to $1,200, including installation.
- Energy efficiency: New condensers run more efficiently, lowering bills.
- System lifespan: Replacing old units can extend AC life by 10 years or more.
- Frequency of repairs: Multiple repairs increase total cost and downtime.
The table below compares costs and benefits:
| Factor | Repair | Replacement |
| Initial Cost | Low ($50-$150) | High ($600-$1200) |
| Long-Term Savings | Low | High |
| Energy Efficiency | May stay low | Improved |
| System Lifespan | Short extension | Long extension |
| Downtime | Possible repeated repairs | One-time replacement |
Choose replacement if repair costs near replacement price. Also, pick replacement if repairs won’t fix the root problem. This ensures your AC stays reliable and effective.
Read Also: Air Conditioning Working Downstairs But Not Upstairs
Conclusion
Fixing a hole in your AC condenser can save money and extend its life. Start with cleaning the area around the hole carefully. Use the right patch or sealant for a strong repair. Check for leaks after the repair to be sure it works well.
Regular maintenance helps prevent future damage. Small problems can become big if ignored. Act quickly to keep your AC running smoothly. A well-kept condenser means better cooling and less worry. Simple steps make a big difference in your AC’s performance.