


Cracked grout in a shower floor looks alarming, but most cracks are a surface problem — not a structural one — and homeowners fix them in an afternoon with under $30 in materials.
The real pain is not knowing whether you’re looking at a quick patch or a sign of something worse hiding beneath the tile.
This guide walks you through assessing crack severity, removing damaged grout, applying the right replacement product, and knowing exactly when a contractor is the smarter call.
What Causes Cracked Shower Grout (and When It Matters)
Grout cracks for predictable reasons, and identifying the cause tells you whether you need a simple repair or a deeper fix.
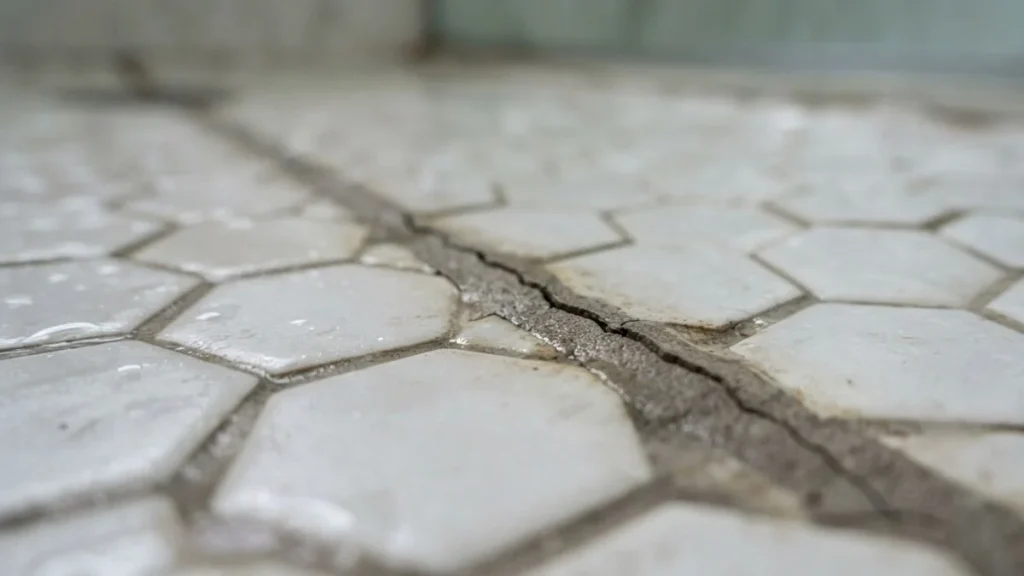
Why Grout Cracks
Every shower goes through daily heat and humidity cycles. That constant expansion and contraction stresses tile joints over time, eventually causing grout deterioration even in well-installed showers.
Four other causes account for most cases:
- Improper mixing or application — grout that was too wet when applied shrinks as it cures, creating hairline cracks grout shower floor owners often notice within the first year
- Inadequate curing time — water exposure before grout fully hardens (typically 24-72 hours) weakens the bond permanently
- Substrate movement — tile joint failure from subfloor settling or tile shifting underneath puts stress no grout joint can absorb indefinitely
- Shower grout failing after remodel — new construction movement is common in the first 12-24 months as materials settle
Severity Assessment: Cosmetic vs. Urgent
Not every crack needs immediate action. Use this guide to assess what you’re dealing with.
| Crack Type | Description | Risk Level | Action |
|---|---|---|---|
| Hairline crack | Thinner than a credit card edge | Low | Monitor monthly |
| Wide crack (1/8″+ ) | Visible gap, finger-catchable | High | Repair now |
| Crack near drain | Any width near water pooling zone | High | Repair now |
| Discoloration or mold smell | Dark staining alongside crack | Urgent | Investigate substrate before repairing |
Hairline cracks carry minimal moisture infiltration risk in the short term. Wide cracks are a different problem — water reaches the substrate beneath the tile, and bathroom waterproofing fails progressively from that point forward.
A mold smell or dark discoloration alongside any crack means moisture has already infiltrated. In that case, remove the grout first and inspect what’s underneath before committing to cracked grout repair methods.
Removing Old Grout and Prepping Joints
Skipping proper removal is the single most common reason a regrout shower floor DIY job fails within months. New grout bonded over crumbling old grout will crack again fast.
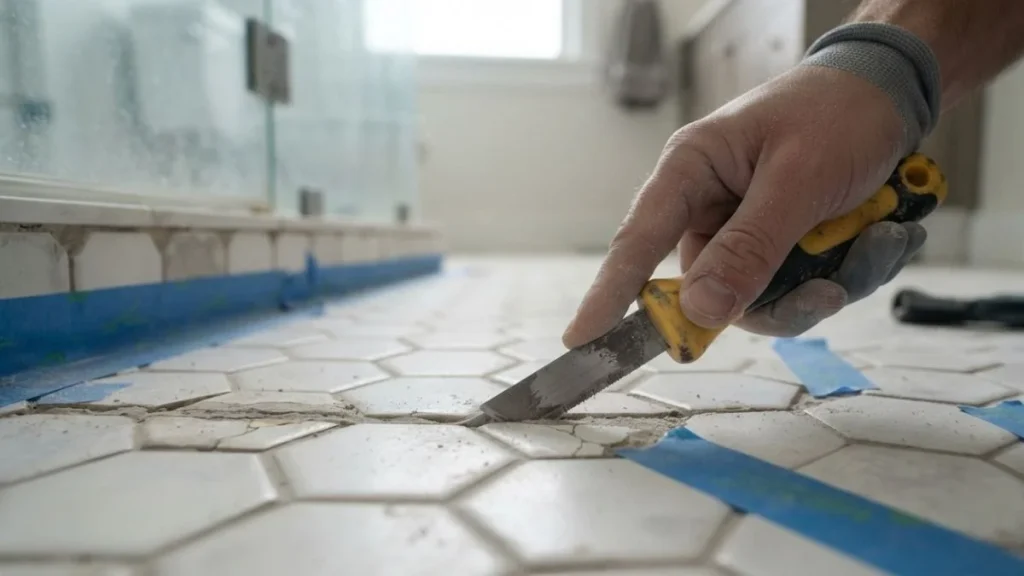
Removal Methods and Tools
A grout saw tool is the standard choice for shower repair — it’s a handheld carbide-tipped blade that cuts through grout without jumping onto tile edges. For larger areas or significant grout deterioration, an oscillating multi-tool with a grout removal blade works faster and gives better control. Brands like Dremel and Fein both make compatible attachments widely available at Home Depot or Lowe’s.
Manual scraping with a utility knife or grout rake tool works on hairline cracks and small sections, but it’s slow and increases tile chip risk on ceramic or porcelain edges.
Here’s the practical rule: remove grout to a depth of at least 1/8 inch. Anything shallower gives the new material too little surface area to bond properly.
Protect tile edges with painter’s tape before starting. It won’t stop a slipped tool, but it reduces surface scratching significantly.
Preparing for New Grout
Once old grout is out, preparation determines how well the new material adheres.
Follow these steps in order:
- Vacuum all joint debris thoroughly — loose particles prevent proper bonding
- Scrub joints with a stiff brush to remove dust and residue
- Allow the substrate to dry completely — minimum 24 hours after any moisture infiltration exposure
- Check your replacement product’s instructions on wetting the joint before application, since epoxy grout alternatives and standard cement grouts have opposite requirements on this point
Step-by-Step Grout Repair Process
Choosing the right grout material and applying it correctly are the two steps that determine whether this repair lasts 2 years or 15.

Materials and Mixing
Three grout types suit shower floor repair:
| Type | Durability | Water Resistance | Cost | Best For |
|---|---|---|---|---|
| Standard cement grout | Moderate | Low unless sealed | $ | Budget repairs, low-traffic showers |
| Polymer-modified grout | High | High built-in | $$ | Most DIY shower repairs |
| Epoxy grout | Highest | Excellent | $$$ | High-moisture zones, color-critical repairs |
Polymer-modified grout is the practical default for most cracked grout repair methods on a shower floor — it has built-in flexibility that resists tile joint failure from normal expansion and contraction. Epoxy grout alternatives like TEC Accucolor or Laticrete SpectraLOCK make sense near drains or in showers with a history of grout deterioration.
Mix to a peanut butter consistency — thick enough to hold its shape, not runny. Mix small batches. Epoxy grout starts hardening within 20-30 minutes; standard cement grout gives you closer to 45.
Application and Curing
Apply grout with a rubber grout float held at a 45-degree angle, pressing firmly to pack material fully into each joint. Work diagonally across the tile surface — moving parallel to joints drags material back out.
Remove excess within 15-20 minutes using a damp sponge in a circular motion. Rinse the sponge frequently. Waiting too long leaves grout haze that requires chemical remover to fix.
Curing times differ significantly:
- Standard cement grout: wait 24 hours before light water exposure, 72 hours before full shower use
- Epoxy grout: follow manufacturer specs exactly — most require 24 hours minimum but cure harder and faster than cement
Seal cement-based grout after full curing. Epoxy and polymer-modified products do not require sealing.
DIY vs. Professional: When to Call a Contractor
Most cracked grout in a shower floor is a genuine DIY job. But a few specific conditions make professional help the smarter financial decision, not just a convenience.
Cost Comparison
A complete DIY regrout shower floor repair typically costs $20-$60 in materials — grout, a grout saw tool or grout rake tool, float, and sponge. A professional tile contractor charges $200-$500 for a standard shower floor regrouting job, depending on square footage and regional labor rates.
The DIY math works clearly in your favor for isolated cracks or moderate grout deterioration across a single shower floor.
When the Job Exceeds DIY Territory
Here’s the problem: some situations look like simple grout repair but involve deeper damage that a surface fix won’t solve.
Call a contractor when you encounter any of these:
- Widespread tile joint failure across more than 30-40% of the shower floor — full removal and reset is likely needed
- Soft or spongy tile when pressed — indicates substrate damage from long-term moisture infiltration, requiring subfloor repair before any grout work
- Cracks radiating from the drain area — drain flange movement or failed bathroom waterproofing membrane beneath the tile
- Recurring shower grout failing after remodel — repeated failure in the same joints signals an installation or structural problem no surface repair fixes permanently
- Visible mold beneath removed grout — requires remediation before regrouting
Questions to Ask Any Contractor
Ask specifically whether they’ll inspect the waterproofing membrane, not just replace surface grout. A contractor who skips that conversation on a moisture-damaged floor is selling you a temporary fix.
Reputable tile contractors typically warranty labor for 1-2 years. A careful DIY repair with quality polymer-modified or epoxy grout, properly applied, realistically lasts 5-10 years.
Read Also: How To Clean Floor Tile Grout Without Scrubbing
Frequently Asked Questions
Can I caulk over cracked grout instead of replacing it?
Caulking over intact grout at corner joints and floor-wall transitions is correct practice — those joints are designed to flex. Applying caulk over cracked field grout on the shower floor is a temporary patch at best; it traps moisture underneath and typically fails within 6-12 months without addressing the underlying tile joint failure.
Why is my shower grout cracking after only 6 months?
Early cracking almost always points to installation error — grout mixed too wet, insufficient curing time before water exposure, or no movement joint left at floor-wall transitions. Shower grout failing after remodel this quickly is a workmanship issue, not a product failure, and warrants a direct conversation with whoever did the original install.
How long does shower grout repair actually take?
Active working time is 2-4 hours for a standard shower floor, depending on how much old grout requires removal. Add a mandatory 24-72 hour curing period before the shower is usable again — epoxy grout sits at the shorter end of that range, standard cement grout at the longer end.
Getting It Right the First Time
The difference between a repair that lasts a decade and one that fails in a year comes down to complete removal of damaged grout and correct product selection — not technique. Start today by probing every cracked joint with a utility knife tip: if material crumbles or the knife sinks deeper than 1/8 inch, that joint needs full removal and replacement with a polymer-modified or epoxy grout.


