


A deteriorating brick window sill can channel water directly into your wall cavity, causing structural damage that costs far more to fix than the original brick window sill repair.
In pre-1950s homes especially, failed mortar joints and spalling brick face two threats at once: freeze-thaw cycles that widen cracks every winter, and water infiltration that rots interior framing and triggers mold.
This guide gives you a clear diagnostic process, the right materials for the job, and a step-by-step repair method that holds for years.
When to Repair vs. Replace
Not every damaged brick window sill needs full replacement. Reading the damage correctly saves you money and prevents unnecessary demolition of historic masonry that can’t be easily replicated.
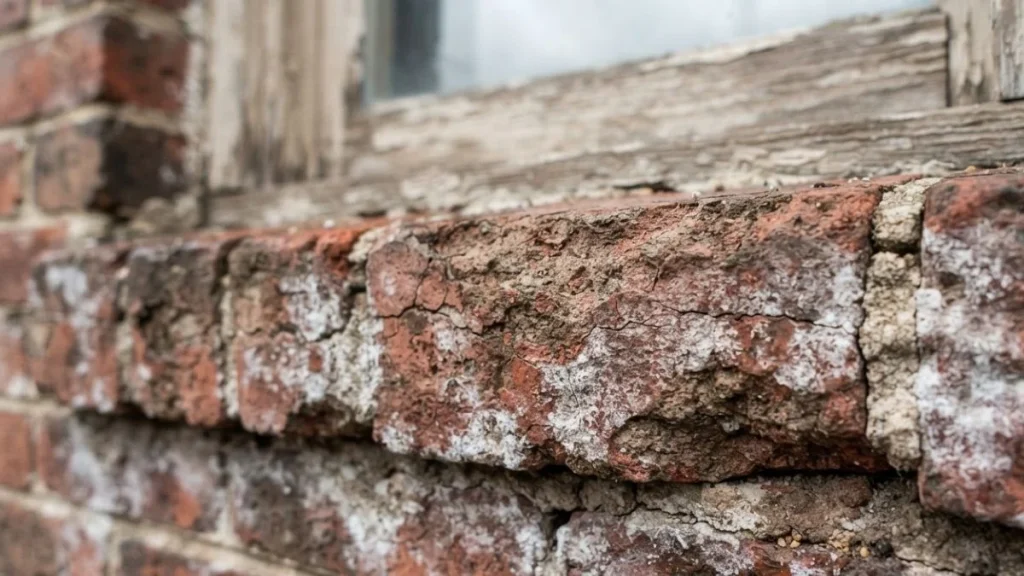
What Does the Damage Actually Look Like?
Surface-level problems are almost always repairable. Hairline cracks under 1/8 inch wide, mortar erosion between joints, minor surface spalling (where the brick face flakes but the core stays solid), and efflorescence (the white mineral deposits left by evaporating water) all fall into the repair category. These are signs of weathering, not structural failure.
Deeper damage tells a different story. If you see cracks wider than 1/4 inch, bricks that shift or rock when pressed, full-depth fractures running through the brick body rather than just the mortar joints, or visible water infiltration staining on interior walls directly below the sill, replacement is the more reliable path. Structural masonry compromise at the sill level can undermine the window’s load-bearing seat.
How to Decide: Repair or Replace?
Use this framework:
- Repair if damage is confined to mortar joints or the brick surface, with no movement or interior water penetration
- Replace if more than 40% of the sill brick is fractured, hollow-sounding when tapped, or actively directing water inward
- Get a professional inspection if you’re unsure — especially in pre-1950s homes where historic brick is softer and reacts differently to modern repair materials
The National Park Service preservation guidance specifically cautions against using high-strength Portland cement mortars on historic soft brick, since mismatched hardness accelerates masonry deterioration. Type N mortar is the correct specification for most historic brick window restoration work.
When in doubt, a licensed mason can assess structural integrity in under an hour and give you a clear repair-vs-replace answer before you buy a single bag of mortar.
Materials: Mortars, Caulks, and Sealants
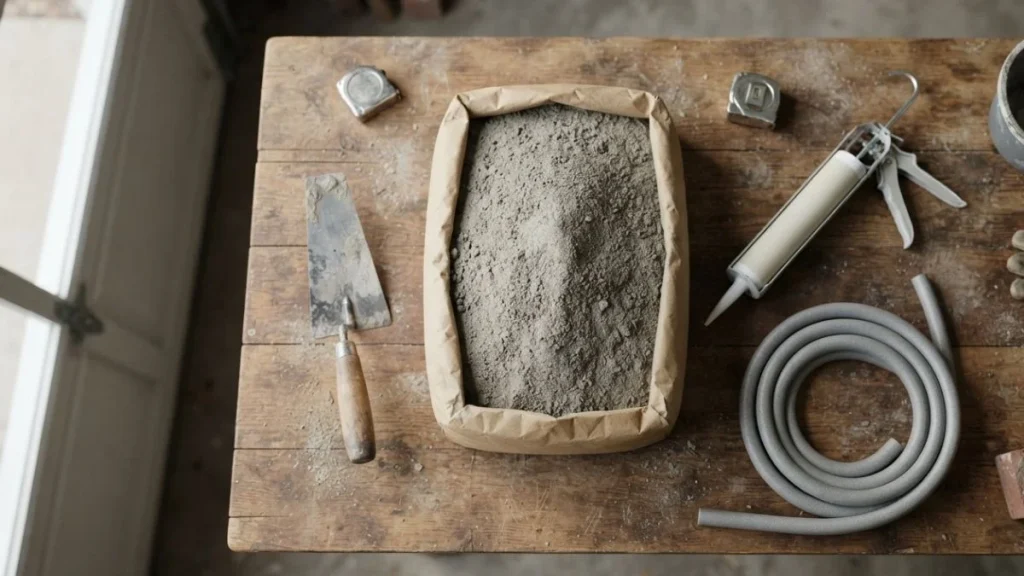
Choosing the wrong material is the most common reason brick window sill repairs fail within a few years. The fix isn’t just about filling gaps — it’s about matching the mortar or sealant to the brick’s physical properties.
Type N Mortar: The Right Specification for Most Sills
Type N mortar, as defined under ASTM C270, uses a mix ratio of 1 part Portland cement, 1 part lime, and 6 parts sand. That lime content is what matters. It keeps the mortar softer and more breathable than high-strength alternatives, allowing moisture to escape through the joint rather than being forced back into the brick face — which accelerates masonry deterioration.
Type S mortar (stronger, less lime) and straight Portland cement mixes are too rigid for most brick window sill repair work, particularly on pre-1950s structures where the brick itself is softer. When the mortar is harder than the brick, freeze-thaw cycles crack the brick face rather than the sacrificial mortar joint — exactly the opposite of what you want.
Pre-mixed Type N bags from manufacturers like Quikrete or Sakrete are reliable for repointing work. For historic brick window restoration, hydraulic lime mortars from suppliers like St. Astier offer even better compatibility.
Caulks and Sealants: Sealing the Transition Zones
Mortar handles joint repointing. Caulk handles the interface between the brick sill and the window frame — a gap that moves seasonally and needs a flexible seal.
Siliconized acrylic caulk (paintable, water-resistant) works for most climates. Pure silicone outperforms it in extreme heat or cold but won’t accept paint. For joints deeper than 1/2 inch, install a foam backer rod first to control sealant depth and prevent three-sided adhesion, which causes premature failure.
In freeze-thaw climates, polyurethane sealants like Sikaflex-1a provide superior elongation and adhesion for water infiltration prevention at exterior sills.
Step-by-Step Repair Process
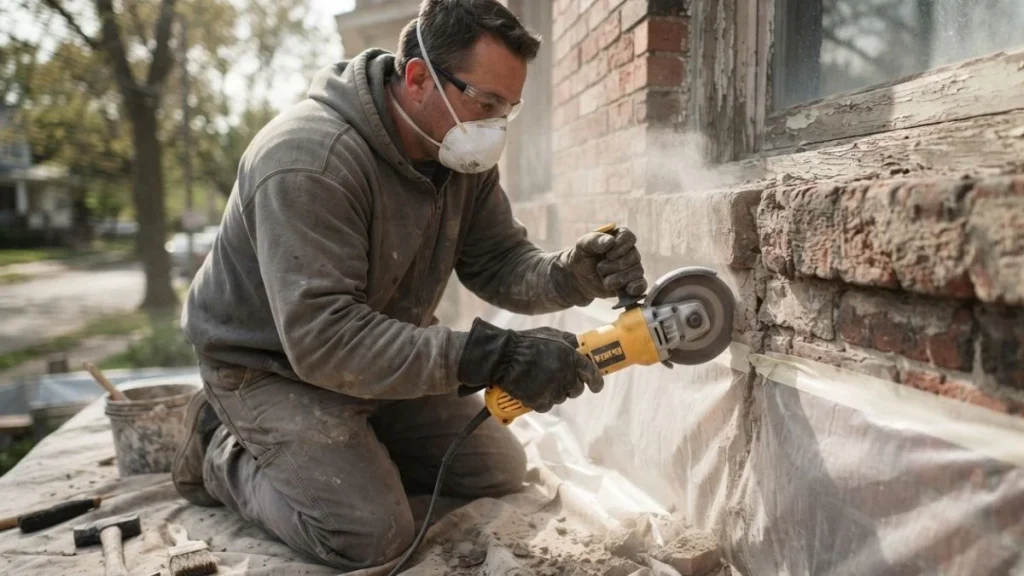
Repointing a brick window sill takes patience more than skill. Rush the prep work or skip the curing steps, and the new mortar will fail within a season.
Prep and Removal: Do This Right First
Gather these tools before starting:
- Angle grinder with a mortar-raking blade (for thick joint removal)
- Cold chisel and hammer (for hand work near brick edges)
- Oscillating tool with carbide blade (for tight corners)
- Safety glasses, respirator rated for silica dust, and work gloves
- Plastic sheeting and a shop vacuum with HEPA filter for dust control
Remove deteriorated mortar to a minimum depth of 3/4 inch — shallow repointing bonds poorly and fails fast. Work the grinder along the center of the joint, never against the brick face. Switch to a cold chisel for the final 1/4 inch nearest the brick edge to avoid chipping. Silica dust from old mortar is a serious respiratory hazard; wet the joint slightly and vacuum continuously.
Repointing and Finishing: Technique Determines Longevity
Dampen the cleaned joint with clean water 30 minutes before applying mortar. Bone-dry masonry pulls moisture out of fresh mortar too quickly, causing weak, crumbly joints.
Pack Type N mortar in layers no deeper than 1/4 inch at a time using a tuck pointer. Let each layer firm up before adding the next. Once the final layer reaches thumbprint hardness — firm but not set — tool the joint to match the original profile. A concave or weathered joint sheds water better than a flat one.
Allow 28 days for full cure before applying any sealant. Then run a bead of polyurethane or siliconized acrylic caulk along the sill-to-frame joint for complete water infiltration prevention. That final seal is what keeps the repointing work intact through the next freeze-thaw cycle.
Water Management and Seasonal Maintenance
A perfect repointing job fails prematurely if water has nowhere to go. Managing drainage and doing annual inspections is what separates a 5-year repair from a 25-year one.
Slope, Flashing, and Drainage Fundamentals
A brick window sill — sometimes called a cill in British and older American architectural documents — must slope away from the window frame at a minimum of 15 degrees to shed water effectively. Less than that and water pools at the frame joint, undoing even well-executed mortar repointing for window sills.
Flashing integration matters just as much. Metal flashing (typically aluminum or copper) installed beneath the sill course directs water outward before it can migrate into the wall cavity. On pre-1950s homes, original flashing is often corroded or absent entirely. If you’re doing significant sill work, inspect the flashing and replace it if it shows pinhole corrosion or separation from the brick bond. Copper flashing from manufacturers like W.P. Carey or Amcraft lasts 50+ years and is worth the added cost in historic brick window restoration projects.
Pre-Winter Inspection Checklist
Run this check every October before ground freeze:
- Press along all mortar joints — any give or crumbling means repointing is needed before winter
- Check the sill-to-frame caulk joint for gaps, shrinkage, or peeling
- Clear debris from the sill surface that traps moisture against the brick face
- Look for efflorescence, which signals active water infiltration moving through the masonry
Extending Repair Lifespan Year-Round
Apply a penetrating silane-siloxane water repellent — products like Silpro C20 or Aquapel — every 5 to 7 years to reduce water absorption without trapping vapor inside the brick. Avoid film-forming sealers, which block the breathability that Type N mortar brick masonry depends on to prevent interior moisture buildup and accelerated masonry deterioration.
Cost and Timeline Expectations
Brick window sill repair costs vary widely based on damage severity, sill size, and whether you hire out or do it yourself. Having realistic numbers before you start prevents mid-project surprises.
DIY Cost Breakdown
Material costs for a single sill repointing job are modest:
| Item | Approximate Cost |
|---|---|
| Type N mortar (50 lb bag) | $12–$18 |
| Polyurethane caulk (tube) | $8–$14 |
| Foam backer rod (20 ft roll) | $5–$9 |
| Silane-siloxane water repellent (1 qt) | $25–$40 |
| Mortar raking blade (angle grinder) | $20–$35 |
A single window sill repointing job typically runs $60–$120 in materials. The angle grinder itself costs $50–$120 if you don’t own one, but amortizes quickly if you have multiple sills or other masonry work to complete.
Professional Labor Rates
A licensed mason charges $40–$80 per hour depending on region and project complexity. A straightforward mortar repointing job on one window sill takes 2–4 hours, putting professional repair cost at $150–$400 per sill including materials. Full brick sill replacement — where structural masonry is compromised — runs $400–$900 per opening, factoring in brick matching, flashing replacement, and finish work.
Historic brick window restoration adds cost when salvaged period-correct brick must be sourced or when lime-based mortars require special mixing and application techniques.
How Long Does Repair Take?
- Minor repointing (hairline joints, one sill): 3–5 hours of active work, plus 28-day mortar cure
- Moderate damage (multiple joints, partial spalling): 1–2 days of work across a weekend
- Full sill replacement: 1–3 days depending on brick sourcing and drying time
Plan repairs for late spring through early fall. Mortar needs ambient temperatures above 40°F during application and the first 48 hours of cure — cold weather masonry work risks freeze damage before the joint reaches structural strength.
You May Like Also: Bay Window Sill Replacement
Frequently Asked Questions
What type of mortar should I use for brick window sill repair?
Type N mortar, as specified under ASTM C270, is the correct choice for most brick window sill repair work. Its 1:1:6 ratio of Portland cement, lime, and sand produces a mix soft enough to protect historic brick from freeze-thaw cracking while still providing durable weather resistance.
Can I repair a brick window sill myself or do I need a professional?
Surface repointing and caulk replacement are manageable DIY tasks for a careful homeowner with basic tools and a half-day of time. Hire a licensed mason if you find structural movement, interior water infiltration, or brick that crumbles under light pressure — those conditions require professional assessment before any repair material goes in.
How do I prevent water damage after repairing a brick sill?
Apply a penetrating silane-siloxane water repellent after the mortar reaches full cure at 28 days, seal the sill-to-frame joint with polyurethane caulk, and verify the sill slopes at least 15 degrees away from the window frame. Run a visual inspection every October to catch joint deterioration before winter freeze-thaw cycles widen new cracks.
Getting Started on Your Repair
The material you choose matters more than the technique — Type N mortar and a penetrating silane-siloxane sealer will outlast any high-strength Portland cement patch by a decade or more on pre-1950s brick. This week, walk each window sill and press firmly along every mortar joint — any joint that gives, crumbles, or shows gaps wider than 1/8 inch needs repointing before the first hard freeze hits.


