Have you noticed a small hole in your subfloor and wondered how to fix it before it causes bigger problems? Patching that tiny damage quickly can save you time, money, and stress down the road.
In this guide, you’ll learn simple, step-by-step methods to repair your subfloor like a pro—even if you’re not an expert. Keep reading to discover easy tips that will make your floor strong and safe again in no time.
Assessing The Damage
Before patching a small hole in your subfloor, it is important to carefully assess the damage. This step helps determine the best repair method and ensures lasting results. Proper assessment prevents further problems such as structural weakness or uneven flooring. Take your time to inspect the hole and understand its size, depth, and the type of material involved.
Identifying Hole Size And Depth
Start by measuring the hole’s size using a tape measure or ruler. Note both the width and length of the damaged area. This information guides the choice of patch materials and tools. Small holes may only need a simple filler, while larger ones require a piece of plywood or subfloor panel.
Next, check the hole’s depth. Use a thin object like a screwdriver or a stick to probe inside. This helps find out if the damage goes through the entire subfloor or only affects the surface.
- Shallow holes under 1/4 inch deep usually fix with wood filler or putty.
- Medium holes between 1/4 inch and 1 inch may need a patch with plywood or a backing piece.
- Deep holes over 1 inch might require cutting out the damaged section and replacing it.
Mark the hole’s edges clearly. This makes cutting or sanding easier during repair. Use chalk or a pencil to outline the damaged area. Accurate measurement and marking reduce mistakes and save time.
Checking Subfloor Material
Knowing the subfloor material is crucial before patching. Different materials require different repair techniques and supplies. Common subfloor materials include plywood, oriented strand board (OSB), and concrete.
Here is how to check your subfloor material:
- Look at the exposed edges: Remove any loose debris around the hole.
- Observe the texture: Plywood shows thin layers of wood veneer glued together.
- OSB has visible wood chips and flakes pressed tightly.
- Concrete feels hard and grainy, usually gray in color.
Knowing the subfloor type helps select the right patching product. For example, wood filler works well on plywood and OSB but not on concrete. Concrete needs a special patching compound designed for cement surfaces.
Check the subfloor for signs of water damage, rot, or mold near the hole. These issues may require more extensive repairs or replacement. If the subfloor feels soft or crumbles when pressed, replace that section rather than patch it.
Preparing The Area
Preparing the area is the first step in patching a small hole in the subfloor. This step ensures a strong and lasting repair. A clean, smooth surface helps the patch material stick well. It also prevents further damage or mold growth. Taking time to prepare the hole and its surroundings makes the repair easier and better. Follow simple steps to get the area ready before you apply any patch.
Cleaning Around The Hole
Start by cleaning the area around the hole carefully. Dirt, dust, and grime can stop the patch from holding tightly. Use a broom or vacuum to remove loose dirt first. Then, wipe the area with a damp cloth to clear fine dust and stains. Let the surface dry completely before moving to the next step. A dry surface helps the patch material stick better.
Here are some tips for cleaning around the hole:
- Clear any furniture or obstacles near the hole.
- Sweep or vacuum the floor area within 12 inches around the hole.
- Use a mild detergent with water on a cloth to wipe the surface.
- Dry the area using a clean, dry cloth or let it air dry.
Proper cleaning prevents future problems like mold or weak patches. It also makes the repair look neat. Take your time to clean well. This small effort improves the patch’s strength and durability.
Removing Loose Debris
After cleaning, focus on removing loose debris inside and near the hole. Loose wood fibers, splinters, or old glue can weaken the repair. Use a flat tool like a putty knife to scrape away loose bits gently. Avoid damaging the surrounding subfloor during this process. Removing debris creates a solid base for the patch material.
Follow these steps to remove loose debris effectively:
- Inspect the hole for any loose or soft wood pieces.
- Use a putty knife or scraper to lift and remove loose material.
- Clear out dust and small particles with a vacuum or brush.
- Check the edges of the hole; smooth rough spots if needed.
Repair Techniques
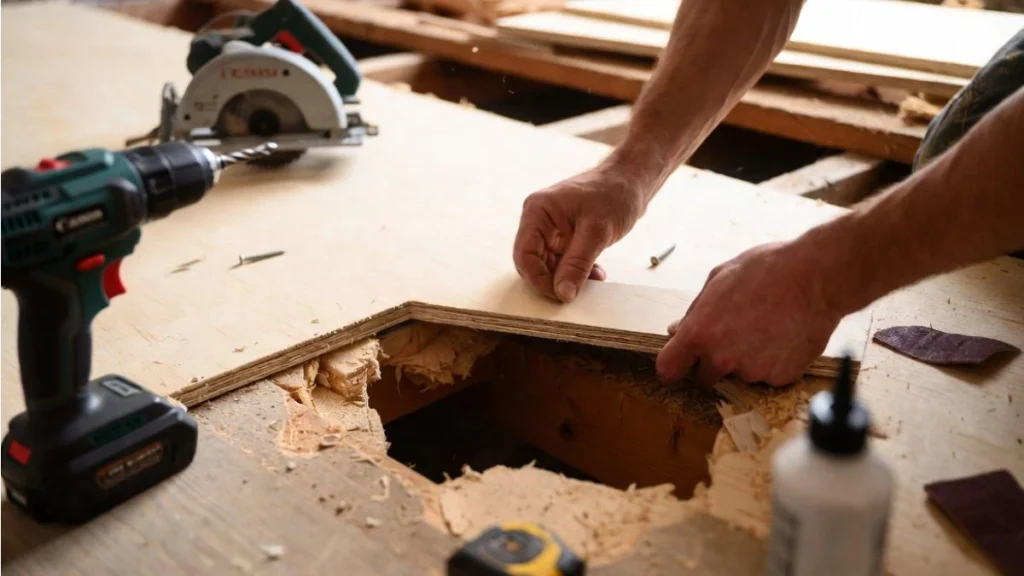
Repairing a small hole in a subfloor requires the right techniques to restore strength and smoothness. The method depends on the hole size and floor material. Using proper repair techniques prevents further damage and prepares the surface for new flooring. Small holes can often be fixed with simple fillers, while larger holes need patches for stability. Both methods are affordable and easy to do with basic tools.
Using Wood Filler For Small Holes
Wood filler works well for holes smaller than 1/2 inch in diameter. It fills gaps and cracks, making the surface level and smooth. Choose a wood filler that matches your subfloor material, such as plywood or particleboard. Follow these steps for best results:
- Clean the hole: Remove dust, dirt, and loose wood pieces.
- Apply the filler: Use a putty knife to press filler into the hole.
- Smooth the surface: Level the filler with the putty knife for a flat finish.
- Let it dry: Drying time varies; check the product instructions.
- Sand the area: Use fine sandpaper to smooth the patch.
Here is a quick overview of common wood fillers:
| Type | Best For | Drying Time | Paintable |
| Water-based | Indoor use, small holes | 30 minutes to 1 hour | Yes |
| Epoxy-based | Durable, moisture areas | 2 to 4 hours | Yes |
| Solvent-based | Large cracks, heavy use | 1 to 2 hours | Yes |
Tips: Avoid overfilling to reduce sanding work. Wear gloves and work in a ventilated area.
Applying A Patch For Larger Holes
Holes larger than 1/2 inch need a patch for strength and stability. A patch replaces the damaged section and supports the floor above. Use plywood or similar wood for the patch. Follow these steps:
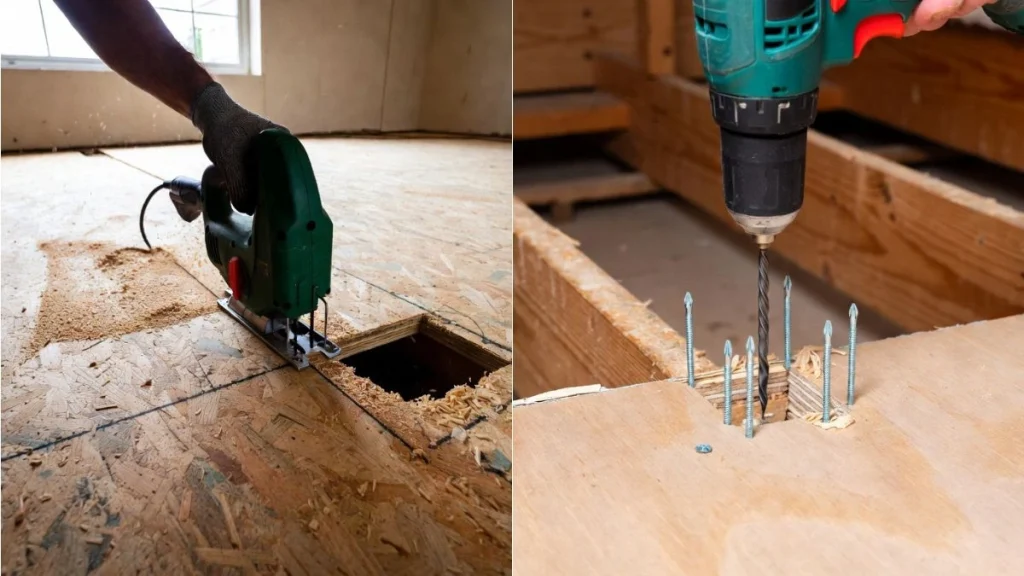
- Cut out the damaged area: Use a saw to remove the hole and create a clean square or rectangle.
- Measure and cut the patch: Cut a piece of plywood matching the hole size.
- Add support: Attach wood strips inside the hole edges to hold the patch.
- Secure the patch: Place the patch into the hole and screw it to the supports.
- Fill gaps: Use wood filler or caulk to fill any small gaps around the patch.
- Sand the surface: Smooth the patch edges and surrounding area.
Note: Make sure the patch is level with the floor. Uneven patches cause flooring problems later.
Finishing The Repair
After filling the small hole in your subfloor, the next step is finishing the repair. This process makes the patch smooth and blends it with the rest of the floor. Finishing well helps protect the repair and keeps your floor looking neat. It also prepares the surface for any covering or painting you want to do.
Sanding The Patched Area
Sanding is key to a clean, even surface. It removes bumps and rough edges from the patch. Use medium-grit sandpaper (around 100-120 grit) first to smooth out the area. Then switch to fine-grit sandpaper (150-180 grit) for a softer finish.
- Wear a dust mask to avoid breathing in dust.
- Sand in a circular motion for even smoothing.
- Check the surface often by running your hand over it.
- Remove dust with a vacuum or damp cloth before moving on.
Sealing And Painting Tips
Sealing the patched area protects it from moisture and wear. It also makes the patch match the rest of the floor. Use a good quality wood primer or sealant. Apply it with a small brush or roller for control.
- Let the sealant dry completely before painting.
- Use paint that matches your floor color and finish.
- Apply thin, even coats to avoid drips.
- Allow each coat to dry before adding another.
Follow this simple painting process:
- Apply wood primer or sealant to the patch.
- Wait for it to dry fully (check product instructions).
- Paint the area using thin coats.
- Let paint dry between coats.
- Add more coats if needed for full coverage.
Sealing and painting improve the durability of your repair. They help the patch blend in and last longer. Proper finishing keeps your subfloor strong and good-looking.
You May Read Also: How to Replace Subfloor under Load Bearing Wall
Preventing Future Damage
Fixing a small hole in the subfloor is only the first step. Preventing future damage keeps the floor strong and safe for years. Taking care of the subfloor stops small problems from becoming big repairs. It saves money and time. Simple actions protect your home’s foundation and improve its value.
Regular Subfloor Maintenance
Regular checks keep the subfloor in good shape. Look for cracks, soft spots, or signs of wear every few months. Catching problems early helps you fix them before they grow. Use a flashlight and a screwdriver to test hard-to-see areas.
- Inspect for damage: Check for holes, cracks, and loose boards.
- Clean the area: Remove dust and debris to stop mold growth.
- Tighten screws and nails: Secure loose parts to avoid squeaks and movement.
- Apply sealant: Seal gaps to keep out moisture and pests.
Moisture Control Strategies
Moisture is the main cause of subfloor damage. Water weakens wood and causes mold. Keep the subfloor dry to stop damage. Use simple ways to control moisture in your home.
Start by checking for leaks in pipes or roofs. Fix them fast. Use a dehumidifier in damp areas like basements. Make sure rooms have good airflow. Open windows or use fans to reduce moisture.
- Install vapor barriers: Lay plastic sheets under the floor to block moisture.
- Improve drainage: Keep gutters clean and direct water away from the house.
- Use waterproof paint: Apply on basement walls and floors for extra protection.
- Check plumbing: Regularly inspect pipes for leaks or drips.
Conclusion
Patching a small hole in your subfloor is simple and saves money. Use the right tools and materials for a strong fix. Take your time and follow each step carefully. This repair helps keep your floor stable and safe. You don’t need to call a professional for small holes.
Try this fix yourself and enjoy a smooth, even floor again. Small repairs make a big difference in home care. Keep your subfloor in good shape for many years.