If your home has a dirt floor basement, you already know the problems — cold floors upstairs, a musty smell that never goes away, and energy bills that seem higher than they should be. The good news is that insulating a dirt floor basement is a project most homeowners can handle themselves, and when done right, it makes a real difference in comfort, air quality, and monthly costs.
This guide walks you through everything you need to know — the right materials, the correct order of steps, realistic costs, and the mistakes that waste your money before you even get started.
Why Insulating a Dirt Floor Basement Actually Matters
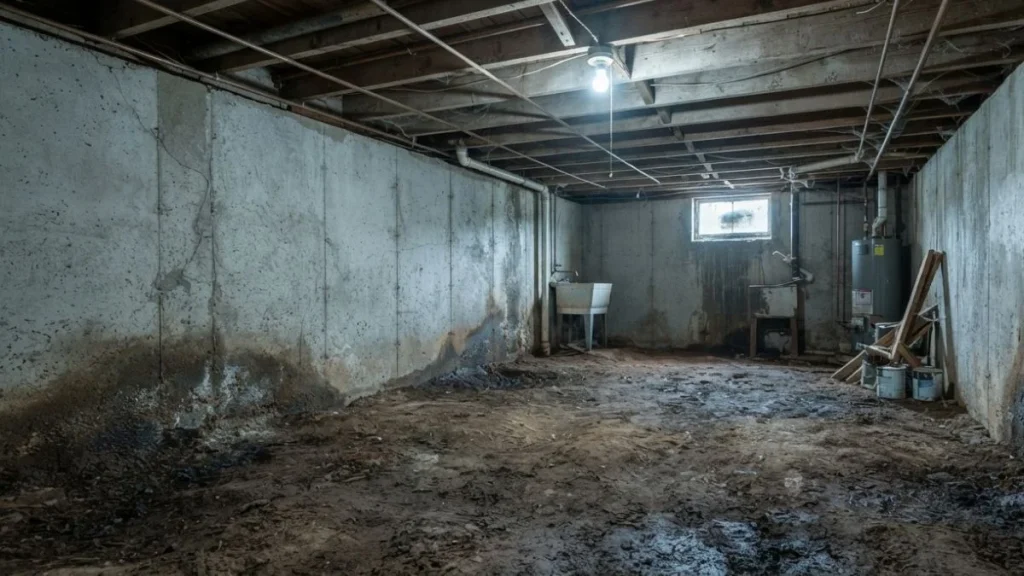
Most homeowners focus on insulating walls and attics, and completely overlook what’s happening beneath their feet. But an uninsulated dirt floor basement can be responsible for significant heat loss, persistent moisture problems, and poor indoor air quality — all at the same time.
Soil naturally holds moisture and releases it as vapor throughout the year. That vapor rises into your basement and eventually works its way into your living space. This leads to condensation on walls, wood rot on floor joists, and the growth of mold and mildew — none of which are cheap to fix once they take hold.
From an energy standpoint, the U.S. Department of Energy estimates that uninsulated basement floors and walls can account for up to 15–20% of a home’s total heat loss. That’s a significant number, especially during winter months when your heating system is working overtime to compensate for heat escaping through the ground.
Beyond energy costs, there’s the comfort factor. Cold floors in the rooms directly above the basement are a telltale sign that the basement is pulling heat out of your living space. Proper insulation creates a thermal break between the cold ground and your home, which means warmer floors, more consistent room temperatures, and a heating system that doesn’t have to work as hard.
Signs your dirt floor basement needs attention:
- Floors above the basement feel noticeably cold in winter
- A persistent musty or earthy smell inside the house
- Visible moisture, condensation, or white mineral deposits on basement walls
- Energy bills that keep climbing without explanation
- Allergy symptoms that worsen indoors
What You Need to Know Before You Start
Jumping straight into buying materials is one of the most common — and most expensive — mistakes homeowners make. Before you spend a dollar on insulation, you need to understand what you’re working with.
Assess Your Basement Condition First
Walk your basement carefully and look for active water intrusion — puddles, damp spots along the walls, or water stains that indicate past flooding. Insulation will not fix a water problem. If water is entering your basement during rain or snowmelt, that issue must be resolved before anything else.
Also check your ceiling height. Some insulation methods add 2–4 inches to the floor height, which can matter if your basement is already low.
Moisture Is Your Biggest Problem — Not Temperature
This is the most important concept to understand before insulating a dirt floor basement. Moisture vapor rises constantly from soil, and if you trap it without a proper vapor barrier, you’ll create conditions that are actually worse than doing nothing at all. Mold thrives in warm, moist, enclosed spaces — exactly what an improperly insulated basement becomes.
Key terms to understand:
| Term | What It Means |
| Vapor Barrier | A plastic sheet that blocks moisture vapor from rising through the soil |
| R-Value | A measure of insulation’s resistance to heat flow — higher is better |
| Encapsulation | Completely sealing the floor and walls with a vapor barrier system |
| Thermal Bridging | Heat escaping through gaps or uninsulated areas in your insulation layer |
Check for Radon Before You Seal Anything
Radon is a naturally occurring radioactive gas that comes from soil and rock. Dirt floor basements are particularly vulnerable because there’s no concrete barrier between the soil and your air supply. The EPA recommends testing every home for radon, and if you’re about to seal your basement floor, testing first is essential. Radon test kits are inexpensive and widely available at hardware stores.
Best Insulation Methods for a Dirt Floor Basement
There’s no single “right” method for every basement. The best approach depends on your budget, how you plan to use the space, and how serious your moisture situation is.
Vapor Barrier + Rigid Foam Insulation
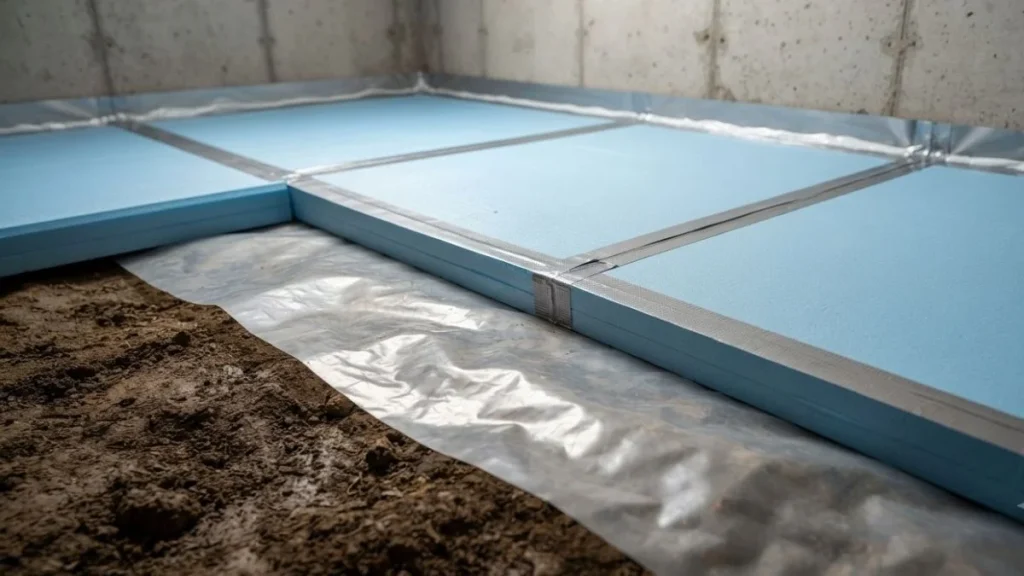
This is the most widely recommended method for dirt floor basements, and for good reason. It addresses both moisture and thermal insulation in one system, it’s DIY-friendly, and it delivers solid results without breaking the bank.
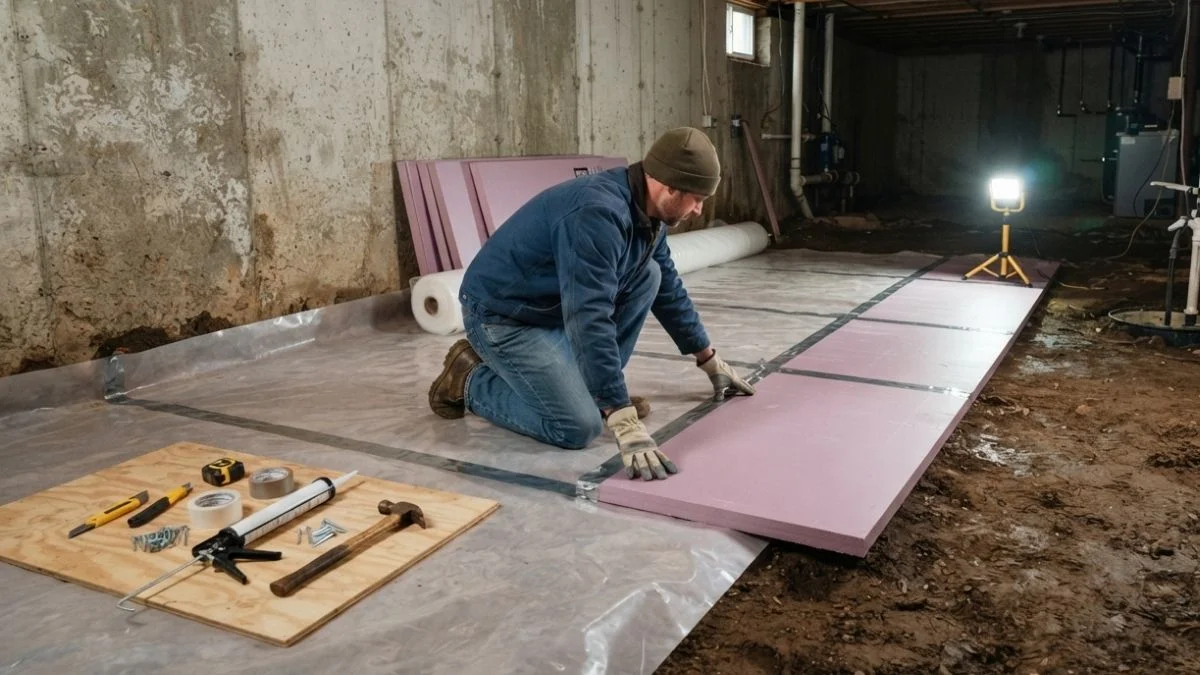
The process involves laying a heavy-duty vapor barrier directly on the soil, then placing rigid foam insulation boards on top. The combination creates a moisture block at the ground level and a thermal break above it.
For the vapor barrier, a minimum 6-mil polyethylene sheet is the standard, but a 10-mil or 20-mil reinforced barrier offers better durability and puncture resistance — especially if you’ll be walking on the surface regularly.
For the rigid foam, you have three main options:
| Foam Type | R-Value Per Inch | Best For | Approximate Cost |
| XPS (Extruded Polystyrene) | R-5 | Moisture-prone basements | $0.40–$0.60/sq ft |
| EPS (Expanded Polystyrene) | R-3.8 | Budget-conscious projects | $0.25–$0.40/sq ft |
| Polyiso | R-6+ | Maximum thermal performance | $0.50–$0.70/sq ft |
XPS is generally the preferred choice for dirt floor basements because it has a low moisture absorption rate, which matters when it’s sitting close to the ground.
Full Basement Encapsulation
Encapsulation goes further than a basic vapor barrier. It involves covering the entire floor and lower portions of the walls with a thick, durable liner — typically 12-mil to 20-mil reinforced polyethylene — creating a complete sealed environment. This is the gold standard for moisture control and is especially recommended for crawl spaces and basements with serious humidity issues.
Full encapsulation is more expensive, typically running $3,000–$8,000 for professional installation depending on square footage. However, it dramatically improves air quality, reduces the risk of structural wood damage, and can even lower your home’s radon levels when combined with a proper ventilation system.
Gravel + Vapor Barrier + Subfloor System
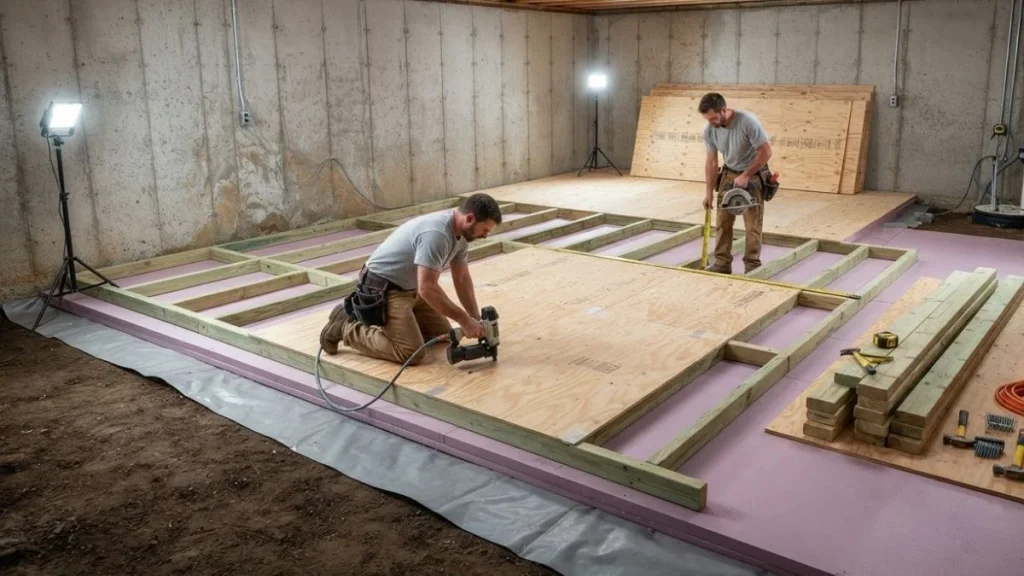
If you’re planning to convert your dirt floor basement into actual living space — a home office, gym, or recreation room — this method is the right move. A 2–4 inch layer of compacted gravel is placed first to improve drainage, followed by the vapor barrier, then rigid foam insulation, and finally a sleeper subfloor system using pressure-treated lumber and plywood or OSB panels.
This creates a floor that’s dry, insulated, and structurally sound enough to support everyday use. It’s the most involved and expensive DIY method, but the results are a genuinely usable finished space.
Step-by-Step: How to Insulate a Dirt Floor Basement
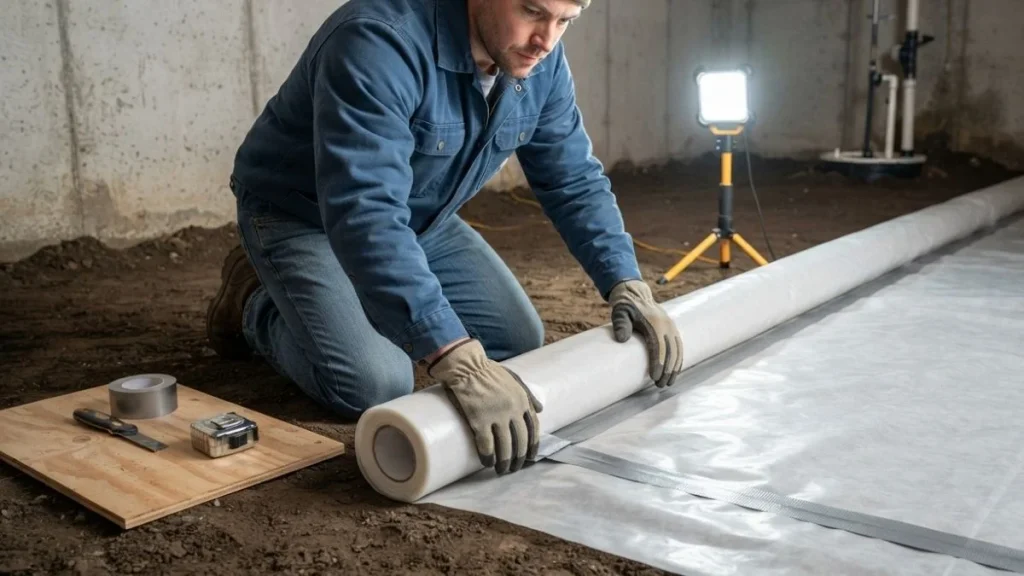
Step 1 — Clean and Prepare the Floor
Remove all debris, rocks, organic material, and any items stored on the floor. Use a rake and shovel to level the surface as much as possible. A relatively flat floor makes installing your vapor barrier and insulation significantly easier and more effective. If there are any obvious low spots where water could pool, fill them with compacted soil or gravel before moving forward.
Step 2 — Test for Moisture and Radon
Tape a 12-inch square of plastic sheeting directly to the dirt floor and leave it for 24–48 hours. If moisture collects underneath, you have active vapor transmission that must be addressed. Also run your radon test during this time. Both tests take minimal effort but tell you exactly what you’re dealing with before you commit to an insulation approach.
Step 3 — Install the Vapor Barrier
Roll out your vapor barrier across the entire floor, overlapping seams by a minimum of 12 inches. Run the edges up the walls 6–12 inches and secure them with construction tape or seam tape rated specifically for vapor barriers. Every seam and wall connection should be taped — an unsealed gap defeats the purpose of the entire barrier.
Common mistakes to avoid:
- Using thin plastic sheeting (less than 6-mil) that tears easily
- Not overlapping seams far enough
- Skipping tape on seams and wall connections
- Failing to run the barrier up the walls
Step 4 — Lay the Rigid Foam Insulation
Place your foam boards directly on top of the vapor barrier. Stagger the seams between boards — just like laying tile or hardwood — so no continuous gap runs across the floor. Tape all foam board seams with foil tape to create a continuous thermal layer. For most climates, 2 inches of XPS foam (R-10) is a solid starting point for a basement floor.
Step 5 — Add a Subfloor Layer (If Needed)
If you plan to use the space or want to protect the foam from foot traffic and stored items, add a layer of ¾-inch plywood or OSB on top of the foam. Use pressure-treated lumber for any framing that contacts the insulation layer. This final layer protects your investment and gives you a proper surface to work with.
How Much Does It Cost to Insulate a Dirt Floor Basement?
Cost is where most homeowners need a realistic picture before starting. Here’s what you can expect:
| Project Scope | DIY Cost | Professional Cost |
| Vapor barrier only (1,000 sq ft) | $150–$300 | $400–$800 |
| Vapor barrier + rigid foam | $600–$1,200 | $1,500–$3,000 |
| Full encapsulation | $1,500–$3,000 | $3,000–$8,000 |
| Gravel + barrier + subfloor system | $2,000–$4,500 | $5,000–$10,000+ |
The DIY savings are real, but so is the learning curve. If your basement has significant moisture issues, structural concerns, or elevated radon levels, professional assessment is worth the cost. A contractor who specializes in basement waterproofing and insulation can spot problems that aren’t obvious to the untrained eye.
Return on investment: Most homeowners recoup insulation costs through energy savings within 3–7 years, depending on their home size, local energy rates, and the method used. Comfort improvements — warmer floors, better air quality, reduced musty odors — are immediate.
Common Mistakes That Waste Your Money
Even with the best intentions, these errors can cost you significantly in rework and repairs.
- Using fiberglass batt insulation on a dirt floor. Fiberglass absorbs moisture and becomes a breeding ground for mold when placed near soil. It has no place in a dirt floor basement application.
- Skipping the vapor barrier entirely. No amount of insulation compensates for uncontrolled moisture vapor rising from the soil.
- Ignoring radon before sealing. Sealing your basement without testing traps radon gas inside. Always test first.
- Choosing the wrong R-value for your climate. An R-10 floor might be adequate in a mild climate but insufficient in Climate Zone 6 or 7, where R-15 or higher is recommended.
- Insulating the floor but ignoring the walls. Floor insulation alone delivers limited results. Basement walls and rim joists should be insulated as part of the same project for maximum efficiency.
Read Also: Should I Insulate My Floor Joists?
Conclusion
Insulating a dirt floor basement isn’t complicated, but it does require doing things in the right order — moisture control first, insulation second, and finishing layers last. Skip any of those steps, and you’re likely to end up with a bigger problem than the one you started with.
Start with a proper assessment of your basement’s moisture situation. Test for radon. Install a quality vapor barrier before a single piece of insulation goes down. Choose the right foam for your climate and budget. Done correctly, this project pays for itself in energy savings, protects your home’s structure, and genuinely improves the comfort and air quality of your entire house.
If your basement has active water intrusion or a serious moisture problem, bring in a professional before proceeding. The upfront cost of expert advice is always cheaper than fixing a moisture or mold problem after the fact.