


Vinyl plank flooring popping up is almost never a flooring defect — it’s a diagnostic puzzle with a specific, fixable root cause hiding underneath.
Most homeowners facing this problem within the first 1-3 years don’t know whether to blame the installation, the subfloor, or the product itself — and that uncertainty leads to expensive, unnecessary replacement.
This guide gives you a root cause framework and matched repair methods so you fix the real problem the first time.
What’s Actually Causing the Popping
Vinyl plank flooring lifting has 4 distinct root causes. Identifying the right one before touching a single plank saves you hours of wasted repair work.
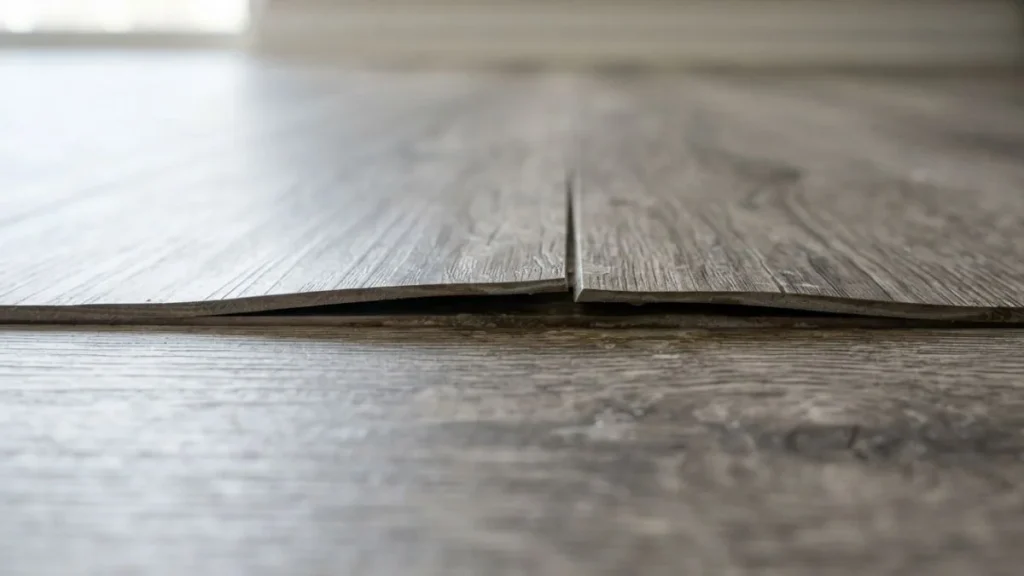
Excess Moisture and Humidity
Moisture is the leading cause of LVP popping up. Subfloor moisture above the ASTM F2170 threshold of 75% relative humidity (RH) — measured in the concrete slab itself — prevents planks from seating flat, causing cupped vinyl flooring and upward pressure at the joints.
Humidity spikes above 65% RH in the room post-installation expand the planks laterally. In a floating floor system, that expansion has nowhere to go except up. Moisture intrusion from below — a crawl space, plumbing leak, or poorly sealed concrete — compounds the problem fast.
Inadequate Expansion Gaps
Vinyl plank expansion gaps around the room perimeter must be maintained at a minimum of 1/4 inch, per installation guidelines from major brands including COREtec and LifeProof. Without that gap, thermal expansion from seasonal temperature swings compresses the planks against the wall, forcing pressure to release upward at the weakest lock joint.
Poor Subfloor Prep and Installation Defects
An uneven subfloor — anything beyond 3/16 inch over 10 feet — prevents full plank seating and stresses the click-lock system with every footstep. Skipping the acclimation period (typically 48 hours at room temperature) means planks expand after installation rather than before. Applying adhesive to a floating-floor product is another common installer error that restricts natural movement and causes buckling.
Defective Locking Tabs and Manufacturing Flaws
Click-lock systems rely on a tight tongue-and-groove tab to hold planks flat. A locking mechanism failure — from a damaged tab during installation, a batch defect, or plank warping from production — lets planks shift and pop under normal foot traffic. Check for a gap between planks at the seam; visible separation confirms a lock failure rather than a subfloor or moisture issue.
Diagnosing Your Specific Problem
Fixing vinyl plank flooring popping up starts with one rule: match the repair to the cause, not the symptom. These 3 diagnostic steps tell you exactly which failure mode you’re dealing with.
Visual Inspection Checklist
Walk the entire floor and note the pattern of movement. Random popping scattered across the room points to subfloor preparation issues or underlayment problems. Popping concentrated along a single row or seam line suggests a click-lock failure or locking mechanism damage in that specific run.
Look for these specific signs:
- Plank cupping (edges higher than center) or crowning (center higher than edges) — both indicate moisture damage to vinyl flooring
- Visible gaps between planks at the seam, confirming lock disengagement
- Swelling, discoloration, or soft spots at plank edges, signaling moisture intrusion from below or surface spills
- Planks lifting uniformly near walls, pointing directly to missing or compressed vinyl plank expansion gaps
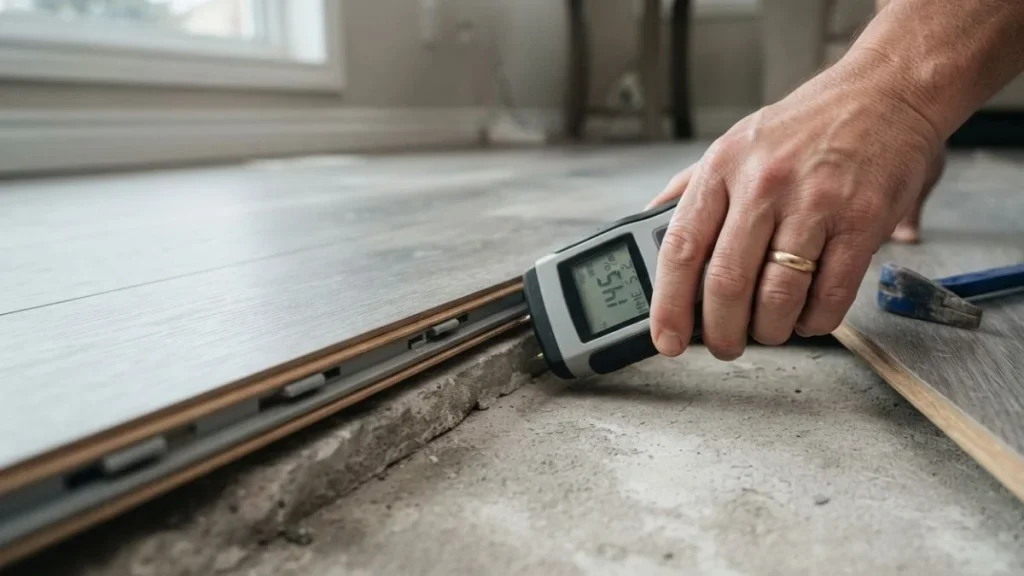
Moisture Meter Testing
A pin-type or pinless moisture meter, such as those made by Tramex or General Tools, gives you a subfloor reading in under 2 minutes. Concrete subfloor readings above 75% RH (per ASTM F2170 standards) confirm active moisture damage. For ambient conditions, a digital hygrometer measuring above 65% RH in the room links floating floor cupping to humidity rather than a subfloor defect.
Identify the moisture source by testing both the subfloor and the slab separately. A high slab reading with a normal room reading means the problem is coming from below — a crawl space, ground moisture, or plumbing — not from indoor humidity.
Timeline and Installation Context
When the popping started relative to the installation date is one of the most reliable diagnostic signals available. Popping within the first 30 days almost always traces back to a skipped acclimation period or installation defects. Popping that develops after 6-12 months more commonly points to seasonal thermal expansion or a gradual moisture intrusion problem.
Ask yourself 3 questions:
- Did any water event — flooding, appliance leak, heavy condensation — precede the popping?
- Was the floor installed by a certified professional, or was acclimation documentation skipped?
- Did the popping begin or worsen after a seasonal change, suggesting thermal expansion as the driver?
Repair Methods Matched to Root Cause
Each repair method below is tied directly to a specific failure mode. Using the wrong fix — like re-clicking planks over an active moisture problem — means the popping returns within weeks.
Moisture-Related Popping
Start by eliminating the moisture source before touching a single plank. Deploy a dehumidifier rated for the room’s square footage and target indoor RH below 55%. Run it continuously for at least 72 hours while monitoring readings with a hygrometer.
If the subfloor itself is wet, remove the affected planks — floating floors disassemble without demolition tools — and allow the subfloor to dry completely before reinstallation. For concrete subfloors in high-risk areas like basements, reinstall with a 6-mil polyethylene moisture barrier or a product like Roberts 70-193 underlayment, which provides both cushion and moisture protection.
Expansion Gap Fixes
Remove the baseboard or quarter-round trim along the affected wall to expose the plank edges. If planks are pushed tight against the wall, use a pull bar and tapping block to re-space them, restoring a minimum 1/4-inch expansion gap around the full perimeter. In severe cases where thermal expansion has compressed multiple rows, you may need to remove and re-lay the planks from the wall outward.
Reinstall trim without nailing it to the floor — nail only into the wall. Trim nailed to the plank surface pins the floating floor and re-creates the same gap compression problem.
Click-Lock and Physical Damage Repairs
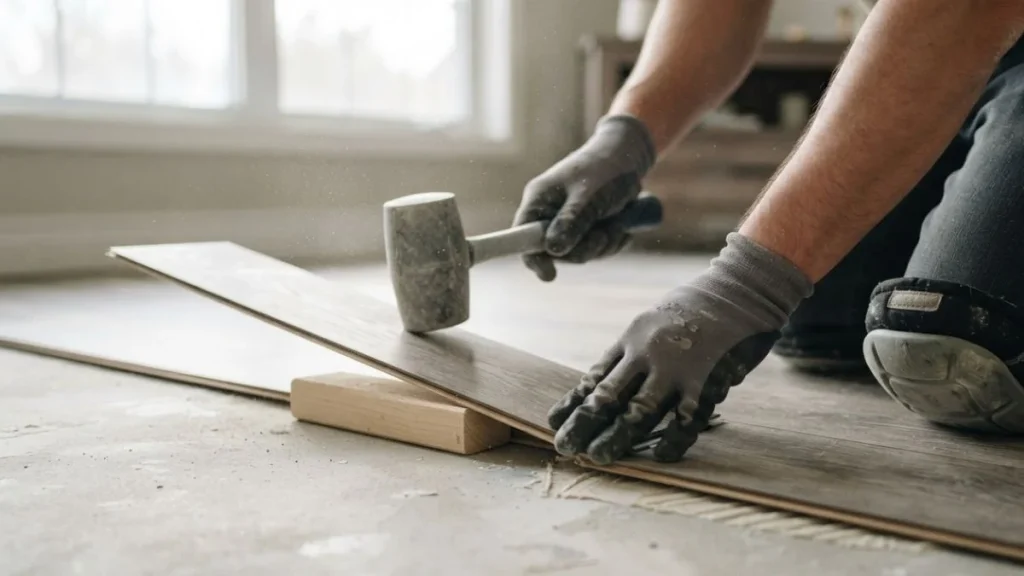
For a disengaged click-lock connection with no physical damage to the tab, re-engage the joint by angling the plank upward at roughly 45 degrees and pressing down firmly until the lock clicks. A tapping block and rubber mallet help seat stubborn joints without cracking the locking mechanism.
A broken or chipped locking tab requires single-plank replacement. Remove planks row by row back to the damaged piece — most floating LVP systems allow this without full floor removal. For planks glued or installed in tight spaces, a Crain 135 undercut saw and pull bar make extraction practical without damaging adjacent planks.
Installation Best Practices (Prevention)
Most cases of vinyl plank flooring lifting are preventable. The 3 practices below address the root causes before installation begins, not after.
Acclimation Requirements Before Laying
Acclimation means storing unopened plank boxes flat in the installation room for 48-72 hours before laying, allowing the product to reach the room’s temperature and humidity equilibrium. Skipping this step is one of the most common installation defects — planks laid cold or dry will expand after installation, compressing against walls and triggering the same popping pattern as a missing expansion gap.
In humid climates like the Gulf Coast or Pacific Northwest, extend acclimation to the full 72 hours. In dry climates or during winter heating season, run a humidifier during acclimation to condition planks closer to the home’s typical operating humidity.
Subfloor Moisture Barriers and Prep
Concrete subfloors require a vapor retarder — minimum 6-mil polyethylene sheeting or an equivalent underlayment product — before any floating LVP installation. Test concrete moisture levels with a calcium chloride test per ASTM F1869 standards before laying. Readings above the manufacturer’s threshold (typically 3 lbs per 1,000 sq ft per 24 hours) require mitigation before installation proceeds.
Subfloor flatness must be within 3/16 inch over a 10-foot span. High spots create pressure points that stress click-lock systems under foot traffic. Fill low spots with a Portland cement-based floor leveling compound like Mapei Planipatch before laying any plank.
Expansion Gap Sizing by Room Dimensions
Every floating floor needs a minimum 1/4-inch perimeter expansion gap, but larger rooms require more. For rooms exceeding 30 feet in any direction, most manufacturer installation guides — including those from COREtec and Shaw — specify increasing the gap to 1/2 inch to accommodate greater thermal expansion across the full floor length.
At interior doorways, install T-molding transition strips rather than running planks continuously between rooms. Continuous runs through multiple rooms without transitions create a single large floating mass with no pressure relief, making LVP popping up almost inevitable after the first full seasonal temperature cycle.
You May Read Also: Floor Popping Sound Under Carpet?
Frequently Asked Questions
How do you fix vinyl planks popping without removing them all?
Locate the specific plank or row where the lock has disengaged, then re-engage the joint by angling the plank at 45 degrees and pressing down until it clicks. If the cause is a missing expansion gap, remove only the baseboard trim, re-space the perimeter planks with a pull bar, and reinstall the trim.
What humidity level causes vinyl plank flooring to pop?
Indoor relative humidity above 65% RH causes floating LVP to expand laterally and pop at the joints. Subfloor moisture above 75% RH — measured per ASTM F2170 — creates the same pressure from below, particularly on concrete slabs without a vapor barrier.
Can clicking vinyl planks be repaired or do they need full replacement?
A disengaged click-lock with an intact tab can be re-clicked without replacement. A physically broken or chipped locking tab requires replacing that individual plank — most floating LVP systems allow single-plank swaps without removing the entire floor.
When should you stop DIY repairs and call a professional?
Call a flooring professional when moisture readings remain elevated after 72 hours of dehumidification, when more than 10% of the floor is affected, or when the subfloor itself shows rot, structural damage, or active water intrusion. Those conditions require remediation beyond plank-level repair.


