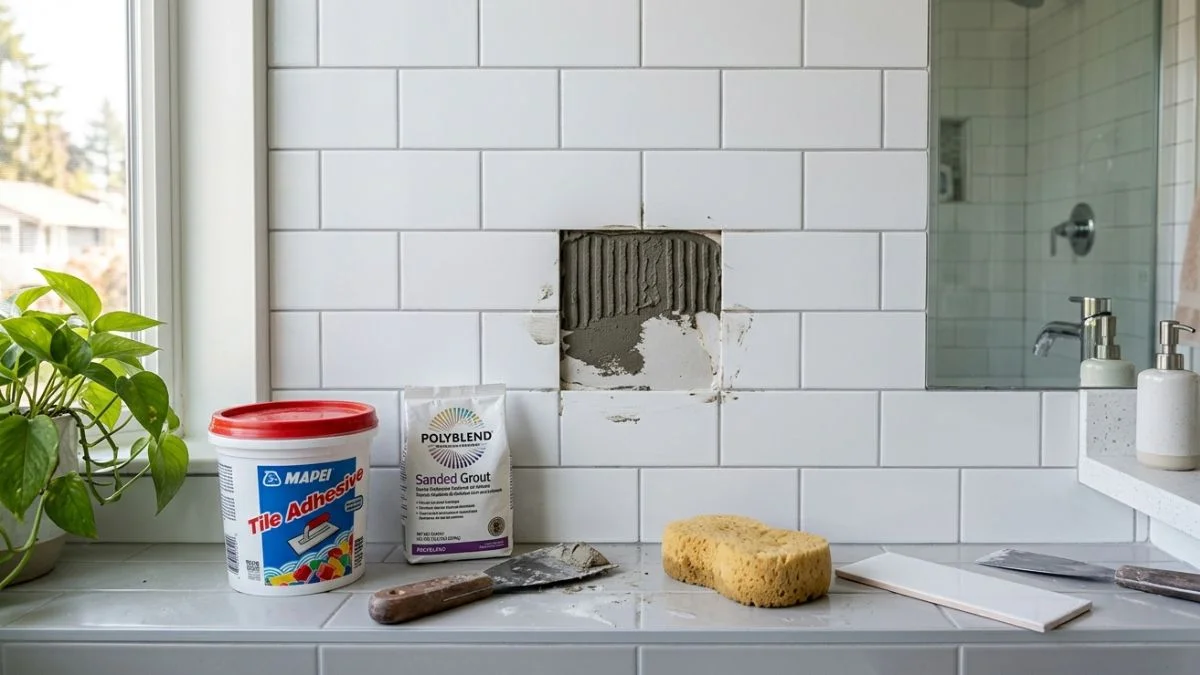
You walk into your bathroom and find a tile sitting on the floor — bare wall where it used to be. Frustrating, right? The good news is this is a very common problem, and you can fix it yourself in a single afternoon without calling a contractor.
Leaving it unrepaired isn’t an option though. That exposed patch invites water damage, mold, and more tiles coming loose over time.
In this guide, you’ll learn exactly why tiles fall off, what tools and materials you need, how to reattach and regrout the tile the right way — and how to make sure it doesn’t happen again.
Why Do Bathroom Tiles Fall Off the Wall?
Before you grab the adhesive and start pressing that tile back into place, take a minute to understand why it fell in the first place. Skipping this step is the number one reason homeowners end up fixing the same tile two or three times. Once you know the root cause, you can fix it properly — and make sure it stays fixed.
Poor Original Installation
In many cases, a fallen tile isn’t really a tile problem — it’s an installation problem that took a few years to show itself. Using too little adhesive, spreading it unevenly, or using the wrong adhesive type for a wet bathroom environment are the most common culprits. Surface preparation matters too — tiles installed over dusty, greasy, or unprepared walls never fully bond in the first place. They might hold for a year or two, but eventually gravity wins.
Moisture and Water Damage
Moisture is one of the biggest enemies of a tiled wall. It usually starts with small cracks in the grout — these act as entry points for water, which slowly weakens the adhesive bond behind the tile. Steam from hot showers makes things worse, especially in bathrooms without proper ventilation. In more serious cases, a hidden leaking pipe behind the wall can saturate the surface entirely, causing multiple tiles to fall in the same area.
Age and General Wear
Sometimes tiles fall simply because the materials holding them have reached the end of their lifespan. Mastic adhesive — common in homes over 15–20 years old — dries out and becomes brittle over time, losing its grip on the tile. Grout deteriorates too, leaving the adhesive exposed to moisture and air. Add in years of natural expansion and contraction from temperature changes, and older installations will eventually start to give way.
Structural Movement
All homes settle over time, and that subtle wall movement puts stress on rigid tile bonds. Heavy nearby construction, vibrating appliances, or repeated impact on shared walls can also loosen tiles that weren’t firmly bonded. If tiles are falling in a pattern — along a diagonal or consistently on one wall — structural movement could be the cause, and it’s worth having a professional assess the situation before reattaching anything.
What You Need Before You Start — Tools and Materials
One of the biggest mistakes beginners make is jumping straight into the repair without gathering everything they need first. Running back and forth to the hardware store mid-project is not only frustrating — it can actually affect the quality of your repair if adhesive starts setting before you’re ready. Take 15 minutes to get everything together before you start, and the whole job will go much more smoothly.
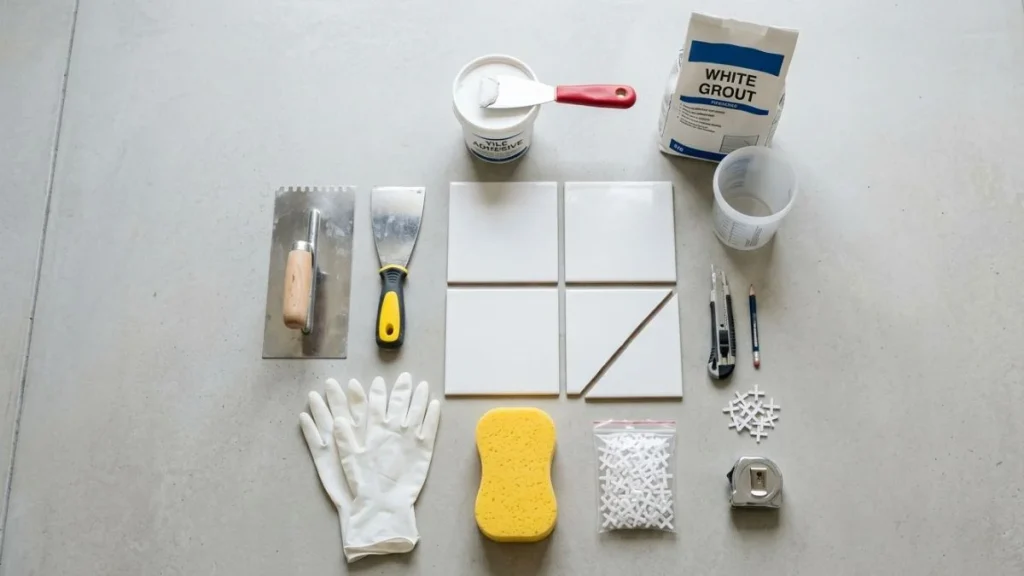
Tools You’ll Need
You don’t need a professional tile setter’s toolkit to pull this off. Most of these tools are either already in your home or inexpensive to pick up at any hardware store.
- Putty knife or scraper — for removing old adhesive from the wall and the back of the tile
- Notched trowel — for spreading adhesive evenly onto the surface
- Grout saw or oscillating tool — for removing old or cracked grout from the surrounding joints
- Rubber mallet — for gently tapping the tile flush with the surrounding tiles without cracking it
- Tile spacers — to maintain even grout lines on all four sides of the tile
- Painter’s tape — to hold the tile in position while the adhesive cures
- Sponge and bucket — for cleaning excess grout off the tile surface
- Safety glasses and gloves — always worth wearing when scraping or cutting old grout
Materials You’ll Need
Beyond the tools, you’ll need a handful of materials — most of which are affordable and easy to find at any home improvement store.
- Wall tile adhesive or mastic — the bonding agent that holds the tile to the wall
- Pre-mixed or sanded grout — to refill the joints around the tile after it’s set
- Grout sealer — applied after grouting to protect against future moisture penetration
- Replacement tile — only needed if the original tile is cracked, chipped, or damaged beyond reuse
Choosing the Right Adhesive
This is the most important material decision for this repair. Using the wrong adhesive is one of the top reasons tiles fall off again shortly after being reattached.
Mastic Adhesive works well for bathroom walls with low moisture exposure — areas away from direct water contact. However, it softens under prolonged moisture, so never use it inside a shower.
Epoxy Adhesive creates a fully waterproof, extremely strong bond making it the best choice for shower walls and areas with regular direct water contact. It sets quickly, so you’ll need to work efficiently once mixed.
Thinset Mortar is the industry standard for tile installation — highly durable, moisture-resistant, and ideal for heavier tiles. It requires a bit more prep but delivers the most reliable long-term result.
| Adhesive Type | Best For | Water Resistance | Difficulty |
| Mastic | Dry or low-moisture walls | Moderate | Easy |
| Epoxy | Showers, wet areas | Excellent | Moderate |
| Thinset Mortar | Heavy tiles, wet areas | Excellent | Moderate |
When in doubt, go with epoxy or thinset for any bathroom tile repair. The slightly higher cost and extra effort are always worth it compared to repeating the repair in six months.
How to Fix a Bathroom Tile That Fell Off — Step-by-Step
Now that you know why tiles fall and have everything ready, it’s time to get to work. Follow these steps carefully and you’ll have that tile back on the wall — properly this time — by the end of the day.
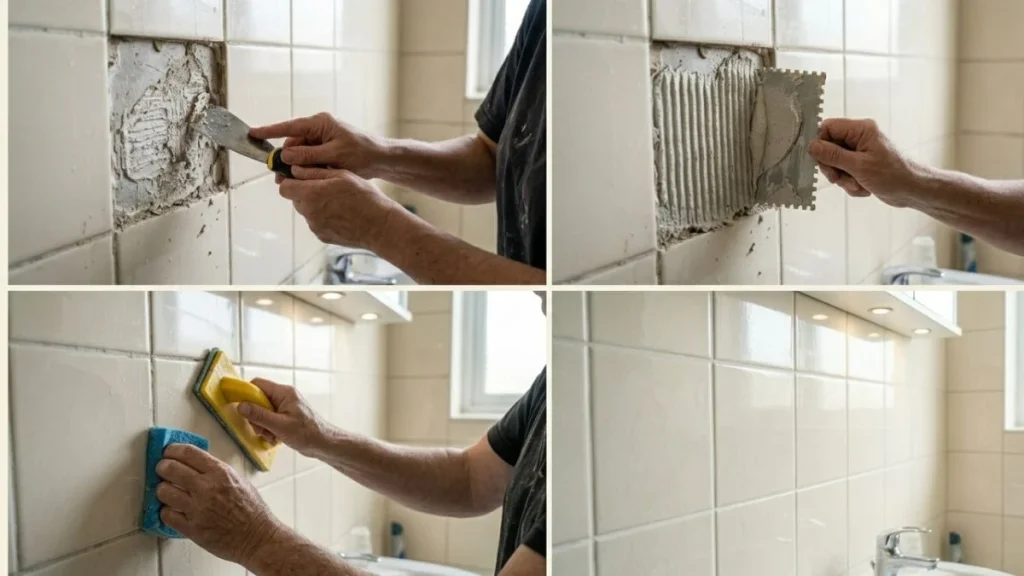
Step 1 Inspect the Tile and the Wall Surface
Before anything else, take a close look at both the tile and the wall. Start with the tile itself — check for cracks, chips, or glaze damage. If it’s fully intact, you can reuse it. If it’s cracked or damaged, replace it with a matching tile. Next, press gently on the exposed wall area. A solid, dry surface means you’re good to go. If it feels soft, damp, or crumbly, there’s underlying moisture damage that needs fixing first.
When to Replace Instead of Reattach
If the tile is cracked or the wall feels damaged, replacement is the smarter move. Also press on the surrounding tiles — if more than two or three feel hollow or loose, plan to reattach those at the same time.
Step 2 Remove Old Adhesive and Clean the Surface
This is the step most DIYers rush — and it’s exactly why tiles fall off again. Fresh adhesive won’t bond properly over old residue or dust. Use your putty knife to scrape all old adhesive off both the wall and tile back. Sand down any stubborn raised patches until both surfaces are smooth and flat. Wipe everything down with a damp cloth, then let both surfaces dry completely before moving on.
Dealing With Mold Behind the Tile
If you spot black marks or smell something musty, apply a mold-killing primer or diluted bleach solution, leave it for 10–15 minutes, then wipe clean. Allow at least 24 hours to dry before applying adhesive. If the drywall feels soft or crumbling, that section needs to be replaced before retiling.
Step 3 Apply the Tile Adhesive
With clean, dry surfaces ready, spread adhesive evenly onto the wall using your notched trowel in smooth, consistent strokes going in one direction. The ridges created by the notches compress when the tile is pressed in, creating a stronger bond. For best results, also apply a thin layer directly to the back of the tile — this technique is called back-buttering.
Back-Buttering — Why It Matters
Back-buttering increases adhesive contact to nearly 100%, eliminating hollow spots and air gaps behind the tile. Those gaps are what cause tiles to crack under pressure and eventually fall. It takes less than a minute and makes a significant difference in how long the repair lasts.
Step 4 Press and Set the Tile
Press the tile firmly into position using both hands, applying steady even pressure across the entire face. Use a rubber mallet with a folded cloth over the tile to gently tap it flush with surrounding tiles. Insert tile spacers into all four joints, then secure the tile with painter’s tape anchored to the surrounding tiles while the adhesive cures.
How Long to Let the Adhesive Cure
Mastic needs at least 24 hours. Thinset mortar requires 24–48 hours. Epoxy varies by brand but generally needs 24 hours. The tile should feel completely immovable before moving on to grouting.
Step 5 Regrout the Tile
Once the adhesive has fully cured, remove the spacers and tape. Mix powdered grout with water to a smooth peanut butter consistency, or use pre-mixed grout straight from the container. Apply it with a rubber float at a 45-degree angle, pressing firmly into all four joints. Wipe excess grout off the tile with a damp sponge using circular motions, rinsing frequently. Once the grout haze dries — about 20–30 minutes — buff the tile clean with a soft dry cloth. Keep the area dry for at least 24 hours.
Step 6 Seal the Grout
Sealing is the final step most homeowners skip — and that’s a mistake. Unsealed grout absorbs moisture and soap residue, accelerating the same damage that caused the tile to fall in the first place. Once grout has fully cured — 24–72 hours — apply grout sealer carefully along each joint using a small applicator brush.
Wipe any sealer off the tile face immediately. Allow 24 hours before exposing the area to water. Reapply sealer once a year as part of your regular bathroom maintenance — it takes less than 10 minutes and keeps your tiles in place for years to come.
Common Mistakes to Avoid When Reattaching Bathroom Tiles
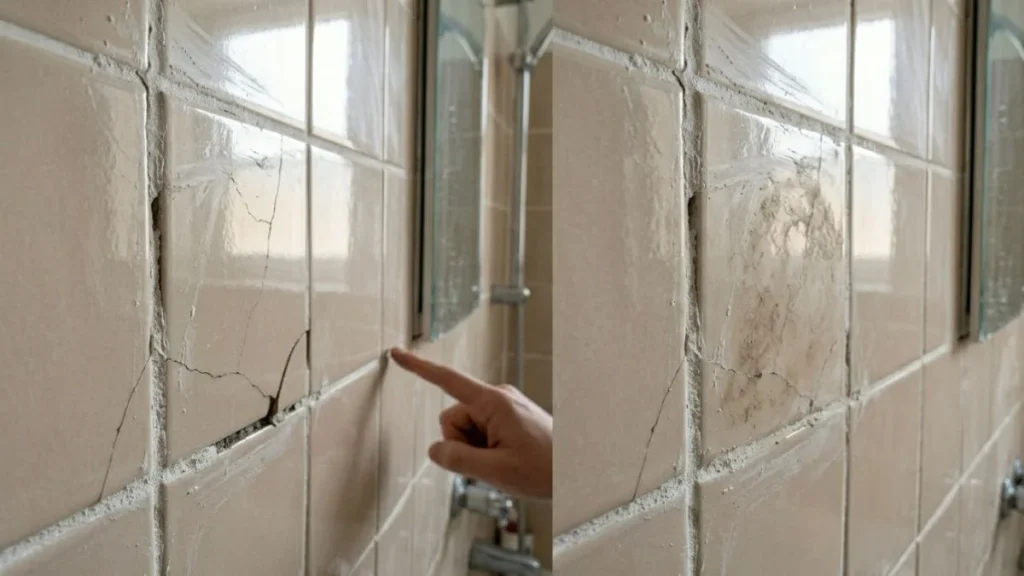
Even with the right tools and materials in hand, a few common mistakes can turn a straightforward tile repair into a recurring headache. Here’s what to watch out for before, during, and after the job.
Skipping Surface Preparation
This is the most common mistake — and the most costly. Applying fresh adhesive over old residue, dust, or a damp surface creates a bond that looks solid at first but fails within weeks. No matter how good your adhesive is, it cannot compensate for a poorly prepared surface. Always scrape, clean, and fully dry both surfaces before applying anything.
Using the Wrong Adhesive for the Environment
Using a general-purpose adhesive in a high-moisture bathroom is a recipe for repeat failure. Mastic softens under prolonged water exposure and should never be used in a shower or wet area. Always match your adhesive to the environment — epoxy or thinset for wet zones, mastic only for dry wall areas.
Not Allowing the Adhesive to Fully Cure
Grouting too soon can shift the tile out of position and weaken the bond before it’s fully formed. Always respect the manufacturer’s recommended curing time. When in doubt, wait a few extra hours — a tile cured for 36 hours is far more secure than one grouted at 20.
Applying Too Little or Too Much Adhesive
Too little adhesive creates hollow spots behind the tile that lead to cracking and failure. Too much squeezes into the grout lines, making grouting messy and difficult. Use the back-buttering technique with a notched trowel for full, even coverage every time.
Forgetting to Seal the Grout
Unsealed grout absorbs moisture, soap, and bacteria almost immediately — accelerating deterioration and allowing water back behind the tile. Sealing takes less than 10 minutes and protects your repair for months. There’s simply no good reason to skip it.
Reattaching a Tile Over a Damaged Wall Surface
Tiling over a moldy, soft, or water-damaged wall doesn’t fix the problem — it hides it. Trapped moisture will continue spreading, damaging surrounding walls and pushing more tiles off over time. Always address the underlying wall condition before reattaching anything.
How to Prevent Bathroom Tiles From Falling Off Again
Fixing a fallen tile is satisfying — but having to fix the same tile again six months later is not. With a little ongoing attention, keeping your bathroom tiles firmly in place is straightforward. These four habits make all the difference.
Regular Grout Inspection and Maintenance
Grout is your tile’s first line of defense against moisture. Inspect your grout lines every 6–12 months and look for cracks, crumbling sections, or gaps where grout has shrunk away from the tile edge.
These openings allow water to sneak behind tiles and silently weaken the adhesive bond over time. When you spot damaged grout, address it quickly — catching a small crack early takes 20 minutes to fix. Ignoring it can mean dealing with multiple fallen tiles down the road.
Improve Bathroom Ventilation
Steam and humidity are constant threats to tile adhesive, and poor ventilation allows them to build up and cause damage over time. Run your exhaust fan during every shower and keep it running for at least 15–20 minutes afterward.
If your bathroom doesn’t have an exhaust fan, installing one is one of the most worthwhile upgrades you can make — it significantly extends the life of your tiles, grout, and wall surfaces. Cracking a window after showering also helps when weather permits.
Fix Leaks Immediately
A slow hidden leak is one of the most damaging things that can happen to a tiled wall. Even a small, steady drip can saturate the wall behind your tiles over weeks and months, dissolving the adhesive bond and softening the surface beneath.
If you notice a tile becoming loose without obvious cause, water staining, a persistent musty smell, or soft spots on the wall — investigate immediately. Fixing a minor leak early is a simple job. Ignoring it can mean replacing entire sections of wall, not just tiles.
Use the Right Products From the Start
Prevention begins at installation. Always use waterproof adhesive and moisture-resistant grout in any bathroom setting, and use epoxy or thinset for shower walls and areas with direct water contact. Beyond installation, grout sealer is your most important preventive tool.
Apply it as soon as new grout has cured and reapply once a year going forward. It creates a protective barrier that blocks moisture from reaching the adhesive behind the tile — directly addressing the most common cause of tile failure.
When to Call a Professional
DIY tile repair works well for a single fallen tile with a clean, dry wall. But knowing when to step back and call a professional is just as important as knowing how to do the repair yourself.
If multiple tiles in the same area are falling off, it almost always points to a bigger underlying issue that fresh adhesive alone won’t solve. A soft or spongy wall surface signals moisture has penetrated deep enough to require drywall replacement — not just a tile fix.
Visible mold covering a large area should never be tiled over without proper professional remediation first. And if tiles keep falling off after repeated DIY attempts, a hidden leak or structural issue is almost certainly the real cause.
You Should Read Also: Avoid These Common Mistakes in Bathroom Remodeling
Conclusion
A fallen bathroom tile is one of those home repairs that looks intimidating but is completely manageable once you know what you’re doing. Clean the surface properly, use the right adhesive for your bathroom environment, let everything cure fully, regrout, and seal — follow those steps and the repair will last.
More importantly, take a few minutes to understand why the tile fell in the first place. That one extra step is what separates a permanent fix from a temporary one.
Keep up with your grout, run your exhaust fan, and reseal once a year. A little routine maintenance goes a long way toward making sure you never deal with this problem again.
If the wall behind the tile shows signs of moisture damage or mold, or if multiple tiles keep coming loose, don’t hesitate to call a professional. Some problems go deeper than the tile itself — and catching them early always saves money in the long run.