


Draining your water heater is an important part of keeping it working well and lasting longer. But what do you do if your water heater doesn’t have a floor drain?
It can feel tricky and even a little overwhelming. Don’t worry—you’re not alone, and this guide will show you exactly how to handle it step by step. By the end, you’ll know how to drain your water heater safely and easily, even without that convenient floor drain.
Preparing The Water Heater
Draining a water heater without a floor drain needs careful preparation to avoid water damage. Preparing the water heater is the first step to ensure safety and a smooth draining process. This involves turning off energy sources and stopping water flow. Proper preparation protects your home and the water heater from harm.
Turn Off Power Or Gas
Before draining the water heater, turn off its power source. Electric heaters must have their power switched off at the breaker panel. Gas heaters need the gas supply turned off at the valve.
Follow these steps:
- Locate the circuit breaker for the electric water heater.
- Flip the breaker switch to the OFF position.
- If you have a gas water heater, find the gas valve near the heater.
- Turn the gas valve handle clockwise until it stops.
Safety is crucial. Working on a water heater with power or gas on risks shock or fire. Here is a quick guide:
| Energy Type | Action | Why |
| Electric | Turn off breaker switch | Prevent electrical shock |
| Gas | Turn off gas valve | Avoid gas leaks or fire |
Double-check that the heater is off before proceeding. Never skip this step. It keeps you safe throughout the draining process.
Shut Off Water Supply
Stopping water flow into the heater is the next step. Locate the cold water shutoff valve, usually above the heater. Turn it clockwise to close the valve completely.
Here is how to do it:
- Find the pipe that brings cold water to the heater.
- Look for a valve handle or lever.
- Turn the handle clockwise to stop water.
Confirm water is off by opening a hot water faucet in your home. Water should stop flowing after a few seconds.
| Step | Action | Purpose |
| 1 | Locate cold water valve | Identify water supply to heater |
| 2 | Turn valve clockwise | Stop water flow into heater |
| 3 | Check hot faucet | Ensure water supply is cut off |
Do not drain the heater before shutting off water. Otherwise, the tank will refill, making draining impossible.
Alternative Drainage Methods
Draining a water heater without a floor drain can seem tricky. Many homes lack a built-in drain system in the water heater area. This makes removing water safely a challenge. Alternative drainage methods provide simple, practical ways to drain the tank without causing water damage. These methods use common tools and careful planning to guide water away from floors and walls.
Using A Bucket
Using a bucket is a straightforward way to drain a water heater without a floor drain. This method works best for small to medium-sized water heaters or when only partial draining is needed. Here is how to do it safely and efficiently:
- Choose a large, sturdy bucket with a capacity of at least 5 gallons.
- Turn off the water heater
- Attach a hose
- Open the pressure relief valve
- Open the drain valve slowly
- Empty the bucket carefully
This method requires patience, as you must empty the bucket multiple times. Keep towels or rags nearby to wipe any spills. Using a bucket allows control over water removal and prevents flooding in areas without drains.
Employing A Hose Extension
Using a hose extension improves water flow and directs it far from your water heater area. This method is ideal for draining larger water heaters or when the tank needs full emptying. Follow these steps:
- Attach a garden hose
- Extend the hose
- Ensure the hose end is lower
- Open the pressure relief valve
- Open the drain valve fully
- Monitor the hose
Tips for hose extension use:
| Tip | Reason |
| Use a clear hose | To watch the water flow and detect clogs early |
| Secure hose ends | Prevents water spills and hose movement |
| Check drainage location | Avoid flooding or water damage |
This method reduces manual labor and speeds up the draining process while keeping your home safe from water damage.
Creating A Temporary Drainage Area
When no floor drain exists, creating a temporary drainage area is an effective way to manage water discharge. This option works well if outdoor drainage is not available or if you want to protect flooring and walls inside. The process involves setting up a controlled space to collect and dispose of the water safely.
Steps to create a temporary drainage area:
- Lay down heavy-duty plastic sheeting
- Build a shallow containment border
- Place a large basin or tray
- Direct the water heater drain hose
- Monitor the water level
- Keep towels and mop nearby
This method requires attention and frequent water removal but prevents damage in areas without drains. It is a smart solution for temporary or one-time water heater draining needs.
Step-by-step Draining Process

Draining a water heater without a floor drain can seem tricky. The key is to control and direct the water safely. Follow each step carefully to drain your water heater smoothly and safely.
Connecting The Hose
Start by attaching a garden hose to the water heater’s drain valve. This hose will carry the water away from the heater. Choose a hose long enough to reach an outdoor area or a large bucket. A few important tips for this step:
- Check the hose for leaks before attaching it.
- Use a hose with a diameter that fits tightly on the valve.
- Point the hose end to a safe drainage spot, such as a driveway or a large container.
- Secure the hose firmly to avoid it coming loose during draining.
Ensuring a tight connection prevents spills and water damage. Take time to set this up before opening the valve.
Opening The Drain Valve
Next, open the drain valve carefully. This lets the water flow out through the hose. Follow these steps for a smooth process:
- Wear gloves to protect your hands from hot water.
- Slowly turn the drain valve handle counterclockwise.
- Allow water to start flowing gently into the hose.
- If water doesn’t flow, open a hot water tap inside your home to release pressure.
- Do not open the valve fully at once; open it gradually to avoid sudden water bursts.
Opening the valve slowly helps control water flow and prevents hose disconnection. Watch the water coming out to check for debris or sediment. Sediment build-up can clog the hose or valve. If you see a lot of sediment, consider flushing the heater more than once.
Keep monitoring the hose connection during this step. Tighten it if you notice leaks. Stay nearby until the heater is fully drained.
Managing Water Flow
Managing water flow is crucial without a floor drain. Use these methods to avoid spills and damage:
- Use a bucket or large container to catch water if you cannot drain outside.
- Empty the bucket regularly to prevent overflow.
- Direct the hose away from walls, furniture, and electrical outlets.
- Consider using a water pump if draining takes too long.
- Keep towels or rags nearby to clean up any spills quickly.
Here is a simple guide to managing water flow safely:
| Task | How to Do It |
| Water Collection | Place buckets under hose end and empty frequently. |
| Water Direction | Point hose outdoors or to a drainable surface. |
| Flow Control | Open valve slowly and adjust as needed. |
| Safety | Wear gloves and keep children away. |
Patience is key. Let the water flow steadily and check your setup often. This careful management prevents accidents and keeps the area dry.
Flushing Sediment Without A Floor Drain
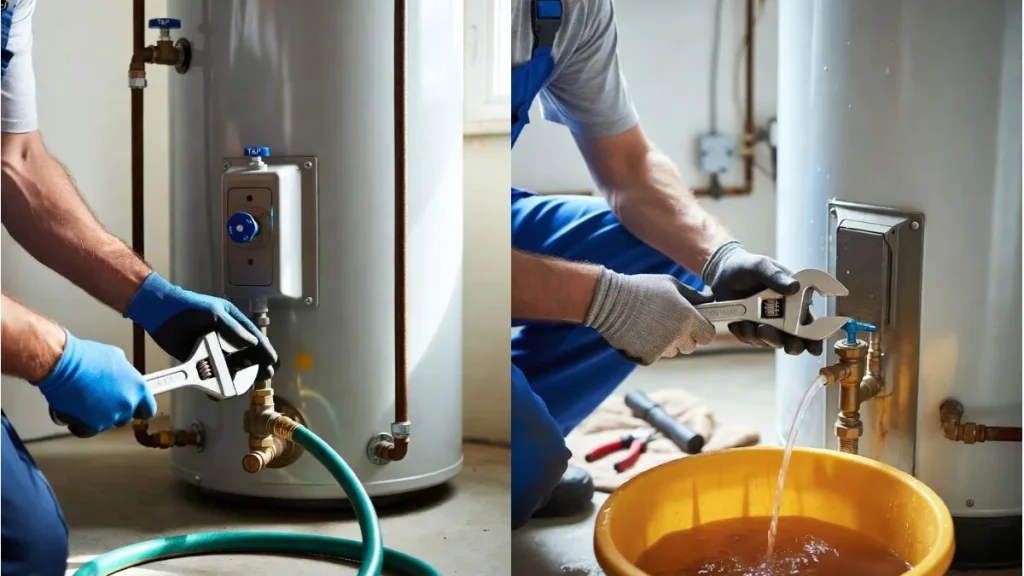
Flushing sediment from a water heater is important to keep it working well. Sediment builds up inside the tank and can cause problems like less hot water and damage. Draining the water heater usually needs a floor drain to let the water flow out easily. But many homes don’t have floor drains. This makes the task harder but not impossible. There are ways to flush out sediment safely without a floor drain. These methods help remove dirt and keep the heater running longer.
Using Multiple Buckets
Using buckets is a simple way to drain water from your heater when no floor drain exists. It takes some time and effort but works well for small to medium water heaters.
Steps to follow:
- Turn off the power or gas supply to the water heater.
- Close the cold water supply valve at the top of the heater.
- Attach a garden hose to the drain valve at the bottom.
- Place the hose end inside a large bucket.
- Open the drain valve slowly to let water flow into the bucket.
- When the bucket is full, close the drain valve and empty the bucket outside or in a utility sink.
- Repeat the process until most water is drained and sediment comes out.
This method works well if you are patient and careful. It avoids flooding and controls water flow easily. The main challenge is managing the weight of full buckets.
Flushing Through The Hose
Flushing sediment through a hose lets you direct water outside or to a safe drainage area. This method reduces manual work and is good for larger tanks.
How to flush with a hose:
- Turn off the heater’s power or gas supply.
- Shut off the cold water supply valve.
- Connect a garden hose securely to the water heater’s drain valve.
- Run the hose to an outdoor spot or a drain that can handle hot water.
- Open the drain valve slowly to start water flow through the hose.
- Open the cold water supply valve slightly to help flush out sediment.
- Let water run until it flows clear, showing sediment has cleared.
- Close the drain valve and remove the hose carefully.
Important safety points:
- Check the hose connection for leaks before starting.
- Do not let water flow into areas that can flood or get damaged.
- Wear gloves and eye protection to avoid hot water splashes.
- Keep children and pets away during flushing.
Flushing through a hose is faster and less messy than using buckets. It moves sediment out by using cold water pressure to clean the tank. This method works best with a long hose and a proper drain location.
Post-draining Steps
After draining a water heater without a floor drain, completing the post-draining steps is essential. These steps ensure the heater works properly and safely. Properly closing valves, refilling the tank, and restoring power or gas prevent damage and avoid accidents. Follow each step carefully to keep your water heater in good shape.
Closing The Valve
Once the water heater is fully drained, the first task is to close the drain valve. This step stops any remaining water from leaking out and prepares the heater for refilling. Leaving the valve open can cause water damage and reduce the heater’s efficiency.
Follow these simple tips when closing the valve:
- Turn the valve handle clockwise until it is tight but avoid forcing it.
- Check for any drips around the valve after closing it.
- Use a rag or towel to dry the area if water is present.
- Inspect the valve for any signs of damage or corrosion.
Refilling The Tank
After closing the drain valve, it is time to refill the water heater tank. Filling the tank slowly avoids air pockets that can cause noise or damage. The process requires patience and care to ensure the tank fills completely and safely.
Follow these steps to refill your tank:
- Turn on the cold water supply valve connected to the heater.
- Leave a hot water faucet open in your home to let air escape.
- Wait until water flows steadily from the faucet, showing the tank is full.
- Close the faucet after steady water flow.
Restoring Power Or Gas
With the tank full, restoring power or gas to the water heater is the last step. This step allows the heater to begin warming the water again. Take safety precautions to avoid accidents or damage during this stage.
Follow these safety tips when restoring power or gas:
- Ensure the tank is full before turning on power or gas.
- For electric heaters, switch on the circuit breaker or plug the heater back in.
- For gas heaters, turn the gas supply valve back on and relight the pilot light if needed.
- Never attempt to relight the pilot light if you smell gas. Call a professional immediately.
You May Also Like: Is An Expansion Tank Required For A Water Heater
Common Challenges And Tips
Draining a water heater without a floor drain presents unique challenges. Space limits and water control become major concerns. Knowing common issues helps avoid damage and extra work.
Handling Limited Space
Small utility rooms or tight corners make draining tricky. Moving around hoses and buckets can feel cramped. Clear the area first to create room for tools and water containers. Use compact equipment designed for tight spaces.
Tips for managing limited space:
- Use a flat, flexible hose: Easier to bend and fit in narrow spots.
- Place buckets strategically: Position buckets to catch water without blocking access.
- Work in stages: Drain water in small amounts to avoid heavy lifting and spills.
- Keep towels handy: Quickly soak up any water that escapes.
Planning your setup reduces stress. Organize tools before starting. Move slowly and carefully to avoid knocking over buckets or hoses.
Preventing Water Damage
Water can cause costly damage if not controlled. Without a floor drain, spills can spread quickly. Protect floors and walls before draining begins. Use waterproof barriers like plastic sheets or towels around the heater base.
Steps to prevent damage:
- Turn off power and water supply: Avoid accidents and unnecessary leaks.
- Place waterproof liners: Lay down sheets or trays under the heater.
- Use multiple containers: Catch water in stages to reduce overflow risk.
- Check hose connections: Ensure tight seals to prevent sudden leaks.
- Have a mop or wet vacuum ready: Clean up spills immediately.
Careful preparation keeps your home safe and dry. Watch for leaks during draining and act fast. This approach reduces cleanup time and protects your property.
Conclusion
Draining a water heater without a floor drain is doable with the right steps. Use a garden hose and direct water outside or to a safe spot. Take your time and follow safety tips carefully. This helps keep your water heater working well and lasts longer.
Regular draining prevents buildup and improves efficiency. Small effort, big benefits. Now you know how to handle this task with no floor drain around. Keep your home safe and your water heater healthy.


