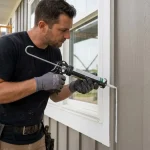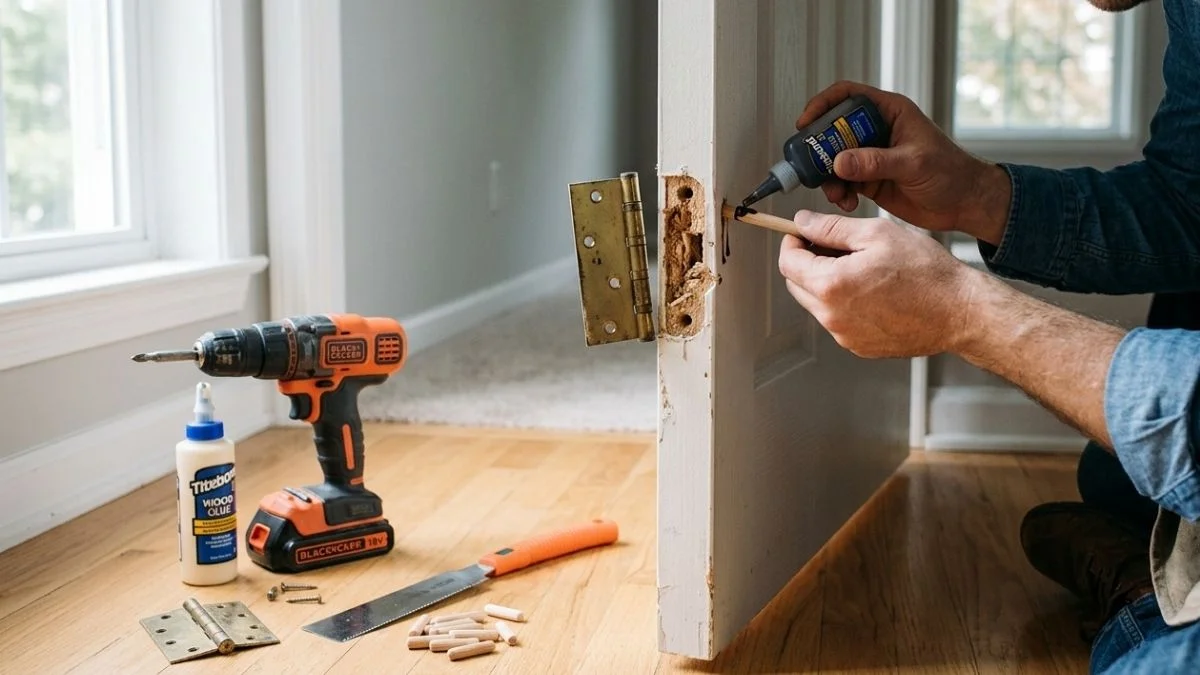
A hollow door hinge repair costs under $10 in materials — a fraction of the $150–$300 a carpenter charges to replace the door entirely.
When hinge screws pull out of a hollow-core door, the hole enlarges and the screw spins freely, leaving the door sagging, dragging the floor, or swinging loose from the frame.
This guide covers 4 proven repair methods, ranked by difficulty, so you can pick the right fix and complete it today.
Why Hollow Doors Fail at Hinge Holes
Hollow-core doors have a thin wood veneer skin — typically 3mm thick — stretched over a cardboard honeycomb or lightweight wood lattice interior. There is almost no solid wood directly behind the hinge zone, except for small embedded wood blocks placed during manufacturing. Those blocks are often only 1–2 inches wide, and hinge screws frequently miss them entirely.
The Structural Problem
When a screw threads into that honeycomb core, it grips the veneer and whatever thin material surrounds it. Every time the door swings, the hinge transfers load directly to those screws. Over time — especially on heavy doors or high-traffic entries — that load enlarges the screw hole. The wood fibers compress and crumble, turning a tight grip into a loose spin.
How to Recognize a Stripped Hinge Hole
The signs are consistent across nearly every case:
- The screw turns without resistance and never tightens
- The hinge plate shifts or rocks when you open and close the door
- A visible gap opens between the hinge leaf and the door edge
- The door sags, drags along the floor, or fails to latch
Why Simply Tightening Fails
Driving a longer or wider screw into a stripped hole feels like a fix but rarely holds. The surrounding core material is already compromised — it crumbles under renewed pressure instead of gripping the new screw threads. This is why hollow core door screw hole repair requires rebuilding the hole material itself, using methods like the toothpick method, wooden dowels, or wood filler before re-drilling and resetting the hinge.
Method 1: Wooden Dowel Pin Repair (Gold Standard)
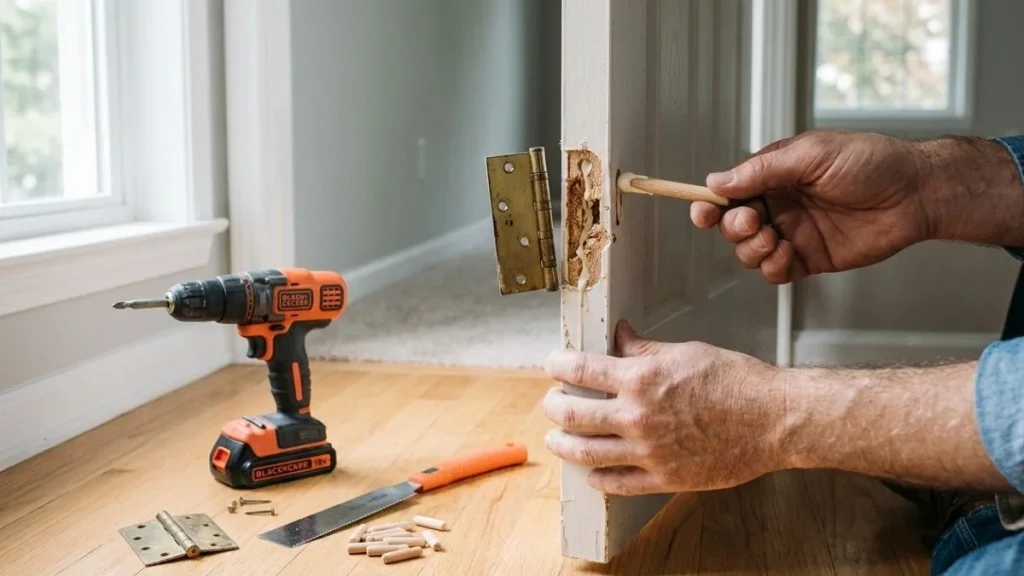
The wooden dowel pin method is the most durable hollow door hinge repair available to a DIYer. It replaces the compromised core material with solid wood, giving the reinstalled screw fresh, dense fiber to grip.
Tools and Materials
| Item | Specification |
|---|---|
| Wooden dowel | 3/8″ or 1/2″ diameter hardwood |
| Drill bit | Spade or Forstner bit matching dowel diameter |
| Adhesive | Titebond II or equivalent carpenter’s wood glue |
| Sandpaper | 80–120 grit for flush trimming |
| Saw or chisel | For cutting dowel flush with door edge |
Step-by-Step Process
- Drill out the stripped hole to match your dowel diameter — use a Forstner bit for a clean, flat-bottomed cavity.
- Coat the dowel generously with carpenter’s glue and tap it into the hole with a mallet until fully seated.
- Cut the dowel flush with the door edge using a chisel or flush-cut saw.
- Sand smooth, then let the glue cure fully — Titebond II requires 24 hours minimum under normal conditions.
- Re-drill a new pilot hole through the cured dowel at the original screw angle, sized slightly smaller than your screw shank.
- Drive the hinge screw into the pilot hole and reinstall the hinge plate.
Drying and Re-Installation Timing
Skipping the cure window is the most common mistake. Glue that hasn’t fully set will compress under screw torque, and you’ll strip the new material just as fast as the original. If the original hole is severely enlarged — wider than 3/4″ — offset the new pilot hole by 1/2″ to center it in solid dowel material rather than the edge.
Method 2: Toothpick and Glue Quick Fix
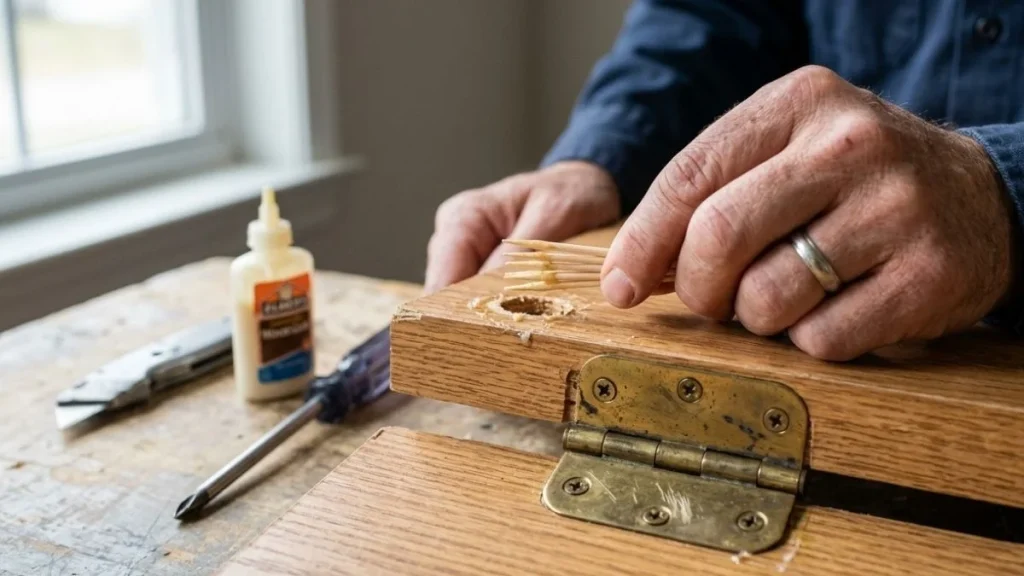
The toothpick method is the fastest no-power-tool fix for a stripped hinge screw hole, and it works reliably on light-duty interior hollow-core doors where only one or two screws have pulled out.
When This Method Makes Sense
Reach for toothpicks when:
- The stripped hole is small — roughly the original screw diameter, not visibly enlarged
- Only one screw per hinge has failed, not multiple
- The door is lightweight (standard interior hollow-core, not a solid or fire-rated door)
- You need a same-day fix without a drill or specialty bits
Step-by-Step Process
- Bundle 3–5 round wooden toothpicks together and dip them in carpenter’s glue — Elmer’s Wood Glue or Titebond both work here.
- Push the glue-coated bundle firmly into the stripped hole until packed tight.
- Snap or trim the toothpicks flush with the door edge.
- Drive the original hinge screw back in immediately, before the glue sets. The screw threads bite into the fresh wood fibers and glue matrix as it cures around them.
- Hold the hinge plate in position for 60 seconds, then avoid heavy use for at least 2 hours.
Honest Limitations
The toothpick fix fills the hole but doesn’t deliver the density of a proper wooden dowel pin repair. On a busy door — a bathroom used by multiple people, a closet that gets slammed — expect to repeat this repair within 6–18 months. It also won’t work if the door hinge hole enlargement is already wider than about 1/4″ beyond the screw diameter. At that point, the dowel method or wood filler approach is the right call.
Method 3: Wood Filler and Plastic Plugs
Wood filler and plastic plug kits sit between the toothpick method and the dowel repair in both durability and effort. They’re widely available at hardware stores like Home Depot and Lowe’s, and they require no special bits or precise hole-drilling.
Two Product Types to Know
Plastic anchor plugs — sold in hinge repair kits like the Onward Hardware Hinge Bolt Kit — are small ribbed plastic inserts that press directly into the stripped hole. They grip the surrounding material and give the screw fresh threads to bite into. These work best when the hollow core door screw hole hasn’t enlarged significantly beyond the original screw gauge.
Wood filler compounds — products like DAP Plastic Wood or Minwax High Performance Wood Filler — pack into the hole, cure hard, and get re-drilled once set. They bond to whatever remaining wood fiber surrounds the hole, essentially casting a new substrate in place.
Step-by-Step Process
- Clean debris and loose material from the stripped hole using a pick or thin screwdriver.
- For plastic plugs: press the plug firmly into the hole until flush, then drive the hinge screw directly into the plug center.
- For wood filler: pack the compound into the hole with a putty knife, slightly overfilling. Let cure per product specs — DAP Plastic Wood dries in 2–4 hours under normal conditions.
- Once cured, re-drill a clean pilot hole through the filler at the correct diameter for your screw gauge.
- Reinstall the hinge and drive screws to snug — avoid overtightening, which can crack the filler.
Realistic Lifespan
Wood filler repair typically holds 2–5 years on a lightly used interior door. It won’t match the long-term holding power of a hardwood dowel because filler compounds lack cross-grain wood fiber structure. For hinge screws pulled out on a high-traffic door, treat this as a medium-term solution and plan to revisit.
Prevention and Long-Term Solutions
Fixing a stripped hinge hole once is straightforward. Fixing the same hole three times means the installation method — not just the hole — needs to change.
Proper Installation Technique
Pre-drilling a pilot hole is the single most effective way to prevent door hinge hole enlargement before it starts. The pilot hole should be slightly undersized — typically 1/16″ smaller in diameter than the screw shank — so the threads cut cleanly into wood fiber rather than forcing it apart. Splitting the thin veneer layer or compressing the honeycomb core is almost always caused by driving screws without a pilot hole.
Overtightening is the second leading cause of stripped screw holes on hollow-core doors. Use the hand-tight-plus-quarter-turn rule: snug the screw until resistance builds, then turn no more than 1/4 rotation further. Power drivers set to a low torque clutch setting — around 4–6 on most cordless drills — prevent the sudden over-drive that collapses the core material instantly.
Balanced door alignment also reduces long-term hinge strain. A door that drags the floor or catches the frame on closing transfers lateral load directly into the hinge screws on every cycle.
When Repair Won’t Work
Some situations go beyond what any DIY hollow door hinge repair method can solve:
- Multiple consecutive holes stripped along the same hinge mortise — there’s no solid material left to anchor into
- Frame rot or water damage behind the hinge zone, which no filler or dowel can structurally compensate for
- Soft-close hinge mechanisms requiring millimeter-precise screw placement that a relocated pilot hole disrupts
At that point, the cost comparison shifts. A new hollow-core interior door runs $50–$150 at Home Depot. A carpenter’s installation labor adds $100–$200. That’s still less than $350 total — often cheaper than repeated repairs on a door that’s fundamentally compromised.
Common Repair Failures and Fixes
Most hollow door hinge repair failures trace back to one of three mistakes: rushing the cure time, mismatching materials to hole size, or ignoring hinge hardware compatibility before re-drilling.
Screw Still Spins After Repair
This almost always means one of two things. Either the dowel or filler didn’t cure fully before the screw was driven — the material compressed under torque instead of gripping the threads — or the pilot hole drilled through the repair was too large, leaving no wood fiber for the screw to bite into.
The fix: remove the screw, assess the repair material. If it feels soft or crumbly, the cure was incomplete. Strip it out, repack with fresh carpenter’s glue and a correctly sized wooden dowel, and wait the full 24–48 hours before re-drilling. Size the new pilot hole at least 1/16″ smaller than the screw shank diameter.
Hinge Re-Pulls After Several Weeks
When a repaired hinge screw pulled out hollow door again within weeks, insufficient glue coverage is usually the cause. A thin coat on the dowel surface bonds only to the outermost contact ring — the interior of the hole gets no adhesion. The dowel loosens under cyclical load and the screw follows.
Re-do the repair with glue applied both inside the drilled cavity and across the full dowel surface before insertion. Titebond II specifically resists the shear forces that door hinges generate repeatedly.
Soft-Close Hinge Incompatibility
Soft-close and concealed European hinges — brands like Blum and Grass — use precise screw geometry that an offset pilot hole disrupts. Before re-drilling hinges on any door fitted with these mechanisms, confirm the new hole location still falls within the hinge plate’s adjustment range. Blum hinges typically allow 3mm of lateral adjustment. If your offset exceeds that, the hinge won’t seat correctly regardless of how solid the repair material is.
Read Also: Repair Cabinet Door Hinge Holes Particle Board
FAQ
What size dowel should I use for hollow door hinge repair?
Use a 3/8″ hardwood dowel for standard hinge screw holes, or step up to 1/2″ if the hole has enlarged beyond the original screw diameter. Match your Forstner or spade bit exactly to the dowel diameter so the fit is snug without forcing.
How long does wood glue take to dry in hinge holes?
Titebond II and most carpenter’s glues reach handling strength in 1 hour but require a full 24 hours to cure before you drill or drive screws into the repair. Forcing the process early compresses the uncured glue and defeats the repair entirely.
Can you repair stripped screw holes multiple times on the same door?
A dowel repair can be done once per hole location effectively — after that, there’s typically not enough surrounding material to support another dowel of the same diameter. If the same hole fails twice, offset the new pilot hole by at least 1/2″ or evaluate whether the door itself needs replacement.
Is the toothpick method a permanent fix?
No. The toothpick method is a reliable short-term fix for small, lightly stripped holes on interior doors, but it lacks the wood density to hold long-term on high-traffic doors. Expect 6–18 months of hold before the repair needs repeating or upgrading to a dowel solution.
Get Your Door Hinges Holding Tight Again
The material inside a stripped hole — not the screw itself — determines whether any repair holds, which is why rebuilding that material with a hardwood dowel and carpenter’s glue outperforms every shortcut. Pick up a 3/8″ hardwood dowel, a bottle of Titebond II, and a matching Forstner bit for under $15 total, and most repairs are complete in under an hour of active work plus a 24-hour cure.