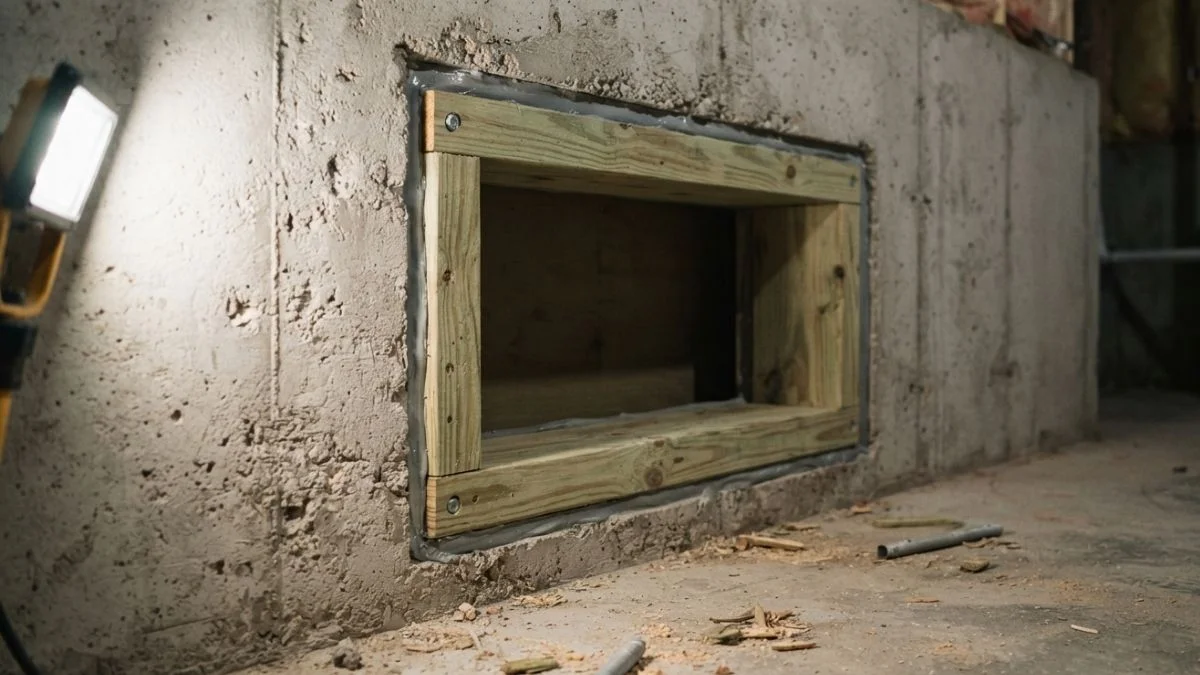
Framing a basement window in concrete fails most often because of moisture damage and improper fastening — not because the process is too complicated.
The real problem is that standard carpentry skills don’t transfer cleanly to concrete walls: wood selection, anchor placement, and moisture barriers all follow different rules underground, and one wrong material choice can mean rotted framing within a few years.
Follow this guide and you’ll know exactly which materials to buy, how to fasten wood securely to concrete, and which mistakes to avoid before you drive a single fastener.
Why Treated Lumber Is Non-Negotiable
Concrete wicks moisture constantly, even when it looks dry. Any wood that contacts a concrete wall — directly or through indirect humidity — will absorb that moisture over time. Untreated dimensional lumber in contact with concrete typically rots within 1 to 2 years, leaving the window buck (the wooden frame built inside the concrete opening) structurally useless.
What “Pressure-Treated” Actually Means
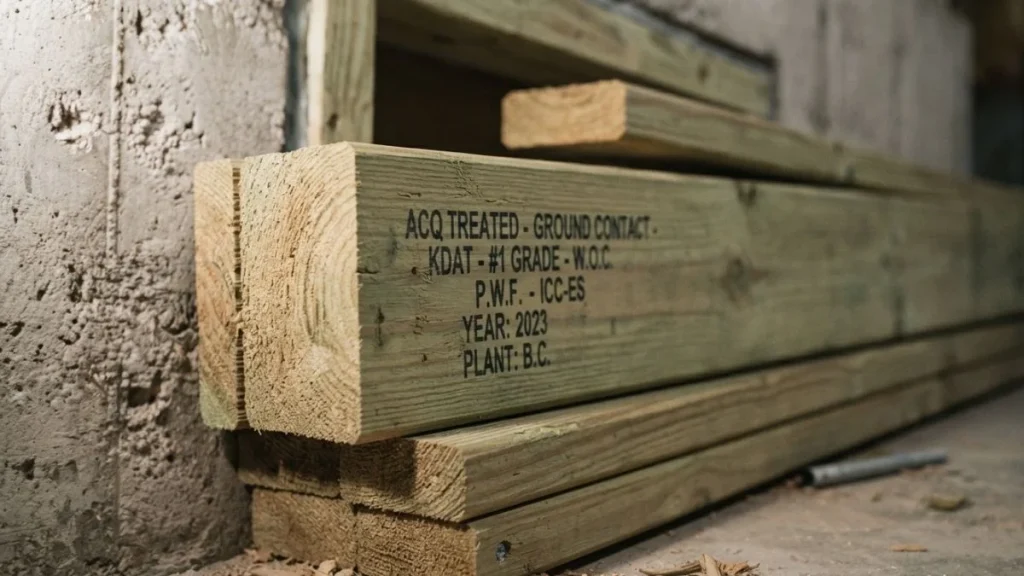
Pressure-treated lumber is wood forced to absorb a preservative — most commonly alkaline copper quaternary (ACQ) — under high pressure. This treatment resists fungal decay and insect damage, both common in below-grade environments. For basement window framing in concrete, look for lumber stamped “UC4A” or “UC4B,” which indicates it’s rated for ground or concrete contact. Standard “above-ground” treated lumber rated UC3B is not sufficient here.
Choosing the Right Lumber Size
Most standard basement windows use a window buck frame built from 2×6 or 2×8 pressure-treated lumber. The depth of the buck should match the thickness of your concrete wall so the window sash sits flush and weather sealing is possible on both the interior and exterior faces. Measure your wall thickness before buying lumber — concrete basement walls typically run 8 to 12 inches thick.
Pressure-Treated vs. Cedar or Redwood
Cedar and redwood are naturally rot-resistant and easier to work with than ACQ-treated lumber, which can corrode certain fasteners. The trade-off is cost: cedar and redwood run 30 to 50 percent more than pressure-treated pine. For most DIYers, pressure-treated lumber is the practical choice — just use hot-dipped galvanized or stainless steel fasteners to avoid corrosion from the ACQ chemicals.
Anchoring Framing to Concrete: Methods and Tradeoffs
Attaching wood framing to concrete requires mechanical fasteners rated for concrete — construction adhesive alone will not hold a window buck securely over time, especially with seasonal temperature swings and moisture cycling.

Fastener Types and Load Capacity
| Fastener | Best Use | DIY-Friendly | Notes |
|---|---|---|---|
| Tapcon screws | Primary anchor for window framing | Yes | 3/16″ size handles most residential loads |
| Lag bolts with sleeve anchors | Heavy loads, thicker frames | Moderate | Requires precise pre-drilling |
| Construction adhesive | Supplementary only | Yes | Never use as sole fastener |
| Wedge anchors | Commercial/structural applications | No | Overkill for residential window bucks |
Tapcon screws are the standard choice for DIY basement window installation in concrete. The 3/16-inch diameter Tapcon carries a shear load of roughly 270 pounds in 2,000 PSI concrete — more than sufficient for a window buck frame in a residential basement wall.
Installation Technique
Drilling technique matters as much as fastener choice. Use a hammer drill (not a standard drill) with a carbide-tipped masonry bit sized to match the Tapcon packaging — typically a 5/32-inch bit for 3/16-inch Tapcons. Drill at least 1/4 inch deeper than the fastener’s embedment length to clear concrete dust from the hole.
Space fasteners every 16 to 24 inches along each frame member. Drive Tapcons until snug — stop the moment resistance increases sharply. Over-torquing strips the concrete threads and destroys the anchor point entirely, requiring you to relocate the fastener.
Step-by-Step Installation Process
Work through each phase in order. Skipping ahead — especially on waterproofing — is the single most common reason a finished basement window fails within the first few winters.
Pre-Installation Setup
Measure the concrete opening in 3 places for both width and height: top, middle, and bottom. Use the smallest measurement to size your window buck frame. Also measure wall depth from the exterior face to the interior face — this determines your lumber width. Inspect the concrete for cracks wider than 1/8 inch, spalling (flaking surface), or active moisture stains. Active water intrusion must be addressed before framing begins. Remove any existing frame completely, cutting flush with an oscillating tool and scraping old sealant clean.
Frame Assembly and Positioning
Build the buck frame on a flat surface before placing it in the opening. Pre-assembling off-site gives you a square, tight frame that’s easier to adjust than one built piece-by-piece inside the wall. Cut sill, head, and two side jamb pieces from pressure-treated lumber, then fasten corners with structural screws. Set the assembled frame into the opening, shim it plumb and level on all planes, and clamp it temporarily. Drive Tapcon screws through the frame into concrete starting at the sill, checking level after every 2 fasteners.
Waterproofing the Frame-Concrete Interface
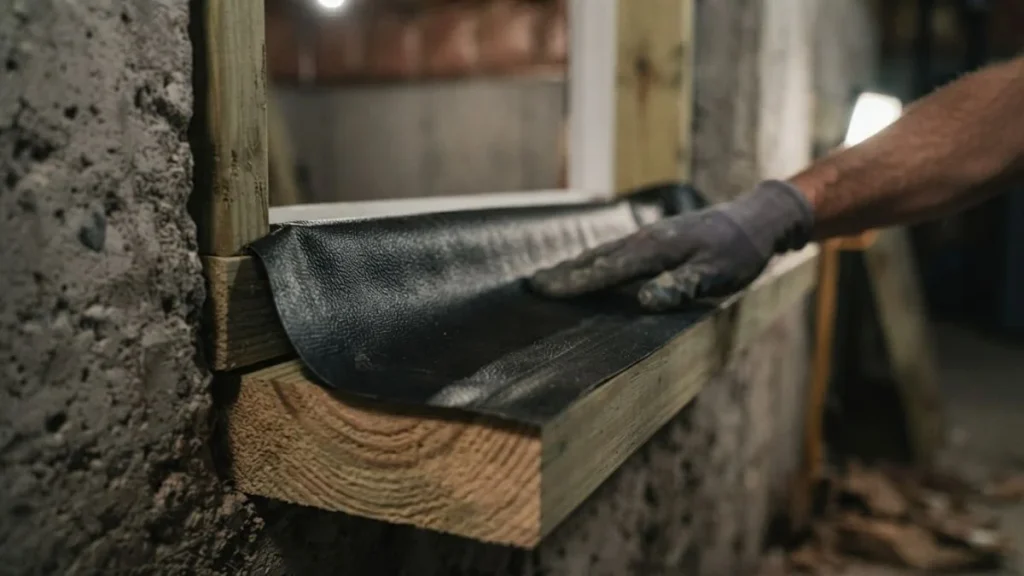
Install self-adhering pan flashing across the sill before setting the window sash — this directs any infiltrating water outward. Apply polyurethane caulk (Sika or Tremco are reliable brands) around the full exterior perimeter where the window buck meets concrete. On the interior side, fill gaps with foam backer rod first, then caulk over it. Never seal the interior completely before confirming the exterior drainage plane slopes away from the opening.
Common Mistakes That Compromise the Installation
Most framing failures aren’t caused by difficult conditions — they’re caused by shortcuts that seem harmless at the time. These 5 mistakes show up repeatedly in failed basement window installations.
Using the Wrong Lumber
Untreated lumber in contact with a concrete wall will begin absorbing moisture immediately. Visible rot typically appears within 12 to 24 months, but structural degradation starts sooner. Even “interior” framing lumber placed near — but not touching — concrete can fail if basement humidity runs consistently above 70 percent. Use pressure-treated lumber rated UC4A or UC4B for every piece of the window buck, without exception.
Inadequate Fastening
Too few Tapcon screws, or screws spaced wider than 24 inches, allows the frame to shift during window sash installation and over seasonal cycles. A shifted frame binds the window sash, breaks the weather sealing, and creates gaps for water entry. Follow the 16-to-24-inch spacing rule on every member, including the sill.
Skipping or Rushing Waterproofing
Omitting pan flashing under the sill is the fastest path to hidden rot behind finished walls. Water that enters the frame-concrete interface has nowhere to go except into the wood and surrounding structure. Apply flashing and polyurethane caulk before the window goes in — retrofitting it afterward is nearly impossible.
Shimming Only at Corners
A window buck shimmed only at its 4 corners will rack (twist out of square) under the weight of a window sash. Place shims every 16 inches along the sill and head jamb, not just at corners.
Mounting the Frame Flush to the Exterior Face
Positioning the buck frame flush with the exterior concrete face leaves no room for pan flashing, drip caps, or exterior trim adjustments. Set the frame back at least 1/2 inch from the exterior face to create a proper ledge for flashing and weather sealing.
Tools, Materials, and Time Estimates
Having the right tools before you start prevents mid-project trips to the hardware store that break your workflow and add hours to the job.
Essential Tools
- Hammer drill: Required for hard concrete. A standard cordless drill won’t generate enough impact to drive a masonry bit cleanly — it will overheat and stall. Milwaukee and DeWalt both make reliable hammer drills in the $150–$200 range.
- Carbide-tipped masonry bit set: Match bit diameter to your Tapcon size (5/32-inch bit for 3/16-inch Tapcons).
- 24-inch level: Shorter levels miss rack and bow in longer frame members.
- Oscillating multi-tool: Needed for cutting out old frames and trimming shims flush.
- Caulking gun, utility knife, pry bar, dust mask, safety glasses: Standard but non-negotiable on a concrete wall penetration job.
Materials Checklist
| Material | Quantity Guidance |
|---|---|
| Pressure-treated lumber (2×6 or 2×8) | Measure opening perimeter + 20% waste |
| Tapcon screws (3/16″ x 2-3/4″) | 1 screw per 16–24 inches of frame perimeter |
| Polyurethane caulk (Sika or Tremco) | 1 tube per window |
| Foam backer rod (3/8″ diameter) | Match gap width at frame-concrete interface |
| Self-adhering pan flashing | Sill width + 6 inches overlap each side |
| Shims (composite, not wood) | 1 pack per window |
Use composite shims rather than wood — wood shims compress and rot at the concrete interface over time.
Labor Time Estimates
A first-time DIYer should budget 8 to 10 hours per window, including measuring, frame assembly, fastening, and waterproofing. An experienced DIYer familiar with concrete anchors and window buck assembly can complete the same job in 4 to 6 hours. Installing a second window in the same session typically runs 25 to 30 percent faster as technique and material layout improve.
Recommended: How to Replace Metal around Basement Windows
Ready to Finish Your Basement Right
Pressure-treated lumber, properly spaced Tapcon screws, and pan flashing at the sill are the 3 decisions that determine whether a basement window frame lasts 20 years or fails in 2. Before buying materials, measure your concrete wall thickness at the rough opening and confirm your lumber width matches — that single measurement drives every other material choice on the list. Get that number right first, and the rest of the installation follows a clear, repeatable sequence.