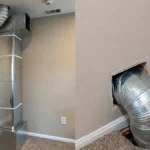
Are you struggling to keep your room cool without making a mess? Ducting a window air conditioner might be the simple solution you need.
When done right, it helps direct the cool air exactly where you want it, boosts efficiency, and keeps your space comfortable all day long. You’ll discover easy steps to set up ducting for your window AC, saving you money and hassle.
Choosing The Right Window AC

Ducting a window air conditioner can improve the cooling distribution in your room. Choosing the right window AC is essential for effective cooling and energy savings. The right unit matches your space size, power needs, and budget. Understanding different types, sizes, and energy ratings helps you pick the best option.
Types Of Window Air Conditioners
Window air conditioners come in several types, each with unique features. Choose a type based on your room size, installation ease, and cooling needs. The main types include:
- Standard Window AC: Fits into a window frame. Easy to install and affordable. Best for single rooms.
- Through-the-Wall AC: Installed through a wall opening. Offers permanent cooling but needs professional help to install.
- Portables with Window Kit: Portable units that vent hot air through a window kit. Flexible but less efficient than window models.
- Inverter Window AC: Uses inverter technology to save energy by adjusting compressor speed. Runs quieter and uses less power.
Sizing Your AC Unit
Choosing the correct size is crucial. A unit too small will not cool well. A unit too large wastes energy and costs more.
Use the room size to find the right power, measured in BTUs (British Thermal Units). Follow this basic guide:
- Up to 150 sq. ft: 5,000 BTU
- 150 – 250 sq. ft: 6,000 BTU
- 250 – 350 sq. ft: 8,000 BTU
- 350 – 450 sq. ft: 10,000 BTU
- 450 – 550 sq. ft: 12,000 BTU
Consider other factors that affect sizing:
- Sunlight exposure: Rooms with direct sunlight may need a higher BTU unit.
- Ceiling height: Higher ceilings increase room volume and cooling needs.
- Number of occupants: More people generate more heat.
- Appliances and electronics: Devices add heat to the room.
Use this sizing formula for more accuracy:
BTU = Room Area (sq. ft) × 25 to 30
Always check the manufacturer’s size recommendations before purchase.
Energy Efficiency Considerations
Energy efficiency lowers electricity bills and reduces environmental impact. Look for units with a high Energy Efficiency Ratio (EER) or Seasonal Energy Efficiency Ratio (SEER).
Important points:
- Energy Star Rating: Units with this label meet strict efficiency standards.
- Inverter Technology: Saves power by adjusting cooling output.
- Programmable Thermostats: Help control temperature and reduce waste.
- Sleep Mode: Lowers energy use during night.
Preparing The Installation Site
Preparing the installation site is a crucial step before ducting a window air conditioner. Proper preparation ensures the unit fits well, works efficiently, and lasts longer. It also helps avoid common problems like air leaks, water damage, or poor cooling performance. Taking time to get the site ready makes the whole installation smoother and safer.
Measuring Window Dimensions
Accurate measurements of the window are essential for fitting the air conditioner and ducting properly. Use a tape measure to get the width, height, and depth of the window frame. Measure the inside of the window opening, not just the glass area.
- Width: Measure from the left to the right inside edges.
- Height: Measure from the bottom to the top inside edges.
- Depth: Measure how far the window frame extends inward.
Write down these numbers and compare them with the air conditioner’s size. Check the product manual for minimum and maximum window sizes it supports.
| Measurement | How to Measure | Why It Matters |
| Width | Inside window frame from left to right | Ensures unit fits horizontally without gaps |
| Height | Inside window frame from bottom to top | Prevents vertical gaps and ensures stability |
| Depth | Window frame thickness | Needed for proper duct installation and support |
Double-check measurements to avoid buying the wrong size. Accurate sizing saves time and money.
Clearing The Area
Clear the installation site to create a safe and easy workspace. Remove furniture, curtains, and decorations near the window. This allows easy access to the window and prevents damage during installation.
Keep the area free from dirt and dust. Clean window sills and frames to help the unit seal tightly. A clean surface also helps weatherproof materials stick better.
- Move objects at least 3 feet away from the window.
- Vacuum or wipe down window frames and sill.
- Check for fragile items that could fall during installation.
- Ensure there is enough space outside for the ducting.
Clearance outside is important. Make sure no plants, wires, or obstacles block the window’s outside part. This helps airflow and prevents damage to the duct.
Weatherproofing Tips
Weatherproofing stops air leaks and water from entering around the air conditioner. Proper sealing keeps your home comfortable and protects walls and floors.
Use weatherstripping or foam tape to seal gaps between the window frame and the air conditioner. These materials are easy to apply and create a tight fit.
Consider these weatherproofing steps:
- Apply self-adhesive foam strips around the unit edges.
- Use waterproof caulk on small cracks or holes.
- Install a window insulation panel or plastic film during winter.
- Check seals regularly for wear or gaps.
Installing The Window Ac Unit

Installing the window air conditioner correctly is essential for its performance and energy efficiency. A well-installed unit keeps your room cool and prevents air leaks. This process involves placing the AC unit securely, ensuring it is stable, and sealing all gaps around it. Proper installation also helps avoid water damage and noise issues. Follow these steps to install your window air conditioner with ducting effectively.
Positioning The Unit
Start by choosing the right window for your air conditioner. The window should be close to an electrical outlet to avoid using long extension cords. The unit must fit the window size, so measure the window width and height before buying.
Place the AC unit so that it tilts slightly outside. This angle lets water drain outside, preventing leaks inside the room.
- Check window type: Sliding or double-hung windows work best.
- Measure carefully: Measure the window frame width and height.
- Ensure support: The window sill must be strong enough to hold the unit.
- Consider sunlight: Avoid direct sunlight on the unit for better cooling.
Securing The AC In Place
Once positioned, secure the air conditioner to keep it stable and safe. A loose unit can fall or let hot air inside.
Follow these steps to secure the unit:
- Lower the window sash until it rests on the top of the AC unit.
- Use brackets or mounting hardware included with the unit.
- Attach support brackets underneath the unit if needed.
- Tighten screws on the side panels to fix the unit in place.
- Check the unit’s balance to maintain the slight outward tilt.
Proper securing prevents vibrations and noise. It also keeps the air conditioner from falling during strong winds or storms.
Sealing Gaps And Openings
After securing the unit, seal all gaps around it to stop air leaks. Gaps let warm air in and cool air out, reducing efficiency.
Use these materials to seal gaps:
- Foam insulation strips
- Weatherstripping tape
- Silicone caulk
- Plastic panels or side curtains
Steps to seal gaps:
- Insert foam strips between the window frame and the AC side panels.
- Apply weatherstripping tape along the top and sides of the window sash.
- Fill any small cracks with silicone caulk for a tight seal.
- Use plastic panels or side curtains to cover larger openings.
Ducting Options For Window Acs

Ducting a window air conditioner helps direct cooled air to specific areas. This improves comfort and efficiency. Choosing the right ducting option is key for good airflow and easy installation. Various duct types work well with window ACs. Each has pros and cons based on space, cost, and performance.
Types Of Ducts Suitable For Window Units
Window air conditioners can use different duct types to move cold air. The main types include flexible ducts, rigid ducts, and insulated ducts. Each type fits certain room layouts and installation styles.
- Flexible Ducts: Made from plastic or metal with a wire coil. These ducts bend easily around corners.
- Rigid Ducts: Usually made of sheet metal or PVC. They have a fixed shape and size.
- Insulated Ducts: Can be flexible or rigid but include insulation. They reduce heat gain or loss.
Flexible ducts are popular for their ease of use. They adapt to tight spaces and bends. Rigid ducts are more durable and offer less air resistance. Insulated ducts help keep the air cooler during delivery.
| Duct Type | Material | Shape | Common Use |
| Flexible Duct | Plastic, Metal | Round, Bendable | Short runs, Complex paths |
| Rigid Duct | Sheet Metal, PVC | Rectangular or Round | Long runs, Straight paths |
| Insulated Duct | Flexible or Rigid with Insulation | Varies | Energy efficiency, Temperature control |
Advantages And Disadvantages Of Each
Each duct type has benefits and drawbacks. Flexible ducts save time and effort during installation. They fit in small spaces and corners easily. But they can sag or get damaged, reducing airflow. Also, they may wear out faster than rigid ducts.
Rigid ducts provide better airflow because they stay open and smooth inside. They last longer and are less likely to leak air. The downside is their installation is harder and needs more space. Cutting and sealing rigid ducts requires tools and skills.
Insulated ducts keep air cooler for longer distances. This improves cooling efficiency, especially in hot spaces. They also reduce noise from airflow. Insulated ducts cost more and are bulkier than non-insulated ones. Installation can be tricky if space is limited.
| Duct Type | Advantages | Disadvantages |
| Flexible Duct | Easy to install, Flexible, Fits tight spaces | Can sag, Lower durability, Reduced airflow |
| Rigid Duct | Better airflow, Durable, Low air leaks | Hard to install, Requires more space, Needs tools |
| Insulated Duct | Keeps air cool, Reduces noise, Energy efficient | More expensive, Bulkier, Complex installation |
Choosing The Best Ducting Route
Picking the right ducting route affects AC performance and ease of installation. Short, straight routes are best for airflow. Avoid too many bends or long runs to reduce air loss. Measure the space carefully before planning the path.
Consider these tips:
- Plan for minimal bends. Each bend reduces airflow and cooling power.
- Use existing cavities. Walls, ceilings, or crawl spaces can hide ducts.
- Avoid hot areas. Keep ducts away from heat sources to maintain cool air.
- Check accessibility. Routes should allow for future maintenance.
- Seal all joints. Prevent air leaks along the ducting path.
Use proper supports to keep ducts in place and prevent sagging. Flexible ducts need more support than rigid ones. Also, insulated ducts work best in routes exposed to heat or long distances. Proper duct routing improves cooling and reduces energy costs.
Connecting And Securing The Duct
Follow clear steps to make sure the duct fits tightly and stays in place. This section explains how to attach, seal, support, and insulate the duct for the best results.
Attaching The Duct To The Ac Unit
Start by choosing the right duct size that matches your window AC’s exhaust outlet. A duct that is too small or too large will cause air leaks and reduce cooling efficiency.
- Align the duct flange with the AC unit’s exhaust port.
- Use screws or clamps to fix the duct firmly on the outlet.
- Ensure the duct is straight and not twisted to allow smooth airflow.
Here is a simple table to help select the correct duct size:
| AC Unit Size (BTU) | Duct Diameter |
| 5,000 – 8,000 | 6 inches |
| 8,000 – 12,000 | 7 – 8 inches |
| 12,000+ | 8 – 10 inches |
After attaching, gently pull on the duct to check stability. A secure connection prevents the duct from falling or loosening during operation. Avoid gaps between the duct and the AC unit to keep the airflow uninterrupted.
Sealing Connections
Sealing the duct connection is vital to stop air leaks and maintain cooling power. Use weatherproof materials that can handle heat and moisture.
- Apply aluminum foil tape around the joint between the duct and AC outlet.
- Use a high-quality silicone sealant to fill small gaps.
- Check for cracks or holes in the duct and seal them immediately.
Follow these steps for a tight seal:
- Clean the surface of the duct and AC outlet to remove dust.
- Wrap the connection with aluminum foil tape, pressing firmly.
- Apply silicone sealant over the tape edges for extra protection.
Sealing prevents warm air from entering and cold air from escaping. It also reduces moisture buildup, which can cause mold or rust. Regularly inspect the seal to ensure it stays intact over time.
Supporting And Insulating The Duct
Supporting the duct keeps it from sagging or disconnecting. Insulating it stops heat from affecting the cooled air inside.
- Install brackets or straps every 3 feet along the duct length.
- Use foam pipe insulation or reflective duct wrap around the duct.
- Secure insulation with tape or zip ties to prevent slipping.
Testing And Adjusting The Setup

After ducting a window air conditioner, testing and adjusting the setup is critical for efficient performance. This step ensures the air flows properly, no air escapes, and moisture drains correctly. A well-tested and adjusted system saves energy and keeps your room comfortable. Take time to check each part carefully. Small fixes now prevent big problems later.
Checking For Air Leaks
Air leaks reduce cooling power and increase energy use. Start by inspecting all duct connections and window seals. Use your hand or a piece of tissue paper to feel for any airflow escaping from seams or gaps. Focus on:
- The duct joints
- The window frame around the unit
- Where the duct meets the air conditioner
Seal any leaks with weather stripping, duct tape, or silicone caulk. Avoid using regular tape as it may not hold well.
Here is a simple checklist for air leaks:
| Area | Check Method | Fix |
| Duct joints | Feel for air with hand or tissue | Apply foil tape or mastic sealant |
| Window gaps | Look for visible cracks or light | Use weather stripping |
| Unit-to-duct connection | Listen for whistling sounds | Apply silicone caulk |
Ensuring no air escapes keeps the cooled air inside and improves energy savings.
Adjusting Airflow
Proper airflow is key to cooling the room evenly. After sealing leaks, check if air moves freely through the duct. Blockages or sharp bends reduce airflow. Use these steps:
- Turn on the air conditioner at the desired setting.
- Feel airflow at the duct outlet with your hand or a small piece of paper.
- Check for weak airflow or uneven cooling in the room.
If airflow is weak, try these fixes:
- Straighten any bends in the duct
- Clean dust and debris from ducts
- Ensure the duct diameter matches the unit’s outlet size
Adjust vents and louvers to direct air where you need it most. Sometimes, closing or partially closing vents in unused rooms improves airflow to main areas.
Use this table to identify common airflow issues and solutions:
| Problem | Cause | Solution |
| Weak airflow | Clogged duct or sharp bends | Clean duct; straighten bends |
| Uneven cooling | Improper vent direction | Adjust vents and louvers |
| Noise from duct | Loose fittings or high speed | Tighten joints; lower fan speed |
Regular airflow checks keep your air conditioner running smoothly and quietly.
Ensuring Proper Drainage
Window air conditioners produce water as they cool the air. Proper drainage stops water from leaking inside and causing damage. Check the drain system after installing the duct.
Steps to ensure proper drainage:
- Locate the drain hole or pan on the outside part of the unit.
- Make sure the ducting does not block the drain.
- Confirm the unit is slightly tilted outside to let water flow out.
If water pools inside or leaks indoors, problems may include:
- Clogged drain hole
- Incorrect unit tilt
- Blocked duct or drain pipe
Clear any clogs with a small brush or compressed air. Adjust the unit’s angle by raising the inside slightly so water moves outward. Use a level tool for accuracy.
You May Also Like: Installing Window Air Conditioner in Aluminum Window Frame
Conclusion
Ducting a window air conditioner can improve cooling in your space. It helps move cool air where you need it most. Proper installation keeps the unit working well and saves energy. Small steps, like sealing gaps, make a big difference.
This simple upgrade can increase comfort during hot days. Take your time and follow easy instructions carefully. Enjoy cooler rooms without buying a new air conditioner. It’s a smart way to stay comfortable and save money.